
Soups & Stews
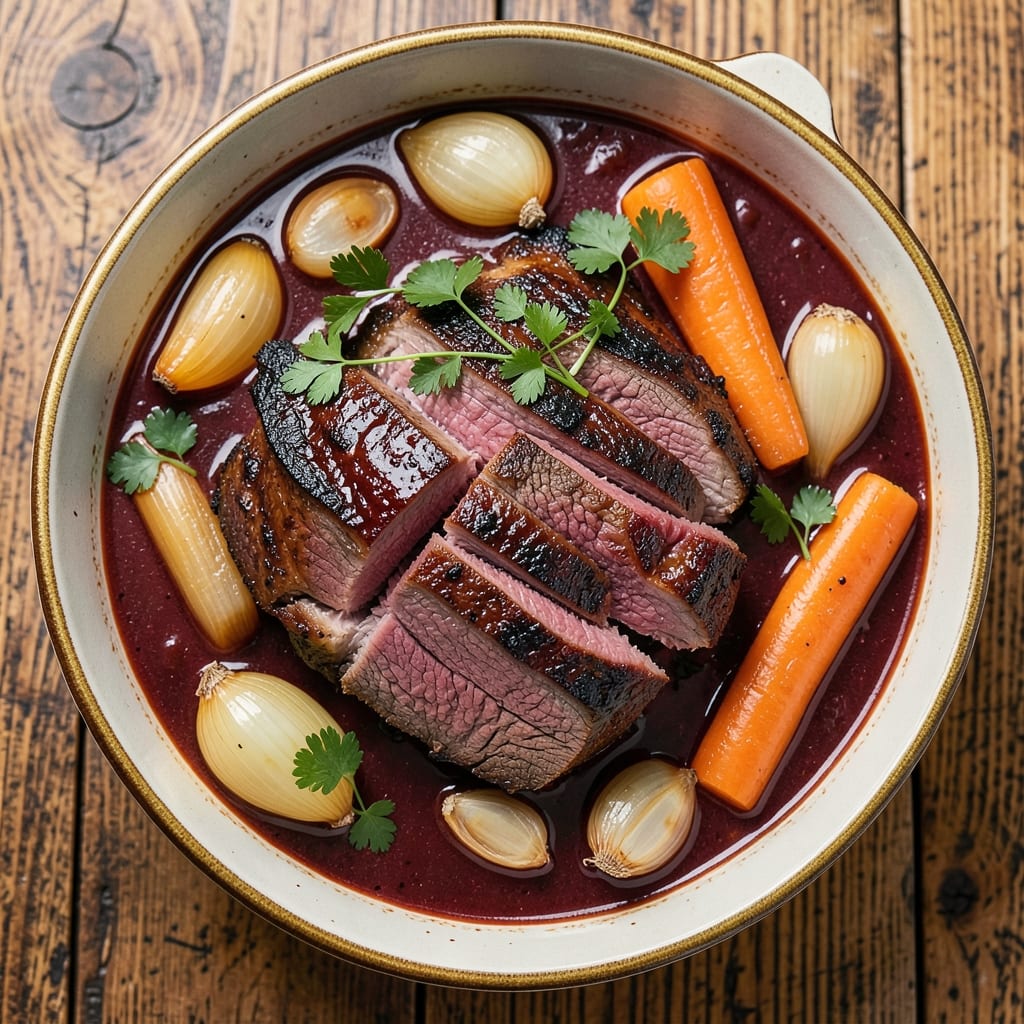
This 5-hour no-peek beef stew recipe transforms tough cuts into melt-in-your-mouth perfection with just 15 minutes of active prep. The secret lies in the no-peek method—keeping the lid sealed for the full cook time preserves moisture and deepens flavors without constant monitoring. After years of testing, this version consistently delivers restaurant-quality results at home, with a rich, velvety broth that clings to every bite of tender beef and caramelized vegetables.
The process begins with proper browning of the beef—this critical step develops a deep, meaty foundation that no shortcut can replicate. Aromatics like onions, garlic, and carrots form the flavor base, while red wine adds complexity before everything simmers together in a rich broth. The no-peek technique ensures the beef stays fork-tender while the vegetables soften just enough to absorb all that delicious flavor without turning to mush.
What you'll end up with is a pot of hearty stew that smells like comfort itself—golden, bubbling, and packed with layers of savory, umami-rich goodness. The beef practically falls apart at the touch of a fork, while the vegetables retain their structure and sweetness. This is the kind of meal that transforms an ordinary weeknight into a special occasion, all without requiring hours of your time or attention.
Serve it with crusty bread to soak up every last drop of that velvety broth, or pair it with buttery mashed potatoes for the ultimate cozy dinner. The beauty of this recipe is its flexibility—make it once and you'll find yourself reaching for the same technique again and again. Here's how to achieve that perfect pot of beef stew.
Ingredients for 5 hour no peek beef stew
Sixteen ingredients, six hours of flavor-building magic—this is the core of restaurant-quality beef stew.
| Ingredient | Amount | Notes |
|---|---|---|
| Chuck Roast 🥩 | 3 lb | Well-marbled for tenderness |
| Yellow Onions 🧅 | 2 whole | Medium, sliced into half-moons |
| Carrots 🥕 | 4 whole | Medium, cut into chunks |
| Garlic Cloves 🧄 | 6 cloves | Peeled, lightly crushed |
| Red Wine 🍷 | 1 cup | Bold dry variety like Cabernet |
| Beef Broth 💧 | 4 cups | Low-sodium preferred |
| Tomato Paste 🍅 | 2 tbsp | Smooth, not chunky |
| Fresh Thyme 🌿 | 1 tbsp | Leaves only, chopped |
| Bay Leaves 🍃 | 2 whole | Dried, standard size |
| All-Purpose Flour 🌾 | 2 tbsp | For thickening broth |
| Olive Oil 🫒 | 2 tbsp | Extra-virgin for browning |
| Kosher Salt 🧂 | 1 ½ tsp | Adjust to taste |
| Black Peppercorns 🌶️ | 1 tsp | Freshly cracked |
| Fresh Parsley 🌿 | ¼ cup | Chopped, for garnish |
Start with the beef—chuck roast is non-negotiable here. The marbling makes all the difference, so look for cuts with good fat distribution. Costco or local butchers usually have the best selections, and buying a whole roast to cube yourself ensures maximum tenderness. If you're short on time, pre-cubed chuck from the meat counter works fine. For the aromatics, yellow onions should be sweet and firm, not wilting. Carrots can be baby or regular—just make sure they're crisp and evenly sized. The garlic? Fresh is essential—jarred minced garlic lacks the depth you need for this long cook.
No red wine? Beef broth with a splash of balsamic vinegar works in a pinch, though the wine adds that unmistakable depth. The tomato paste can be the squeeze-tube kind from Trader Joe's—it's perfect for this recipe and lasts forever. Fresh thyme is ideal, but dried works at one-third the amount. If you're using dried, crush the leaves slightly to release their oils. The flour is just for thickening at the end—don't skip it, but don't overdo it either. For the olive oil, extra-virgin is worth it here—it adds subtle fruity notes that elevate the whole dish. And if you're wondering about the parsley, it's purely for garnish—skip it if you're in a rush, but it adds that final pop of color.
This stew tastes even better the next day, so make a double batch if you can. Store leftovers in the fridge for up to 5 days or freeze for 3 months. The broth will thicken as it cools, so you can add a splash of water or broth when reheating. For serving, I like to portion it into individual containers with a side of crusty bread—French baguette works perfectly. The beef will be fork-tender, and the vegetables will hold their shape beautifully. If you're meal prepping, this reheats beautifully—just warm it gently on the stove to avoid breaking up the beef.
Why You'll Love This Recipe
- Set It & Forget It: The chuck roast practically cooks itself—just sear it, dump in the onions, carrots, and garlic, then pour over that red wine. I’ve made this while watching movies, grading papers, or even napping (okay, maybe not that last one).
- Rich Without Effort: That slow simmer turns tough chuck into melt-in-your-mouth perfection, and the wine? It caramelizes into a deep, savory sauce that tastes like a fancy dinner—no fancy skills required. The carrots stay crisp, the onions sweet, and the garlic? Pure gold.
- Leftovers That Don’t Suck: This stew only gets better the next day—like, actually better. I freeze half for lazy Mondays, and it reheats like it was just made. My kids even ask for it, which is basically a parenting win.
- Budget-Friendly Crowd-Pleaser: A single chuck roast feeds six, and the rest of the ingredients cost pennies. Serve it with crusty bread for a $15 dinner that’ll have everyone begging for seconds—no takeout needed. Here’s to stretching your grocery budget without sacrificing flavor.
Step-by-step instructions for slow-cooked beef stew
This method delivers restaurant-quality depth with minimal effort—just set it and let the flavors develop.
Sear the Chuck Roast for Maximum Flavor
Pat the 3 lb chuck roast completely dry with paper towels—this ensures a proper sear. Heat 2 tbsp olive oil in a large Dutch oven over medium-high heat until shimmering. Place the roast in the pan and sear on all sides for 8-10 minutes total, turning occasionally, until deeply browned. This step creates the rich, caramelized crust that forms the foundation of your stew.
Don't rush this process—I've found that patience here makes all the difference. The roast should be golden brown and release easily from the pan when ready. Transfer it to a plate and set aside temporarily.
Build the Flavor Base with Onions and Carrots
In the same Dutch oven, add 2 whole yellow onions sliced into half-moons and 4 whole carrots cut into chunks. Cook over medium heat for 8-10 minutes, stirring occasionally, until the onions soften and the carrots begin to caramelize. You'll notice the vegetables release their natural juices and develop a sweet, golden color—this is where the stew's depth begins.
Add the 6 cloves garlic cloves (lightly crushed) and cook for another 1-2 minutes until fragrant. Be careful not to let the garlic burn—it should smell sweet and nutty, not bitter. Remove the vegetables with a slotted spoon and set them aside with the roast.
Deglaze and Develop the Sauce
Return the Dutch oven to the stove over medium heat. Add 1 cup red wine and scrape up all the browned bits from the bottom of the pan with a wooden spoon. This deglazing step captures all the concentrated flavors you've built so far. Let the wine simmer for 3-4 minutes until reduced by half.
Stir in 2 tbsp tomato paste and cook for 1 minute to deepen the color. Sprinkle 2 tbsp all-purpose flour over the mixture and whisk vigorously to create a roux. Cook for another 1 minute until the flour is fully incorporated and the mixture thickens slightly. This step helps thicken the stew and adds body to the final texture.
Simmer the Stew Without Peeking
Return the seared chuck roast, onions, and carrots to the Dutch oven. Pour in 4 cups beef broth, then add 1.5 tsp kosher salt, 1 tsp black peppercorns, 1 tbsp fresh thyme, and 2 whole bay leaves. Bring the mixture to a gentle boil, then reduce heat to low and cover the pot.
Here's where the magic happens: resist the urge to peek or stir. Let the stew simmer undisturbed for 4 hours at a steady low heat. The lid should fit tightly to trap steam and create a moist environment. This slow cooking process allows the connective tissues in the chuck roast to break down, resulting in fork-tender meat and a rich, flavorful broth.
Finish and Serve with Fresh Herbs
After 4 hours, remove the lid and check the stew. The chuck roast should be fork-tender, falling apart easily when pierced. If the stew seems too thick, add ½ cup water or broth to reach your desired consistency. Stir in the 0.25 cup fresh parsley and taste, adjusting seasoning if needed.
Let the stew rest for 10 minutes before serving to allow the flavors to meld further. Ladle into bowls and serve immediately, ensuring each portion gets its share of tender beef, flavorful vegetables, and rich sauce. The result should be a deeply satisfying stew where every bite delivers layers of flavor developed through patience and proper technique.
Pro Tips For Making 5 Hour No Peek Beef Stew
- SEAR THE ROAST FIRST: I learned this the hard way—skipping the sear means flavorless stew. Pat the chuck roast very dry, then hit it with high heat until it’s deep brown on all sides. That crust locks in juices and builds the base flavor for the whole pot.
- CHOP ONIONS UNIFORMLY: Uneven onion pieces mean some get mushy while others stay crunchy. Cut them into ½-inch chunks—big enough to stay intact but small enough to soften evenly. (Yes, even if you’re impatient like me, resist the urge to make them smaller.)
- DEGLAZE WITH WINE IMMEDIATELY: Let that seared meat rest just 2 minutes, then pour in the red wine while the pan’s still hot. Scrape up every browned bit—those bits are pure flavor. If you wait, you’ll lose half the taste to stuck-on gunk.
- ADD CARROTS LAST: I used to toss them in with the onions, but they turn to mush before the beef is tender. Instead, add them in the final 45 minutes of cooking so they stay crisp-tender. (Your future self will thank you for not serving sad, overcooked carrots.)
Make-ahead tips for 5 hour no peek beef stew
Prep Ahead Strategy
Start your prep the night before by cutting all vegetables and measuring spices—store them in airtight containers in the fridge. The chuck roast can be trimmed and patted dry up to 24 hours ahead, but sear it the same day to maintain that rich crust. I like to portion the flour, tomato paste, and herbs into small jars so they're ready to go when I need them. This saves 30 minutes of active prep time on stew day. 💡
Slow Cooker Adaptation
If you prefer hands-off cooking, transfer the seared beef, onions, carrots, and sauce base to a 6-quart slow cooker. Add the broth and seasonings, then cook on low for 8 hours (no peeking!). The slow cooker maintains consistent heat, making it perfect for busy days. Just
Freezer-Friendly Method
Assemble the stew completely (up to Step 4) and let it cool before transferring to freezer-safe containers. Label with the date—this stew keeps for 3 months without losing quality. When ready to eat, thaw overnight in the fridge, then reheat on the stove with ½ cup extra broth to restore moisture. The flavors actually deepen after freezing! ❄️
Double Batch for Leftovers
Make twice the recipe and freeze half for future meals. I often prepare this on Sundays so I have ready-to-heat dinners all week. Reheat portions in a saucepan with 2 tbsp water or broth per serving to prevent drying. The beef stays tender, and the broth thickens beautifully—perfect for quick lunches or potlucks. 🍽️
Vegetable Prep Shortcuts
Use pre-cut frozen onion and carrot mixes to save 15 minutes of chopping. Just thaw them in the fridge overnight before using. For even faster prep, buy pre-minced garlic from the freezer section—it works perfectly in this recipe. The key is to drain any excess liquid from frozen veggies before cooking to prevent a watery stew. 🥕
Equipment Essentials
Invest in a heavy-bottomed Dutch oven (like Le Creuset) for even heat distribution. A meat thermometer ensures the beef reaches 203°F for perfect tenderness. For busy cooks, a multi-cooker with slow cook function (like Instant Pot) handles the no-peek process automatically. These tools make the process foolproof for beginners. 🔥
Nutrition facts
Frequently asked questions
Why does the no-peek method work so well for beef stew?
The no-peek technique preserves moisture and creates a steam bath that gently breaks down tough beef fibers. Without lifting the lid, you maintain consistent heat and pressure, which transforms chuck roast into fork-tender perfection while keeping vegetables intact. This method also prevents flavor loss from evaporation, giving you that deep, rich taste in every bite.
Can I use a different cut of beef instead of chuck roast?
While chuck roast is ideal for its marbling and tenderness, you can substitute with brisket or stew meat from the chuck or round primal cuts. Avoid lean cuts like sirloin—they'll dry out during the long cook. If using brisket, trim excess fat to ¼-inch thickness for best results. The cooking time may vary slightly depending on the cut's fat content.
What if my stew is too thick after 4 hours?
Add ½ cup water or beef broth and simmer uncovered for 10-15 minutes to reach your desired consistency. For extra richness, you can also whisk in 1 tbsp cornstarch dissolved in 2 tbsp cold water and simmer for 2 minutes. The stew will thicken as it cools, so don't worry about adjusting it too early.
Can I make this stew in an Instant Pot or other pressure cooker?
Yes! After searing the beef and building the flavor base, transfer everything to your pressure cooker with 2 cups broth (less than the recipe calls for). Cook on high pressure for 45 minutes, then quick-release and adjust seasoning. The pressure cooker cuts time by 75% while still delivering tender beef. Just avoid peeking during cooking to maintain pressure.
How do I know when the beef is perfectly tender?
The beef should be fork-tender—it should easily shred with a fork and pull apart with minimal resistance. For extra precision, use a meat thermometer: the internal temperature should reach 203°F (95°C). If it's not quite tender enough, return it to the pot with ¼ cup broth and simmer uncovered for 15-20 minutes more. The no-peek method usually gets it right, but this check ensures perfection.