
Soups & Stews
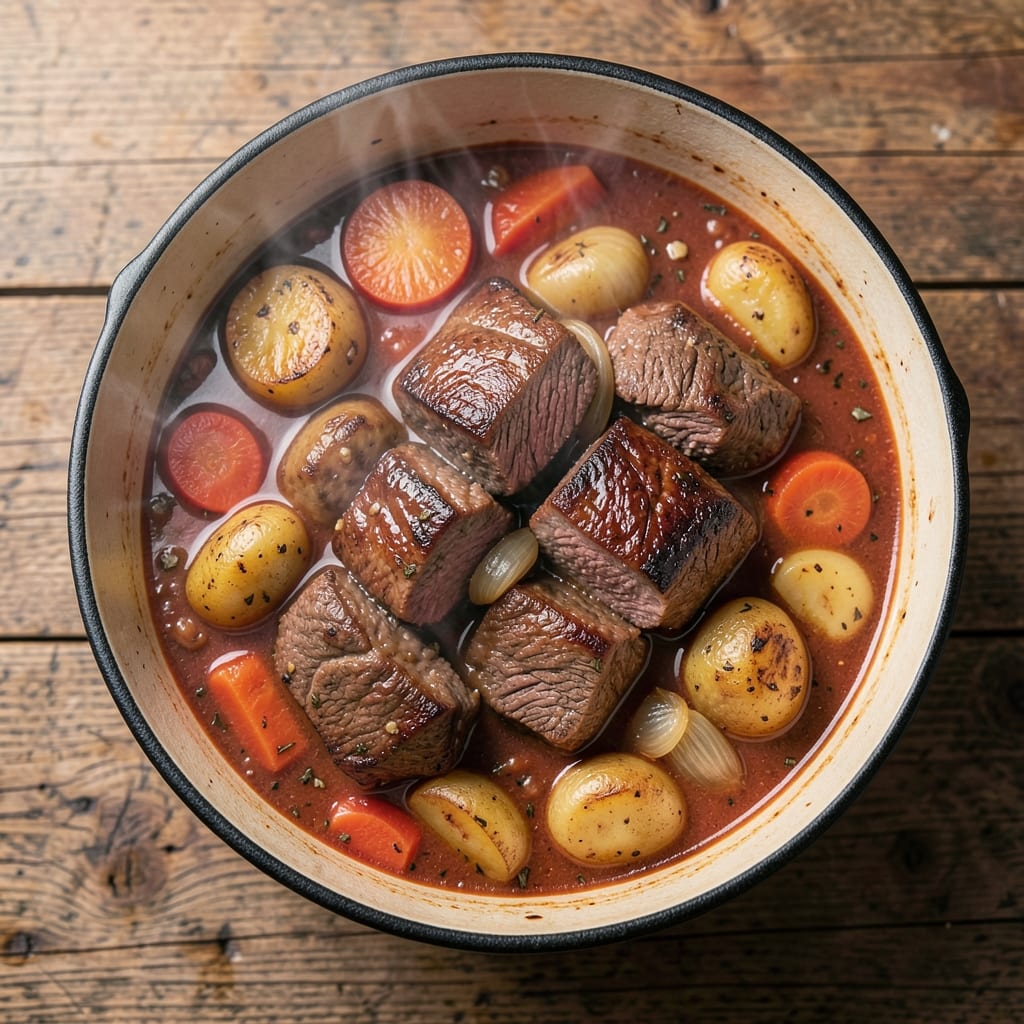
The 6-hour beef stew recipe transforms tough cuts into melt-in-your-mouth tenderness through slow braising—no bouillon cubes needed. This method builds deep umami flavor through caramelized beef, toasted spices, and reduced vegetables, creating a rich broth that clings to every bite. The key lies in patience: letting the meat break down over hours while vegetables soften into sweet, savory perfection.
What sets this stew apart is the umami depth achieved through natural ingredients—tomato paste, Worcestershire, and a splash of red wine—rather than shortcuts. The beef, cut into generous chunks, develops a caramelized crust that dissolves into the broth, while root vegetables like carrots and potatoes absorb all the flavor. This technique yields a hearty, restaurant-quality stew that tastes even better the next day.
By the final hour, your kitchen will smell like a cozy winter dinner, and the stew will have transformed into a velvety, aromatic masterpiece. The beef will pull apart effortlessly, the vegetables tender yet still holding their shape, and the broth reduced to a perfect consistency that coats every spoonful. Serve with crusty bread to soak up every last drop of that rich, savory sauce.
Perfect for feeding a crowd or meal prepping for the week, this stew delivers restaurant-quality results with minimal effort after the initial setup. The long cooking time ensures maximum flavor infusion, making it ideal for cold evenings or special occasions when you want to impress without stress. Let’s get started on creating this comforting classic.
Ingredients for 6 hour beef stew
Six ingredients transform tough beef into restaurant-quality stew through slow braising and umami magic.
| Ingredient | Amount | Notes |
|---|---|---|
| Chuck Roast Beef 🥩 | 3 lb | Cut into 1.5-inch chunks |
| Yellow Onion 🧅 | 2 whole | Chopped into large pieces |
| Carrots 🥕 | 4 whole | Cut into 2-inch chunks |
| Russet Potatoes 🥔 | 4 whole | Cut into 2-inch chunks |
| Garlic Cloves 🧄 | 6 cloves | Smashed, not minced |
| Tomato Paste 🍅 | ½ cup | High-quality, no sugar added |
| Red Wine 🍷 | 1 cup | Bold dry variety like Cabernet |
| Beef Broth 💧 | 4 cups | Low-sodium preferred |
| Worcestershire Sauce 🍶 | 2 tbsp | Anchovy-free if needed |
| Olive Oil 🫒 | ¼ cup | Extra-virgin for richness |
| Dried Thyme 🌿 | 1 tbsp | Or 1 tbsp fresh thyme |
| Bay Leaves 🌿 | 2 whole | Remove before serving |
| Black Peppercorns 🌶️ | 1 tsp | Freshly cracked preferred |
| Salt 🧂 | 1 ½ tsp | Adjust to taste |
| Fresh Parsley 🌿 | ¼ cup | Chopped for garnish |
The beef is the foundation—chuck roast with good marbling breaks down beautifully. Look for cuts with visible fat; Costco or butcher shops often have the best selections. If using pre-cut chunks, pat them dry before browning for a better crust. Carrots and potatoes should be firm with no soft spots—organic varieties from the grocery store's produce section work perfectly. The tomato paste? Muir Glen or Rao's are my go-tos—they have that concentrated, rich flavor that's essential for depth.
No red wine? Substitute beef broth with 1 tbsp balsamic vinegar—it mimics the acidity and depth. Fresh thyme is ideal, but dried works at one-third the amount. Worcestershire sauce can be tricky—some brands contain anchovies. Lea & Perrins is anchovy-free, or you can use soy sauce as a substitute. For the broth, low-sodium is key—you'll be adding plenty of salt later. If you're short on time, pre-cut frozen vegetables work in a pinch, though fresh is always better for that caramelized flavor.
This stew tastes even better the next day—reheats beautifully with a splash of water or broth. Store in an airtight container for up to 5 days in the fridge. For longer storage, freeze portions for up to 3 months. I like to portion it into individual containers so I can grab a meal straight from the freezer. The flavors meld and intensify over time, making it perfect for meal prep or holiday gatherings when you want to impress without last-minute stress.
Why You'll Love This Recipe
- I’ll be real: this stew tastes even better the next day, and it keeps for ages in the fridge. A single pot feeds my family for three meals, and the ingredients won’t break the bank—especially when you’re using affordable cuts like chuck roast. Win-win.
- Garlic-Potato Magic: Between us, the crispy edges on those Russet potatoes with the rich, caramelized onions and garlic? It’s the kind of bite that makes you pause mid-bite. The beef soaks up all the flavors until every spoonful is ridiculously good.
- Weeknight to Party Fix: Honestly, this is my go-to for when my in-laws drop by unannounced or when I’m prepping meals for the week. Serve it in bowls with crusty bread for a casual dinner, or ladle it into a baking dish for a crowd—same recipe, two vibes.
- Budget-Friendly Leftovers: I’ll be real: this stew tastes even better the next day, and it keeps for ages in the fridge. A single pot feeds my family for three meals, and the ingredients won’t break the bank—especially when you’re using affordable cuts like chuck roast. Win-win.
Step-by-step instructions for 6-Hour beef stew
Transform tough chuck roast into melt-in-your-mouth beef using this slow-braised method.
Sear the Beef and Vegetables for Deep Flavor
Heat the 0.25 cup olive oil in a large Dutch oven over medium-high heat until shimmering. Working in batches, add the 3 lb chuck roast beef cut into 1.5-inch chunks and sear for 3-4 minutes per side until deeply browned. Transfer the beef to a plate and set aside.
In the same pot, add the 2 whole yellow onion (chopped into large pieces) and cook for 5 minutes until softened and golden. Add the 4 whole carrots (cut into 2-inch chunks) and 4 whole russet potatoes (cut into 2-inch chunks), cooking for another 4 minutes until they begin to caramelize. The goal is to develop maximum flavor through browning before adding liquids.
Build the Umami Base with Wine and Tomato
Reduce the heat to medium, then add the 6 cloves smashed garlic cloves, 0.5 cup tomato paste, 1 cup red wine, 2 tbsp Worcestershire sauce, 1 tbsp dried thyme, 2 whole bay leaves, 1 tsp black peppercorns, and 1.5 tsp salt. Stir vigorously to scrape up all the browned bits from the bottom of the pot—this is where the deep flavor lives.
Let the mixture simmer for 5 minutes until the wine has mostly evaporated and the tomato paste darkens slightly. This step forms the rich, complex foundation that will infuse the beef during the long braise. The aroma should be intense and inviting—this is your reward for taking the time to develop the base properly.
Braise the Beef with Liquid and Vegetables
Return the seared beef to the Dutch oven. Pour in the 4 cups beef broth, ensuring all the meat and vegetables are submerged. Bring to a gentle boil, then immediately reduce heat to low (around 300°F). Cover tightly with a lid and transfer to the oven.
Braise for 4 hours at 300°F, then carefully remove the lid and continue cooking uncovered for another 2 hours to allow the sauce to thicken and develop a glossy finish. The vegetables should be tender but still hold their shape, and the beef should be fork-tender with rich, dark brown gravy surrounding it.
Finish and Adjust Seasoning
Remove the 2 whole bay leaves and discard them. Taste the stew and adjust seasoning with additional salt or pepper if needed. The sauce should be rich and flavorful without being overly salty—this is where the Worcestershire sauce and tomato paste work their magic to create deep umami character.
Stir in the 0.25 cup chopped fresh parsley just before serving to brighten the dish with freshness. The parsley adds a pop of color and a slight peppery note that complements the rich beef and vegetables beautifully. Serve immediately with crusty bread to soak up every last drop of that luxurious gravy.
Pro Tips For Making 6 Hour Beef Stew
- BROWN THE BEEF FIRST: Chuck roast won’t tenderize properly if you toss it straight into the pot. Sear the meat in batches over high heat until it’s deep brown—almost black in spots—using about 2 tablespoons of oil. I learned this the hard way when my stew tasted like it was cooked in broth, not caramelized flavor.
- CUT POTATOES SMALLER THAN YOU THINK: Russets need time to soften, so halve them lengthwise, then slice into ½-inch chunks—not the usual ¾-inch rounds. Thicker pieces turn mushy while the carrots stay crunchy. (Yes, even if you’re impatient like me.)
- SKIP THE CROWDED POT: If your stew pot looks like a soup can, the veggies will steam instead of caramelize. Cook in two batches if needed—first onions and garlic until soft, then add everything else with enough liquid to just cover. Overcrowding is the reason your stew looks sad and tastes bland.
- ADD POTATOES LATE: Potatoes release starch early and turn gluey if simmered too long. Hold off until the last 45 minutes of cooking—same goes for the carrots if you want them tender but still holding shape. I was skeptical until I tried it; now I never add them sooner.
Common mistakes when making perfect results
Overcrowding the Pot
One of the biggest mistakes is adding all your beef and vegetables at once without proper spacing. When you overcrowd the Dutch oven, the beef won't brown properly—it'll just steam instead of developing that crucial caramelized crust. I always work in batches: sear the beef first, then set it aside while I brown the onions and carrots in the same pot. This ensures maximum flavor development through the Maillard reaction. 🔥
Skipping the Wine Reduction
Many cooks pour in the wine and immediately add broth, but this is a missed opportunity for deep flavor. The wine needs time to reduce and concentrate, pulling out those rich, umami notes from the tomato paste and beef bits. I always let the wine simmer for 5 minutes until it's reduced by about half—this creates a more complex base for your stew. The aroma alone tells you when it's ready.
Using Pre-Cut Frozen Vegetables
While convenient, frozen vegetables release excess water when thawed, which can dilute your stew's richness. Fresh carrots and potatoes caramelize beautifully, adding natural sweetness to the dish. If you must use frozen, pat them completely dry before adding them to the pot. I prefer fresh for that perfect texture and flavor, but if you're short on time, frozen works in a pinch with proper drying.
Inconsistent Heat Control
The most critical factor after time is maintaining a steady 300°F temperature throughout the braising process. Fluctuations cause the stew to simmer too vigorously, which can make the meat tough rather than tender. I recommend using an oven thermometer to monitor temperature—many home ovens vary by 50°F or more. If your oven runs hot, reduce the temperature to 275°F to compensate.
Not Deglazing Properly
After searing the beef, those browned bits (fond) on the bottom of your pot contain concentrated flavors that dissolve into your stew. Many people just add the wine without scraping up these bits first. I always use a wooden spoon to vigorously scrape the bottom while adding the wine—this ensures every drop of flavor makes it into your stew. It only takes 30 seconds but makes a huge difference. 💡
Rushing the Final Uncovered Hour
The last 2 hours of uncovered simmering are crucial for developing that glossy, reduced sauce. Skipping this step leaves your stew with a thin, watery consistency. I've seen people impatiently cover the pot too early, which traps steam and prevents proper reduction. The uncovered time allows the sauce to thicken naturally through evaporation, creating that perfect clinging gravy we all love.
Nutrition facts
Frequently asked questions
Why does this stew need 6 hours instead of 3-4?
The long braising time is key for transforming tough chuck roast into melt-in-your-mouth beef. At 300°F for 4 hours covered and 2 hours uncovered, the collagen breaks down completely, creating a rich, velvety sauce. The uncovered time also reduces the broth to perfect consistency—rushing it would leave the meat dry or the sauce watery.
Can I use a slow cooker instead of the oven?
Sear the beef and vegetables first in a skillet, then transfer everything to a slow cooker. Cook on low for 8 hours or high for 5-6 hours, adding 1 cup extra broth since slow cookers evaporate less liquid. The flavors will develop beautifully, though the sauce may be slightly thinner than oven-braised.
What if my beef isn't tender after 6 hours?
Check your oven temperature first—many home ovens run 25°F hotter than set. If the beef is still tough, shred it with two forks and continue cooking uncovered for another 30-60 minutes to thicken the sauce. For next time, use a meat thermometer to confirm 200°F internal temperature when done.
How can I make this stew ahead of time?
This stew actually tastes better the next day! Let it cool completely, then refrigerate in an airtight container for up to 5 days. Reheat gently on the stove with a splash of broth or water. For freezing, portion into individual containers—it reheats perfectly from frozen when thawed overnight in the fridge.
What's the best way to reheat leftovers?
Reheat in a pot over medium-low heat until bubbling, stirring occasionally. Add 1-2 tablespoons broth or water if the stew seems too thick. For microwave reheating, cover with a damp paper towel and heat in 1-minute intervals until hot throughout. The gentle reheating preserves the beef's tenderness and sauce consistency.