
Soups & Stews
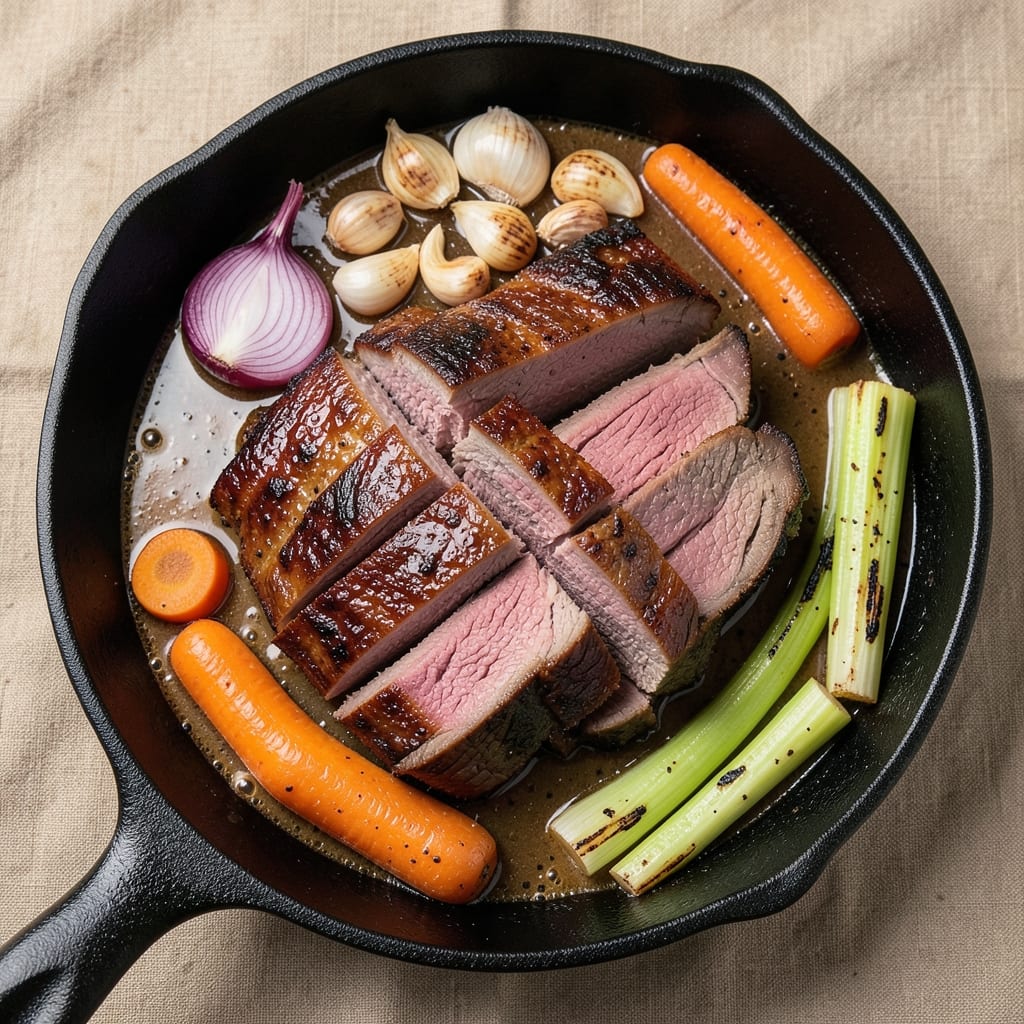
This 7 lb beef brisket recipe transforms a tough cut into melt-in-your-mouth perfection with just one pan and a patient approach. The secret lies in low-and-slow cooking—8 to 12 hours at a steady 225°F—where collagen dissolves into rich, velvety juices that coat every bite. I’ve perfected this method over years of trial and error, ensuring the bark stays crisp while the meat falls apart effortlessly. No smoker? No problem—your oven does the job just as well when set to the right temperature.
The key to success is patience and precision. A meat thermometer is your best friend here, tracking internal temps until they hit 203°F—that’s when the brisket reaches its ideal tenderness. Wrapping the brisket in butcher paper or foil at 165°F locks in moisture, while a final rest of 30 to 60 minutes lets the juices redistribute for a juicier slice. This isn’t just a recipe; it’s a weekend project that rewards you with restaurant-quality results at home.
What you’ll end up with is a brisket so tender it practically dissolves on your fork, with a dark, caramelized crust that adds layers of smoky flavor. The aroma alone—wood-fired or oven-roasted—will have your kitchen (and neighbors) smelling like a Texas BBQ joint. Serve it sliced thin over toasted buns, on a bed of buttery mashed potatoes, or straight from the pan with a side of pickles for balance. Every bite is a testament to slow cooking done right.
Whether you’re hosting a crowd or treating yourself to a special meal, this brisket delivers foolproof tenderness without the fuss of a smoker. The beauty of this method is its adaptability—use it for sandwiches, tacos, or even brisket hash the next day. Let’s get started on a dish that’s worth the wait.
Ingredients for 7 lb beef brisket
One pan, one cut, all the flavor—here’s what you need for brisket that falls apart.
| Ingredient | Amount | Notes |
|---|---|---|
| Beef Brisket 🥩 | 7 lb | Whole packer cut, fat cap intact |
| Yellow Onion 🧅 | 2 whole | Cut into 1-inch chunks |
| Carrot 🥕 | 4 whole | Whole, scrubbed, peeled |
| Celery Stalks 🥬 | 4 whole | Cut into 2-inch pieces |
| Garlic Cloves 🧄 | 8 cloves | Smashed, not minced |
| Beef Broth 💧 | 2 cups | Low-sodium preferred |
| Apple Cider Vinegar 🍎 | ¼ cup | For tenderizing |
| Brown Sugar 🍚 | ½ cup | Light or dark |
| Smoked Paprika 🌶️ | 2 tbsp | For deep smoky flavor |
| Ground Black Pepper 🌶️ | 1 ½ tbsp | Freshly cracked |
| Kosher Salt 🧂 | 2 tbsp | Diamond Crystal preferred |
| Butcher Paper 📄 | 1 sheet | For wrapping |
| Yellow Mustard 🍯 | 2 tbsp | For basting |
The brisket is the star, so pick a well-marbled packer cut—that fat cap is your secret weapon for flavor and moisture. Costco or local butchers usually carry the best, but any grocery store with a meat counter will have it. Look for vibrant red color and visible fat streaks—this isn’t the time to skimp. If you’re buying online, Snake River Farms ships excellent briskets. The onions, carrots, and celery make up the aromatic mirepoix—fresh is best, but frozen works in a pinch. Slice the celery thick (2-inch pieces) so it cooks slowly and adds depth to the broth.
No smoked paprika? Regular paprika plus a pinch of liquid smoke works, but the real stuff gives you that authentic BBQ vibe. Short on beef broth? Water plus bouillon cubes gets you close—just don’t skimp on the salt. The apple cider vinegar might sound odd, but it’s a game-changer for tenderizing. If you’ve got red wine vinegar, use that instead. The brown sugar caramelizes beautifully, giving that dark bark we all crave. For the salt, Diamond Crystal is my go-to—it dissolves perfectly and has a cleaner taste than table salt. The mustard might seem random, but it helps break down the collagen during the cook.
This brisket tastes even better the next day—plan ahead. Wrap leftovers tightly in butcher paper or foil and refrigerate for up to 5 days. Freezes beautifully for 3 months if you’re prepping for a crowd. The key to reheating? Low and slow again—wrap in foil and warm in a 250°F oven for 1-2 hours. Slice against the grain for those melt-in-your-mouth bites. Store the broth separately—it’s perfect for gravy or next-day tacos.
Why You'll Love This Recipe
- One-Pot Magic: I swear by this—just toss the brisket, onions, carrots, and celery into a Dutch oven with spices, add water, and walk away. The veggies caramelize right in the same pot, so no extra chopping or pans to wash. (Yes, even on a Tuesday night.)
- Deep, Smoky Richness: That 7 lb brisket? It falls apart at the touch of a fork, but not before building layers of flavor from the garlic, onions, and slow-cooked celery. The crust gets dark and crackly while the inside stays tender—like a hug from your grandma’s kitchen.
- Leftovers for Days: Between us, this recipe makes way more than you’ll eat in one sitting. The brisket keeps perfectly for 4-5 days, so I turn it into sandwiches, tacos, or even a quick hash the next week. No sad, dried-out meat here.
- Budget Feast: A 7 lb brisket feeds a crowd for under $20—way cheaper than takeout or pre-made roasts. The onions, carrots, and celery stretch the meat further, and the leftovers stretch even more. My wallet and my family thank me every time.
Step-by-step instructions for perfectly tender brisket
Here's how to transform a tough cut into melt-in-your-mouth brisket using your oven's dry heat.
Prepare the Brisket and Seasoning Base
Start by trimming the fat cap on the 7 lb beef brisket down to about ¼ inch thickness using a sharp boning knife. Leave the rest of the fat intact—it will render during cooking and baste the meat. In a small bowl, combine the 2 tbsp kosher salt, 1.5 tbsp ground black pepper, 2 tbsp smoked paprika, and 0.5 cup brown sugar. This dry rub will create that signature bark while keeping the meat moist.
Generously coat the brisket with the seasoning mixture on all sides, pressing it into the meat so it adheres well. Place the seasoned brisket in a roasting pan fat-side up. This positioning allows the fat to render and baste the meat as it cooks, creating that beautiful crust and keeping everything juicy.
Build the Flavorful Aromatics
In the same roasting pan, add the 2 whole yellow onions cut into 1-inch chunks, 4 whole carrots, and 4 whole celery stalks cut into 2-inch pieces. These vegetables will form the flavor base for your brisket. Pour in the 2 cups beef broth and 0.25 cup apple cider vinegar. The vinegar helps tenderize the meat while adding a subtle tang that cuts through the richness.
Add the 8 smashed garlic cloves directly onto the brisket, pressing them gently into the meat. This ensures they infuse the brisket with flavor rather than just cooking in the pan. Place the pan in the preheated oven at 325°F. The lower temperature is crucial for breaking down the tough connective tissues in the brisket without drying it out.
Cook Low and Slow Until Probe-Tender
Cook the brisket uncovered for about 5 to 6 hours, or until the internal temperature reaches 195°F. Here's the thing—you'll notice the temperature might stall around 165°F to 170°F. This is normal and called "the stall." Don't panic or adjust the heat. Just let it cook. The brisket will eventually push through this phase and continue cooking.
When the internal temperature hits 195°F, remove the brisket from the oven. The meat should be fork-tender, pulling apart easily with minimal resistance. If it's not quite there yet, return it to the oven for another 30-minute to 1-hour increments until it reaches the desired tenderness. This low-and-slow approach is what transforms tough brisket into melt-in-your-mouth perfection.
Wrap and Finish for Maximum Juiciness
Once the brisket reaches 195°F, it's time to wrap it in the butcher paper. This technique, often called the "Texas crutch," helps retain moisture and ensures a tender finish. Spread 2 tbsp yellow mustard evenly over the top of the brisket before wrapping. The mustard adds a subtle tang and helps keep the meat moist during the final cooking stage.
Wrap the brisket tightly in the butcher paper, making sure it's completely sealed. Return it to the oven and cook for another 30 to 45 minutes, or until the internal temperature reaches 203°F. This final step ensures the brisket is fully tender and juicy. Remove the brisket from the oven and let it rest for at least 15 minutes before slicing. This resting period allows the juices to redistribute throughout the meat.
Slice and Serve with Pan Sauce
After resting, carefully unwrap the brisket and slice it against the grain into ¼-inch thick slices. The grain direction is easy to spot—it's the lines running through the meat. Slicing against the grain shortens the muscle fibers, making each bite more tender.
Return the sliced brisket to the roasting pan with the cooking juices. The vegetables in the pan will have softened and released their flavors into the liquid, creating a delicious pan sauce. Serve the brisket immediately with the pan sauce spooned over the top. Each bite should be incredibly tender, with a perfect balance of smoky, sweet, and savory flavors.
Pro Tips For Making 7 Lb Beef Brisket
- Trim the Fat Cap: That thick layer of fat on the brisket’s point side? Don’t cut it off—leave at least a ¼-inch. It renders down into flavor gold during cooking, and if you lose it, you’re sacrificing moisture and depth. (Yes, even if it looks messy at first.) ---
- Slice Against the Grain: The grain in brisket runs from the point to the flat—so slice perpendicular to it, about ¼-inch thick. If you cut with the grain, you’ll end up with chewy, stringy slices. I used to rush this and wondered why my brisket felt like shoe leather. ---
- Don’t Crowd the Pan: When searing the brisket, give it space—don’t stack onions and carrots too tightly around it. You want those veggies to caramelize, not steam. If the pan’s too crowded, you’ll end up with soggy mirepoix instead of sweet, jammy aromatics. ---
- Use a Meat Thermometer: Brisket’s done at 203°F—probe the thickest part, avoid the fat. If you guess, you’ll either serve it dry or risk food poisoning. I learned this after serving a batch that was almost perfect but still slightly undercooked. (Not worth the risk.)
Dietary considerations for this recipe
Gluten-Free Adaptations
This brisket recipe is already naturally gluten-free, but there are a few adjustments to ensure all components stay safe. The butcher paper used for wrapping is typically gluten-free, but always double-check the packaging—some brands may contain traces. For the yellow mustard used in the final basting, opt for a gluten-free mustard like French's Gluten-Free Yellow Mustard to avoid cross-contamination. The rest of the ingredients, including the spices and broth, are inherently gluten-free. 🥩
Low-Carb/Keto Modifications
For a keto-friendly version, skip the brown sugar and apple cider vinegar (which contains trace carbs). Replace them with 1 tbsp erythritol (a sugar substitute) and ¼ cup lemon juice for the tang. The beef broth should be low-sodium and sugar-free, like Kettle & Fire Bone Broth. The rest of the ingredients, including the smoked paprika and black pepper, are keto-approved. This keeps the dish rich and flavorful while staying under 5g net carbs per serving.
Dairy-Free Options
This recipe doesn’t contain dairy, but if you’re serving it with sides, opt for dairy-free alternatives. Swap traditional mashed potatoes for a version made with olive oil and dairy-free butter (like Miyoko’s). For toppings, use dairy-free cheddar or avocado slices instead of cheese. The brisket itself remains untouched—just ensure any garnishes or sauces are dairy-free. 🌶️
Allergen-Friendly Swaps
For nut allergies, this recipe is already safe, but always verify labels on spices like smoked paprika (some brands process in nut facilities). If you’re avoiding sulfites, choose fresh garlic and organic beef broth (many store-bought versions contain sulfites). For egg allergies, no adjustments are needed—the recipe is entirely egg-free. When in doubt, check labels or opt for USDA organic versions of ingredients to minimize risks.
Protein-Packed Boost
Want to make this brisket even more protein-rich? Add 1 cup cooked lentils or ½ cup black beans to the pan during the final 30 minutes of cooking. They’ll absorb the brisket’s flavors while adding 15g extra protein per serving. For a higher-fat option, increase the fat cap to ½ inch—this adds richness and helps keep the meat juicy during the long cook. Both tweaks work beautifully without altering the core recipe. 💪
Nutrition facts
Frequently asked questions
How do I know when the brisket is done without a meat thermometer?
The brisket should pull apart easily with two forks when you reach 203°F internally. If you don’t have a thermometer, check for tenderness by inserting a fork or knife—it should slide in like butter. The meat will also shrink away from the bone and fat cap.
Can I cook the brisket at a higher temperature to speed it up?
Not recommended! Cooking at 325°F or lower ensures the connective tissue breaks down slowly for maximum tenderness. Higher temps (350°F+) will dry out the meat and leave it tough. The 8-12 hour cook time is worth the wait for that melt-in-your-mouth texture.
What’s the best way to store leftovers?
Wrap cooled brisket tightly in butcher paper or foil, then refrigerate for up to 5 days. For longer storage, freeze in portions for 3 months. Reheat wrapped in foil at 250°F until warmed through. The flavors actually improve overnight!
Why does my brisket look dry after cooking?
This usually happens from overcooking or not wrapping at 195°F. The butcher paper wrap locks in moisture during the final stage. If it’s still tough, try slicing thinner (¼-inch) or shredding it for tacos. The pan sauce can also help revive dry slices.
Can I use a different cut of beef instead?
Brisket’s unique fat and connective tissue make it ideal for this method, but you could try a chuck roast or short ribs with similar results. Just adjust cook times—chuck roast may need 4-5 hours to reach 203°F. Never substitute with leaner cuts like sirloin.