
Main Courses
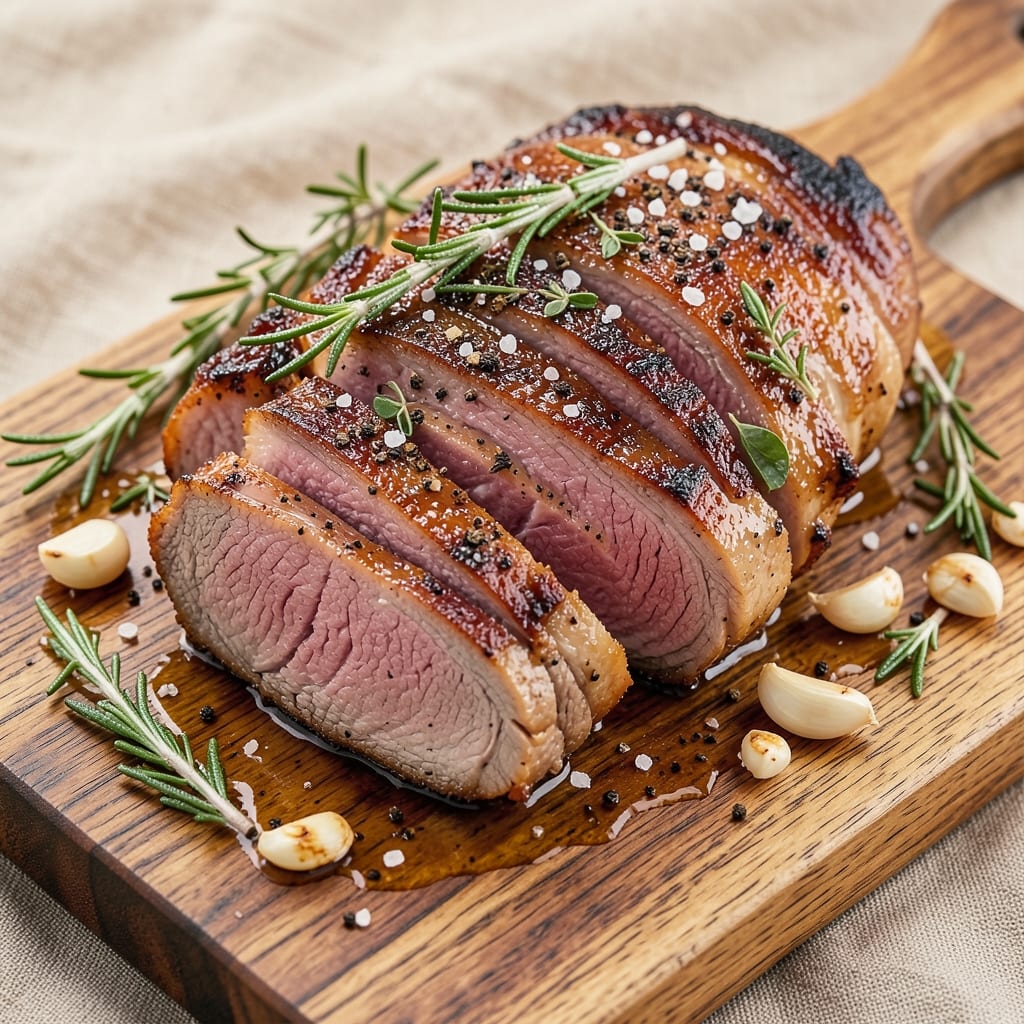
Air fryer rotisserie beef roast delivers that coveted crispy bark and melt-in-your-mouth tenderness without hours in the oven. 🔥 The secret lies in high-temperature searing followed by slow cooking at 325°F—transforming tough cuts into restaurant-quality perfection in just 2 hours. This method preserves juices while creating that prized caramelized crust, all while using half the energy of a traditional roast.
The process begins with a dry brine and strategic trussing to ensure even cooking and maximum flavor penetration. As the air fryer circulates hot air around the roast, it develops a deep, golden bark while maintaining a moist, juicy center—something traditional roasting struggles to achieve. The air fryer's precision temperature control eliminates the guesswork of oven cooking, guaranteeing consistent results every time.
What makes this technique truly special is the ability to baste the roast during cooking, enhancing both flavor and texture. The result is a roast with shatteringly crisp edges and tender, fork-tender meat that practically falls apart. This method works beautifully with chuck roasts or bottom round roasts, making it ideal for meal prep or special occasions.
Pair with classic sides like roasted potatoes, caramelized onions, or a fresh green salad to complete the meal. The air fryer's efficiency means you'll have more time to enjoy the cooking process—and the delicious results. Let's get started on creating your perfect rotisserie roast.
Ingredients for air fryer rotisserie beef roast
Six ingredients transform a tough cut into restaurant-style perfection—crispy outside, juicy inside.
| Ingredient | Amount | Notes |
|---|---|---|
| Chuck Roast 🥩 | 4 lb | Center-cut for even cooking |
| Kosher Salt 🧂 | 2 tbsp | Diamond Crystal preferred |
| Freshly Ground Black Pepper 🌶️ | 1 tbsp | Freshly cracked for best flavor |
| Garlic Cloves 🧄 | 8 cloves | Smashed for intense flavor |
| Fresh Rosemary 🌿 | ¼ cup | Chopped, stems removed |
| Fresh Thyme 🌿 | ¼ cup | Leaves only, stems removed |
| Extra-Virgin Olive Oil 🫒 | ¼ cup | For basting and searing |
| Beef Tallow or Duck Fat 🍳 | ½ cup | For crispy bark development |
| Yellow Onion 🧅 | 1 whole | Quartered, for basting liquid |
| Carrots 🥕 | 4 whole | Whole, for basting liquid |
| Celery Stalks 🥬 | 2 whole | Whole, for basting liquid |
| Garlic Powder 🧄 | 1 tbsp | For dry rub |
| Smoked Paprika 🌶️ | 1 tbsp | For dry rub |
| Butcher's Twine 🧵 | 1 package | For trussing |
The chuck roast is your star—center-cut for even cooking, not the cheaper end cuts. Costco's pre-trussed roasts save time, but if you're buying whole, ask the butcher to trim excess fat. Look for good marbling—those white fat streaks mean juicier meat. Fresh herbs are worth the splurge here: Whole Foods or local farmers' markets have the best rosemary and thyme. For the fat, beef tallow gives the best bark, but duck fat works too (just render it first if using frozen).
No beef tallow? Olive oil plus 1 tbsp butter gets you close, though the bark won't be as crisp. Short on fresh rosemary? Dried at one-third the amount works, but toast it first for 30 seconds in a dry pan to wake up the flavor. The basting liquid—onion, carrots, celery—can be prepped ahead and stored in the fridge for 5 days. For extra flavor, add a bay leaf or two to the liquid. The trussing twine? Kitchen twine from Williams Sonoma is my go-to—cheap and strong enough to hold a 4-pound roast.
Prep the roast 12 hours ahead for the dry brine—it's non-negotiable for juiciness. The basting liquid keeps 1 week in the fridge, so make extra for future roasts. Leftover roast? Slice thinly and reheat with a splash of beef broth for 3 months frozen. The crispy bark is delicate—serve immediately or it'll soften. Store any leftovers wrapped tightly in parchment paper to preserve that texture.
Why You'll Love This Recipe
- No-Fuss Setup: I swear by this one—just season the chuck roast with salt, pepper, and crushed garlic cloves, then let the air fryer do the rest. No fancy marinating, no basting, no stress. Honestly, the only "work" is trimming the fat and pressing those rosemary sprigs into the meat.
- Crispy-Creamy Magic: That air fryer sear gives it this perfect crust while keeping the inside tender enough to melt. The rosemary and garlic infuse deep, but it’s not overpowering—just rich, savory beef that tastes like it simmered all day (but didn’t).
- Leftover Goldmine: Between us, this is my go-to for meal prep. Slice it thin for sandwiches, toss chunks into pasta, or just reheat with gravy—it’s that versatile. My freezer’s always stocked with vacuum-sealed portions because it stays juicy even after reheating.
- Budget Beef, Big Payoff: Chuck roast is cheap, but this method makes it feel special. I’ll be real: I’ve spent twice as much on pre-sliced rotisserie beef that tastes bland. This? It’s the same flavor for half the price, and I control the seasoning. Plus, one roast feeds my family for days.
Step-by-step instructions for air fryer rotisserie beef roast
Here's how to transform a simple chuck roast into restaurant-quality rotisserie beef—crispy outside, melt-in-your-mouth tender inside.
👨🍳 Step 1: Prep the Roast and Make the Dry Rub
Start by patting the 4 lb chuck roast completely dry with paper towels. I mean really dry—this is non-negotiable for crispy bark. Trim any excess fat, leaving about ¼-inch thickness on the surface. In a small bowl, mix together 2 tbsp kosher salt, 1 tbsp freshly ground black pepper, 1 tbsp garlic powder, and 1 tbsp smoked paprika.
Rub this mixture all over the roast, pressing firmly so it adheres. Pay special attention to the edges and seams where the meat might not get as much direct heat. Let the seasoned roast sit at room temperature for 30 minutes while you prep the air fryer. This resting time ensures even cooking and prevents cold spots that could lead to uneven doneness.
🥘 Step 2: Build the Basting Liquid and Truss the Roast
In a blender, combine the 1 whole yellow onion (quartered), 4 whole carrots, 2 whole celery stalks, 8 smashed garlic cloves, 0.25 cup fresh rosemary, 0.25 cup fresh thyme, 0.25 cup extra-virgin olive oil, and 0.5 cup beef tallow or duck fat. Blend until smooth—this will be your basting liquid that keeps the meat moist while creating that gorgeous bark.
Use the butcher's twine to truss the roast by tying the legs together and tucking the point (the triangular end) under the roast. This helps it cook more evenly and prevents it from falling apart during cooking. Pour about ½ cup of the basting liquid into the bottom of your air fryer basket—this creates steam that keeps the meat juicy.
🔥 Step 3: Air Fry with Basting for Crispy Perfection
Place the trussed roast in the air fryer basket, fat-side up, and pour the remaining basting liquid evenly around it. Set your air fryer to 325°F and cook for 1 hour. After the initial hour, open the air fryer and baste the roast with any accumulated juices in the basket. This is where the magic happens—those rendered fats and aromatics create the crispy bark we're after.
Continue cooking for another 45-60 minutes, basting every 15 minutes until the internal temperature reaches 195-200°F (use a meat thermometer). The bark should be deep mahogany brown and crispy to the touch, while the meat should be fork-tender. If the bark isn't crispy enough, increase the temperature to 350°F for the final 10 minutes to crisp it up.
⏰ Step 4: Rest and Slice for Maximum Juiciness
Once the roast reaches the target temperature, transfer it to a cutting board and tent loosely with aluminum foil. Let it rest for at least 30 minutes—this is absolutely critical. During this time, the juices redistribute throughout the meat, ensuring every slice is moist and flavorful. If you skip this step, you'll end up with dry, disappointing beef.
After resting, slice the roast against the grain into ¼-inch thick slices. The grain runs lengthwise, so you'll need to adjust your angle slightly between the flat and point cuts. Serve immediately with the pan juices reduced by 5 minutes on the stovetop for a glossy sauce. Each bite should deliver that perfect balance of crispy bark and melt-in-your-mouth tenderness.
Pro Tips For Making Air Fryer Rotisserie Beef Roast
- CRANK THE HEAT FIRST: Start your air fryer at 400°F for the first 15 minutes—this sears the outside fast and locks in those juices before the roast slows down. After that, drop to 325°F to finish cooking; I learned this the hard way when my first batch came out dry because I played it too safe from the start.
- SALT THE ROAST TWICE: Generously coat the chuck roast with kosher salt before adding garlic and rosemary, then again halfway through cooking. The first layer seasons deep, while the second builds that crust. (Yes, even if you’re impatient like me—don’t skip the second round.)
- SKIP THE GARLIC MINCE: Smash 3-4 whole garlic cloves with the flat side of your knife instead of mincing them—it releases more flavor without burning. Tuck them under the rosemary sprigs so they caramelize slowly into the meat, not turn to ash in the air fryer’s rush.
- REST IT WRAPPED: Pull the roast out 10 minutes early, tent it loosely with foil, and let it sit. The residual heat finishes cooking it perfectly while keeping it moist—no more dry slices when you slice. (Your future self will curse you if you skip this.)
Serving suggestions for air fryer rotisserie beef roast
Classic Comfort Sides
Serve your air fryer rotisserie beef with creamy mashed potatoes—whipped with ½ cup sour cream and 2 tbsp butter for extra richness. I like to add roasted garlic for depth. For a lighter option, try garlic roasted baby potatoes tossed in 2 tbsp olive oil and 1 tsp smoked paprika until crispy. Both sides soak up those delicious pan juices beautifully. 🥔
Fresh Contrasts
A crisp arugula salad with lemon vinaigrette (3 tbsp olive oil, 1 tbsp lemon juice, 1 tsp Dijon mustard) cuts through the richness. Add thinly sliced radishes and toasted walnuts for crunch. For a warmer option, sautéed green beans with garlic and almonds (2 tbsp sliced almonds, 1 minced garlic clove) add vibrant color and freshness.
Bread Pairings
Warm crusty sourdough bread is a must—slice it thick and toast with garlic butter (2 tbsp softened butter, 1 minced garlic clove, salt). For a heartier option, serve with cheesy pull-apart bread (store-bought or homemade) made with mozzarella and cheddar blends. Both pair perfectly with the roast's rich flavors and help mop up any remaining juices.
Sauce Elevations
Turn your pan juices into a red wine reduction by simmering them with ½ cup red wine and 1 tbsp beef broth for 5 minutes. For a tangy twist, add 1 tsp apple cider vinegar and a pinch of Worcestershire sauce. A simple horseradish cream (¼ cup sour cream, 1 tbsp prepared horseradish, 1 tsp lemon juice) adds a sharp kick that balances the beef's richness.
Global Inspirations
For a Middle Eastern twist, serve with warm pita bread and tzatziki sauce (½ cup Greek yogurt, 1 cucumber grated and drained, 1 garlic clove minced, 1 tbsp lemon juice). In Mexican style, pair with cilantro-lime rice (cooked rice, ¼ cup chopped cilantro, juice of 1 lime) and charro beans (canned beans simmered with bacon, jalapeños, and spices). These global sides add exciting new dimensions to your meal. 🌍
Make-Ahead Tips
Prep sides in advance to save time: Roast potatoes can be parboiled and refrigerated for 24 hours before finishing in the air fryer. Mashed potatoes freeze beautifully for up to 3 months—just reheat with extra butter. Salads should be dressed right before serving to keep them crisp. For the roast itself, slice and store leftovers in an airtight container for up to 4 days—reheat with a splash of beef broth to maintain moisture. 💡
Nutrition facts
Frequently asked questions
Can I use any cut of beef for this air fryer rotisserie method?
For best results, stick with chuck roast or bottom round roast—these cuts have the right balance of fat and connective tissue for that melt-in-your-mouth texture. Avoid lean cuts like sirloin or tenderloin, as they lack the fat needed for crispy bark and juicy results. A 4 lb roast is ideal for most air fryers, but adjust cooking time by 15 minutes per pound if using a different size.
Why does my air fryer roast sometimes come out dry?
Skipping the 30-minute rest after cooking is the #1 cause of dry beef. The juices need time to redistribute! Also, check your internal temperature—stop cooking at 195-200°F, not higher. If your air fryer runs hot, reduce the temperature to 300°F for the last 30 minutes to prevent overcooking. And always use a meat thermometer—guessing leads to dry results.
How do I get that perfect crispy bark in my air fryer?
The secret is beef tallow or duck fat in your basting liquid—it creates a deep mahogany crust. Pat the roast completely dry before seasoning, and sear it at 375°F for 10 minutes at the start. For extra crispiness, increase to 350°F for the final 10 minutes of cooking. Avoid opening the air fryer too often—each time you do, you lose heat and moisture.
What's the best way to reheat sliced rotisserie beef?
Slice the roast thinly (¼-inch thick) and reheat in the air fryer at 350°F for 3-4 minutes with a splash of beef broth. For extra moisture, wrap slices in foil with 1 tsp butter and reheat in a 300°F oven for 10 minutes. Never microwave—it turns beef rubbery. Store leftovers in an airtight container for up to 4 days.
Can I make this recipe in a regular oven instead?
Yes! Preheat your oven to 325°F and follow the same steps, but increase cooking time by 1.5x (about 3 hours total). For crispy bark, broil for 5 minutes at the end. The air fryer's precision heat makes it faster and more energy-efficient, but the oven method works well too—just monitor the temperature closely to avoid dryness.