
Main Courses
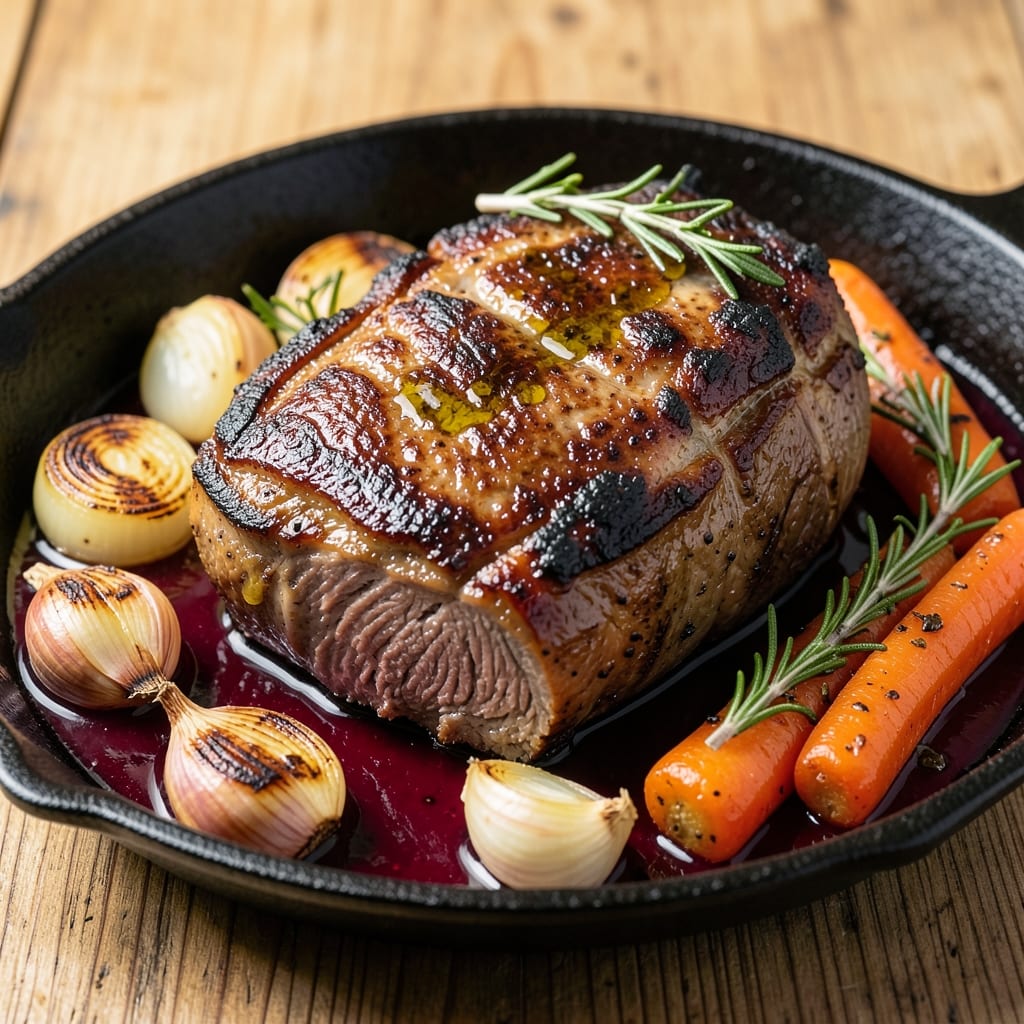
This alternative roast beef recipe transforms tough cuts into melt-in-your-mouth perfection using slow-braising techniques and bold red wine. Instead of traditional dry-heat roasting, we'll create a tender, flavorful masterpiece with rosemary and red wine that infuses every bite. The key lies in low-and-slow cooking that breaks down connective tissue while building deep, complex flavors.
What makes this approach truly special is its versatility—perfect for chuck roast, short ribs, or even beef brisket. The red wine marinade tenderizes while adding rich depth, while fresh rosemary brings an aromatic brightness that cuts through the richness. This method delivers restaurant-quality results without requiring special equipment, just patience and attention to timing.
The result is beef so tender it practically falls apart at the touch, bathed in a luscious red wine reduction that clings to every bite. Each slice is infused with herbal notes and subtle sweetness from the wine, creating a dish that's elegant enough for dinner parties but simple enough for weeknight meals. The slow-braising technique ensures maximum flavor penetration and texture transformation.
Serve with classic sides like creamy mashed potatoes or buttery egg noodles to soak up every drop of that flavorful sauce. This recipe proves that alternative methods can yield extraordinary results—transforming humble beef cuts into something truly special. Let's get started on creating this showstopping centerpiece.
Ingredients for alternative roast beef
Sixteen ingredients to transform tough beef into restaurant-quality masterpiece using slow-braising techniques.
| Ingredient | Amount | Notes |
|---|---|---|
| Chuck Roast 🥩 | 3 lb | Well-marbled, bone-in preferred |
| Dry Red Wine 🍷 | 1 ½ cups | Bold, like Cabernet Sauvignon |
| Fresh Rosemary 🌿 | ½ cup | Stems removed, finely chopped |
| Garlic Cloves 🧄 | 6 cloves | Peeled, lightly crushed |
| Yellow Onion 🧅 | 1 whole | Medium size, sliced |
| Carrots 🥕 | 4 whole | Medium size, peeled |
| Beef Broth 💧 | 2 cups | Low-sodium preferred |
| Olive Oil 🫒 | 2 tbsp | Extra-virgin for richness |
| Salt 🧂 | 1 ½ tsp | Diamond Crystal kosher |
| Black Peppercorns 🌶️ | 1 tsp | Freshly cracked |
| Thyme 🌿 | 1 tsp | Fresh, or 0.5 tsp dried |
| Tomato Paste 🍅 | 2 tbsp | Smooth, not chunky |
| Balsamic Vinegar 🍶 | 1 tbsp | For depth of flavor |
| Honey 🍯 | 1 tbsp | For subtle sweetness |
The chuck roast is the foundation—look for well-marbled cuts with visible fat between the muscles. Costco or Whole Foods carry excellent options, or ask your butcher to trim excess fat while preserving marbling. Bone-in roasts add flavor but require longer cooking; boneless works if you're short on time. Fresh rosemary matters here—avoid dried for this dish unless it's a pinch of culinary-grade powder. For the red wine, Cabernet Sauvignon or Merlot work best, but any bold, dry red will do. The beef broth should be low-sodium to balance the rich flavors.
No red wine? Beef broth with 1 tbsp balsamic vinegar mimics the depth, though the color will differ. Fresh thyme unavailable? Dried thyme at half the amount suffices, but fresh has superior aroma. The tomato paste can be swapped for 1 tbsp tomato sauce if you're avoiding canned ingredients. For honey, maple syrup works equally well. If using bone-in beef, increase cooking time by 30-45 minutes. The onions and carrots act as flavor anchors—baby carrots or frozen chopped veggies simplify prep without sacrificing texture.
This dish excels when made ahead—flavors deepen overnight. Store in the refrigerator for 4-5 days, covered with its sauce. For longer storage, freeze portions in airtight containers for up to 3 months. Reheat gently on the stove with a splash of broth to maintain moisture. The sauce thickens upon cooling, so add a splash of water or wine when reheating. Leftovers transform into perfect sandwiches or tacos the next day.
Why You'll Love This Recipe
- One-Pan Magic: I swear by this—just toss the chuck roast, chopped onion, and garlic into a Dutch oven with the wine and rosemary, then walk away. That’s it. No fancy searing or flipping; the slow cook lets the wine reduce into a rich, sticky sauce while you’re actually living your life.
- Wine-Infused Richness: The red wine doesn’t just flavor the meat—it transforms it. That deep, slightly tangy note from the wine cuts through the beef’s richness, while the rosemary adds a piney brightness. Honestly, it tastes like a fancy bistro dish, but I’m the one who made it in my kitchen.
- Leftovers That Shine: Between us, this roast is better the next day. The flavors meld into something even more cohesive, and I’ve turned last night’s dinner into today’s lunch with zero effort. Slice it thin, toss it in a sandwich, or pile it onto crusty bread—it’s always a win.
- Budget-Friendly Crowd-Pleaser: A chuck roast is cheap, and this recipe stretches it far without sacrificing taste. I’ve fed six people for under $15, and not one of them complained. The wine might seem like a splurge, but a single bottle does the trick, and the leftovers make it even more economical.
Step-by-step instructions for slow-braised red wine & rosemary roast beef
Transform tough chuck roast into melt-in-your-mouth perfection with this slow-braising technique.
Sear the Chuck Roast for Deep Flavor
Pat the 3 lb chuck roast completely dry with paper towels—this ensures maximum browning. Heat 2 tablespoons olive oil in a heavy Dutch oven over medium-high heat until shimmering. Place the roast in the pan and sear on all sides for 8-10 minutes total, turning occasionally, until deeply browned and developing a crust. The key here is patience—don't rush the searing or the flavor foundation will be weak.
While the roast browns, remove it from the pan and set aside. The browned bits (fond) in the bottom of the pot will dissolve into the braising liquid, adding layers of depth. This step is non-negotiable for developing that rich, caramelized flavor that defines a proper braise.
Build the Aromatic Base
In the same Dutch oven, add 1 whole yellow onion and 4 whole carrots, both cut into 1-inch chunks. Sauté for 5 minutes until softened and beginning to caramelize. Add the 6 peeled garlic cloves and 0.5 cup finely chopped fresh rosemary, cooking for another 1-2 minutes until fragrant. This aromatic base forms the flavor backbone of your braise.
Stir in 2 tablespoons tomato paste and cook for 1 minute to deepen the color and remove any raw taste. This step prevents the braising liquid from being cloudy and adds a subtle umami richness that complements the wine. The tomato paste also helps thicken the final sauce slightly, creating a more cohesive texture.
Deglaze and Combine Liquids
Pour in 1.5 cups dry red wine, scraping up all the browned bits from the bottom of the pot with a wooden spoon. Let it simmer for 3-4 minutes until reduced by half, allowing the alcohol to burn off and the wine's flavors to concentrate. Add 2 cups beef broth, 1 tablespoon balsamic vinegar, and 1 tablespoon honey, stirring to combine. The balsamic adds complexity while the honey balances acidity with subtle sweetness.
Return the seared chuck roast to the pot, along with 1.5 teaspoons salt and 1 teaspoon freshly cracked black peppercorns. Add 1 teaspoon thyme and bring the liquid to a gentle simmer. The liquid should come about halfway up the roast—if it's too shallow, add a splash more broth. This ensures even cooking and prevents the meat from drying out.
Braise Until Fork-Tender
Cover the Dutch oven and transfer it to a 325°F oven. Braise for 3 hours, then carefully flip the roast and continue cooking for another 3 hours (total 6 hours). The meat should be fork-tender, falling apart easily when pierced with a fork. If the liquid reduces too quickly, add a splash more broth or water during cooking.
Here's the thing—braising is a marathon, not a sprint. The slow cooking breaks down collagen in the meat, transforming tough fibers into silky texture. Check the internal temperature periodically after 4 hours—it should reach 200-205°F for perfect tenderness. The roast will continue cooking slightly after removal, so don't overcook.
Rest and Serve with Braising Sauce
Remove the roast from the pot and transfer it to a cutting board. Tent loosely with foil and let it rest for 15-20 minutes. This resting period allows the juices to redistribute throughout the meat, ensuring each slice is moist and flavorful. Skim any excess fat from the braising liquid in the pot and reduce it over medium heat for 5-7 minutes until slightly thickened.
Slice the roast against the grain into ½-inch thick portions. Serve immediately with the reduced braising sauce spooned over the top. Each bite should deliver rich, wine-infused beef with tender carrots and onions that have absorbed all the flavors. The sauce should coat the back of a spoon, balancing the meat's depth with subtle sweetness and acidity.
Pro Tips For Making Alternative Roast Beef
- SEAR THE ROAST FIRST: Chuck roast needs that crust to hold up during long cooking. Sear it hard in a hot Dutch oven—3-4 minutes per side—before adding wine and veggies. I used to skip this, and the meat just turned out bland and dry.
- SMASH THE GARLIC: Whole garlic cloves won’t infuse like smashed ones. Use the flat side of your knife to crush them slightly before adding to the pan. This releases more flavor into the wine and onion base—trust me, it matters.
- DON’T OVERCOOK THE WINE: Red wine boils down fast—keep it simmering gently for 5-7 minutes max. If you let it reduce too long, it turns bitter and overpowers the dish. Stir occasionally, and watch it like a hawk.
- REST UNDER FOIL: After roasting, tent the meat with foil and let it sit for 15 minutes. This keeps it juicy while you finish the veggies—no one wants a slice that falls apart when you cut it. (Yes, even if you’re impatient like me.)
Pro cooking tips for great alternative roast beef
Dutch Oven Mastery
Your choice of cookware makes all the difference here. A heavy-duty Dutch oven like Le Creuset or All-Clad is ideal—its thick walls retain heat evenly and prevent scorching. Avoid thin, flimsy pots that can't handle the long braising time. If you don't own one, a 6-quart oven-safe pot with a tight-fitting lid works in a pinch, though it may take slightly longer to come to temperature. 🌡️
Pro tip: Preheat your Dutch oven in the oven alongside the roast. Place it on the middle rack for 10 minutes at 325°F before adding your ingredients. This ensures everything starts cooking at the same temperature, creating a consistent environment for even braising. The preheated pot also helps caramelize the onions and carrots faster during the initial searing phase.
Temperature Control
Precision matters when braising—325°F is non-negotiable for this recipe. Use an oven thermometer to verify your oven's accuracy, as many ovens run 15-25°F hotter or cooler than set. For even more control, consider using a slow cooker on low for 8-10 hours—just add all ingredients except the honey (add it during the last hour to prevent burning). The slow cooker method is foolproof for busy days. ⏰
If using a stovetop approach, maintain a gentle simmer—never a rolling boil. The liquid should bubble softly around the edges while staying still in the center. Too much heat = tough meat. Too little heat = undercooked beef. Aim for that barely-there bubble throughout the entire braising process. I've ruined many braises by letting them boil too vigorously!
Timing Hacks
Short on time? Start with a parboiled approach: Simmer the roast in water for 2 hours before transferring to the braising liquid. This jumpstarts the collagen breakdown, cutting total cook time by 1-2 hours. For the parboil, use enough water to cover the roast and add 1 onion, 2 carrots, and 2 garlic cloves for flavor. Drain and proceed with the original recipe. 💡
Another trick: Flip the roast halfway through cooking. This ensures even browning and prevents one side from overcooking. Use tongs or a meat fork to carefully turn it in the pot. If the meat isn't fork-tender after 6 hours, add ½ cup more broth and continue cooking for another 30-60 minutes. Patience pays off—this isn't a race to see who can make beef fastest!
Flavor Boosters
Elevate your braise with these pro additions: Swap ½ cup of the beef broth for white wine (like Chardonnay) in the liquid to add brightness. For umami depth, add 1 teaspoon fish sauce or 1 bay leaf during the braising phase. I also love finishing with 1 tablespoon cold butter stirred into the reduced sauce at the end—it adds luxurious mouthfeel and helps emulsify the sauce. 💛
Don't underestimate the power of fresh herbs at the table. Garnish with extra rosemary sprigs or thinly sliced scallions for a pop of color and freshness. A sprinkle of flaky sea salt (like Maldon) right before serving enhances all the flavors. The contrast between the warm, braised beef and bright herbs makes every bite feel special.
Nutrition facts
Frequently asked questions
Can I use this method with beef cuts other than chuck roast?
This slow-braising technique works beautifully with short ribs, brisket, or even bottom round roast. For short ribs, reduce cooking time to 4-5 hours total, while brisket may need 8 hours for complete tenderness. The key is choosing well-marbled cuts that benefit from moisture and low heat.
What if I don't have red wine? Can I substitute?
Yes! Replace the wine with 2 cups beef broth plus 1 tablespoon balsamic vinegar for depth. For extra richness, add 1 teaspoon soy sauce or 1 bay leaf. The dish will still be flavorful—just with a slightly different profile. The wine adds complexity, but these substitutes work well in a pinch.
How do I know when the beef is done?
The meat should reach an internal temperature of 200-205°F for perfect tenderness. Use a meat thermometer inserted into the thickest part. The beef will continue cooking slightly after removal, so don't overcook. When pierced with a fork, it should fall apart easily—this is your cue it's ready!
Can I make this in a slow cooker instead of the oven?
Certainly! Transfer all ingredients (except honey) to a 6-quart slow cooker and cook on low for 8-10 hours. Add the honey during the last hour to prevent burning. The slow cooker method is hands-off and equally delicious. Just ensure the liquid covers at least half the roast for proper braising.
What are the best sides to serve with this dish?
This rich, wine-braised beef pairs perfectly with creamy mashed potatoes, buttery egg noodles, or roasted root vegetables. For a lighter option, try polenta or wild rice pilaf. The tender beef and flavorful sauce soak into starchy sides beautifully, creating a satisfying meal.