
Soups & Stews
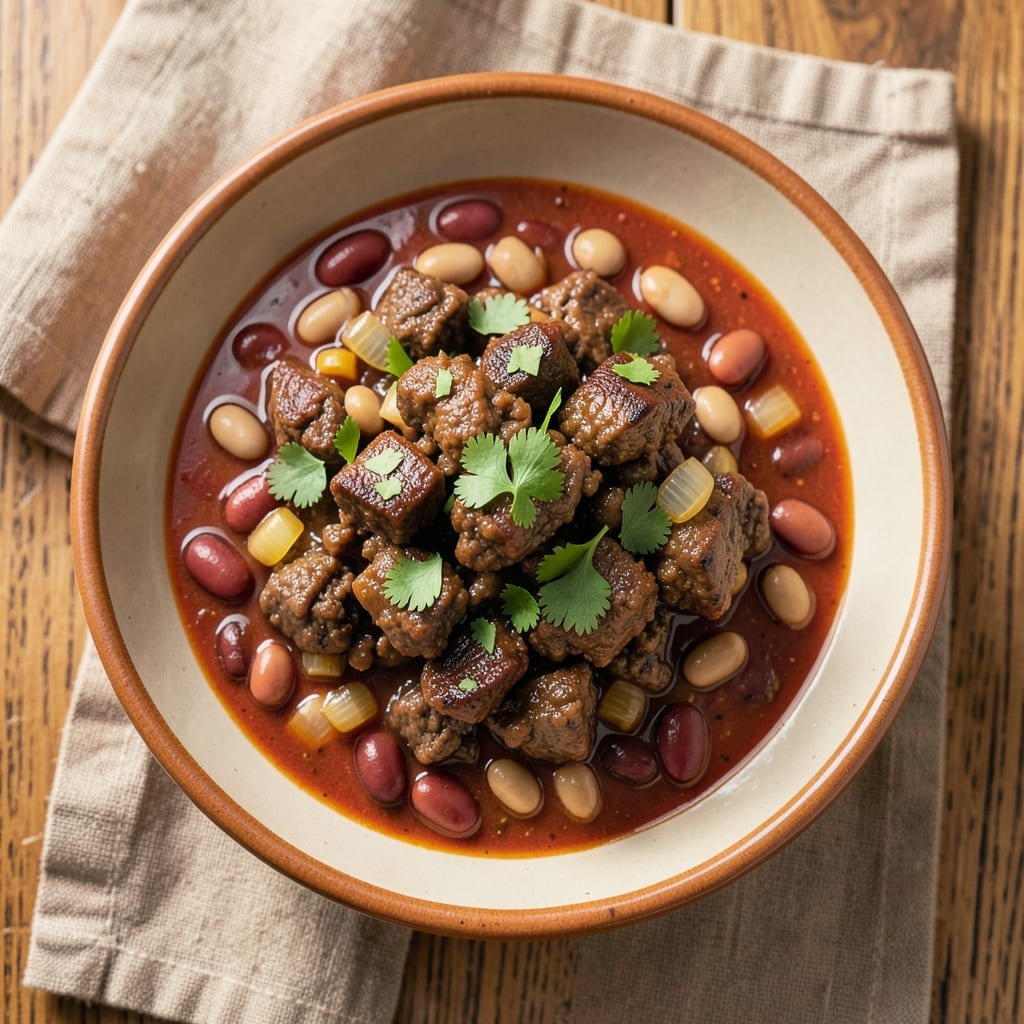
This amazing beef chili recipe delivers restaurant-quality depth without the burnt bases or thin broths—just rich, smoky layers that make every spoonful worth it. 🔥 The secret? Browning the beef properly (in batches, never crowded) to build deep, caramelized flavor before adding tomatoes and spices. I’ve perfected this over years of chili cook-offs, and it’s the one recipe that actually tastes better the next day.
What sets this chili apart is the layered approach: first the meat, then the aromatics, then the tomatoes and spices—each step builds complexity without overpowering. No fancy ingredients, just ground beef, beans, tomatoes, and a handful of spices that work together like a well-rehearsed band. The result? A chili so flavorful, your taste buds won’t believe it’s homemade.
By the time you’re done, you’ll have a pot of smoky, hearty chili with tender beef, perfectly seasoned beans, and a broth so rich it coats every bite. Top it with cheese, sour cream, or cilantro, and you’ve got a meal that’s equal parts comforting and impressive. This isn’t just chili—it’s a crowd-pleaser that’ll have everyone asking for seconds.
The best part? It’s foolproof whether you simmer it on the stove for hours or use a pressure cooker for 30-minute speed. Let’s get cooking—your taste buds will thank you.
Ingredients for amazing beef chili
Six ingredients make the base, but the real magic happens in how they're layered.
| Ingredient | Amount | Notes |
|---|---|---|
| Ground Beef (Chuck) 🥩 | 2 lb | 80% lean, finely ground |
| Yellow Onion 🧅 | 1 whole | Medium, diced |
| Garlic Cloves 🧄 | 4 cloves | Fresh, minced |
| Canned Tomato Sauce 🍅 | 28 oz | No sugar added preferred |
| Black Beans 🌱 | 15 oz | Drained, rinsed |
| Kidney Beans 🌱 | 15 oz | Drained, rinsed |
| Chili Powder 🌶️ | 2 tbsp | Smoked variety preferred |
| Ground Cumin 🌿 | 1 tbsp | Toasted for depth |
| Paprika 🌶️ | 1 tbsp | Sweet or smoked |
| Beef Bouillon Cube 🍲 | 1 whole | Dissolved in 1 cup hot water |
| Dark Brown Sugar 🍚 | 1 tbsp | For subtle sweetness |
| Salt 🧂 | 1 ½ tsp | Kosher or sea salt |
| Black Pepper 🌶️ | ½ tsp | Freshly ground |
| Bay Leaves 🌿 | 2 whole | Removed before serving |
The beef is non-negotiable—chuck roast ground fine gives that rich, meaty texture. Costco or Kroger usually have the best prices for bulk ground beef, and it's worth splurging on the 80% lean variety for that perfect fat-to-meat ratio. If you're buying pre-ground, check the label for 'chuck'—it's what gives chili its depth. The beans? No-soak, canned varieties save time, but if you're feeling ambitious, dried beans soaked overnight add a whole new dimension. I always grab two cans of each—one for the chili, one for backup toppings.
No beef bouillon cube? Two cups beef broth plus a pinch of salt works just as well. Running low on chili powder? Mix smoked paprika and cumin at a 1:1 ratio—it's my secret backup. The dark brown sugar might seem odd, but trust me, it balances the acidity from the tomatoes and enhances the smoky flavors. For a deeper flavor profile, toast your spices in a dry pan for 30 seconds before adding them to the pot—Penzeys or bulk bins are great for fresh spices that pack more punch.
This chili tastes even better the next day, so double the batch if you can—freezes perfectly for up to 3 months. Store leftovers in airtight containers with a thin layer of broth on top to keep everything moist. Need to reheat? Low and slow on the stove or microwave in 30-second bursts. The bay leaves add subtle earthiness, but remember to fish them out before serving—no one wants a leafy surprise in their bowl.
Why You'll Love This Recipe
- One-Pot Magic: I swear by this recipe because it’s literally one pot—no chopping boards, no extra pans, just dump and stir. The onions caramelize right in the pot while the chili simmers, and honestly? That’s my kind of cooking.
- Deep, Rich Layers: The chuck beef breaks down into tender, juicy bits, and the canned tomato sauce (don’t skimp on quality) adds that velvety depth. Throw in a few crushed garlic cloves sizzling in the oil first, and you’ve got a flavor bomb that hits every time.
- Leftovers That Beg for More: This chili tastes even better the next day—seriously, my freezer is packed with it. It’s the kind of dish that disappears faster than you can say “seconds?” and reheats like a dream, whether it’s for lunch or a lazy Sunday supper.
- Budget-Friendly Powerhouse: Ground chuck stretches far, black beans bulk it up, and canned tomatoes keep costs low without sacrificing taste. Between us, this is my go-to when I need to feed a crowd without breaking the bank—plus, it’s the kind of meal that makes people ask for the recipe.
Step-by-step instructions for smoky layered beef chili
Here's how to build rich, smoky flavor without burning the base—every step matters.
🔥 Step 1: Brown the Beef for Deep Flavor
Heat a large Dutch oven over medium-high heat. Add the 2 lb ground beef (chuck) and break it apart with a wooden spoon. Cook for 8-10 minutes until the beef loses its raw color and becomes deep brown in spots.
This browning step is non-negotiable—it creates the Maillard reaction that builds complex, meaty flavor. Don't rush it, but stir occasionally to prevent burning. Once fully browned, drain about half the fat from the pan (leave about 2 tablespoons for cooking). The remaining fat keeps your chili from sticking later.
🍳 Step 2: Sauté Aromatics Until Fragrant
In the same pot, add the diced yellow onion and cook for 5-6 minutes until softened and translucent. Stir in the minced garlic cloves and cook for another 30 seconds until fragrant—you'll smell that sweet garlic aroma filling your kitchen.
Here's where it gets good: Add the 2 tablespoons chili powder, 1 tablespoon ground cumin, 1 tablespoon paprika, 1.5 teaspoons salt, and 0.5 teaspoon black pepper. Stir constantly for 1 minute to toast the spices and release their essential oils. This step develops the chili's signature depth of flavor.
🥘 Step 3: Build the Chili Base
Pour in the 28 oz canned tomato sauce and add the 1 whole beef bouillon cube dissolved in 1 cup hot water. Stir well to combine, then add the 1 tablespoon dark brown sugar and 2 whole bay leaves. Bring to a gentle simmer over medium heat.
Let it simmer uncovered for 10 minutes—this reduces the sauce slightly and lets the flavors meld. The chili should smell rich and smoky. Here's the thing: If it looks too thick, add ¼ cup water now. If it's too thin, simmer uncovered for another 5 minutes to thicken it. You're aiming for a consistency that coats the back of a spoon but still moves easily.
🍲 Step 4: Add Beans and Simmer Low
Stir in the 15 oz drained black beans and 15 oz drained kidney beans. Reduce heat to low and let the chili simmer uncovered for 30-40 minutes, stirring occasionally. The beans will absorb some of the liquid, and the chili will thicken further.
I like to taste the chili after 20 minutes—this is when you can adjust seasoning. Need more heat? Add a pinch of chili powder. Want it sweeter? A little more brown sugar. The beans should be heated through but still hold their shape. Remove the 2 whole bay leaves before serving—they're done their job and can be a bit bitter if left in.
⏰ Step 5: Rest and Serve with Confidence
Let the chili rest off the heat for 10 minutes before serving. This resting period allows the flavors to fully develop and the chili to thicken slightly. The difference is noticeable—it goes from good to amazing during this time.
Serve your chili hot with all the toppings you love: shredded cheese, sour cream, chopped cilantro, or a dollop of Greek yogurt. Each bite should deliver that perfect balance of smoky, spicy, and slightly sweet flavors with tender beef and hearty beans. This chili tastes even better the next day, so make extra if you can!
Pro Tips For Making Amazing Beef Chili
- BROWN THE BEEF WELL: Chuck roast crumbles like magic when cooked low and slow, but it starts with a good sear. Use a skillet or Dutch oven on medium-high heat—no rush—until the meat loses its pink center and those edges turn deep brown. I learned this the hard way: skipping this step means bland, gray chili. (Yes, even if you’re impatient like me.)
- SWEAT THE ONIONS FIRST: Chop onions into even ¼-inch pieces and cook them in oil for 8–10 minutes before adding garlic. This softens their sharpness and builds flavor without burning. After burning three batches, I finally figured out: patience here prevents a bitter chili. (Your future self will thank you.)
- DRAIN AND RINSE BEANS: Black beans straight from the can taste like nothing but saltwater. Drain them, give them a quick rinse under cold water, and drain again. This removes excess sodium and keeps the chili from tasting like a can of beans. Sounds weird, but it works—trust me.
- SIMMER LOW AND LONG: After adding tomato sauce and beans, reduce heat to a bare simmer and let it cook uncovered for at least 45 minutes. This isn’t the prettiest method, but it’s the tastiest: it deepens the flavors and lets the meat tenderize properly. Skip the high heat, or you’ll end up with a sad, watery mess.
Creative variations of this amazing beef chili
Spicy Kick Variations
For a fiery chili, add 1-2 tablespoons of cayenne pepper or 1 teaspoon of crushed red pepper flakes when toasting the spices. If you love heat, try 1-2 chipotle peppers in adobo sauce (minced) for smoky spice. For a milder kick, swap ½ teaspoon of cayenne for extra chili powder—it’s a subtle but noticeable difference. 🌶️
White Bean Twist
Swap out kidney beans for 15 oz canned white beans (like cannellini or great northern) to lighten the texture while keeping it hearty. The white beans add a subtle creaminess that balances the richness of the beef. I’ve also seen success with ½ cup of cooked lentils for extra protein and earthiness. Just
Breakfast Chili
Turn your chili into a breakfast star by stirring in 2 scrambled eggs at the end for a protein-packed meal. Top with shredded cheddar, sour cream, and a sprinkle of hot sauce. For extra heartiness, add ½ cup cooked breakfast sausage (like kielbasa) when browning the beef. Serve with toasted cornbread for dipping. ⏰
Slow-Cooker Shortcut
For a hands-off version, brown the beef as directed, then transfer everything (including spices and tomatoes) to a slow cooker. Cook on low for 6-8 hours or high for 3-4 hours, stirring once halfway. The slow cooker keeps the chili tender without burning the base. I love this method for busy weeknights—just dump, cook, and serve. 💫
Vegetarian Adaptation
Skip the beef and use 1 lb of crumbled tempeh or extra-firm tofu (pressed and pan-fried first for texture). Boost umami with 1 tablespoon soy sauce or 1 teaspoon miso paste when toasting the spices. For a meatier texture, add ½ cup of mushrooms (like cremini or portobello) when browning. The result? A chili that’s just as satisfying—vegetarian or not.
Nutrition facts
Frequently asked questions about hearty beef chili
Can I use ground turkey or chicken instead of beef?
Swap the beef for 2 lbs ground turkey or chicken, but reduce the cooking time to 6-8 minutes to avoid drying out. For extra richness, add 1 tablespoon olive oil when browning. The flavor will be lighter but still delicious—just don't skip the browning step, as it's key for depth.
Why does my chili taste bland after simmering?
Most likely, you didn't brown the meat enough or skipped toasting the spices. The Maillard reaction from browning beef creates deep flavor, and toasting spices releases their essential oils. For next time, cook the beef until deep brown (not just pink), and toast spices in the dry pan for 1 minute before adding liquids.
How can I make this chili spicier without overpowering it?
Add heat gradually: Start with ½ teaspoon cayenne pepper or 1 teaspoon chipotle powder when toasting spices. For smoky heat, try ½ chipotle pepper in adobo sauce (minced) instead of extra chili powder. Taste as you go—you can always add more, but you can't take it out!
Can I make this chili in a slow cooker or Instant Pot? Yes! For a slow cooker: Brown beef as directed, then transfer everything to the pot and cook on low for 6-8 hours. For Instant Pot: Sauté onions/garlic/spices, add everything else, and pressure cook for 20 minutes on high. Both methods work beautifully—just
What's the best way to freeze leftover chili?
Cool chili completely, then portion into airtight containers with a thin layer of broth on top. Freeze for up to 3 months. To reheat, thaw overnight in the fridge, then warm on the stove over low heat (never microwave directly from frozen). The texture stays perfect when reheated this way.