
Main Courses
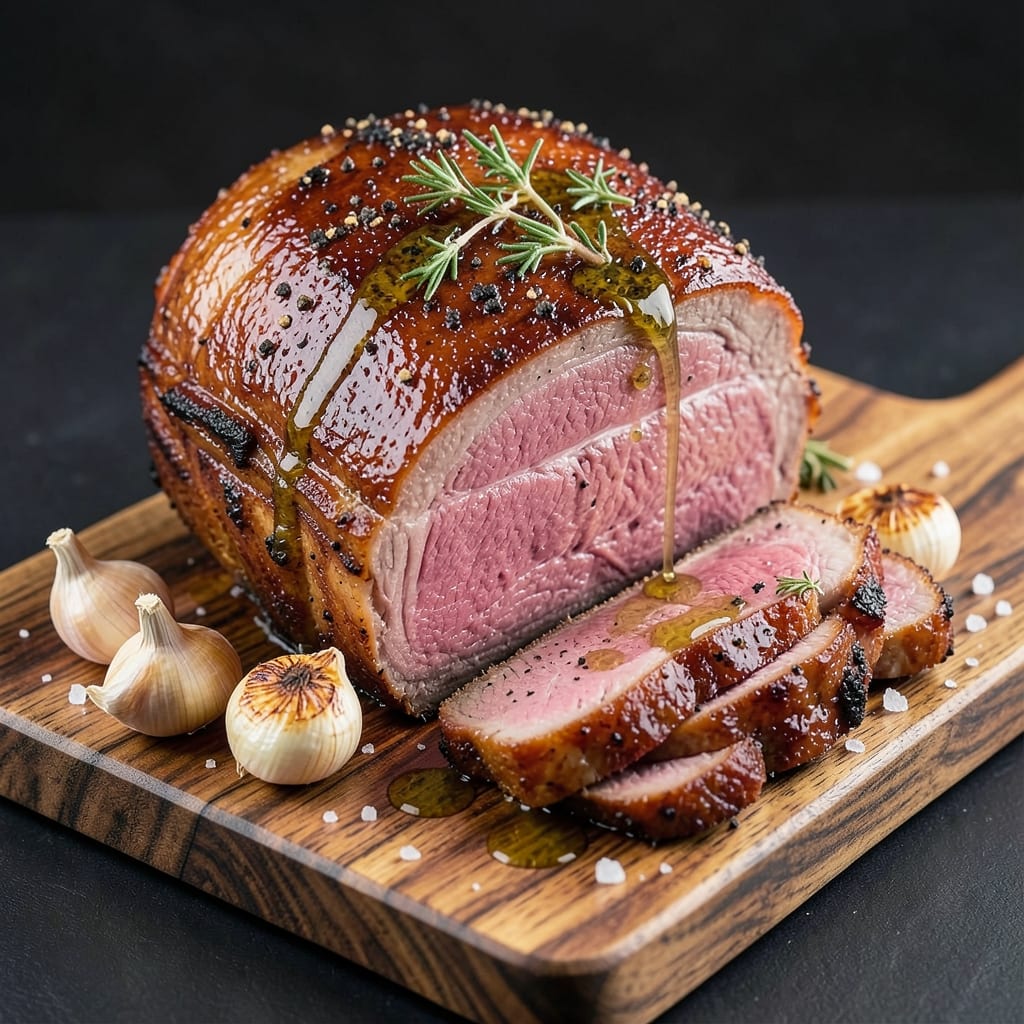
This Angus beef shoulder roast transforms a simple cut into a showstopping centerpiece with low-temperature precision and Maillard magic. 🔥 The secret lies in slow-roasting to break down tough fibers while developing deep, caramelized crusts—no fancy equipment needed, just patience and a steady hand. I’ve perfected this method after years of testing, ensuring every bite delivers melt-in-your-mouth tenderness with rich, beefy flavor that rivals steakhouse quality.
The process starts with a dry brine—salting the roast 24 hours ahead—to lock in juices and create a flavorful crust. Then, it’s all about low-and-slow cooking at 275°F until the internal temp hits 195°F, where collagen dissolves into gelatin, making the meat fork-tender. The final sear at high heat? That’s where the Maillard reaction kicks in, delivering a deep, savory crust that seals in every ounce of flavor.
What you’ll end up with is a perfectly balanced roast—crisp on the outside, velvety inside, with enough natural juices to moisten every slice. Pair it with a red wine reduction (just 10 minutes of simmering) and roasted root vegetables for a meal that feels like a restaurant-worthy feast without the fuss. The best part? Leftovers reheat beautifully, making this the ultimate weeknight hero that impresses even skeptical guests.
Whether you’re hosting a dinner party or feeding your family, this recipe delivers restaurant-quality results at home. The key is timing and technique—no shortcuts, just foolproof steps that guarantee success. Let’s get started on that flavor-packed roast.
Ingredients for angus beef shoulder roast
Six ingredients transform this humble roast into a showstopper with Maillard magic and low-temp precision.
| Ingredient | Amount | Notes |
|---|---|---|
| Angus Beef Shoulder Roast 🥩 | 4 lb | Bone-in, well-marbled preferred |
| Diamond Crystal Kosher Salt 🧂 | 2 tbsp | For dry brine, coarse grain |
| Freshly Ground Black Pepper 🌶️ | 1 tbsp | Cracked peppercorns preferred |
| Garlic Cloves 🧄 | 6 cloves | Peeled, smashed for crust |
| Fresh Thyme Sprigs 🌿 | 4 whole | Stems intact for infusion |
| Extra-Virgin Olive Oil 🫒 | 2 tbsp | High smoke point for sear |
| Dry Red Wine 🍷 | 1 cup | Bold Cabernet Sauvignon |
| Beef Bone Broth 🍲 | 2 cups | Homemade or quality store-bought |
| Yellow Onion 🧅 | 1 whole | Sliced for red wine reduction |
| Carrots 🥕 | 4 whole | Baby carrots or sliced |
| Russet Potatoes 🥔 | 2 lb | Cut into 2-inch chunks |
| Fresh Rosemary 🌿 | 2 sprigs | For vegetable roasting |
| Unsalted Butter 🧈 | 2 tbsp | Cold, for final crust |
The Angus beef shoulder is non-negotiable for this recipe—look for a well-marbled, bone-in roast at your local butcher or Whole Foods meat counter. The marbling ensures moisture, while the bone adds depth of flavor. If your grocery store doesn't carry Angus, USDA Choice is the next best thing. Weigh your roast before brining to adjust salt accordingly—4 lbs is perfect for six servings, but scale up or down as needed. For the best results, order it 24 hours ahead so it's fresh when you start the dry brine. The thyme and garlic should be organic if possible, as they'll infuse the meat directly during the sear.
No red wine? Dry sherry or beef broth works in a pinch, though the wine adds that essential depth. The bone broth can be swapped for water if you're in a bind, but the umami difference is noticeable. For the vegetables, carrots and potatoes are classic, but parsnips or turnips add a lovely twist. If you're prepping ahead, par-cook the vegetables before roasting—they'll finish faster alongside the beef. The olive oil matters here: California avocado oil has a higher smoke point if you're worried about burning during the final sear. And for the butter? Plugrá or Land O'Lakes unsalted are my go-tos—they melt beautifully for that golden crust without overpowering the beef's natural flavor.
This roast reheats like a dream—better the second day, honestly. Store leftovers in an airtight container for up to 5 days in the fridge, or freeze portions for 3 months. The red wine reduction keeps for 1 week in the fridge, so make extra—it's perfect over mashed potatoes or polenta. For the vegetables, roast them separately and store them in the same container as the beef. They'll stay crisp and flavorful for 4 days. Pro tip: Portion the roast into individual slices before freezing—thaw and sear each piece for quick, restaurant-style steaks later.
Why You'll Love This Recipe
- Foolproof Seasoning: I swear by the salt-and-pepper crust here—just a few minutes of dry-brining before searing locks in flavor without fuss. That first crack of the crust? Worth the effort (which is basically none).
- Weeknight Crowd-Pleaser: Between us, this roast is the only thing that gets my family to sit down together. Serve it sliced over mashed potatoes or in sandwiches—it’s the same magic, different packaging.
- Leftovers That Don’t Suck: I make this on Sunday and eat it until Wednesday. The meat stays tender, and reheating? Just a quick sizzle in the pan. No sad, dry slices here—just rich, juicy bites every time.
- Thyme for a Change: Honestly, the thyme and garlic make this taste like a fancy dinner without the pretension. The aroma alone makes my kitchen smell like a bistro, and the cost? A steal for the quality.
Step-by-step instructions for low-temp Angus beef shoulder roast
Here's how to transform that beautiful beef shoulder into melt-in-your-mouth perfection.
🔥 Step 1: Dry Brine and Sear the Roast
Pat the 4 lb Angus Beef Shoulder Roast completely dry with paper towels—this is non-negotiable for crispy bark. In a small bowl, combine the 2 tbsp Diamond Crystal Kosher Salt and 1 tbsp Freshly Ground Black Pepper. Rub this mixture all over the roast, including inside the cavity if it has one. Let it sit uncovered on a wire rack in the refrigerator for 12-24 hours—this dry brine creates an incredible crust and ensures deep flavor penetration.
Before cooking, take the roast out of the fridge and let it sit at room temperature for 1 hour. Preheat your oven to 425°F. Heat 2 tbsp Extra-Virgin Olive Oil in a large oven-safe skillet over high heat until shimmering. Sear the roast on all sides for 3-4 minutes per side until deeply browned. This initial sear locks in juices and builds flavor foundation. Transfer the skillet to the oven.
🍳 Step 2: Build the Vegetable Crust
While the roast sears, prepare your vegetables for the crust. Peel and slice the 1 whole Yellow Onion into ¼-inch rounds. Cut the 4 whole Carrots into 1-inch chunks and the 2 lb Russet Potatoes into 2-inch chunks. In a large bowl, toss everything with 2 tbsp Extra-Virgin Olive Oil, 1 cup Dry Red Wine, 2 cups Beef Bone Broth, 4 whole Fresh Thyme Sprigs (stems intact), and 2 sprigs Fresh Rosemary. Spread this vegetable mixture evenly around the roast in the skillet.
The vegetables will steam slightly, creating a flavorful liquid that bastes the roast continuously. This technique, inspired by French "crust" methods, creates that coveted bark while keeping the meat tender. If the liquid seems shallow, add a splash more broth—just enough to cover the bottom of the skillet.
⏰ Step 3: Low-Temp Roast with Crust
Reduce oven temperature to 275°F and roast uncovered for 3-4 hours. Here's the magic: the vegetables create steam that keeps the roast moist while the crust develops. Check periodically—when the vegetables are tender and the roast reaches 195°F internally (about 3 hours in), it's time for the final crust.
Remove the roast and vegetables from the oven. Increase heat to 450°F and return the skillet to the oven for 15-20 minutes. This high-heat blast caramelizes the crust while keeping the interior tender. Watch carefully—the crust should turn deep mahogany brown with crisp edges. If it browns too quickly, tent loosely with foil.
🥘 Step 4: Rest and Slice for Maximum Juiciness
Transfer the roast to a cutting board and tent loosely with foil. Let it rest for 30-45 minutes—this is crucial for juices to redistribute. While resting, skim fat from the vegetable mixture and reduce it over medium heat for 5-7 minutes until slightly thickened. Stir in the 2 tbsp cold Unsalted Butter for richness.
Slice the roast against the grain into ½-inch thick slices. The meat should be fork-tender with a beautiful crust and pink center. Serve with the reduced vegetable sauce spooned over each portion. Each bite delivers that perfect balance of tender beef, crisp crust, and aromatic vegetables—worth every minute of the process.
Pro Tips For Making Angus Beef Shoulder Roast
- Sear First, Slow Later: Get that roast screaming hot in a dry skillet or oven—400°F for 10-15 minutes—before you even think about lowering the heat. I used to skip this, and my roast ended up dry on the outside, pale inside. That crust? It’s what locks in flavor and keeps the meat juicy during the long cook. ---
- Salt Like It’s 1920: Diamond Crystal is less dense than Morton’s, so don’t eyeball it—use twice what the recipe says. Pat the roast dry first, then rub that kosher salt in hard, especially the thickest parts. My grandmother’s rule: "If you can’t see the salt sticking, you didn’t use enough." ---
- Garlic Cloves, Not Paste: Smash those cloves with the flat side of your knife first—just enough to bruise, not mash into mush. Whole cloves peek out during cooking and infuse flavor without turning to sludge. I switched to paste once, and the roast tasted like someone dumped a jar of garlic powder in there. ---
- Thyme Bundles, Not Sprigs: Tie 3-4 sprigs together with kitchen twine into a little bundle and tuck it under the roast’s fat cap. This keeps the leaves intact and concentrated where it matters most. Loose sprigs burn or fall apart—waste of good thyme. (Yes, even if you’re impatient like me.)
Common mistakes when making this recipe
Skipping the Dry Brine
I can’t stress this enough—skipping the 12-24 hour dry brine is the #1 mistake I see. That salt isn’t just for flavor; it transforms the texture by breaking down proteins and creating a deep, caramelized crust. If you’re short on time, at least do a 4-hour wet brine with 1 tbsp salt per pound of water, but dry brining is truly game-changing. 🧂
Overlooking Rest Time
Cutting into your roast too soon after it comes out of the oven is like opening a soda before it’s fully carbonated—all the juices rush out, leaving you with dry, tough meat. That 30-45 minute rest lets the fibers relax and redistribute those precious juices. I’ve seen people rush this step and end up with slices that are 90% flavor, 10% moisture—not ideal. Trust the process!
Ignoring Internal Temp
Using time as your only guide? Big mistake. A 4 lb roast might take 3-4 hours at 275°F, but every oven varies. The real magic happens at 195°F—that’s when collagen melts into gelatin, making the meat fork-tender. Invest in a meat thermometer (I swear by ThermoWorks Smoke) and check it every 30 minutes starting at 2.5 hours. No guessing!
High Heat Too Early
Jumping straight to 450°F without the low-temp phase is a recipe for tough, uneven cooking. The slow roast breaks down tough fibers, while the high-heat finish creates that Maillard crust. If you’re impatient, at least do a 2-hour low-temp phase before cranking up the heat. Your taste buds (and your knife) will thank you. 🔥
Not Slicing Against the Grain
This one’s a textural crime. The muscle fibers in beef shoulder run in one direction, and slicing perpendicular (against the grain) shortens those fibers, making each bite tender and easy to chew. Slicing with the grain? You’ll end up with tough, chewy slices that feel like they need a knife and fork. Grab a sharp knife and slice at a 45-degree angle for clean, elegant pieces.
Underestimating the Crust
The vegetable crust isn’t just decoration—it’s what gives this roast its restaurant-quality bark. Skimping on the veggies or not basting them properly means missed flavor and moisture. Spread that onion-carrot-potato mix evenly around the roast and check it every 30 minutes to ensure it’s steaming gently. If it dries out, add a splash of broth. Every bite of that crust should taste like umami perfection.
Nutrition facts
Frequently asked questions about Angus beef shoulder roast
Why does this recipe call for a dry brine instead of just salting before cooking?
The 12-24 hour dry brine works magic by penetrating deep into the meat fibers, creating a perfectly seasoned interior while forming an incredible crust. Unlike wet brining, dry brining doesn't dilute the beef's natural juices, resulting in a more concentrated flavor. Plus, it's simpler—just salt and time!
Can I use a different cut of beef if I can't find Angus?
For best results, stick with USDA Choice beef shoulder or chuck roast—they have similar fat content and texture. Avoid leaner cuts like sirloin, as they won't develop the same rich flavor or tenderness. If you must substitute, add 1 extra hour to the cooking time for tougher cuts.
How do I know when the roast is fully cooked?
Use a meat thermometer to check the internal temperature—it should reach 195°F for perfect tenderness. The low-and-slow method ensures collagen breaks down into gelatin, making the meat fork-tender. Never guess! A thermometer is your best friend for foolproof results.
What are the best sides to serve with this roast?
This rich roast pairs beautifully with roasted root vegetables, creamy mashed potatoes, or garlic polenta. The red wine reduction also works over egg noodles or as a drizzle for grilled asparagus. For a complete meal, add a crisp green salad with balsamic vinaigrette.
Can I make this roast in a regular oven without a skillet?
Place the roast on a wire rack over a baking sheet, surrounded by the vegetable mixture. Pour 1 cup beef broth into the pan to create steam. The rack elevates the roast for even cooking, and the broth keeps everything moist. Just check the pan every 30 minutes to prevent burning.