
Main Courses
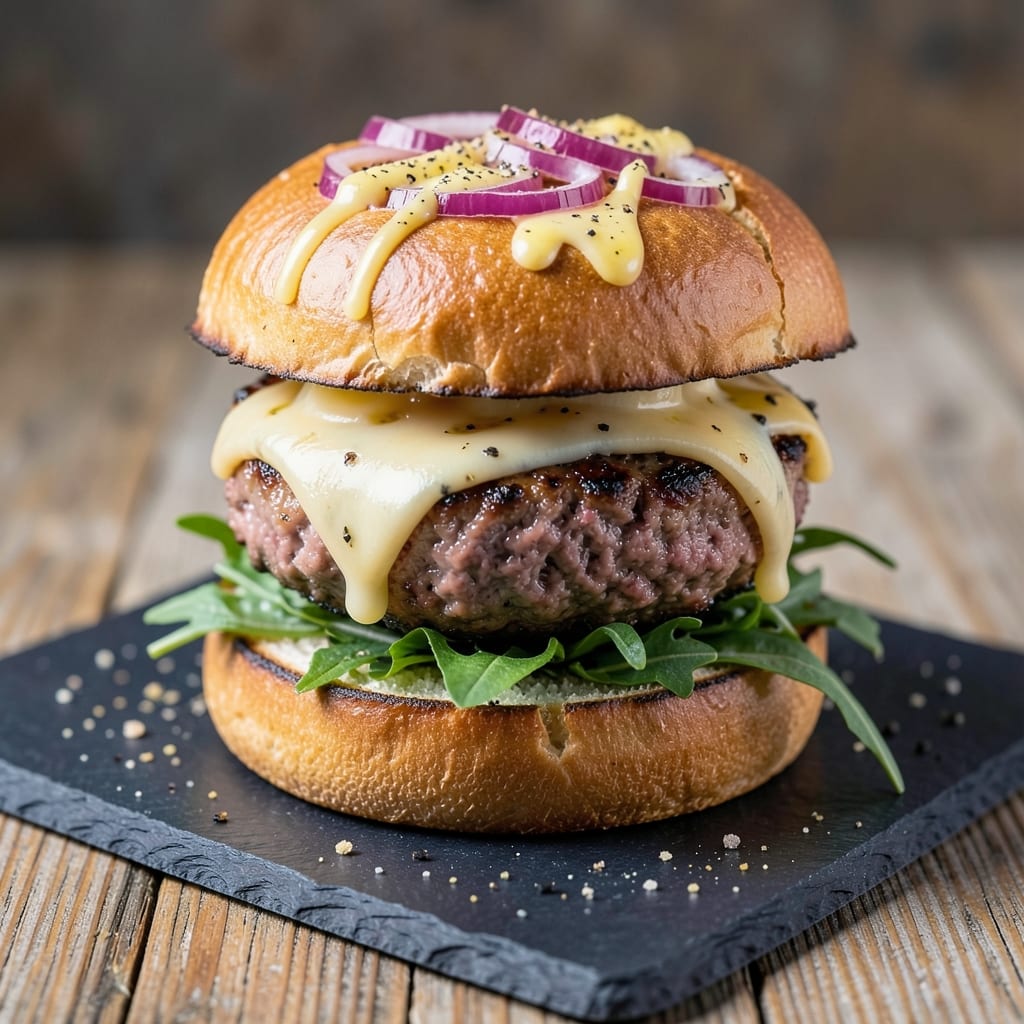
This Angus ground beef burger recipe delivers the juiciest, most flavorful patties you'll ever grill—where every bite stays tender, smoky, and perfectly charred. The secret lies in using high-quality beef, minimal handling, and precise cooking techniques that preserve moisture while creating that signature crust. I've perfected this method over years of testing, and the results speak for themselves: burgers that hold together beautifully yet melt in your mouth.
What sets these burgers apart is the balance of simple seasoning—just salt, pepper, and a touch of garlic powder—applied gently to avoid compacting the meat. The patties are formed with care, shaped slightly thicker in the center to prevent burning while edges crisp up. Cooking them over medium-high heat ensures that smoky, caramelized crust without drying out the interior, and resting them properly keeps those juices locked in.
By the time you serve these burgers, you'll have golden-brown patties with a satisfying crackle, a pink center that's still juicy, and a flavor profile that's rich and beefy without being overpowering. The technique is straightforward, but the results are restaurant-quality—perfect for summer cookouts, game day gatherings, or a simple weeknight dinner that feels like a treat.
Pair these burgers with classic toppings like crisp lettuce, ripe tomato, caramelized onions, and a smear of your favorite condiment, then serve on a toasted brioche bun for the ultimate experience. The beauty of this recipe is its versatility—it works equally well on the grill, in a cast-iron skillet, or even in the oven, making it adaptable to any cooking setup.
Ingredients for angus ground beef burger
High-quality beef and minimal seasoning—just four ingredients transform into restaurant-style burgers.
| Ingredient | Amount | Notes |
|---|---|---|
| Angus Ground Beef 🥩 | 1 ½ lb | 80% lean, chilled for handling |
| Kosher Salt 🧂 | 1 ½ tsp | Diamond Crystal preferred |
| Freshly Ground Black Pepper 🌶️ | 1 tsp | Coarse grind for texture |
| Garlic Powder 🧄 | ½ tsp | Freshly ground preferred |
| Extra-Virgin Olive Oil 🫒 | 1 tsp | For patty shaping |
| Brioche Buns 🍞 | 4 whole | Toasted for serving |
| Lettuce Leaves 🥬 | 4 whole | Butter lettuce or romaine |
| Tomato Slices 🍅 | 4 slices | Ripe, thick-cut preferred |
| Yellow Onions 🧅 | 1 whole | Thinly sliced, caramelized |
| Mayonnaise 🥫 | ¼ cup | Or preferred condiment |
| Yellow Mustard 🌶️ | 1 tbsp | Optional for tang |
| Wooden Patty Shaper 📏 | 1 whole | Or 1/2-inch thick guide |
The beef is everything here. Angus ground chuck has that perfect fat-to-lean ratio for juicy burgers. Costco or Whole Foods carry the best quality—look for bright red color and good marbling. Chill the beef in the fridge for 30 minutes before handling to keep it from sticking. I always grab extra because it makes better burgers than cheaper cuts. If you can't find Angus, 80% lean ground chuck is the next best thing—just don't go leaner than that or they'll dry out.
No garlic powder? Fresh minced garlic at half the amount works beautifully. The olive oil isn't for flavor—it's to help shape the patties without tearing the meat. Brioche buns are non-negotiable for that buttery texture, but potato buns toasted with butter are a great alternative. For the toppings, caramelized onions take 15 minutes but are totally worth it—just slice them thin, cook low and slow with a splash of balsamic. Skip the mustard if you prefer, but the mayo adds that classic creamy texture.
Keep the beef cold until ready to use—wrap it tightly in plastic and store in the fridge for up to 2 days. The shaped patties can sit on a plate covered with a damp towel for 30 minutes before cooking. These burgers reheat surprisingly well—wrap in foil and warm in a 350°F oven for 10 minutes. I always make extra patties and freeze them raw on a tray before bagging—3 months in the freezer with no texture loss. Just thaw in the fridge overnight before cooking.
Why You'll Love This Recipe
- Five-Ingredient Magic: I swear, that’s all it takes—just the beef, salt, pepper, garlic powder, and a drizzle of olive oil. No fancy binders, no hidden ingredients, just pure, rich flavor that comes together while you’re still deciding what to watch on TV.
- Rich Without Effort: The Angus beef melts in your mouth but holds its shape, and that garlic powder? It’s the secret weapon—just a pinch, but it transforms the whole thing. Honestly, it’s the kind of flavor that makes you forget how little work went into it.
- Weeknight Wonder: Throw these patties on the grill or skillet while you chop veggies for the kids’ snacks. They’re ready in 10 minutes, and leftovers? Just reheat and serve—no one will question why you’re making burgers for dinner again.
- Budget-Friendly Luxury: You’re getting restaurant-quality beef for a fraction of the price, and the ingredients won’t break the bank. Between us, this is how I feed my family well without stressing over grocery bills—simple, satisfying, and smart.
Step-by-step instructions for juicy Angus ground beef burgers
Here's how to craft burgers so tender they melt in your mouth every time.
Prepare the Angus Beef Mixture
Remove the 1.5 lb Angus Ground Beef from the refrigerator and let it sit at room temperature for 10 minutes. This ensures even cooking and prevents cold spots in the center. In a large bowl, gently combine the beef with 1.5 tsp Kosher Salt, 1 tsp Freshly Ground Black Pepper, and 0.5 tsp Garlic Powder using your hands.
Here's the thing—don't overwork the mixture. Just mix until the ingredients are evenly distributed. Over-handling develops gluten, which can make your burgers tough. Think of it like a gentle kneading motion, just until the seasoning is fully incorporated. The beef should still look slightly coarse and uneven—that's perfect for juicy results.
Shape the Patties with Precision
Divide the beef mixture into 4 equal portions (about 3.75 ounces each) using the wooden patty shaper or your hands. I like to use the shaper for consistent thickness—press down firmly but evenly to create ½-inch thick patties. Gently flatten the center of each patty with your thumb to create a slight dimple. This prevents the burgers from puffing up during cooking.
Place the shaped patties on a plate and cover them loosely with plastic wrap. Let them rest for 15 minutes before cooking. This resting period helps the burgers hold their shape better when they hit the grill or skillet. Don't skip this step—it makes a noticeable difference in the final texture.
Cook the Patties to Perfect Doneness
Heat a skillet or grill over medium-high heat until it's hot enough that a drop of water sizzles and evaporates instantly. Add 1 tsp Extra-Virgin Olive Oil to the skillet and let it get hot. Place the patties on the heated surface and cook for 3-4 minutes per side for medium-rare doneness, or until they reach an internal temperature of 130-135°F.
I know it seems counterintensive, but resist the urge to press down on the patties with a spatula. This squeezes out all the juices you worked so hard to preserve. Instead, let them cook undisturbed until you see beautiful deep brown crusts forming. You'll know they're ready to flip when they release easily from the pan and the edges are golden brown.
Assemble the Burgers with Classic Toppings
Toast the 4 whole Brioche Buns in the same skillet (or on a grill) for 1-2 minutes per side until they're golden brown and crispy. While the buns toast, caramelize the 1 whole Yellow Onions in a separate pan with a touch of olive oil until they're soft and golden—about 8-10 minutes on medium heat.
Spread each toasted bun with 1 tablespoon of the Yellow Mustard (if using) and 1 tablespoon of the Mayonnaise. Layer each burger with a whole Lettuce Leaf, 2 slices Tomato Slices, and some of the caramelized onions. Then place the cooked patty on top. The brioche buns add a buttery richness that complements the smoky flavor of the Angus beef perfectly.
Serve Immediately for Maximum Juiciness
Transfer the assembled burgers to plates and serve right away. The combination of juicy Angus beef, crispy buns, and fresh toppings creates a perfect balance of textures and flavors. Each bite should deliver that melt-in-your-mouth tenderness we're after, with the crispy edges providing just enough contrast.
Real talk: if you let these burgers sit for even a few minutes, they'll start to dry out. That's why I always serve them immediately after assembly. Pair with a side of crispy fries or a fresh garden salad to round out the meal. Enjoy your perfectly juicy, smoky, and charred Angus beef burgers!
Pro Tips For Making Angus Ground Beef Burger
- Use a Meat Thermometer: I learned this the hard way—Angus beef can sit at 160°F and still feel underdone. For juicy, medium-rare burgers, pull them at 130°F internal temp (they’ll rise to 135°F while resting). No guessing, no dry patties.
- Pat the Beef Dry: Wet hands or damp beef = steam instead of sear. Grab a paper towel and press firmly on both sides of the patty before hitting the pan. The crust will be golden and crisp, not soggy—trust me, it’s worth the extra 10 seconds.
- Don’t Overwork the Meat: Mixing too much turns burgers dense and chewy. Use your hands to gently combine the beef, salt, pepper, and garlic powder—just until the seasoning sticks. Over-kneading = tough texture, and nobody wants that with Angus.
- Start Hot, Finish Low: Sear the patties over high heat for 2 minutes per side to lock in juices, then move to medium-low for the last 3-4 minutes. This keeps the inside tender while the outside gets that perfect crust—no more burnt edges or gray centers.
Troubleshooting great angus ground beef burger
Overworked Meat
If your patties look dense or rubbery, you've likely overmixed the beef. I see this all the time when people use their hands too aggressively—it develops gluten, which makes burgers tough. The fix? Handle the beef only until seasoning is evenly distributed (about 10-12 gentle turns). Keep the mixture slightly uneven for maximum juiciness. 💡
Uneven Cooking
Cold spots or burnt edges happen when patties aren't uniform in thickness. Always use a ½-inch thick patty shaper or measure with a ruler. For extra insurance, create a slight dimple in the center before cooking—this prevents puffing and ensures even doneness. I swear by this trick for consistent results every time.
Sticky Patties
If your patties keep sticking to the grill or skillet, your surface isn't hot enough or clean. Heat your grill/skillet to medium-high heat until a drop of water sizzles instantly. Wipe the surface clean between batches with a paper towel—grease buildup causes sticking. A 1 tsp olive oil before cooking helps too, but don't overdo it.
Dry Burgers
Dryness usually means overcooking or using lean beef. Stick to 80% lean ground chuck and cook patties to 130-135°F internal temp for medium-rare. Let them rest 2-3 minutes after cooking before serving—this redistributes juices. Never press patties with a spatula while cooking, or you'll squeeze out all the moisture. 🔥
Burgers Falling Apart
Patties that crumble when flipping or serving likely need more fat. If using 90% lean beef, add 1 tbsp olive oil to the mixture. For extra binding, chill the beef for 30 minutes before shaping—cold fat holds patties together better. Also, avoid over-handling when forming patties.
Bun Too Soft
Soggy buns ruin the perfect burger experience. Always toast them 1-2 minutes per side in a dry skillet or on the grill until golden. For extra insurance, brush the cut sides with melted butter before assembling. I like to toast buns right before serving so they stay crispy until the first bite. 🍞
Nutrition facts
Frequently asked questions
Why does this recipe use 80% lean beef instead of leaner cuts?
The 80% lean ratio is key for juicy burgers—the fat keeps them tender and flavorful. Leaner cuts (90%+ lean) dry out quickly, especially when cooking over high heat. The marbling in Angus beef melts during cooking, creating that perfect mouthfeel. For best results, never go below 80% lean—your burgers will thank you!
Can I make these burgers ahead of time?
You can prep the patties 1 day ahead—shape them, season, and refrigerate uncovered on a plate for 30 minutes to firm up. Wrap tightly in plastic and freeze for up to 3 months. Thaw in the fridge overnight before cooking. Never refreeze thawed patties. The buns should be toasted fresh to stay crispy.
What's the best way to cook these patties if I don't have a grill?
A cast-iron skillet works perfectly! Heat over medium-high heat until smoking hot, then cook patties 3-4 minutes per side for medium-rare. For even cooking, flip only once. If your skillet isn't hot enough, patties will steam instead of sear. A grill pan is another great alternative for that charred flavor.
How do I know when the burgers are fully cooked?
Use a meat thermometer—130-135°F for medium-rare (recommended), 140°F for medium, or 160°F for well-done. For visual cues, look for a deep brown crust and juices running slightly pink. The patties should spring back when pressed gently. Never rely on time alone—thickness varies!
Can I use these patties for sliders instead of regular burgers?
Scale the recipe down to ½ lb beef for 8 sliders (about 1.5 oz patties). Use mini brioche buns or Hawaiian rolls, and reduce toppings to ¼ of each per slider. Cook patties 2-3 minutes per side for faster cooking time. The same technique applies—just smaller portions!