
Main Courses
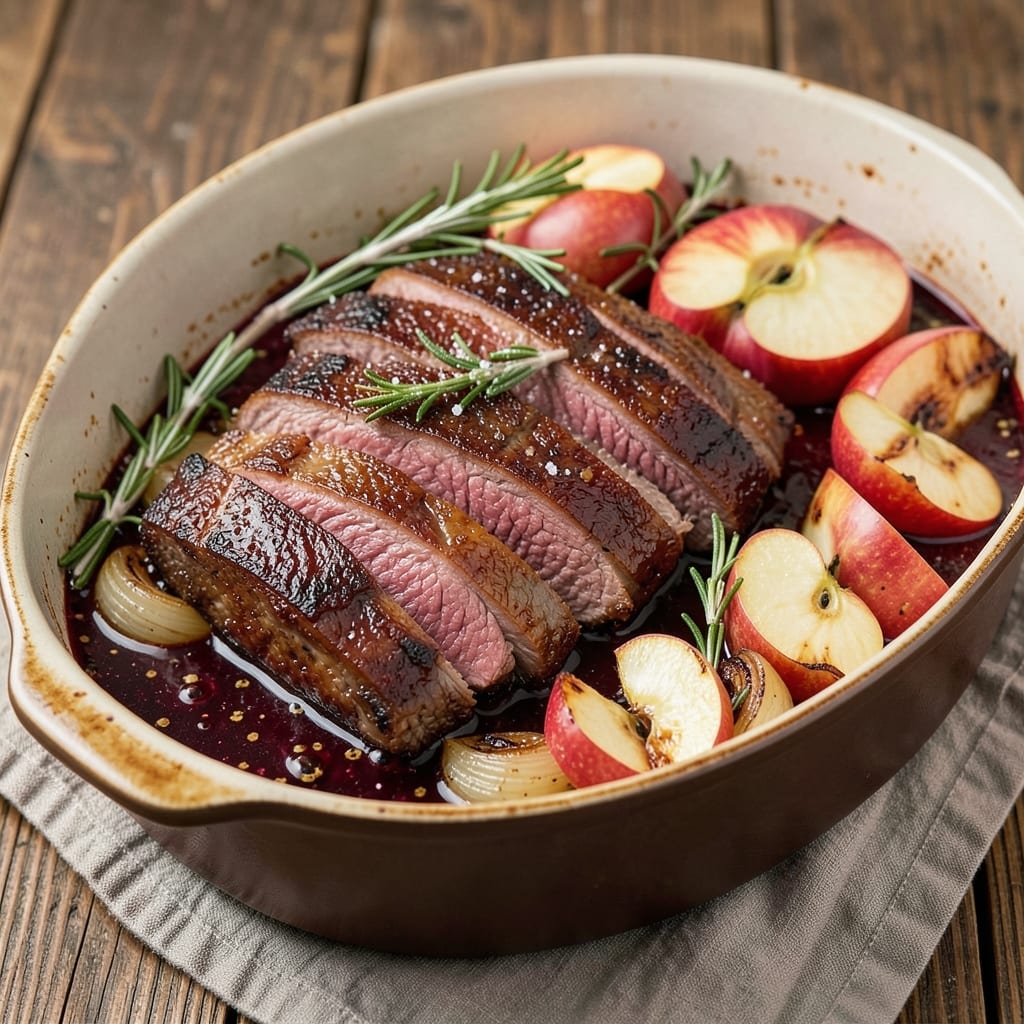
This apple beef recipe transforms tough beef into melt-in-your-mouth tenderness with a caramelized apple glaze that balances sweetness and savory depth. The slow-braising process unlocks rich flavors while the apples soften into a luscious, slightly sticky sauce—perfect for weeknight dinners or special occasions. What makes this dish special is how the apples' natural sugars caramelize against the beef, creating a harmony of textures and tastes that feels both comforting and refined.
The secret lies in the two-step process: first searing the beef to develop a deep, meaty foundation, then slow-braising it with apples, onions, and aromatic herbs until the meat is fork-tender. This method ensures the beef stays juicy while absorbing the sweet-tangy apple sauce, which thickens into a glossy, appetizing finish. The result is a dish that’s hearty enough for a family meal but elegant enough for a dinner party.
Imagine serving this with creamy mashed potatoes or crusty bread to soak up every last drop of that caramelized sauce. The beef will be so tender it practically falls apart, while the apples add a subtle sweetness that cuts through the richness. This recipe delivers restaurant-quality comfort food with minimal effort—ideal for those who want flavor without fuss.
Whether you're recreating a classic French-inspired braise or putting your own twist on the concept, this apple beef dish is versatile enough to adapt to your taste. The slow cooking method means you can prepare it ahead of time, making it perfect for meal prep or entertaining. Let’s get started on creating this satisfying, crowd-pleasing masterpiece.
Ingredients for apple beef
Sweet apples and rich beef create melt-in-your-mouth perfection with minimal effort.
| Ingredient | Amount | Notes |
|---|---|---|
| Beef Chuck Roast 🥩 | 2 ½ lb | Bone-in preferred for flavor |
| Apples 🍎 | 2 medium | Sweet-tart variety like Honeycrisp |
| Yellow Onion 🧅 | 1 whole | Sliced into wedges |
| Garlic Cloves 🧄 | 4 cloves | Peeled, smashed lightly |
| Beef Broth 💧 | 2 cups | Low-sodium preferred |
| Red Wine 🍷 | ½ cup | Dry variety like Cabernet |
| Tomato Paste 🍅 | 2 tbsp | Smooth, not chunky |
| Fresh Thyme 🌿 | ¼ cup | Leaves only, chopped |
| Fresh Rosemary 🌿 | 2 sprigs | Freshly cut, not dried |
| Olive Oil 🫒 | 2 tbsp | Extra-virgin preferred |
| Salt 🧂 | 1 ½ tsp | Kosher or sea salt |
| Black Peppercorns 🌶️ | 1 tsp | Freshly cracked |
| Brown Sugar 🍚 | 2 tbsp | Light or dark works |
The beef is everything here—chuck roast with that perfect marbling of fat. Costco or local butchers usually have it cut for you, but if you're buying whole, look for good fat distribution. Apples? Honeycrisp or Fuji are my go-to—they hold their shape while caramelizing. The thyme and rosemary should be fresh (no dried here), and you can find them at Whole Foods or your local farmers market if you want the best quality. That red wine adds depth, so grab whatever bold, dry bottle you've got open—no need for fancy labels.
No red wine? Beef broth with a splash of balsamic vinegar works just as well. Dried thyme or rosemary? Use half the amount, but fresh is definitely better. If you can't find Honeycrisp apples, Braeburn or Granny Smith both work—just adjust sweetness with extra brown sugar. The tomato paste can be from a tube or a can, but make sure it's smooth. For the beef, trim excess fat before searing, but leave some for flavor. And if you're feeling fancy, sear the beef first—it makes all the difference in that deep, meaty foundation.
This braise tastes even better the next day, so make extra if you're feeding a crowd. Store leftovers in the fridge for 4-5 days, or freeze for 3 months. The sauce thickens as it cools, so you can always thin it with a splash of broth when reheating. I like to portion mine into containers with a side of mashed potatoes—perfect for meal prep. And if you're serving it for company, garnish with fresh thyme sprigs for that restaurant touch.
Why You'll Love This Recipe
- One-Pot Magic: I swear by this recipe when I’m too tired to handle multiple pans. Sear the beef, toss in the onions and apples, pour on the broth—then walk away. That’s it. The chuck roast gets fork-tender while the apples caramelize right in the pot, no extra dishes.
- Sweet-Savory Balance: Between us, the apples aren’t just decoration—they’re the secret weapon. Their natural sweetness cuts through the rich beef, while the garlic and onion build layers of depth. It’s like a hug in a bowl, but with more umami.
- Leftover Goldmine: This dish actually improves the next day. The flavors meld into something even richer, and it reheats beautifully for sandwiches or wraps. I’ve fed a houseful of hungry teens with minimal effort—no one complained, either.
- Budget-Friendly Luxury: A chuck roast stretches far, and apples add freshness without breaking the bank. Honestly, I’ve made this for date nights, potlucks, and lazy Sundays—it’s fancy enough to impress but simple enough to throw together. Win-win.
Step-by-step instructions for slow-braised apple beef
Here's how to transform tough beef into melt-in-your-mouth sweetness with caramelized edges.
Sear the Beef Chuck Roast for Deep Flavor
Pat the 2.5 lb beef chuck roast dry with paper towels—this ensures maximum browning. Heat 1 tablespoon of the olive oil in a heavy Dutch oven over medium-high heat until shimmering. Place the roast in the pan, fat-side down, and sear for 5-6 minutes until a deep golden crust forms. Flip and sear the other side for another 5-6 minutes.
Don't rush this step. You're building flavor through the Maillard reaction, which happens when proteins and sugars brown at high heat. The crust you create will dissolve into the braising liquid, infusing every bite with rich, caramelized depth. If your pan isn't hot enough, the meat will steam instead of sear—watch for that golden crust to form before moving it.
Build the Sweet-Savory Braising Base
Remove the seared roast and set it aside. In the same Dutch oven, add the remaining 1 tablespoon olive oil and increase heat to medium. Add the sliced yellow onion wedges and cook for 5 minutes until softened and beginning to caramelize. Stir in the 4 smashed garlic cloves and cook for 30 seconds until fragrant.
Add the 2 medium apples (peeled and sliced into wedges) and cook for 2 minutes until they begin to soften slightly. Sprinkle in the 2 tbsp tomato paste and stir to coat the onions and apples. This creates a flavorful base that will meld beautifully with the beef. The apples will release their natural sweetness as they braise, balancing the rich, savory beef perfectly.
Deglaze and Combine All Ingredients
Pour in the 0.5 cup red wine and scrape up any browned bits from the bottom of the pan with a wooden spoon. This deglazing step captures all the flavor you've built so far. Add the 2 cups beef broth, 1.5 tsp salt, and 1 tsp freshly cracked black peppercorns, stirring to combine. Return the roast to the pot, fat-side up.
Bring the liquid to a gentle simmer, then reduce heat to low. Cover the pot and let it cook for 2 hours. The liquid should barely bubble—if it's boiling vigorously, reduce the heat further. This slow cooking is crucial for tenderizing the tough chuck roast while allowing all the flavors to meld together. The apples will soften and release their juices, creating a naturally sweet and tangy sauce.
Finish with Aromatics and Brown Sugar
After 2 hours, stir in the 0.25 cup chopped fresh thyme, 2 sprigs fresh rosemary, and 2 tbsp brown sugar. The sugar will caramelize slightly, adding another layer of sweetness and depth to the sauce. Increase heat to medium and uncover the pot. Let it simmer uncovered for 30-45 minutes until the liquid reduces slightly and the sauce thickens to a glossy consistency.
Here's where the magic happens: the sugar and herbs combine with the caramelized onions and apples to create a sauce that's rich, sweet, and perfectly balanced. The beef should be fork-tender at this point—it should easily pull apart with two forks. If the sauce is too thin, continue simmering uncovered until it reaches your desired consistency. The longer you cook it uncovered, the more concentrated and flavorful the sauce will become.
Rest and Serve with Perfect Sauce
Remove the roast from the pot and let it rest on a cutting board for 10-15 minutes. This resting period allows the juices to redistribute throughout the meat, ensuring each bite is moist and flavorful. Skim any excess fat from the surface of the sauce if desired, then return the roast to the pot and spoon the sauce generously over the top.
Slice the beef against the grain into ¼-inch thick pieces and serve immediately with the sauce. The result should be tender, sweet, and rich beef with a glossy, caramelized sauce that coats every bite. This dish pairs beautifully with crusty bread or mashed potatoes to soak up the delicious juices. The combination of sweet apples and savory beef creates a perfect balance that's sure to impress anyone who tries it.
Pro Tips For Making Apple Beef
- SEAR THE ROAST FIRST: That beef chuck needs a deep, dark crust before anything else happens. After patting it dry, hit it with a hot pan—no oil needed—until it’s got solid brown patches. I used to skip this, and the sauce never stuck to the meat like it should.
- PEEL AND CORE APPLES: Apples add sweetness, but their skins turn mushy and bitter when slow-cooked. Peel and core them first, then slice them into even ½-inch pieces so they soften at the same rate as the beef. (Yes, even if you’re tempted to leave the skin on for "texture.")
- DEGLAZE WITH BROTH, NOT WATER: That browned beef fond at the bottom? Don’t waste it. Splash in ½ cup beef broth right after searing—it’ll pull up all the flavor you just built. Water just makes a pale, bland sauce. (Trust me, I’ve done it both ways.)
- LOW AND SLOW FOR TENDERNESS: Chuck roast needs patience—aim for 225°F (107°C) and let it cook until it hits 203°F (95°C) internally. Any higher, and it’ll dry out. I used to rush it, and the meat turned out chewy. Now I set a timer and walk away.
Troubleshooting perfect results
Beef Not Tender Enough
If your beef feels tough after braising, it likely didn’t cook long enough or the temperature wasn’t consistent. Chuck roast needs at least 2.5 hours at 300°F to break down properly. Use a meat thermometer—it should reach 203°F internal temperature. If it’s still firm, return it to the pot with an extra ½ cup beef broth and simmer 30 more minutes covered. 🌡️
Another common issue is overcrowding the pot. If the beef isn’t fully submerged in liquid, it won’t steam properly. Add more broth if needed—the liquid should cover the beef by at least 1 inch. Also, avoid lifting the lid too often, as this lets heat escape and prolongs cooking time.
Sauce Too Thin or Watery
A thin sauce usually means the braising liquid wasn’t reduced enough. After the initial 2-hour cook, uncover the pot and simmer uncovered for 30-45 minutes to thicken it naturally. If it’s still too thin, remove the beef and reduce the sauce on medium-high heat for 5-10 minutes, stirring occasionally. For extra thickness, mix 1 tbsp cornstarch with 1 tbsp cold water, stir it into the sauce, and simmer until it gels.
If the sauce tastes bland, it might need more depth. Deglaze the pot with 1 tbsp red wine vinegar or add 1 tsp balsamic glaze at the end for brightness. A pinch of smoked paprika or cayenne can also add complexity without overpowering the sweetness of the apples.
Apples Turning Mushy or Burning
Apples can become mushy if they cook too long or are cut too small. Stick to wedges (not slices) and add them after the onions and garlic have softened. For firmer apples, use Granny Smith—they hold their shape better than Honeycrisp. If they start to brown too quickly, cover the pot and reduce heat to low. 🍎
If your apples are burning, they’re likely too close to the heat source. Keep the lid slightly ajar or stir them occasionally to prevent direct contact with the pan. For extra insurance, toss the apple wedges in 1 tsp lemon juice before adding them—the acidity helps preserve their color and texture.
Beef Overcooked or Dry
Overcooked beef happens when the pot boils too vigorously, causing the meat to dry out. Keep the liquid at a gentle simmer—it should barely bubble. If the sauce reduces too quickly, add hot broth to maintain moisture. Once the beef reaches 203°F, remove it immediately and let it rest. Overcooking by even 10 minutes can turn tender meat into chewy disappointment.
To rescue slightly overcooked beef, shred it instead of slicing and serve it in the sauce. The sauce’s moisture will help keep it juicy. For future cooks, consider reverse searing: braise the beef to 195°F, then sear it in a hot pan for 1-2 minutes per side to lock in juices.
Nutrition facts
Frequently asked questions
Can I substitute chuck roast with another beef cut?
Yes! For similar results, use chuck shoulder or short ribs. If using short ribs, reduce braising time to 1.5-2 hours since they cook faster. Avoid lean cuts like sirloin—they won't become tender with this method. The key is choosing a cut with good marbling for flavor and tenderness.
What if I don't have red wine? What's the best substitute?
Use beef broth with 1 tbsp balsamic vinegar or apple cider instead. For depth, add ½ tsp soy sauce or 1 tsp Worcestershire sauce. The acidity helps balance the sweetness while keeping the dish rich. If using apple cider, reduce the sugar to 1 tbsp since it's already sweet.
How do I make this dish ahead of time?
This recipe tastes even better the next day! After braising, let it cool completely, then refrigerate for up to 4 days. Reheat gently on low heat with a splash of broth to restore moisture. For freezing, portion into airtight containers for 3 months. Thaw overnight in the fridge before reheating.
What's the best way to serve this apple beef?
Pair it with creamy mashed potatoes, crusty sourdough bread, or roasted Brussels sprouts. For a complete meal, add a simple green salad with a tangy vinaigrette. The sweet-savory sauce works beautifully with any starchy side that can soak up the delicious juices.
Why did my apples turn to mush?
Apples soften when overcooked or cut too small. Use wedges instead of slices and add them after onions caramelize. For firmer texture, choose Granny Smith apples or add them later in the cooking process. Tossing apple wedges in lemon juice before adding also helps preserve their shape.