
Soups & Stews
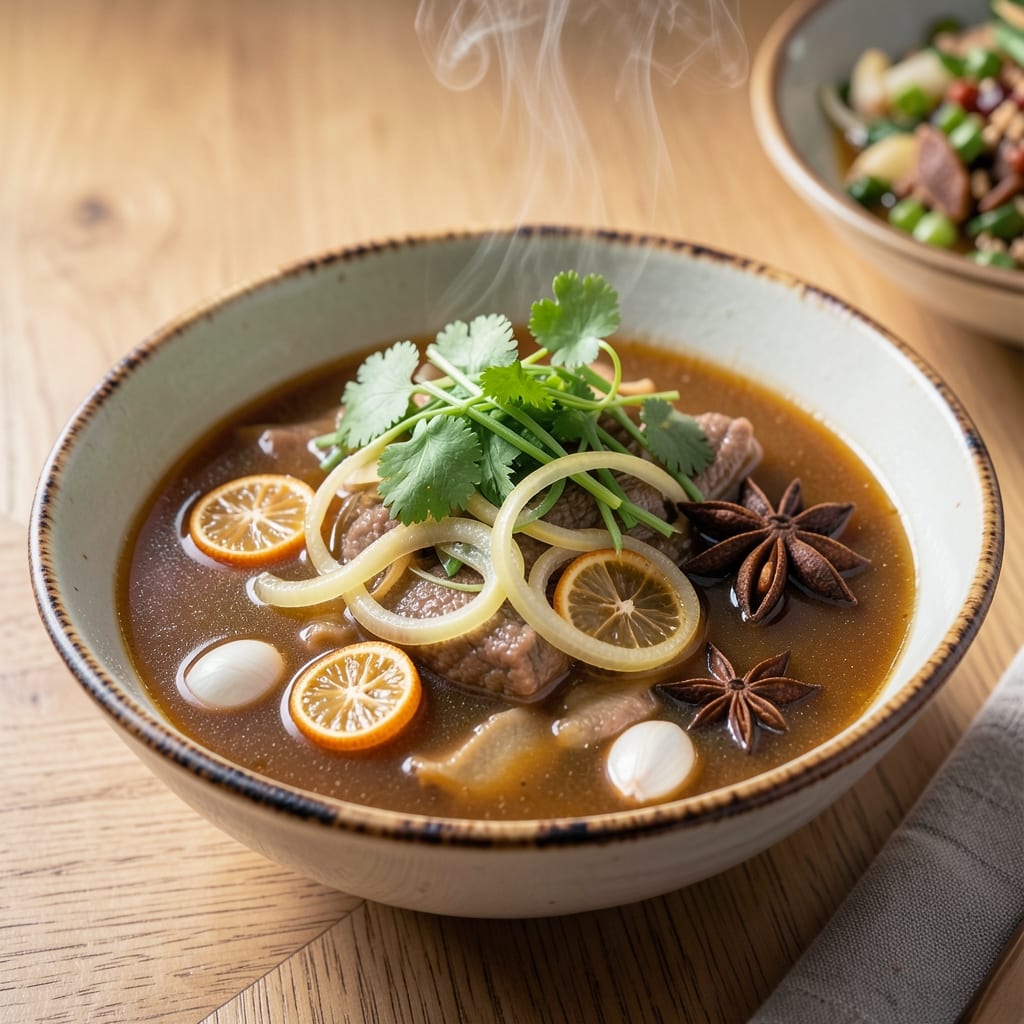
This Asian beef bone broth recipe transforms tough bones into liquid gold, packed with deep umami and aromatic complexity. The secret lies in slow simmering—8 hours of gentle heat—where beef bones release collagen, ginger infuses warmth, and star anise lends its signature aniseed notes. Unlike Western broths, this version incorporates soy sauce, miso, and fish sauce for a savory depth that bridges traditional techniques with modern convenience.
The process is straightforward but requires patience: bones are blanched to remove impurities, then simmered with aromatics until the broth achieves a rich, velvety consistency. A pressure cooker cuts the time to 2 hours, while a slow cooker maintains the traditional approach. The result? A broth so flavorful it elevates ramen, braises, or stir-fries—restaurant-quality at home—with minimal effort.
What sets this broth apart is its versatility. Use it as a base for pho, a braising liquid for tough cuts, or even a quick ramen upgrade. The collagen-rich broth thickens as it cools, creating a natural gel that adds body to soups. Store it for up to 3 months in the freezer, preserving every layer of flavor for future meals.
For those short on time, a sous vide method (60°C/140°F for 24 hours) delivers similar depth without constant monitoring. Whether you simmer or pressure cook, the key is low and slow—patience turns bones into liquid umami gold. Let’s get started.
Ingredients for asian beef bone broth
Six pounds of bones and twelve aromatic ingredients transform into restaurant-quality Asian beef broth.
| Ingredient | Amount | Notes |
|---|---|---|
| Beef Bones 🦴 | 4 lb | Knuckle or marrow bones preferred |
| Cold Water 💧 | 16 cups | Filtered if possible for clarity |
| Yellow Onion 🧅 | 1 whole | Quartered, skin left on |
| Fresh Ginger 🌿 | 4 oz | Unpeeled, sliced into chunks |
| Garlic Cloves 🧄 | 8 cloves | Smashed, skin left on |
| Star Anise Pods 🌟 | 4 whole | Lightly crushed for aroma |
| Cinnamon Sticks 🌿 | 2 whole | 2-inch pieces for depth |
| Light Soy Sauce 🍶 | ½ cup | Kikkoman preferred for balance |
| White Miso Paste 🍶 | 2 tbsp | High-quality, non-GMO |
| Fish Sauce 🐟 | 1 tbsp | Red Boat brand recommended |
| Apple Cider Vinegar 🍎 | 1 tbsp | For acidity and clarity |
| Diamond Crystal Kosher Salt 🧂 | 1 tbsp | For seasoning and preservation |
| Black Peppercorns 🌶️ | 1 tbsp | Coarse grind for texture |
The bones are the foundation—knuckle or marrow bones deliver maximum collagen and marrow richness. Source them from a reputable butcher or specialty meat market like Whole Foods or Costco, where they’re typically sold in bulk. Avoid bones with excessive meat residue, as this can cloud the broth. For the aromatics, fresh ginger and garlic are non-negotiable; their vibrant color and sharp aroma infuse the broth with layers of complexity. Star anise and cinnamon should be whole and fragrant—test by crushing a pod and smelling the intense aroma. If they smell muted, replace them. For soy sauce, Kikkoman strikes the perfect balance between saltiness and umami, while Red Boat fish sauce adds depth without overpowering. These ingredients aren’t just flavor enhancers; they’re the soul of the broth.
No fresh ginger? Substitute with 2 tbsp ground ginger, but the texture and depth won’t match. Out of fish sauce? A dash of Worcestershire sauce (ensure it’s vegetarian) or extra soy sauce works, though the umami profile shifts slightly. For a vegetarian version, replace fish sauce with 2 tbsp coconut aminos. The miso paste can be swapped for white miso powder, but paste delivers a creamier texture. If you’re using a pressure cooker, reduce the soy sauce by 20%—it intensifies under pressure. For a quicker version, blanch the bones for 10 minutes before simmering to remove impurities faster. The vinegar is critical for clarity; lemon juice in a pinch works, but apple cider vinegar’s maltiness complements the broth better. Always taste the broth before straining—adjust salt or soy sauce as needed for balance.
This broth thickens as it cools, forming a natural gel that adds body to soups and braises. Store in airtight glass jars in the refrigerator for up to 5 days, or freeze in ice cube trays for 3 months. The gel will melt upon reheating, restoring the velvety texture. For long-term storage, portion into 1-cup servings—perfect for single-use applications like ramen or braising. If you’ve made extra, blend a portion for a quick bone broth powder by simmering down the broth, then dehydrating or freeze-drying. The powder keeps indefinitely and adds instant umami to any dish. Always let the broth cool completely before refrigerating to prevent skin formation.
Why You'll Love This Recipe
- No Chopping Hassle: I swear by this recipe because the onion, ginger, and garlic barely need slicing—just rough chopping. The broth does all the work while you sip tea or scroll through your phone.
- Umami Bomb: That slow-simmered beef marrow? Pure flavor gold. The ginger and garlic caramelize just enough to add a deep, savory punch without overpowering—like a hug in a bowl.
- Meal Prep MVP: Use it for ramen, stir-fries, or even a quick pho—just reheat and add noodles. I keep a jar in the fridge for those nights when I’m too tired to think, but still want restaurant-quality taste.
- Budget Magic: Beef bones are cheaper than steaks, and this recipe stretches them into gallons. Honestly, I’ve made it with leftover roast bones from Sunday dinner—zero waste, all flavor.
Step-by-step instructions for Asian beef bone broth
This method transforms simple ingredients into a rich, aromatic broth with deep umami complexity.
Prepare the Bones and Aromatics
Rinse the 4 lb beef bones thoroughly under cold water to remove any impurities. Pat them dry with paper towels and place them in a large stockpot. The bones should fit comfortably without overcrowding—this ensures even cooking and maximum flavor extraction.
Add the 1 whole yellow onion (quartered with skin on), 4 oz fresh ginger (sliced into chunks with skin on), and 8 cloves garlic cloves (smashed with skins left on). These aromatics form the flavor foundation of your broth. Lightly crush the 4 whole star anise pods and add them along with the 2 whole cinnamon sticks. These spices contribute warmth and depth without overpowering the broth.
Simmer the Bones for Deep Extraction
Pour in the 16 cups cold water and bring the mixture to a gentle boil over medium-high heat. Once boiling, immediately reduce the heat to maintain a barely simmering state—this is critical for extracting collagen and preventing cloudiness. Skim off any foam or impurities that rise to the surface during the first 15 minutes of cooking.
Cover the pot and let it simmer uncovered for 2 hours. Stir occasionally to prevent the aromatics from sticking to the bottom. The broth should develop a rich, golden color and a subtle sweetness from the caramelizing aromatics. This initial simmering phase is where the bones begin releasing their gelatinous goodness.
Add Umami Boosters and Seasonings
After the initial 2 hours, stir in the 0.5 cup light soy sauce, 2 tbsp white miso paste, 1 tbsp fish sauce, 1 tbsp apple cider vinegar, 1 tbsp Diamond Crystal kosher salt, and 1 tbsp black peppercorns. These ingredients work together to create a complex umami profile. The miso and fish sauce add depth, while the vinegar enhances clarity and brightness.
Return the broth to a simmer and continue cooking for an additional 6 hours. The total cooking time of 8 hours ensures maximum extraction of collagen and minerals from the bones. The broth should reduce slightly, becoming more concentrated and flavorful. You'll notice a subtle sweetness from the caramelized aromatics and a rich, savory depth from the umami ingredients.
Strain and Finish the Broth
Once the cooking time is complete, carefully strain the broth through a fine-mesh sieve or cheesecloth-lined colander into a clean container. Press down gently on the solids to extract as much liquid as possible without forcing bones through the strainer. The strained broth should be clear with a deep golden color and a rich, aromatic fragrance.
Taste the broth and adjust the seasoning if needed. You may need to add a touch more light soy sauce or fish sauce for additional umami depth. Let the broth cool to room temperature before refrigerating. The flavor will continue to develop as it chills, becoming even more complex and satisfying. This Asian beef bone broth is now ready to use as a base for soups, braises, or rice dishes.
Pro Tips For Making Asian Beef Bone Broth
- BLANCH BONES FIRST: Toss those beef bones in boiling water for 5–10 minutes before simmering—it loosens gristle and dirt stuck to the bones. I learned this the hard way after scraping off gunk mid-cook; now I just skip the mess entirely.
- SIMMER, DON’T BOIL: Keep the heat low enough that bubbles barely break the surface—anything hotter clouds the broth and wastes collagen. After burning two batches, I finally got it: a gentle simmer for 12+ hours is the only way to get that silky texture.
- PEEL GINGER ROUGHLY: Skip the perfect slices—just scrub the ginger, slice it thick, and leave the skin on. The texture adds depth, and you won’t waste time peeling every bit. My grandmother swore by this, and she was right: it makes the broth taste richer.
- USE ONION PEELS: Save those onion skins from prepping the yellow onion—they’ll tint the broth golden and add a subtle sweetness. Toss them in with the bones early; it’s free insurance against bland broth. (Yes, even if you’re impatient like me.)
Make-ahead tips for this asian beef bone broth
Freezer Prep
Portion your broth into 1-cup glass jars or silicone ice cube trays before freezing. This makes it easy to grab single servings for ramen or braises later. Leave ½-inch headspace in jars to prevent cracking from expansion. Label each container with the date—most batches keep their peak flavor for 3 months in the freezer. For extra convenience, freeze broth in 177ml (6oz) portions, perfect for single-serving noodle dishes. 🥶
Refrigerator Storage
Transfer cooled broth to airtight glass containers within 2 hours of cooking to prevent skin formation. Store in the fridge for up to 5 days, though the flavor actually improves over time as the spices meld. I like using mason jars because they stack neatly and allow easy reheating. For quick access, keep a jar in the fridge at all times—this ensures you always have umami-rich liquid on hand for last-minute recipes. 💛
Pressure Cooker Shortcut
If you're short on time, use an Instant Pot to reduce cooking time to 2 hours on high pressure. After the initial 15-minute pressure cook, allow a 10-minute natural release before opening. This method extracts collagen just as effectively while saving you hours. For best results, use the same ingredients but reduce the soy sauce by 20% since it intensifies under pressure. The broth will be slightly more concentrated but equally flavorful. ⚡
Collagen Extraction Tips
For maximum gelatin content, simmer the broth at 195-205°F—this temperature range optimizes collagen extraction. Use a meat thermometer to monitor the pot's temperature. If you notice the broth getting cloudy, skim off any foam immediately. The longer you simmer (up to 24 hours for maximum richness), the more gelatinous the broth will become when chilled. I often make a double batch and freeze half for future use. 🌡️
Reheating Perfection
Reheat broth gently on the stovetop over low heat—never microwave it directly. Add 1-2 tbsp water per cup of broth to prevent scorching. For frozen portions, thaw overnight in the fridge before reheating. If the broth seems too thick after reheating, stir in a splash of hot water to restore its liquidity. The gel-like consistency will return as it cools again. This method preserves all the umami depth you worked so hard to develop. 🔥
Nutrition facts
Frequently asked questions
Can I use chicken or pork bones instead of beef?
While beef bones deliver the richest collagen and deep umami, you can adapt this recipe for chicken or pork. For chicken, use 6-8 lb bones and reduce cooking time to 4-6 hours—chicken broth cooks faster. Pork bones work similarly to beef but may yield a slightly lighter broth. The key difference is flavor: beef provides a heartier, meatier taste ideal for Asian dishes, while poultry offers a lighter profile better suited for soups like pho.
Why does my broth look cloudy or greasy?
Cloudiness usually means impurities weren't skimmed early enough or the broth simmered too vigorously. For clarity, skim foam during the first 15 minutes of cooking and maintain a gentle simmer (195-205°F). Grease often comes from excess fat—use a fat separator or chill the broth in the fridge, then skim off solidified fat from the top before reheating. A fine-mesh strainer or cheesecloth also helps remove finer particles.
How can I make this broth vegetarian?
Replace beef bones with mushroom stems, kombu seaweed, or shiitake mushrooms (soaked in hot water for 30 minutes). Swap fish sauce for 2 tbsp coconut aminos and use vegetable broth instead of water. For umami depth, add 1 tbsp nutritional yeast or ½ cup fermented tofu. The broth will have a lighter color but still deliver rich, savory notes perfect for Asian-inspired dishes.
Can I use a slow cooker or Instant Pot?
For a slow cooker, follow the same steps but cook on low for 12 hours or high for 8 hours. The Instant Pot cuts time to 2 hours on high pressure, but reduce soy sauce by 20% (it intensifies under pressure). Always do a 10-minute natural release before opening. Both methods work—slow cookers mimic traditional simmering, while pressure cookers deliver faster results without sacrificing flavor.
What’s the best way to use leftover bones?
Rinse the cooked bones thoroughly and use them for a second batch of broth or as a flavorful addition to soups, stews, or rice dishes. For extra richness, crush the bones into small pieces and simmer with fresh aromatics for 1-2 hours. They’ll release residual collagen and add a deep, meaty depth to any dish. Never waste them—they’re packed with flavor!