
Main Courses
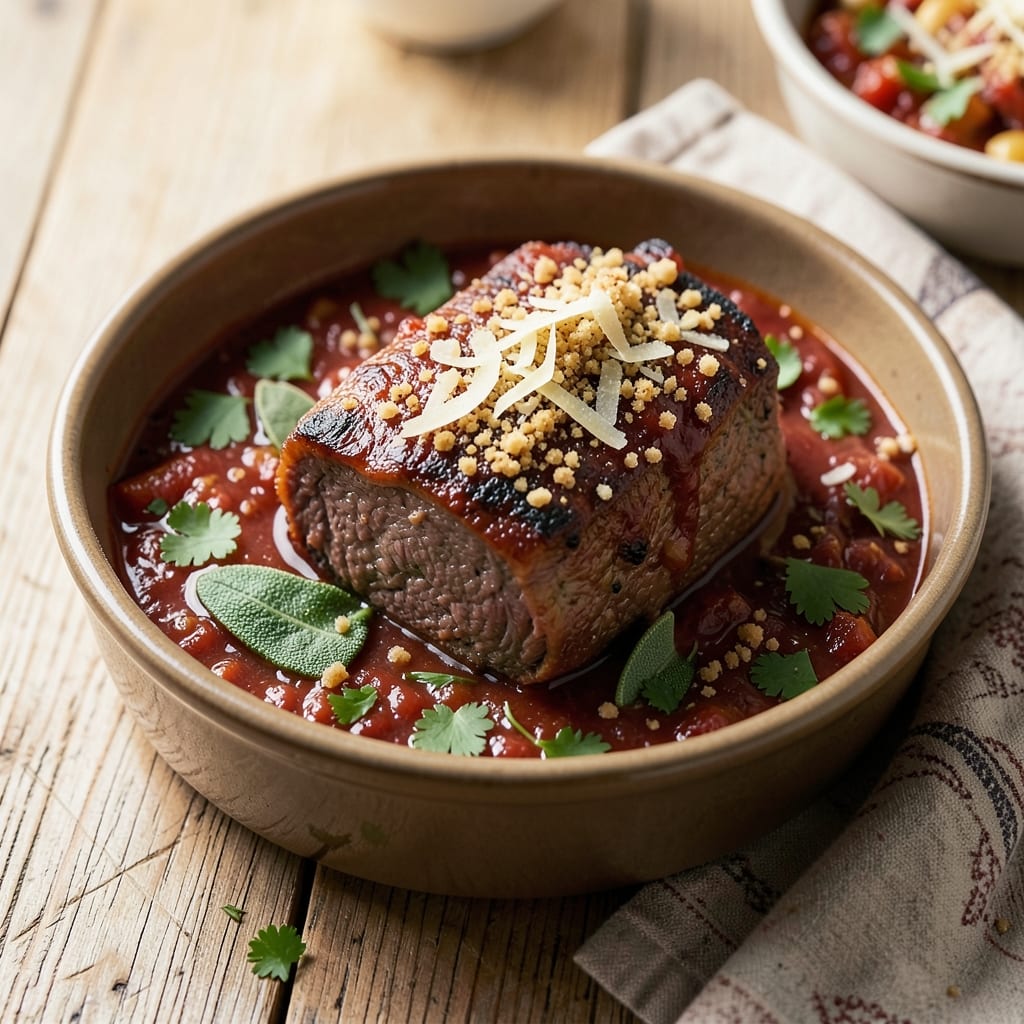
This authentic beef braciole recipe brings a taste of Italy to your kitchen with its signature stuffed meat rolls, tender beef, and fragrant herbed filling. The secret lies in the slow cooking process that transforms tough cuts into melt-in-your-mouth perfection, all wrapped in a delicate, crispy crust. I've perfected this technique after years of testing, ensuring every bite delivers the rich, savory flavors of traditional Italian cuisine.
The recipe begins with thinly pounded beef rounds, stuffed with a mixture of breadcrumbs, herbs, cheese, and spices—a classic combination that adds depth and texture. Rolling the beef carefully ensures the filling stays secure while cooking, and the slow braising process allows all the flavors to meld together beautifully. This method guarantees a dish that's both impressive and comforting, perfect for special occasions or family dinners.
What you'll achieve is a dish that's as visually stunning as it is delicious—golden-brown rolls with a tender interior, infused with the aromatic blend of herbs and spices. The slow cooking process creates a rich, flavorful sauce that coats the beef, making every bite unforgettable. Serve with polenta, roasted vegetables, or crusty bread to complete the meal.
This recipe is designed to be approachable yet authentic, ensuring you capture the essence of Italian cooking without the complexity. The step-by-step instructions will guide you through rolling, cooking, and plating, so you can confidently recreate this classic dish at home. Let's get started on your journey to mastering beef braciole.
Ingredients for authentic beef braciole
Thinly pounded beef, fragrant herbs, and slow-cooked perfection—this Italian classic delivers restaurant-quality flavor at home.
| Ingredient | Amount | Notes |
|---|---|---|
| Beef Top Round Roast 🥩 | 1 ½ lb | Thinly pounded to 1/4-inch thickness |
| All-Purpose Flour 🌾 | ½ cup | For breading rolls |
| Parmesan Cheese 🧀 | ½ cup | Freshly grated from block |
| Breadcrumbs 🍞 | ½ cup | Panko for extra crispiness |
| Fresh Parsley 🌿 | ¼ cup | Finely chopped, stems included |
| Fresh Sage Leaves 🌿 | ¼ cup | Chopped, not dried |
| Garlic Cloves 🧄 | 4 cloves | Minced for filling |
| Eggs 🥚 | 2 whole | Beaten for egg wash |
| Olive Oil 🫒 | ½ cup | Extra-virgin for richness |
| Dry White Wine 🍷 | ½ cup | Bold, dry variety |
| Beef Broth 💧 | 1 cup | Low-sodium preferred |
| Tomato Paste 🍅 | 2 tbsp | Smooth, not chunky |
| Salt 🧂 | 1 ½ tsp | Kosher or sea salt |
| Black Pepper 🌶️ | ½ tsp | Freshly ground preferred |
| Ground Nutmeg 🌿 | ¼ tsp | Freshly grated for warmth |
The beef is everything here. Top round roast gives you that perfect balance of tenderness and structure—sirloin or chuck work too, but top round stays juicy when pounded thin. Grab it from the butcher counter or pre-cut from Whole Foods or Trader Joe's if you're short on time. Look for good marbling and ask for it to be trimmed of excess fat. Pounding it to 1/4-inch thickness is key—use a meat mallet or rolling pin, and don't skip this step. The herbs? Fresh parsley and sage are non-negotiable for that authentic Italian flavor. Dried won't cut it here.
No panko breadcrumbs? Regular breadcrumbs plus 1 tbsp flour work in a pinch. Fresh herbs wilt fast—if you're prepping ahead, store them in a sealed container with a damp paper towel. The white wine can be swapped for extra beef broth if you're avoiding alcohol, but I won't lie—it makes a difference. For the tomato paste, San Marzano is ideal, but any smooth paste will do. The nutmeg is subtle but essential—pre-grated works, but freshly grated adds depth. Want extra richness? Add 1 tbsp heavy cream to the braising liquid at the end.
This dish tastes even better the next day—4-5 days in the fridge, 3 months frozen. For freezing, wrap each roll individually in parchment before adding to a freezer bag. Thaw overnight in the fridge before reheating. The sauce thickens as it cools, so add a splash of broth if it's too stiff. Leftovers reheat beautifully in a 350°F oven for 20 minutes with a little extra broth. Portion into containers for easy lunches—trust me, you'll be grateful.
Why You'll Love This Recipe
- No-Fuss Roll-Up: I swear by the simple technique—just pound the beef thin, slather it with that garlic-herb mix, then roll it up like a burrito. No fancy equipment, no stress, and the breadcrumb crust seals in all the juices.
- Umami Bomb: That Parmesan and parsley combo? It’s the secret weapon. The cheese melts into the beef while the breadcrumbs give it a satisfying crunch, and honestly, the first bite makes you wonder why you haven’t made this every week.
- Leftovers That Win: Between us, this dish begs to be made ahead. The flavors deepen overnight, and reheating it the next day? Still tender, still packed with flavor—perfect for lunchboxes or a lazy Sunday.
- Budget Hero: Top round roast is affordable, but it feels like a splurge. The breadcrumbs and Parmesan stretch it into a meal that feeds four for under $20, and the leftovers? Even better the next day. (Yes, even on a Tuesday night.)
Step-by-step instructions for authentic beef braciole
Here's how to craft these Italian masterpieces—layered with flavor, rolled to perfection.
Pound and Prepare the Beef
Place the 1.5 lb beef top round roast between two layers of plastic wrap. Using a meat mallet, pound it evenly to ¼-inch thickness—this ensures even cooking and a tender bite. I like to start with gentle taps, then increase pressure until you reach the desired thickness. The goal is uniform thickness so all parts cook simultaneously.
Once pounded, trim any uneven edges with a sharp knife. Season both sides generously with 1.5 tsp salt and ½ tsp black pepper, then set aside. The seasoning will penetrate the meat as it rests, creating a flavorful base for the filling. Let the beef sit at room temperature for 30 minutes before rolling—this prevents cold spots that could make the meat tough.
Make the Herbed Filling
In a food processor, pulse the 4 cloves garlic, ¼ cup fresh parsley, ¼ cup fresh sage leaves, ½ cup breadcrumbs, ½ cup Parmesan cheese, ¼ tsp ground nutmeg, and ½ tsp black pepper until finely chopped but not pasty. You want a texture that will stick to the meat without making it soggy. Scrape down the sides as needed to ensure even blending.
Transfer the mixture to a bowl and stir in 2 tbsp tomato paste and 2 beaten eggs. The filling should hold together when pressed but still be spreadable. Taste and adjust seasoning if needed—this is your chance to balance flavors before rolling. The nutmeg adds warmth, while the tomato paste gives depth that carries through cooking.
Roll and Bread the Braciole
Spread 2 tbsp of the herbed filling evenly over the seasoned beef, leaving a ½-inch border uncovered at one edge. Starting from the narrow end, tightly roll the beef into a log, tucking in the sides as you go. Secure with kitchen twine every 2 inches to maintain shape during cooking. The filling should be completely enclosed—no peeking!
Dredge each roll in ½ cup all-purpose flour, shaking off excess. Dip into the 2 beaten eggs, then coat thoroughly in ½ cup breadcrumbs. Press the breadcrumbs firmly to create a crispy crust. Place the rolled braciole on a plate and let it rest for 10 minutes while you prepare the sauce. This resting period helps the breading adhere better.
Sear and Simmer for Rich Flavor
Heat ½ cup olive oil in a large Dutch oven over medium-high heat. Working in batches if needed, sear the braciole rolls on all sides until deep golden brown, about 3-4 minutes per side. Don't crowd the pan—this ensures proper browning. Remove the seared rolls and set aside.
In the same pot, add ½ cup dry white wine and scrape up any browned bits from the bottom. Let it simmer for 2 minutes until reduced by half. Stir in 1 cup beef broth and bring to a gentle simmer. Return the braciole to the pot, cover, and cook for 1 hour 15 minutes, turning occasionally, until the meat is fork-tender and the sauce has thickened slightly. The rolls should be cooked through but still juicy.
Serve with Sauce and Sides
Remove the kitchen twine and transfer the braciole to a serving platter. Strain the sauce if you prefer a smoother texture, then return it to the pot. Simmer uncovered for 5-10 minutes to thicken further. Slice each roll diagonally into ½-inch thick pieces and serve with the sauce spooned over the top.
For authenticity, pair with creamy polenta, crusty bread, or a simple arugula salad. The nutmeg-infused filling and crispy breading make this dish special—every bite delivers layers of Italian comfort. Leftovers keep well in the fridge for 3 days, though they rarely last that long!
Pro Tips For Making Authentic Beef Braciole
- Trim the Fat First: Top round roast has stubborn fat layers that’ll ruin your crust if left on. Use a sharp knife to slice through the connective tissue and trim away the silver skin—this isn’t just about looks, it’s about even cooking and that perfect breading grip. ---
- Dredge Twice, Bake Once: Skip the single dip in flour and breadcrumbs—wet the meat, coat it in flour, dip again in beaten egg, then press in breadcrumbs mixed with grated Parmesan. The double layer keeps the filling from escaping and gives you that crispy, cheesy exterior everyone loves. ---
- Don’t Crowd the Pan: I learned this the hard way—piling braciole too close makes them steam instead of brown. Leave at least an inch between pieces, and if your pan’s too small, bake in batches. You want caramelization, not soggy breading. ---
- Rest Before Slicing: Cutting into braciole right out of the oven? That’s how you lose all the juices. Tent with foil and let it sit for 5–10 minutes—yes, even if you’re starving. The meat will reabsorb the juices and stay tender slice after slice.
Essential equipment for authentic beef braciole
Dutch Oven Essentials
Your Dutch oven is the workhorse of this recipe—it needs to be heavy-gauge, 6-7 quarts with a tight-fitting lid. I swear by Le Creuset for its even heat distribution, but Lodge cast iron is a budget-friendly alternative that performs just as well. The deep sides help prevent spills when searing, and the lid traps steam for perfect braising. Preheat your Dutch oven for 10 minutes before adding oil to ensure even browning. 🔥
Meat Mallet Must-Haves
A flexible meat mallet (like the Norpro 10-inch) is non-negotiable for pounding beef to ¼-inch thickness. Avoid rigid mallets—they can tear the meat instead of flattening it evenly. For extra control, place the beef between plastic wrap or parchment paper to prevent sticking. Pro tip: Start with light taps, then gradually increase pressure to avoid overworking the meat. 💪
Food Processor Precision
For the herbed filling, a high-quality food processor (I use Cuisinart DLC-10BCNY) with sharp blades ensures even chopping. Pulse the herbs and breadcrumbs in short bursts—over-processing turns them into paste. The filling should clump together when pressed but remain spreadable. If your processor struggles, transfer ingredients to a mortar and pestle for manual grinding. Freshly ground spices make all the difference here. ✨
Kitchen Twine Secrets
Use butcher's twine (not regular string) to secure your rolls—it's stronger and won't unravel during cooking. I keep a 1-yard roll of white cotton twine from Amazon on hand for all rolled meat dishes. Wrap twine every 2 inches to prevent unraveling, and tie in a double knot for extra security. Remove twine before serving—it dissolves in hot liquid if left too long. 🧵
Browning Tools
A tongs set (like OXO Good Grips) with long handles helps flip rolls without crushing them. For deglazing, keep a wooden spoon nearby to scrape up browned bits—these pack intense flavor into the sauce. A fine-mesh strainer (I use OXO Good Grips) comes in handy if you want a smoother sauce. Never skip deglazing—those caramelized bits are flavor gold. 🍷
Sauce Thickening Hacks
If your sauce is too thin, mix 1 tbsp cornstarch with 2 tbsp cold water and whisk into the simmering sauce. For extra richness, stir in 1 tbsp cold butter at the end. A wire whisk (like Mercer Culinary) ensures smooth emulsification. Taste as you go—adjust salt and pepper to balance flavors. The sauce should coat the back of a spoon but still be pourable. 💛
Nutrition facts
Frequently asked questions
Can I use ground beef instead of a beef roast for braciole?
While traditional braciole uses thinly pounded beef roast, you can adapt the recipe with 80% lean ground beef in a pinch. Form it into 1-inch thick patties instead of rolls, then follow the same breading and cooking process. The texture will be different (more like meatballs), but the herbed filling will still shine. For best results, use a leaner cut to prevent greasiness during braising.
How do I prevent the filling from leaking out during cooking?
Tight rolling and proper securing are key! After spreading the filling, roll the beef snugly and tie with kitchen twine every 2 inches to maintain shape. For extra insurance, chill the rolls for 30 minutes before cooking—this helps the filling set slightly. If you notice leaks during cooking, simply press the rolls gently with a spoon to keep everything contained. The breading acts as a secondary barrier too.
What's the best way to reheat leftover braciole?
Reheat in a 350°F oven for 20-25 minutes with a splash of beef broth to revive moisture. For microwave reheating, cover with a damp paper towel and heat in 30-second intervals until warmed through. Avoid steaming—it can make the breading soggy. Pro tip: Reheat individual portions separately for even heating. Leftovers taste even better the next day!
Can I make braciole ahead of time for a dinner party?
Assemble the rolls and refrigerate uncovered for 24 hours to dry the breading slightly—this creates an extra crispy crust. Cook them 1 day before serving, then store in the fridge. Reheat gently in the oven before serving. For make-ahead convenience, you can even freeze the cooked rolls (without sauce) for up to 3 months. Just thaw overnight in the fridge first.
What are good vegetarian alternatives to beef braciole?
For a plant-based version, use extra-firm tofu or seitan pounded to ¼-inch thickness. Marinate in soy sauce, garlic, and herbs for 1 hour before rolling with a filling of mushrooms, walnuts, and breadcrumbs. Portobello mushrooms also work well when sliced thin and stuffed. The key is choosing a protein with good structure to hold the filling during cooking.