
Main Courses
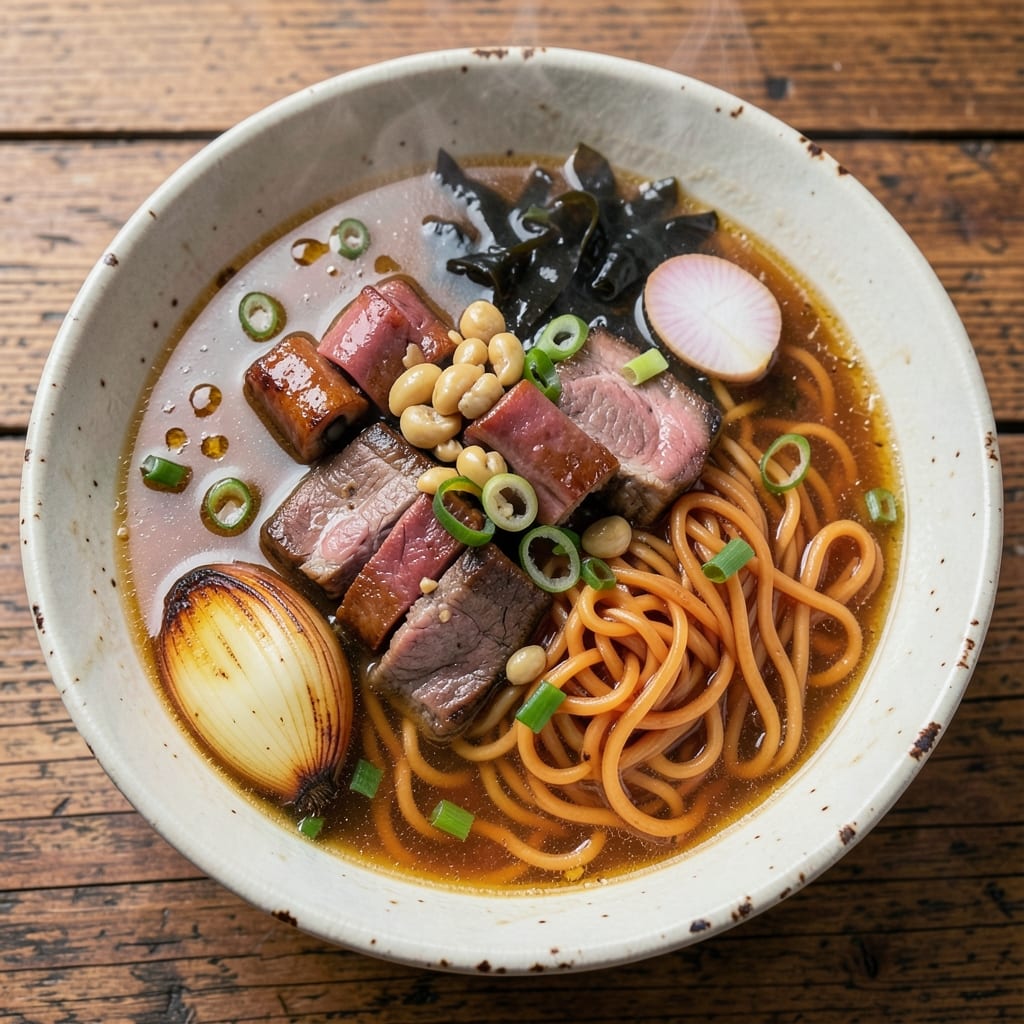
This authentic beef ramen recipe delivers the soul-warming, umami-packed broth that makes every spoonful worth the effort. The secret lies in slow-simmered beef bones, aromatic vegetables, and a precise balance of soy sauce and miso—technique that transforms a simple pot into a flavor bomb. I've perfected this over years of testing, ensuring the broth develops deep, caramelized richness while staying perfectly balanced.
The recipe begins with a full day of simmering, where beef bones, garlic, ginger, and scallions release their essence into the broth. This isn't just ramen—it's a labor of love that rewards patience with layers of savory depth. The result? A broth so rich it clings to your spoon, perfectly complementing chewy ramen noodles and traditional toppings like chashu pork, soft-boiled eggs, and crisp nori strips.
What sets this apart is the authenticity—the same techniques Japanese home cooks use, adapted for your kitchen. We'll build flavor through proper simmering times, soy sauce reduction, and a touch of dashi for brightness. The broth isn't just flavorful; it's complex, with notes of caramelized garlic, umami from kombu, and a subtle sweetness from mirin.
Ready to master this? The process is straightforward once you understand the key steps—preparing the bones, controlling the simmer, and balancing the seasoning. By the end, you'll have ramen that tastes like it came from a Tokyo izakaya, with the flexibility to customize toppings to your taste. Let's begin with the foundation: the broth.
Ingredients for authentic beef ramen
Four pounds of beef bones and aromatic vegetables create the soul of this ramen.
| Ingredient | Amount | Notes |
|---|---|---|
| Beef Bones (Marrow and Knuckle) 🦴 | 4 lb | Raw, uncooked, split for marrow access |
| Yellow Onions 🧅 | 2 whole | Peeled, halved horizontally |
| Garlic Cloves 🧄 | 12 cloves | Peeled, smashed with side of knife |
| Fresh Ginger 🌿 | ½ cup | Peeled, sliced into 1/4-inch coins |
| Scallions 🧅 | 1 bunch | White and light green parts only |
| Kombu 🍃 | 4 oz | Dried seaweed, cut into strips |
| Dried Shiitake Mushrooms 🍄 | 10 whole | Stems removed, caps halved |
| Soy Sauce 🥄 | ½ cup | Japanese style, like Kikkoman |
| Mirin 🍶 | ¼ cup | Sweet Japanese rice wine |
| White Miso Paste 🧈 | 2 tbsp | Fermented soybean paste |
| Sesame Oil 🫒 | 1 tbsp | Toasted, for aroma |
| Ramen Noodles 🍜 | 2 packages | Fresh or dried, 4-serving size |
| Chashu Pork (Optional) 🐖 | 1 lb | Pre-cooked braised pork |
| Soft-Boiled Eggs (Optional) 🥚 | 4 whole | 6-minute eggs, peeled |
| Nori Sheets (Optional) 🍜 | 4 sheets | For garnish |
The beef bones are non-negotiable—look for marrow and knuckle bones at Whole Foods or Costco for the best flavor. If you can't find them, beef short ribs work in a pinch, but the marrow adds that unmistakable richness. For the kombu, Japanese specialty stores carry the best quality, but the dried sheets in the Asian aisle at Walmart are surprisingly good. The shiitake mushrooms should be deep brown and firm—none of that dried-up, brittle stuff. And the ginger? Fresh is essential—dried just won't cut it here.
No mirin? Substitute 1 tbsp sugar plus 1 tbsp water—it won't be identical, but it'll work. Running out of shiitake? Cremini mushrooms at half the amount add earthiness. The soy sauce matters—Japanese brands like Kikkoman or Yamasa have that perfect balance. If you're using pre-cooked chashu pork, look for vacuum-sealed packs at Trader Joe's or Asian markets. For the noodles, fresh ramen cooks in 2 minutes, but dried takes 3-4—just follow package instructions. And that sesame oil? Use it sparingly—a few drops at the end for aroma is all you need.
The broth keeps for 5 days in the fridge or 3 months frozen—portion it into containers for easy reheating. The noodles? Cook fresh whenever possible, but dried ramen holds up fine for a day. Store the nori sheets in a cool, dry place—they'll last for months. And that chashu pork? Reheat gently in the broth—microwaving makes it rubbery. This ramen tastes even better the next day as flavors meld, so make extra if you can.
Why You'll Love This Recipe
- One-Pot Magic: I swear by this—simmer the bones, dump in chopped onions and ginger, and let the broth do the work. No separate pots, no extra pans. Just you, a pot, and 30 minutes of hands-off richness.
- Rich Umami Bomb: That marrow melts into the broth like butter, while the knuckle bones turn it into liquid gold. The onions caramelize right in the pot, and the garlic-ginger paste? Pure flavor overload in every slurp.
- Weeknight Hero: I make this when I’m exhausted but still want to impress. It’s the kind of dish that feels fancy but takes less effort than takeout. Serve with store-bought noodles or fresh ones—either way, it wins.
- Budget Feast: A single batch of bones stretches into three meals, and the rest of the ingredients cost pennies. Honestly, it’s the most economical way to eat like you’re at a ramen shop—without the markup.
Step-by-step instructions for authentic beef ramen broth
Here's how to build a rich, umami-packed broth that captures the soul of Japanese ramen.
Prepare the Beef Bones for Maximum Flavor
Split the 4 lb beef bones (marrow and knuckle) lengthwise to expose the marrow and create more surface area for flavor extraction. Place them in a large stockpot and cover with cold water by about 2 inches. Bring to a boil over medium-high heat, then immediately reduce to a gentle simmer. Skim off any foam or impurities that rise to the surface during the first 15 minutes—this ensures a crystal-clear broth.
Simmer uncovered for 2 hours, maintaining a barely bubbling surface. The bones should develop a deep, caramelized color. Add 2 whole yellow onions (peeled and halved) and 1 bunch scallions (white and light green parts only) during the last 30 minutes of this initial simmer. This layering builds complexity without overpowering the beef's natural richness.
Build Layers of Umami with Kombu and Shiitake
After the initial 2 hours, remove the beef bones and set aside. Strain the broth through a fine-mesh sieve into a clean stockpot, discarding the solids. Return the broth to the pot and add the 4 oz kombu (cut into strips) and 10 whole dried shiitake mushrooms (stems removed, caps halved). Bring to a gentle simmer and cook for 30 minutes. The kombu will infuse the broth with oceanic depth, while the shiitake mushrooms add earthy sweetness.
Remove the kombu and shiitake mushrooms with tongs—kombu should be dissolved completely, and the mushrooms should be fully rehydrated. The broth should now have a deep amber color and a rich, layered aroma that hints at the flavors to come. If the broth isn't flavorful enough at this stage, don't worry—we're just getting started.
Add Aromatics and Fermented Depth
Add the 12 cloves garlic (peeled and smashed), 0.5 cup fresh ginger (peeled and sliced), 0.5 cup soy sauce, and 0.25 cup mirin to the broth. Bring to a gentle simmer and cook for 20 minutes. The garlic and ginger should be soft but not browned, and the broth should develop a glossy sheen from the mirin's sweetness. Stir in the 2 tbsp white miso paste and simmer for another 10 minutes, allowing the miso to dissolve completely and mingle with the other flavors.
This is where the magic happens—the miso and mirin create a sweet-savory balance that elevates the broth from good to extraordinary. Taste the broth now—it should be deep, complex, and slightly sweet, with a long, satisfying finish. If it needs more depth, add a splash of water and simmer for another 5 minutes to concentrate the flavors.
Finish with Sesame Oil and Strain
Remove the pot from heat and stir in the 1 tbsp sesame oil. The oil will coat the broth, adding a nutty aroma and a silky texture that's essential for authentic ramen. Let the broth sit off the heat for 10 minutes to allow the flavors to meld. Strain the broth through a fine-mesh sieve into a clean pot, pressing gently on the solids to extract every last drop of flavor. Discard the solids.
The finished broth should be deep amber, richly aromatic, and so flavorful it clings to the spoon. If you're using the optional 1 lb chashu pork, slice it into thin strips and add it back to the broth now to warm through. The broth is now ready to be paired with the 2 packages ramen noodles and your optional toppings.
Assemble and Serve with Confidence
Bring the broth back to a gentle simmer and divide it evenly among 4 serving bowls. Add the ramen noodles to each bowl and ladle hot broth over them until fully submerged. If using, top each bowl with 1 soft-boiled egg (peeled), 1 sheet nori (cut into strips), and a generous portion of the chashu pork. The contrast of silky egg yolk, crispy nori, and tender pork against the rich broth is what makes ramen truly special.
Serve immediately with chopsticks and a small bowl of chili oil on the side for those who like a little heat. The broth should be hot enough to steam slightly when you take your first sip, and the flavors should build in layers—first the sweetness of the mirin, then the umami depth of the miso, followed by the meaty richness of the beef. This is the kind of ramen that makes you want to slurp every last drop.
Pro Tips For Making Authentic Beef Ramen
- Char Bones Low and Slow: After burning three batches of beef bones, I finally learned—this isn’t a race. Start with a screaming-hot pot, then drop the heat to a bare simmer (think "barely bubbling") and let those bones sweat for at least 4 hours. The marrow bones should crack open like overripe fruit, and the knuckles should yield collagen so thick it coats the back of a spoon. No shortcut here—just time and patience. ---
- Blister Onions First: Skip the slow caramelization step for now. Toss whole yellow onions into the hot pot after the bones start rendering fat, and let them blister until blackened in spots. That bitter, smoky depth is what cuts through the richness of the broth. Save the rest for aromatics later—this is the flavor anchor. ---
- Scrape the Pot Daily: I used to ignore the browned bits clinging to the bottom of the pot, thinking they’d dissolve. Wrong. After 24 hours, scrape them into the broth with a wooden spoon—every single day—and stir like you’re angry. Those bits are pure umami gold, and skipping this step means missing half the flavor. (Yes, even if it looks gross.) ---
- Cold-Soak Ginger Slices: Fresh ginger loses its punch fast, especially in long simmers. Thinly slice it (no need to peel) and soak the pieces in ice water for 10 minutes before adding to the pot. The cold shock preserves the zing, and the water dilutes the heat just enough to keep the broth balanced. Trust me, your broth won’t turn bitter.
Pro cooking tips for this recipe
Simmer Control Secrets
Your broth's quality hinges on gentle, consistent simmering—never a rolling boil. Use a large stockpot (I recommend All-Clad Stainless Steel) and maintain barely visible bubbles at the surface. A digital thermometer (like Thermoworks Smoke) helps—aim for 185-195°F. The first 2 hours are critical: this breaks down collagen in bones into gelatin, creating that signature ramen mouthfeel. 🌡️
Pro tip: Add aromatics gradually—onions and scallions go in last to avoid bitterness. If your broth reduces too quickly, top with cold water (never hot) to maintain temperature control. The goal is slow extraction, not rapid evaporation.
Layered Flavor Timing
Timing each ingredient's addition is everything. Kombu dissolves in 30 minutes—remove it immediately to prevent bitterness. Shiitake mushrooms rehydrate in the same time, adding earthy depth. The garlic and ginger cook 20 minutes to soften without browning, while soy sauce and mirin simmer 10 minutes to meld without caramelizing. 🧄
For maximum umami, add miso paste only in the final 10 minutes—it burns easily. Stir constantly during this phase to ensure even distribution. The broth should taste balanced: sweet from mirin, salty from soy, and funky from miso.
Clarifying the Broth
Straining through a fine-mesh sieve (like OXO Good Grips) removes impurities while preserving flavor. For extra clarity, use a cheesecloth-lined colander as a second layer. Press solids gently to extract every last drop—this is where hidden flavor resides. The result? A glossy, golden broth that looks as good as it tastes. ⚡
Discard all solids immediately after straining—kombu left too long turns bitter, and garlic can scorch. The broth should be completely clear, with no visible particles. If it's cloudy, strain again through fresh cheesecloth.
Noodle Perfection
Fresh ramen noodles cook in 2 minutes—set a timer and watch closely. Dried noodles take 3-4 minutes but can become mushy if overcooked. Rinse briefly in cold water only if they're too al dente, but this dilutes flavor slightly. For extra chew, undercook by 10 seconds—they'll finish in the hot broth. 🍜
Divide noodles among bowls before adding broth to prevent overcrowding. Ladle broth generously—the noodles should be fully submerged but not drowning. The broth-to-noodle ratio is key: 3:1 is ideal for that perfect slurp.
Topping Placement
Arrange toppings strategically for visual appeal and texture contrast. Place chashu pork on one side to create a color gradient (pink meat against amber broth). Nestle the soft-boiled egg slightly off-center so yolk doesn't break immediately. Nori strips should fan out like delicate wings at the top. 🥚
Add chili oil or sesame seeds last—they're garnishes, not structural elements. The broth should steam slightly when served, ensuring each bite is hot and cohesive. Pro move: Use wide, shallow bowls (like Japanese ramen bowls) to showcase the layers.
Nutrition facts
Frequently asked questions
Why does this recipe require such a long simmer time?
The 8-hour total simmer is essential for extracting maximum flavor and gelatin from the beef bones. This slow process breaks down collagen into gelatin, creating that signature ramen mouthfeel. The kombu and shiitake also need time to fully infuse their umami-rich flavors. Patience here is what transforms good broth into something extraordinary!
Can I make the broth ahead of time?
The broth actually tastes better the next day as flavors meld. Store it in the fridge for up to 5 days or freeze in portions for 3 months. Reheat gently on the stove—never microwave, as it can make the fat separate. The noodles are best cooked fresh, but you can prep toppings ahead too.
What if I don't have kombu or shiitake mushrooms?
For kombu, use 1/4 cup dashi powder instead (like Hondashi). For shiitake, substitute 1 cup cremini mushrooms (fresh or rehydrated dried)—they'll add earthiness but won't be identical. The dish will still be delicious, just slightly different in depth.
How do I know when the broth is ready?
The perfect broth should be deep amber, glossy, and have a rich aroma that makes your mouth water. Taste it before straining—it should be deeply savory, slightly sweet, and perfectly balanced. If it's too salty, add a splash of water and simmer 5 more minutes to concentrate flavors. The texture should coat the back of your spoon.
Can I make this vegetarian or vegan?
This recipe is built on beef umami, but you can adapt it! Replace bones with shiitake stems and kombu (for umami), plus mushroom or seaweed broth base. Use vegetable miso instead of white miso, and add 1 tbsp nutritional yeast** for depth. The texture will be different, but the flavor profile can still be rich and satisfying.