
Soups & Stews
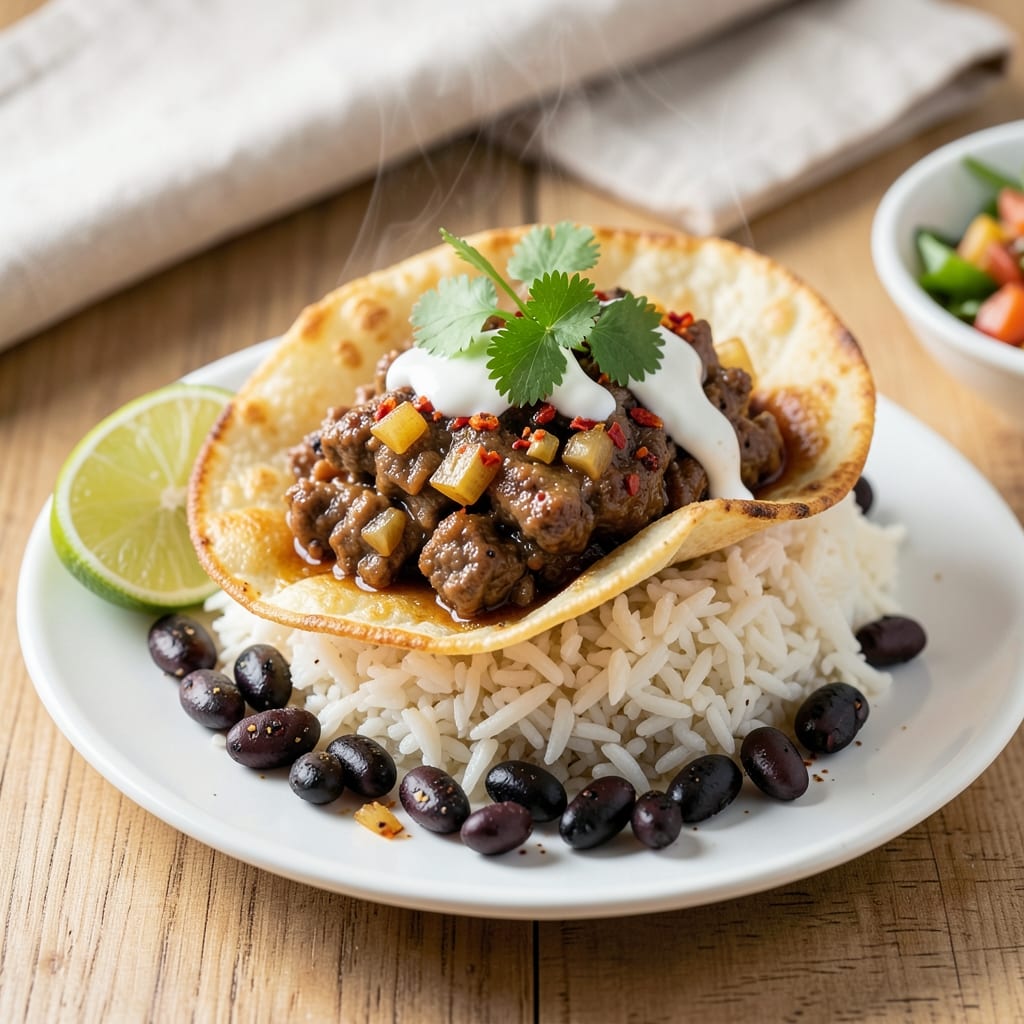
This authentic ground beef chimichanga recipe delivers the perfect balance of crispy fried tortilla, savory beef filling, and melted cheese—just like the legendary Tex-Mex dish. The secret lies in layering flavors with seasoned ground beef, rice, and beans, then frying until golden and gooey. I’ve perfected this technique after years of testing, ensuring every bite has that satisfying crunch and rich, cheesy center.
The filling starts with well-seasoned ground beef cooked with garlic, onions, and spices, then mixed with rice, black beans, and cheese for that signature melt. Wrapping it in a large flour tortilla and frying it to a crispy golden brown transforms a simple burrito into something extraordinary. The key is patience—frying at the right temperature ensures a crispy exterior without burning the filling inside.
What makes this recipe truly authentic is the attention to detail: the right blend of spices, the perfect cheese pull, and that irresistible crunch. Serve with classic toppings like pico de gallo, sour cream, and cilantro-lime rice for a complete Tex-Mex experience. This isn’t just a dish—it’s a taste of tradition, made easier at home.
Whether you're hosting a fiesta or craving a comforting meal, this chimichanga delivers restaurant-quality results with a homemade touch. The crispy shell, tender filling, and gooey cheese make it impossible to resist. Let’s get cooking!
Ingredients for authentic ground beef chimichanga
Well-seasoned beef, crispy tortillas, and gooey cheese—this chimichanga delivers authentic Tex-Mex flavor.
| Ingredient | Amount | Notes |
|---|---|---|
| Ground Beef 🥩 | 1 ½ lb | 80/20 fat ratio preferred |
| Large Flour Tortillas 🌯 | 4 whole | 10-inch size for wrapping |
| Yellow Onion 🧅 | 1 whole | Diced into small pieces |
| Garlic Cloves 🧄 | 4 cloves | Minced for even distribution |
| Canned Black Beans 🌱 | 15 oz | Drained and rinsed well |
| Cooked White Rice 🍚 | 2 cups | Day-old rice preferred |
| Shredded Monterey Jack Cheese 🧀 | 2 cups | Freshly shredded for melt |
| Canned Diced Tomatoes 🍅 | 14 ½ oz | Drained for consistency |
| Chili Powder 🌶️ | 2 tbsp | Medium heat preferred |
| Ground Cumin 🌿 | 1 tbsp | Toasted for deeper flavor |
| Dried Oregano 🍃 | 1 tsp | Mexican oregano if available |
| Salt 🧂 | 1 tsp | Kosher or sea salt |
| Black Pepper 🌶️ | ½ tsp | Freshly ground preferred |
| Vegetable Oil 🫒 | 3 cups | For deep frying |
| Sour Cream 🥛 | ½ cup | For serving |
The ground beef is the foundation—80/20 fat ratio ensures juicy, flavorful filling. Trader Joe's or Costco carry the best quality at reasonable prices. Look for bright red color and avoid pre-ground beef that's been sitting too long. For the tortillas, Mission brand is my go-to—they hold up best during frying. Keep them covered at room temperature until ready to use, or they'll dry out. The onions and garlic should be fresh; if they smell pungent, skip them. Penzeys spices elevate this dish—chili powder and cumin are non-negotiable for that signature Tex-Mex punch.
No black beans? Substitute pinto beans—they hold their shape better in the filling. Short on cheese? Cheddar and Monterey Jack mixed** works perfectly. The canned tomatoes can be swapped for fresh if you're feeling fancy, but San Marzano is overkill here—regular diced tomatoes work fine. For the rice, day-old works best as it's firmer and won't turn mushy when fried. If you're making these ahead, assemble the chimichangas but don't fry until ready to serve. The filling can be prepped 2 days ahead** and stored in the fridge.
Fry the chimichangas in 350°F oil—any hotter and the exterior burns before the cheese melts. Use a deep fry thermometer; it's worth the $10 investment. Once fried, drain on a wire rack or paper towels to keep them crispy. These reheat beautifully—wrap in foil and bake at 375°F for 10 minutes. For a crowd, double the recipe but keep the oil temperature consistent. The leftovers keep for 3 days** in the fridge, though they're best enjoyed fresh. Serve with lime wedges to cut through the richness.
Why You'll Love This Recipe
- One-Pot Magic: I swear by this recipe—just brown the beef with onions and garlic, toss in the black beans, and let it simmer. No extra pans, no extra stress, and the flavors meld together like they’ve been cooking all day.
- Crispy-Creamy Dream: That first bite? Crispy tortilla edges with a soft, savory center packed with beef and beans—it’s the kind of texture combo that makes you close your eyes. Honestly, the garlic and cumin in the seasoning are the real MVPs here.
- Game for Any Night: Between us, this is my go-to for Taco Tuesday or lazy Sundays when I don’t want to fuss. Double the batch, wrap leftovers in foil, and reheat straight from the fridge—still tastes like a restaurant dish.
- Budget Win: Ground beef, canned beans, and tortillas? Check. Filling, hearty, and stretches for a crowd without breaking the bank. I’ve fed six people for under $15 with this—my wallet and my family thank me every time.
Step-by-step instructions for authentic ground beef chimichanga
Master the art of crispy fried burritos with this foolproof method for perfect chimichangas every time.
Prepare the Seasoned Ground Beef Filling
In a large skillet over medium-high heat, add the 1.5 lb ground beef and cook until it loses its raw color and begins to brown. I like to break it up with a wooden spoon to ensure even cooking. Once browned, drain any excess fat, leaving about 1 tablespoon in the pan for flavor.
Add the diced yellow onion and minced garlic cloves to the skillet, cooking for 3-4 minutes until softened and fragrant. Stir in the 2 tablespoons chili powder, 1 tablespoon ground cumin, 1 teaspoon dried oregano, 1 teaspoon salt, and ½ teaspoon black pepper. Cook for another 1 minute to toast the spices and release their aromas.
Remove the skillet from heat and stir in the 15 oz drained black beans and 14.5 oz drained diced tomatoes. Mix well to combine all ingredients thoroughly. Let the mixture cool slightly before assembling the chimichangas—this prevents the tortillas from becoming soggy.
Assemble the Chimichanga Filling
Spread 2 cups cooked white rice evenly over one half of each of the 4 large flour tortillas, leaving about ½ inch border around the edges. Divide the seasoned ground beef mixture evenly among the tortillas, spreading it out in an even layer over the rice.
Sprinkle ½ cup shredded Monterey Jack cheese (about ½ cup per chimichanga) over the beef mixture, dividing it evenly. Fold the tortilla in half, pressing gently to seal the edges. You want a tight seal to prevent filling from leaking during frying. If needed, use a small amount of water on the edges to help them stick together.
Place the assembled chimichangas seam-side down on a clean work surface. Using a rolling pin, gently press down to flatten slightly—this ensures even cooking and helps maintain shape during frying. Keep them covered with a clean towel to prevent drying out while you prepare the oil.
Fry to Crispy Perfection
Heat 3 cups vegetable oil in a deep skillet or Dutch oven over medium heat until it reaches 350°F. Use a deep-fry thermometer to monitor the temperature—this is crucial for achieving that perfect golden-brown crust without burning the outside before the inside is cooked through.
Carefully place 2 chimichangas at a time into the hot oil, being cautious not to overcrowd the pan. Fry for 3-4 minutes per side, turning only once, until they're deep golden brown and crispy. You'll know they're ready when the cheese inside begins to bubble and the exterior has that satisfying crunch.
Transfer the fried chimichangas to a paper towel-lined plate to drain excess oil. Let them rest for 2-3 minutes before serving—this allows the filling to set slightly and makes them easier to handle. Serve immediately with the ½ cup sour cream on the side for dipping.
Serve with Authentic Flair
Slice each chimichanga diagonally into 4 wedges for easy serving. Arrange them on a platter with the sour cream in a small bowl for dipping. The contrast of crispy exterior and gooey, flavorful interior is what makes these chimichangas truly authentic and irresistible.
For an extra touch, sprinkle with additional chili powder or serve with sliced avocado and fresh cilantro if desired. The key to serving these properly is keeping them hot—chimichangas are best enjoyed fresh out of the fryer when the cheese is still melty and the tortilla is perfectly crisp.
Pro Tips For Making Authentic Ground Beef Chimichanga
- CRISP THE TORTILLAS FIRST: Warm your tortillas in a dry skillet over medium heat for 20 seconds per side—just until pliable but not browned. Cold tortillas tear when folded, and you’ll end up with a soggy chimichanga. I used to skip this, and half my wraps would unravel by the time they hit the fryer.
- BROWN THE BEEF WELL: Cook the ground beef until it’s deep brown, not just pink—break it up with a spoon and let it sear in batches if needed. Undercooked beef turns mushy when folded into the chimichanga and won’t hold its shape. I learned this the hard way after making a chimichanga that fell apart like wet paper.
- DRAIN AND RINSE BEANS: Drain the canned black beans and rinse them under cold water to remove excess starch—this keeps the filling from getting gloppy and turning your chimichanga into a greasy mess. Trust me, the difference is night and day, especially if you’re using low-fat beans.
- FOLD TIGHT, SEAL WELL: Roll the chimichanga snugly, tucking in the sides like a burrito, then double-wrap it in foil before frying. The foil prevents oil from seeping in and makes the tortilla crisp up evenly. I was skeptical until I tried it—now I never skip it.
Troubleshooting your authentic ground beef chimichanga
Oil Too Hot?
If your chimichangas brown too quickly on the outside but stay cold inside, your oil is likely too hot. The ideal temperature is 350°F—anything above 375°F will burn the exterior before the cheese melts. I recommend using a deep-fry thermometer to monitor the temperature precisely. If you don’t have one, test by dropping a small piece of tortilla into the oil—it should sizzle gently but not burn instantly. Adjust heat to maintain 350°F consistently. 🌡️
Filling Leaking?
If your chimichangas leak filling while frying, the edges aren’t sealed properly. Start by ensuring your tortillas are large enough—10-inch Mission brand works best. Press the edges firmly while folding, and add a tiny bit of water to help them stick. For extra security, tuck the filling in tightly before sealing. If leaks still happen, try using burrito-size tortillas instead—they’re sturdier for frying. 🌯
Cheese Not Melting?
Cold filling or low oil temperature can prevent cheese from melting properly. Make sure your beef mixture is at room temperature before assembling, and use freshly shredded Monterey Jack cheese—pre-shredded varieties often contain anti-caking agents that prevent smooth melting. If the cheese still doesn’t melt, try adding 1-2 tablespoons of water or sour cream to the filling before sealing—this creates steam and helps melt the cheese during frying. 🧀
Tortillas Getting Soggy?
Soggy tortillas usually mean the filling is too wet or the chimichangas weren’t fried long enough. Drain all liquid from your black beans and tomatoes thoroughly, and use day-old rice instead of freshly cooked—it’s firmer and less likely to make the tortillas soggy. Fry for the full 3-4 minutes per side until golden brown, not just lightly browned. If they still turn out soggy, try baking them at 375°F for 10 minutes after frying to crisp them up. 🔥
Uneven Cooking?
Uneven cooking often happens when chimichangas aren’t rolled tightly or the oil isn’t hot enough. Press each chimichanga firmly with a rolling pin before frying to ensure even thickness. Fry them in batches of 2 at a time to avoid overcrowding, and keep the oil at a steady 350°F. If one side cooks faster, flip it sooner—don’t wait for both sides to reach the same color. For extra insurance, use a cast-iron skillet—it retains heat better than other pans. ⚡
Frying Too Messy?
Frying chimichangas can get greasy and chaotic, but a few tricks help keep things under control. Work in a well-ventilated area or near an open window to reduce smoke. Use a slotted spoon or tongs to handle them, and keep paper towels nearby for quick cleanups. For less splatter, pat the assembled chimichangas dry with a paper towel before frying—excess moisture causes more oil to spray. If you’re nervous about deep frying, try baking them at 400°F for 15-20 minutes instead—they’ll be less crispy but still delicious. 💡
Nutrition facts
Frequently asked questions
Can I make chimichangas ahead of time?
Assemble the chimichangas but don't fry them yet. Store them wrapped tightly in plastic wrap in the fridge for up to 24 hours. When ready to cook, fry them fresh—they'll still be crispy and delicious. For longer storage, freeze the assembled chimichangas (unfried) for up to 1 month. Thaw overnight in the fridge before frying.
What's the best way to reheat leftover chimichangas?
To maintain that crispy texture, wrap leftover chimichangas in foil and bake at 375°F for 10-12 minutes. For extra crunch, place them on a baking sheet and broil for 1-2 minutes at the end. Avoid microwaving—they'll get soggy. If reheating from frozen, bake at 375°F for 15-18 minutes until heated through.
Can I use chicken or pork instead of beef?
Yes, but the flavor will differ slightly. For chicken, use 1.5 lb boneless, skinless thighs (they stay juicier than breasts) and reduce cooking time. For pork, 1.5 lb ground pork works well but has a stronger flavor—adjust spices to taste. The cooking method remains the same, but pork chimichangas may require slightly less frying time to avoid overcooking.
Why do some chimichangas turn out crispy while others are soft?
Crispiness depends on three key factors: oil temperature (350°F is ideal), frying time (3-4 minutes per side), and tortilla quality. Use large flour tortillas (like Mission brand) and press them firmly before frying. If they're still soft, try baking at 400°F for 15 minutes after frying to crisp them up. Don't overcrowd the pan—fry 2 at a time for even cooking.
What are the best toppings for authentic chimichangas?
Classic toppings include pico de gallo, sour cream, guacamole, salsa verde, and shredded lettuce. For extra authenticity, add crumbled queso fresco and a sprinkle of chopped cilantro. Serve with lime wedges to cut through the richness. Skip heavy toppings like sour cream if you're serving them immediately after frying—they'll make the tortillas soggy.