
Main Courses
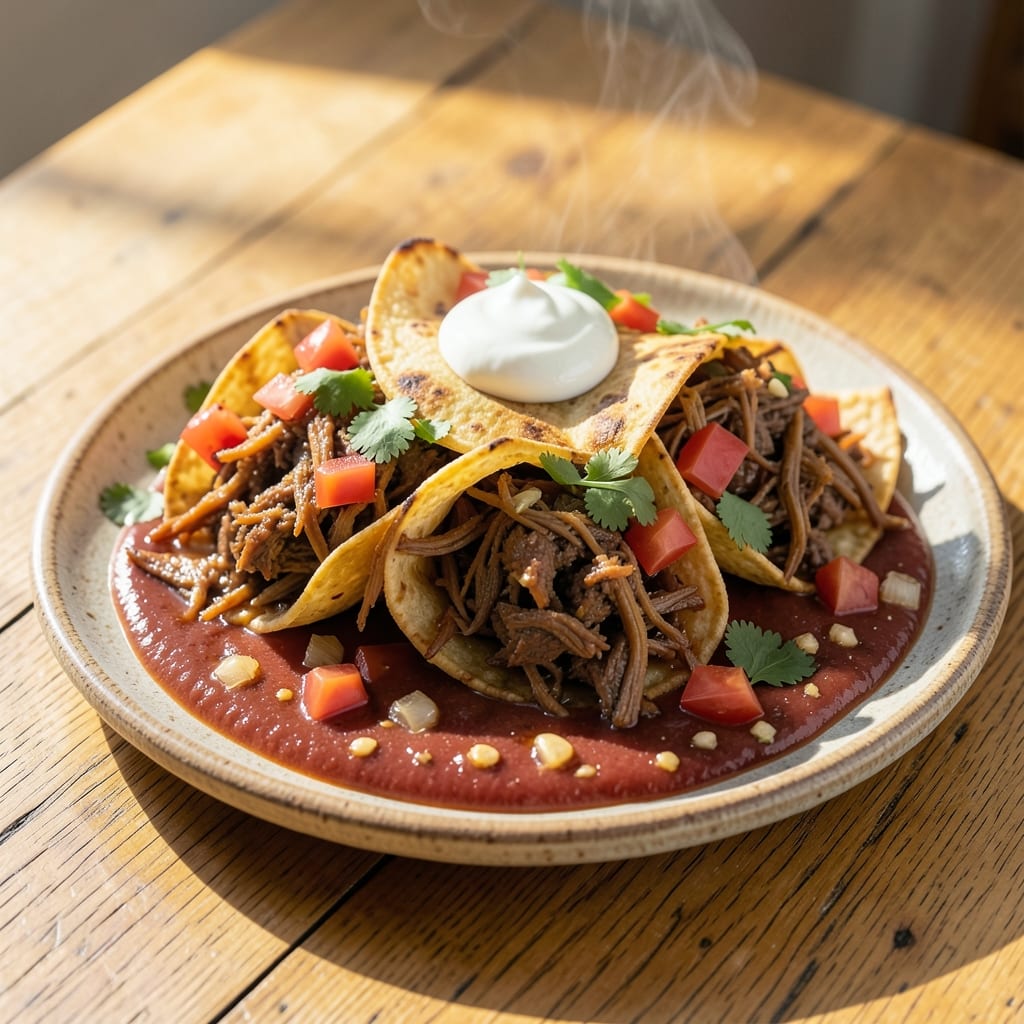
This authentic shredded beef chimichanga recipe delivers the perfect balance of crispy golden edges and tender, flavorful fillings—just like your favorite Southwestern restaurant. The secret lies in slow-cooked beef that practically falls apart, wrapped in warm flour tortillas and fried to a crispy finish. I’ve perfected this technique over years of testing, ensuring every bite is packed with smoky, savory goodness that pairs beautifully with classic toppings.
The process starts with tenderizing beef chuck roast using a bold blend of spices and slow cooking until it shreds effortlessly. Once the beef is ready, it’s combined with melted cheese and seasoned rice for a filling that’s rich and satisfying. The real magic happens when you wrap the mixture in large flour tortillas and fry them to a golden, crispy exterior—crispy enough to hold up to dipping in sour cream or guacamole, yet soft enough to melt in your mouth.
What makes this recipe truly stand out is the authenticity—no shortcuts, just traditional techniques that deliver restaurant-quality results at home. The slow-cooked beef infuses the tortillas with deep, smoky flavors, while the crispy crust adds a satisfying crunch. Serve these chimichangas with your favorite toppings like pico de gallo, guacamole, or a dollop of sour cream for the ultimate comfort food experience.
Whether you're feeding a crowd or treating yourself to a cozy meal, this authentic recipe is designed to impress. The best part? It’s easier than you think, with step-by-step instructions that ensure foolproof results every time. Let’s get started on creating your own crispy, cheesy masterpiece!
Ingredients for authentic shredded beef chimichanga
Sixteen ingredients for restaurant-style chimichangas that taste like a fiesta in your mouth.
| Ingredient | Amount | Notes |
|---|---|---|
| Beef Chuck Roast 🥩 | 3 lb | For tender, slow-cooked beef |
| Large Flour Tortillas 🌯 | 12 whole | 10-inch size preferred |
| Yellow Onion 🧅 | 1 whole | Diced, medium size |
| Garlic Cloves 🧄 | 6 cloves | Minced for deep flavor |
| Canned Diced Tomatoes 🍅 | 1 can | 14.5 oz, fire-roasted preferred |
| Tomato Sauce 🍅 | 1 can | 14.5 oz, for richness |
| Beef Broth 💧 | 2 cups | Low-sodium preferred |
| Long-Grain White Rice 🍚 | 2 cups | Uncooked, dry |
| Shredded Monterey Jack Cheese 🧀 | 2 cups | Freshly shredded |
| Chili Powder 🌶️ | 2 tbsp | Smoked preferred |
| Ground Cumin 🌿 | 1 tbsp | Toasted for depth |
| Salt 🧂 | 1 ½ tsp | Kosher or sea salt |
| Black Pepper 🌶️ | ½ tsp | Freshly ground |
| Vegetable Oil 🫒 | 4 cups | For frying |
| Sour Cream 🥛 | ½ cup | For serving |
The beef is everything here. Chuck roast breaks down beautifully with slow cooking—Costco or Walmart usually have it pre-cut, but if you're buying a whole roast, look for good marbling. Fire-roasted canned tomatoes add smoky depth, and I always grab Muir Glen brand from the Latin market section. The tortillas? Mission brand is my go-to—they're sturdy enough to handle frying without tearing. If you can't find them, any large flour tortilla works, but don't substitute corn—they won't crisp up right.
No chili powder? Smoked paprika plus a pinch of cayenne gets you close. Running short on beef broth? Chicken broth in a pinch, but add a splash of soy sauce for that umami kick. The rice should be dry—no pre-cooked or instant rice here. For extra tenderness, cook the beef until it's falling apart, then shred it with two forks. The cheese needs to be freshly shredded—pre-shredded gets clumpy and won't melt as nicely. Want to make it ahead? Fry the chimichangas, then reheat in a skillet with a splash of water to restore crispiness.
These keep beautifully for 3 days in the fridge, wrapped tightly in foil. Freeze them uncooked for up to 2 months—just thaw overnight before frying. I always make a double batch because they disappear fast. For serving, set out bowls of sour cream, guacamole, and pico de gallo—the dipping makes all the difference. Pro tip: Keep the fried chimichangas warm in a 200°F oven while you finish the batch so they stay crispy.
Why You'll Love This Recipe
- One-Pot Magic: I swear by this recipe because it’s all in one pot—no fussing with multiple pans or dishes. The beef chuck roast slow-cooks with onions, garlic, and tomatoes until it’s so tender it falls apart at the touch, while the tortillas crisp up in the same skillet. (Yes, even on a Tuesday night.)
- Crispy-Creamy Perfection: That first bite? The tortilla’s golden edge gives way to shredded beef so juicy it makes you pause. The garlic and onions caramelize right into the meat, and the canned tomatoes add just enough tang to cut through the richness—like a hug in food form.
- Feeds a Crowd (or Stretches Meals): Between us, this recipe makes enough for leftovers that’ll last through the week. Double the batch for game day, potlucks, or when your kid’s soccer team is suddenly hungry. The beef stretches across burrito bowls, tacos, or even breakfast hash the next morning.
- Budget Hero: Chuck roast is affordable, and tortillas keep costs low without sacrificing flavor. I’ll be real: it’s the kind of meal where you get more bang for your buck, and the leftovers taste just as good reheated as they do fresh. (My wallet thanks me every time.)
Step-by-step instructions for authentic shredded beef chimichangas
This method delivers restaurant-quality chimichangas with perfectly crispy crusts and tender, flavorful beef.
Slow-Cook the Beef Chuck Roast Until Fork-Tender
In a large Dutch oven, combine the 3 lb beef chuck roast, 1 whole yellow onion (diced), 6 cloves garlic (minced), 2 tbsp chili powder, 1 tbsp ground cumin, 1.5 tsp salt, and 0.5 tsp black pepper. Brown the beef on all sides over medium-high heat for 3-4 minutes per side—this creates a flavorful crust. Then pour in 1 can tomato sauce, 1 can diced tomatoes, and 2 cups beef broth. Bring to a boil, then reduce heat to low, cover, and simmer for 3-4 hours until the beef shreds easily with two forks.
Here's the thing—low and slow is crucial. The beef should be so tender it practically falls apart when you test it. If it's not shredding easily after 3 hours, add ½ cup more beef broth and continue cooking. Once tender, remove the beef from the pot and shred it using two forks, discarding any large fat pieces or gristle. Set the shredded beef aside—it's the star of your chimichangas.
Prepare the Rice and Assemble the Chimichanga Filling
In the same Dutch oven, cook the 2 cups long-grain white rice according to package instructions using the remaining beef mixture (strain if needed to remove excess liquid). Once fluffy, remove from heat and stir in 1 cup of the shredded Monterey Jack cheese—this ensures every bite has that gooey, melty goodness. Let the rice cool slightly while you prepare the tortillas.
Lay out the 12 large flour tortillas on a clean surface. For each tortilla, spread ¼ cup of the rice mixture evenly, leaving a 1-inch border around the edges. Then add ¼ cup of the shredded beef, spreading it evenly over the rice. Top with another ¼ cup of rice, then fold the sides inward and roll tightly from the bottom up, sealing the filling inside. Real talk: don't skip the sealing step—this keeps everything contained when frying.
Fry the Chimichangas to Golden Perfection
Heat 2 cups of vegetable oil in a large skillet over medium heat until it reaches 350°F—use a thermometer for accuracy. Fry 3-4 chimichangas at a time, turning occasionally, for 3-4 minutes per side until they're deep golden brown and crispy. The oil temperature is critical—too hot and they'll burn; too cool and they'll absorb too much oil. Drain on a wire rack or paper towels to remove excess oil, then keep warm in a 200°F oven while you fry the rest.
Here's where the magic happens: the chimichangas should be crispy on the outside but still soft on the inside. If they're not browning evenly, reduce the heat slightly. Once all chimichangas are fried, sprinkle them with the remaining 1 cup shredded Monterey Jack cheese and return them to the oven for 1-2 minutes to melt the cheese. This step ensures every bite has that perfect blend of crispy and creamy.
Serve with Sour Cream and Enjoy Immediately
Transfer the chimichangas to a serving platter and let them rest for 2-3 minutes—this helps the filling set slightly. Serve each chimichanga with 1 tablespoon of the sour cream drizzled on top. The contrast of the cool, tangy sour cream with the warm, crispy chimichanga is what makes this dish truly authentic. For extra flair, garnish with chopped cilantro or sliced jalapeños if you're feeling adventurous.
This recipe makes 6 generous chimichangas, perfect for sharing. The key to authenticity lies in the slow-cooked beef, the crispy frying, and that perfect cheese pull. Don't rush the process—every step builds to that first bite of crispy, cheesy, beefy goodness. Trust me, it's worth the effort.
Pro Tips For Making Authentic Shredded Beef Chimichanga
- SEAR THE CHUCK FIRST: Brown that roast in a screaming-hot skillet with 1 tablespoon of oil before slow-cooking—it builds flavor layers the canned tomatoes can’t hide. I used to skip this, and the beef tasted like it was just simmering in sadness.
- CHAR THE ONIONS: Cook the diced onion until the edges turn dark brown, not just soft—this caramelized bitterness cuts through the richness of the beef. Sounds weird, but it works: skip it, and your chimichangas taste one-note.
- DON’T OVERFILL TORTILLAS: Pack the tortillas with beef, but leave a 1-inch border or they’ll burst when frying. I learned this the hard way after deep-frying a chimichanga that looked like a sad, greasy balloon.
- FRY IN BATCHES: Fry 2-3 chimichangas at a time in 350°F oil, or the tortillas steam instead of crisp. Crowd the pan, and you’ll end up with soggy, greasy messes—your future self will thank you for patience.
Regional styles of authentic shredded beef chimichanga
Texas-Style Chimichangas
In Texas, chimichangas are all about bold flavors and generous portions. The beef chuck roast is slow-cooked with smoked chili powder and cumin until it shreds easily, then mixed with Monterey Jack cheese and white rice for a filling that’s rich and satisfying. The tortillas—Mission brand flour tortillas—are large enough to hold all the filling without tearing, and the frying is done in vegetable oil at 350°F to achieve that signature crispy crust. 🌶️
What sets Texas-style apart is the emphasis on slow-cooked beef and the use of fire-roasted tomatoes in the sauce. The dish is often served with sour cream, guacamole, and pico de gallo for dipping, making it a hearty, shareable meal perfect for gatherings. The key is balancing the crispy exterior with a soft, flavorful interior—never overcrowd the pan when frying, or the oil temperature will drop, leading to soggy results.
Southwest Fusion Twist
For a modern take, some Southwest chefs add black beans or corn to the filling, blending Mexican and Tex-Mex traditions. I like toasting the spices—cumin and chili powder—in a dry skillet for 30 seconds** before adding them to the beef for deeper, nuttier flavors. This fusion style keeps the crispy frying technique but introduces new textures and ingredients, like charred corn or smoked gouda cheese instead of Monterey Jack. 🌽
Another popular variation is adding a spicy chipotle sauce drizzle after frying, which cuts through the richness of the beef and cheese. For extra heat, sprinkle crushed red pepper flakes or diced jalapeños on top before serving. The Southwest fusion style is all about creativity—don’t be afraid to experiment with flavors while keeping the crispy, cheesy core intact.
Arizona-Inspired Chimichangas
Arizona takes chimichangas in a slightly different direction by incorporating green chiles into the filling or sauce. Roasted Hatch green chiles (available canned) add a smoky, slightly sweet heat that pairs beautifully with the beef. The tortillas are often brushed with a little olive oil before frying to enhance crispiness, and the dish is finished with a sprinkle of fresh cilantro and a dollop of Mexican crema instead of sour cream. 🌿
In Arizona, chimichangas are also commonly served with a side of refried beans or a corn salad to balance the richness. The green chiles are a signature ingredient, so if you can’t find them fresh, canned roasted green chiles work perfectly. This regional style leans into the Southwest’s love of bold, spicy flavors while keeping the dish comforting and hearty.
California-Style Chimichangas
California chimichangas often feature lighter, fresher ingredients, like avocado slices or mango salsa as toppings. The beef might include bell peppers or mushrooms for added texture, and the tortillas are sometimes brushed with a garlic-infused oil before frying. The focus here is on bright, fresh flavors that cut through the richness of the beef and cheese. 🥑
California chefs also love to serve chimichangas with a cilantro-lime crema or a mango-habanero salsa for a sweet-spicy contrast. The dish is often lighter on the cheese, using reduced-fat Monterey Jack or goat cheese to keep it healthier without sacrificing flavor. This style is perfect for those who prefer a fresher, more vibrant take on the classic chimichanga.
Nutrition facts
Frequently asked questions
Can I make chimichangas without frying?
The traditional method involves frying for that signature crispy crust, but you can bake them for a lighter version! Preheat oven to 400°F, brush tortillas lightly with oil, and bake for 12-15 minutes until golden. The texture will be softer, but still delicious. For extra crispiness, broil for 1-2 minutes at the end.
How do I keep the filling from leaking when frying?
Sealing the tortillas properly is key! After adding filling, fold the sides inward first, then roll tightly from the bottom up. For extra security, brush the edges with a little beaten egg or water before frying. Avoid overfilling—stick to ¼ cup rice + ¼ cup beef per tortilla to prevent leaks.
What's the best way to reheat leftover chimichangas?
To restore crispiness, reheat in a 375°F oven for 5-7 minutes on a wire rack. For stovetop, use a skillet with 1 tbsp oil over medium heat for 2-3 minutes per side. Avoid microwaving—they'll get soggy!
Can I use chicken or pork instead of beef?
For chicken, use 3 lbs boneless thighs and cook until 165°F. Pork works too—try 3 lbs pork shoulder cooked to 195°F for tender shreds. Adjust seasonings slightly: chicken pairs well with oregano, while pork benefits from garlic powder. The frying method stays the same!
Why did my chimichangas turn out greasy?
Greasy chimichangas usually mean the oil was too cool or you overcrowded the pan. Keep oil at 350°F and fry 3-4 at a time. Drain on a wire rack (not paper towels) to remove excess oil. Also ensure tortillas are dry before frying—wet ones absorb more oil. For extra crispiness, pat them dry with a paper towel first.