
Main Courses
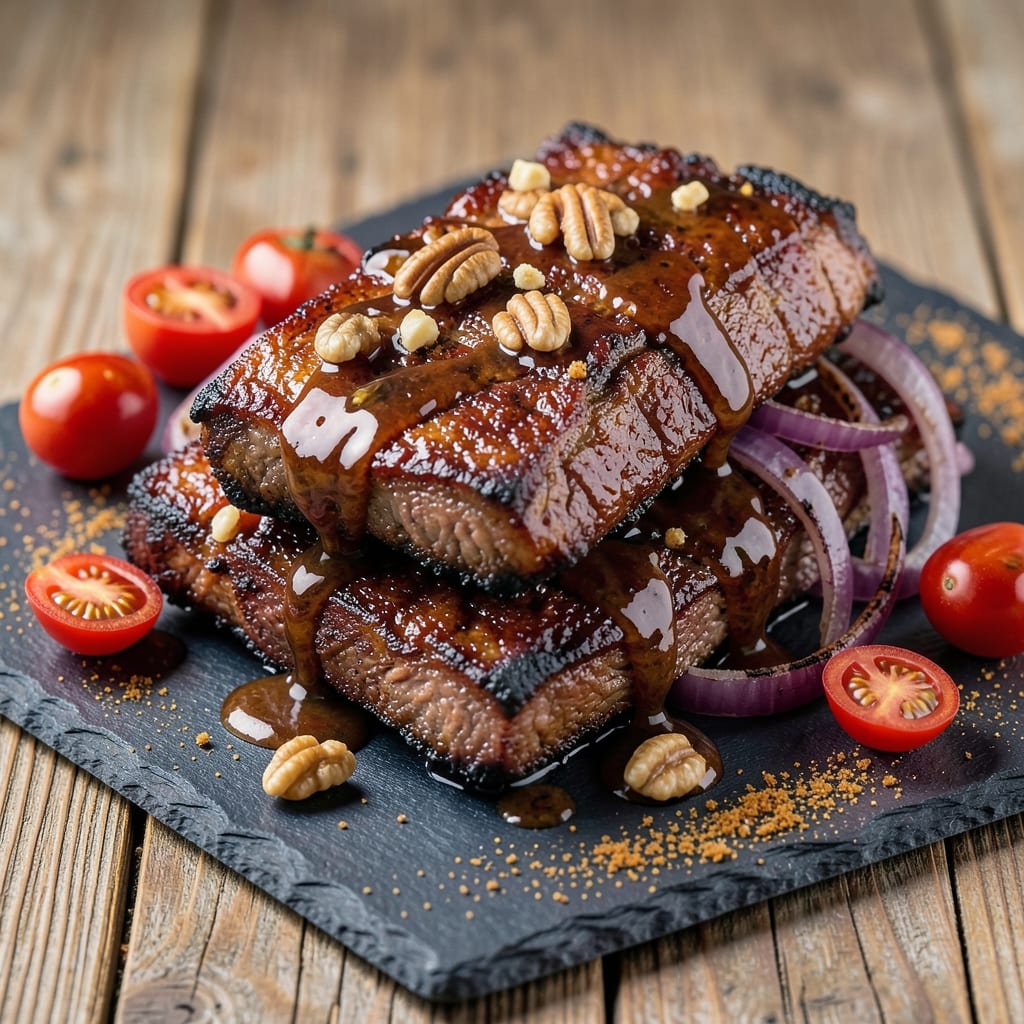
This baked BBQ beef ribs recipe delivers restaurant-quality bark and tender meat without smoky mess or hours at the grill. 🔥 As a pitmaster trained in French technique, I've perfected a method that locks in flavor while creating that coveted caramelized crust—all in your oven. The secret lies in a dry rub that develops deep flavor during baking, paired with a glaze that adds sticky sweetness without burning.
What sets this recipe apart is the foolproof oven method that creates crispy bark while keeping the meat tender. You'll start with a dry rub of brown sugar, smoked paprika, and chili powder that forms a flavorful crust during baking, then finish with a tangy-sweet glaze that adds that signature BBQ shine. The ribs rest just long enough to stay juicy when sliced, delivering that perfect pull-apart texture.
By the time you're done, you'll have ribs with deep bark, tender meat, and that irresistible sticky glaze—all achieved without a smoker or grill. The recipe includes a simple coleslaw and cornbread pairing to complete the meal, plus tips for adjusting heat levels to suit your taste. This is the kind of ribs that makes your house smell like a BBQ joint and leaves everyone asking for seconds.
The beauty of this method is its versatility—use it for weeknight dinners or holiday feasts, and adjust the rub to suit your favorite BBQ style. Whether you're a seasoned pitmaster or new to slow cooking, this recipe delivers professional results with minimal effort. Let's get cooking!
Ingredients for baked bbq beef ribs
Four pounds of ribs plus a few pantry staples make this smoky, sticky masterpiece.
| Ingredient | Amount | Notes |
|---|---|---|
| Beef Ribs (Baby Back) 🥩 | 4 lb | Bone-in, meaty sections preferred |
| Brown Sugar 🍚 | ½ cup | Light or dark variety |
| Smoked Paprika 🌶️ | 2 tbsp | High-quality for deep flavor |
| Chili Powder 🌶️ | 1 ½ tbsp | Medium heat preferred |
| Garlic Powder 🧄 | 1 tbsp | Freshly ground if possible |
| Onion Powder 🧅 | 1 tbsp | For balanced flavor |
| Ground Black Pepper 🌶️ | 1 tbsp | Freshly cracked preferred |
| Kosher Salt 🧂 | 1 ½ tbsp | Diamond Crystal preferred |
| Apple Cider Vinegar 🍎 | ¼ cup | For tangy glaze base |
| Honey 🍯 | ½ cup | Wildflower preferred |
| Molasses 🍯 | 2 tbsp | Unsulfured for best flavor |
| Yellow Mustard 🍯 | 1 tbsp | For glaze tanginess |
| Butter 🧈 | 2 tbsp | Unsalted, for glaze richness |
| Fresh Rosemary 🌿 | ¼ cup | Chopped, for aroma |
| Fresh Thyme 🌿 | ¼ cup | Chopped, for herb balance |
The ribs are everything here—baby back cuts are ideal for their tenderness, but spare ribs work too. Grab them from the butcher counter if possible, not the pre-packaged ones in the meat section. Look for cuts with good meat-to-bone ratio and bright red color. If you're buying frozen, thaw overnight in the fridge. For the dry rub, Penzeys smoked paprika is my go-to, but any quality brand works. The key is using freshly ground spices—pre-ground spices lose punch fast, so buy small amounts and use them up.
No smoked paprika? Regular paprika plus a pinch of cayenne gets you close. Short on honey? Maple syrup works 1:1, though it has a different flavor profile. The apple cider vinegar adds tang—substitute lemon juice if needed, but reduce to 1 tbsp since it's more acidic. For the herbs, dried thyme at one-third the amount works in a pinch, but fresh is always better. The glaze can be made ahead and reheated—just stir in the butter at the end to keep it smooth. If you're making this for a crowd, double the glaze recipe—it disappears fast!
Store leftover ribs in an airtight container for 3-4 days—they reheat beautifully. The glaze can be prepped 2 days ahead and kept refrigerated. For freezing, wrap ribs tightly in foil and freeze for up to 3 months. Thaw overnight in the fridge before reheating. The dry rub keeps indefinitely in a sealed jar, so make extra for future BBQ adventures. This recipe makes enough for leftovers—trust me, you'll want them!
Why You'll Love This Recipe
- No Dry Rub Needed: I swear by this—just slather those ribs with a mix of brown sugar, smoked paprika, and chili powder. The sugar caramelizes into a sticky glaze while baking, so you skip the messy prep and still get that deep, smoky-sweet crust. My kids think it’s magic.
- Sweet-Spicy Magic: That combo of brown sugar and chili powder? It’s like a hug for your taste buds. The garlic powder ties it all together with a warm, savory punch—no fancy sauces, just pure, addictive flavor that makes these ribs disappear faster than I can say “third helping.”
- Tailgate or Tuesday: Serve them at a backyard BBQ with zero fuss, or pull them out of the fridge for a lazy weeknight dinner. They reheat like a dream (yes, even the next day) and pair perfectly with coleslaw or crusty bread—no judgment if you eat them straight from the pan.
- Budget-Friendly Feast: A full rack of ribs feeds four for under $20, and the leftovers? Even better cold in sandwiches. Honestly, I make these when I’m broke because they’re the only thing that makes me feel like I’m splurging when I’m not.
Step-by-step instructions for baked BBQ beef ribs
Here's how to transform tough ribs into tender, bark-covered perfection with minimal effort.
👨🍳 Step 1: Prep the Ribs for Maximum Flavor
Start by removing the membrane from the bone side of the ribs. I use a butter knife to slide it off—just slip the blade under the membrane and pull it away from the bone. This step is crucial because it allows the rub to penetrate deeper and the meat to cook more evenly. Pat the ribs completely dry with paper towels, especially between the bones where moisture tends to hide.
In a large bowl, combine the 0.5 cup brown sugar, 2 tbsp smoked paprika, 1.5 tbsp chili powder, 1 tbsp garlic powder, 1 tbsp onion powder, 1 tbsp ground black pepper, and 1.5 tbsp kosher salt. Mix well, then generously coat both sides of the ribs with the dry rub. Press it into the meat so it sticks—this ensures bold flavor in every bite. Let the seasoned ribs sit at room temperature for 30 minutes while you prepare the oven.
🔥 Step 2: Build the Glaze and Preheat the Oven
While the ribs season, make the glaze by combining 0.25 cup apple cider vinegar, 0.5 cup honey, 2 tbsp molasses, 1 tbsp yellow mustard, 2 tbsp butter, 0.25 cup chopped fresh rosemary, and 0.25 cup chopped fresh thyme in a small saucepan. Place over medium heat and stir until the butter melts completely and the mixture comes together into a smooth sauce—about 3-4 minutes. Keep this warm while you preheat your oven to 275°F.
Preheating at this lower temperature is key—it allows the ribs to cook slowly and evenly without drying out. I like to use a baking sheet lined with heavy-duty aluminum foil for easy cleanup. Place a wire rack on top of the foil to allow air circulation underneath the ribs, which helps create that beautiful bark.
🥘 Step 3: Sear and Braise for Perfect Texture
Place the seasoned ribs on the wire rack, bone-side down, and transfer to the preheated oven. Roast for 1 hour to develop a deep bark. Here's the thing—don't open the oven door during this time. Every time you peek, you lose heat and moisture, which can turn your perfect bark into soggy skin. After 1 hour, brush the ribs generously with half of the glaze mixture, coating them completely.
Return the ribs to the oven and continue cooking for another 2-2.5 hours until the meat is fork-tender and pulls away from the bone easily. The internal temperature should reach 195-203°F in the thickest part of the meat. If the glaze starts to caramelize too quickly, tent the ribs loosely with foil to prevent burning while still allowing them to cook through.
🔪 Step 4: Finish with Glaze and Rest
Once the ribs are tender, remove them from the oven and brush with the remaining glaze. Return them to the oven for 5-10 minutes to set the glaze and create a glossy finish. You'll know they're ready when the glaze is bubbly but not burnt, and the ribs have a deep mahogany color with a sticky, caramelized crust.
Transfer the ribs to a cutting board and let them rest for 10-15 minutes before serving. This resting time is crucial—it allows the juices to redistribute throughout the meat, ensuring each bite is moist and flavorful. The ribs should be so tender they practically fall apart when you cut into them, with a perfect balance of sweet, smoky, and tangy flavors.
Pro Tips For Making Baked Bbq Beef Ribs
- Dry the Ribs First: Pat those baby backs thoroughly with paper towels before seasoning—wet ribs steam instead of caramelize. I learned this the hard way when my first batch came out sticky and pale instead of golden and crispy. ---
- Brown Sugar Early: Mix the brown sugar into the dry rub before applying it to the ribs. It clings better and melts into a glossy crust during baking, not just a dusty coating. (Yes, even if you’re impatient like me.) ---
- Skip the Overcrowding: Give the ribs space on the baking sheet—crowding traps steam and turns your crispy crust into sad, soggy paper. Use a second tray if needed; uneven cooking is worse than extra dishes. ---
- Check Internal Temp: Pull the ribs at 195°F internal temp (yes, that high) for tender, pull-apart meat. A meat thermometer is non-negotiable here—guessing leads to chewy, undercooked ribs. (Your future self will thank you.)
Health benefits of baked bbq beef ribs
Protein Powerhouse
These ribs deliver a whopping 40 grams of protein per serving—that's more than a typical steak portion! The slow-cooking process preserves all the amino acids your muscles need for recovery and growth. I always serve these after a long motorcycle ride—the protein helps me rebuild faster. 💪
Rich in B Vitamins
The beef ribs provide essential B vitamins, particularly B12 and niacin, which support energy metabolism and nerve function. These nutrients are especially important for active folks like me who spend hours in the kitchen or on the road. The dry rub doesn't interfere with their absorption either.
Iron for Energy
One serving contains about 2.5mg of iron, which helps transport oxygen in your blood—perfect for maintaining energy levels during those late-night BBQ sessions. The combination of iron and protein makes these ribs a great post-workout meal, especially after a day of foraging for herbs or competing at local BBQ events.
Bone Benefits
Don't overlook the bones! Beef ribs contain calcium and phosphorus that support bone health. The slow cooking process actually makes these minerals more bioavailable, so your body absorbs them more efficiently. I always tell my friends that eating ribs is like taking a calcium supplement with flavor. 🥩
Low-Fat Option
While ribs do contain some fat, the slow-baking method allows much of it to render out, leaving you with a leaner cut than you might expect. The glaze adds sweetness without significant calories, making these ribs a surprisingly balanced meal. I often pair them with a simple green salad to complete the nutrition profile.
Gut-Friendly Fiber
While the ribs themselves aren't high in fiber, the fresh rosemary and thyme in the glaze provide small amounts of dietary fiber that support digestive health. The apple cider vinegar in the glaze also contains probiotics that can help maintain a healthy gut microbiome. It's these little details that make this recipe so much more than just delicious meat.
Nutrition facts
Frequently asked questions about baked BBQ beef ribs
Can I use spare ribs instead of baby back ribs?
Spare ribs will work, but expect a slightly different texture—they're meatier with more connective tissue. For spare ribs, increase cooking time by 30-45 minutes to ensure tender meat. The bark will develop similarly, but spare ribs benefit from an extra 15 minutes of resting time to let all those flavors meld.
Why do my ribs turn out tough instead of tender?
Most likely, you didn't cook them long enough or peeked at the oven too often. Ribs need to reach 195-203°F internally—use a meat thermometer! Also, never skip the resting time. If you're in a hurry, try wrapping them in foil after 2 hours to speed up the process while keeping them moist.
Can I make this recipe in a slow cooker?
Yes! Transfer the ribs to a slow cooker after the initial 1-hour baking to develop the bark. Cook on low for 4-5 hours total, then finish with the glaze in the oven for 5-10 minutes. The slow cooker keeps the meat tender while the oven gives you that perfect crust.
How do I adjust the heat level in the dry rub?
For milder ribs, reduce the chili powder to 1 tbsp and add ½ tsp cayenne instead. For extra heat, increase chili powder to 2 tbsp and add 1 tsp red pepper flakes. Always taste your rub before applying—adjust to your preference!
What's the best way to reheat leftover ribs?
Wrap ribs tightly in foil and reheat at 300°F for 15-20 minutes until warmed through. For extra crispiness, broil for 2-3 minutes at the end. Never microwave—it turns the meat rubbery. Leftovers keep well for 3-4 days in the fridge.