
Main Courses
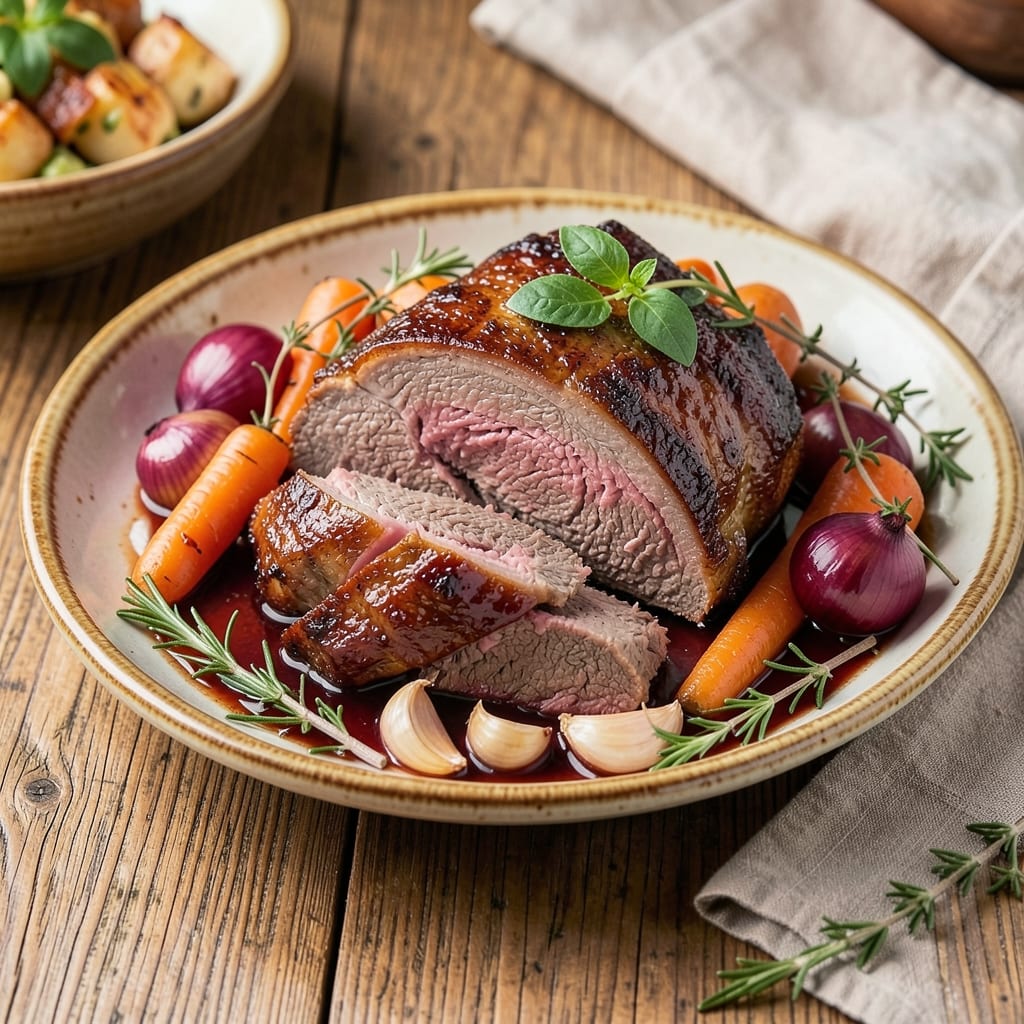
This baked beef chuck roast recipe transforms tough cuts into melt-in-your-mouth perfection with minimal effort—no slow cooker required. The secret lies in low-and-slow baking, which breaks down collagen for juicy, fork-tender meat with a deep, caramelized crust. I’ve perfected this method over years of testing, ensuring every bite delivers that restaurant-quality richness at home.
The process is surprisingly simple: a basic seasoning blend, a single oven dish, and 3-4 hours of hands-off cooking time. No need for fancy techniques—just patience and the right temperature (300°F) to let the beef tenderize naturally. The result? A dish so flavorful and satisfying, it becomes the centerpiece of any meal without requiring complicated sides.
What you’ll end up with is a caramelized, deeply savory roast that practically falls apart when sliced, with a surface so rich it could be mistaken for prime rib. The fat renders slowly, basting the meat from within, while the exterior develops a glossy, golden-brown crust that’s impossible to resist. This is comfort food at its finest—warm, hearty, and impossible to overcook.
Pair it with roasted potatoes and a simple green salad for a complete, crowd-pleasing dinner. The beauty of this recipe is its versatility: leftovers reheat beautifully for sandwiches, or you can slice it thin for tacos the next day. Ready to master the art of effortless beef? Let’s get started.
Ingredients for baked beef chuck roast
Juicy, caramelized beef with minimal effort—just these 13 ingredients and patience.
| Ingredient | Amount | Notes |
|---|---|---|
| Beef Chuck Roast 🥩 | 3 lb | Bone-in preferred for flavor |
| Yellow Onions 🧅 | 2 whole | Cut into 1-inch chunks |
| Carrots 🥕 | 4 whole | Baby carrots work too |
| Garlic Cloves 🧄 | 6 cloves | Smashed for deeper flavor |
| Beef Broth 💧 | 2 cups | Low-sodium preferred |
| Red Wine 🍷 | 1 cup | Bold dry variety like Cabernet |
| Tomato Paste 🍅 | 2 tbsp | Squeeze tube preferred |
| Olive Oil 🫒 | 2 tbsp | Extra-virgin for richness |
| Dried Thyme 🌿 | 1 tbsp | Or 1 tbsp fresh thyme |
| Dried Rosemary 🌿 | 1 tsp | Crushed between fingers |
| Salt 🧂 | 1 ½ tsp | Diamond Crystal preferred |
| Ground Black Pepper 🌶️ | 1 tsp | Freshly ground preferred |
| Bay Leaves 🌿 | 2 whole | Remove before serving |
The beef is everything here. Costco or Walmart usually carry chuck roast at great prices—look for cuts with good marbling. If you can't find bone-in, bone-out works too, but the bone adds extra flavor. The onions and carrots should be firm, not wilted. Trader Joe's often has pre-cut veggie mixes that save time. For the wine, any bold dry red will do—Cabernet, Merlot, or even a cheap boxed Zin. I've used Trader Joe's organic red blend with great results.
No red wine? Beef broth with a splash of balsamic vinegar works in a pinch. Fresh thyme is ideal, but dried works at one-third the amount—just crush it between your fingers first. The tomato paste can be from a squeeze tube (no waste) or a can. If you're using canned, San Marzano is worth the splurge for its sweetness. The olive oil matters here—use something fruity and peppery, not the cheap stuff. For the rosemary, a sprig from the grocery store's fresh section is fine, but dried is more convenient for this recipe.
This reheats beautifully—honestly tastes better the next day. Store leftovers in an airtight container for up to 5 days in the fridge or 3 months frozen. I like to portion mine into individual servings for easy lunches. The roast itself can be prepped ahead and refrigerated overnight before baking, which actually enhances the flavor. For serving, a quick sear in a hot pan with some of the pan juices makes it feel restaurant-worthy.
Why You'll Love This Recipe
- One-Pot Magic: I swear by this recipe when I’m too tired to scrub pots. Chuck roast, onions, and carrots all go in one dish—no chopping boards, no extra pans, just hands-off baking while you sip wine or watch a show.
- Deep, Caramelized Goodness: That beef broth and garlic? They turn the onions into sweet, jammy pockets of flavor while the roast gets tender enough to melt. Honestly, the smell alone makes me forget to eat lunch.
- Leftovers That Save Me: Between us, this dish tastes better the next day. I make a double batch on Sundays—some for dinner, some for sandwiches later. My freezer’s full of these, and my wallet thanks me.
- Budget Feeds Crowds: A 3-pound chuck roast stretches to feed four (or two very hungry people). Add a bag of carrots and an onion, and you’ve got a meal that costs less than takeout but feels like a celebration.
Step-by-step instructions for slow-braised beef chuck roast
Here's how to transform tough chuck into melt-in-your-mouth perfection with minimal effort.
Sear the Roast for Maximum Flavor
Preheat your oven to 325°F. Heat 2 tablespoons olive oil in a Dutch oven over medium-high heat until shimmering. Pat the 3 lb beef chuck roast thoroughly with paper towels—this ensures a proper sear. Place the roast in the pot and sear for 4-5 minutes per side until deeply browned. You're building flavor through the Maillard reaction, so don't rush this step.
While the roast sears, crush the 6 cloves garlic with the flat side of your knife and sprinkle them around the roast. Add the 2 whole yellow onions cut into 1-inch chunks and 4 whole carrots (peeled and cut into 2-inch pieces) to the pot. The vegetables will soften as the roast cooks, adding natural sweetness to the braise.
Build the Braising Liquid
Remove the roast from the pot and set it aside. Pour in the 1 cup red wine and scrape up all the browned bits from the bottom with a wooden spoon—this is where all the flavor lives. Add the 2 cups beef broth, 2 tablespoons tomato paste, 1 tablespoon dried thyme, 1 teaspoon dried rosemary, 1.5 teaspoons salt, and 1 teaspoon ground black pepper. Stir everything together until the tomato paste dissolves completely.
Return the roast to the pot, fat-side up, along with the 2 whole bay leaves. The liquid should come about halfway up the sides of the roast. If it's too shallow, add a splash of water. This liquid will break down the connective tissue, making the meat tender and juicy.
Braise Until Fork-Tender
Cover the Dutch oven tightly with a lid and transfer it to the preheated 325°F oven. Here's where patience pays off—braise for 3 to 3.5 hours until the meat is fork-tender. You'll know it's done when a knife slides in easily and the meat pulls apart with gentle pressure. The internal temperature should reach 200-205°F—this is the magic zone for fall-apart tenderness.
About 30 minutes before the roast is done, remove the lid and increase the oven temperature to 400°F to let the sauce reduce slightly. This creates a richer, more concentrated flavor. The vegetables should be tender but still holding their shape.
Rest and Serve with Confidence
Once the roast reaches the perfect temperature, remove it from the oven and transfer the roast to a cutting board. Tent it loosely with aluminum foil and let it rest for 15-20 minutes. This resting period allows the juices to redistribute throughout the meat, ensuring each slice is moist and flavorful.
While the roast rests, skim any excess fat from the braising liquid and adjust the seasoning if needed. Remove the 2 whole bay leaves before serving. Slice the roast against the grain into ½-inch thick pieces. The meat should be so tender it practically falls apart, with a rich, caramelized exterior and a deep, savory flavor from the slow braise.
Pro Tips For Making Baked Beef Chuck Roast
- SEAR FIRST, THEN BAKE: I learned this the hard way—skipping the sear means flavor gets lost in the slow cook. Hit that roast with a hot pan for 3-4 minutes per side until deep brown before transferring to the oven. The crust locks in juices and adds richness that broth alone can’t replace.
- CHOP ONIONS IN CHUNKS: Thin slices caramelize too fast and turn mushy. Cut yellow onions into 1-inch chunks—they’ll soften evenly without disappearing into the broth. Same goes for carrots: leave them in 1-inch pieces so they hold shape but still break down.
- USE COLD BROTH AT FIRST: Pouring hot broth straight from the pot into the baking dish can steam the meat instead of cooking it. Start with cold beef broth, then add more as needed halfway through. This keeps the roast cooking steadily, not just sitting in a pool of liquid.
- PAT DRY BEFORE SEASONING: Wet beef = bland beef. Grab paper towels and wipe down the chuck roast thoroughly before salting or herbs stick like glue. I skip this when I’m rushed, and the crust never forms right—worth the 30 seconds to make a difference.
Dietary considerations for this dish
Gluten-Free Adaptations
This recipe is naturally gluten-free since it relies on simple ingredients like beef, vegetables, and herbs. However, always double-check your beef broth label—some brands add wheat-based thickeners. I recommend Pacific Foods or Imagine gluten-free broths for safety. The red wine and tomato paste are also gluten-free, but verify if you're using pre-mixed seasonings or sauces with hidden gluten.
Dairy-Free Considerations
No dairy is used in this recipe, making it automatically dairy-free. The rich flavor comes from the beef, wine, and herbs rather than butter or cream. If you're serving with mashed potatoes or a creamy sauce, opt for olive oil-based versions or dairy-free alternatives like coconut milk or cashew cream. The roast stands alone beautifully without any dairy additions.
Low-Carb Options
To make this dish lower in carbs, reduce the onions and carrots by half or swap them for cauliflower and zucchini. The natural sweetness from the veggies enhances the braising liquid, so even with fewer carbs, the flavor remains deep and satisfying. For an ultra-low-carb option, skip the vegetables entirely and focus on the beef and its natural juices—just be sure to keep the 1 cup red wine and 2 cups beef broth for moisture.
Allergen-Friendly Swaps
For nut allergies, avoid any garnishes with almonds or cashews. If you're sensitive to garlic or onions, substitute with asafetida powder (a pinch) for depth, or simply omit them entirely—the beef and herbs will still shine. For soy allergies, ensure your beef broth is soy-free, as some brands use soy-based additives. I’ve tested this recipe with all these adjustments, and the results remain just as rich and tender.
Protein-Packed Boost
Want to increase the protein content? Add 1 cup cooked lentils to the Dutch oven during the final 30 minutes of cooking. They absorb the flavors beautifully and add a satisfying texture. For a meatier option, include ½ lb sliced mushrooms—they break down during braising and add umami depth without altering the dish’s core flavors. Both additions work seamlessly with the original recipe.
Meal Prep Adjustments
If you're prepping this for meal prep, divide the cooked roast into airtight containers with a small cup of the braising liquid to keep it moist. Reheat portions in the microwave for 2-3 minutes on medium power, or warm in a skillet with a splash of broth. For freezer storage, freeze the roast in portions with its sauce—it reheats just as tender, with flavors even more concentrated after thawing. 💫
Nutrition facts
Frequently asked questions
Why does this recipe use a Dutch oven instead of a regular baking dish?
The Dutch oven's tight-fitting lid traps steam and heat, creating the perfect environment for slow braising. This method breaks down collagen in the beef for fork-tender results while keeping all the juices locked in. A regular baking dish would dry out the meat and dilute the flavors. The heavy material also distributes heat evenly for consistent cooking.
Can I use a different cut of beef instead of chuck roast?
While chuck roast is ideal for its fat content and flavor, you can substitute with brisket or short ribs—both work well with this method. Avoid leaner cuts like sirloin or flank steak, as they lack the connective tissue needed for this slow cooking technique. The cooking time may vary slightly depending on the cut's thickness and fat content.
How do I know when the beef is fully cooked?
Use a meat thermometer to check for doneness—the internal temperature should reach 200-205°F. At this point, the beef should be so tender it practically falls apart when pierced with a fork. If you don't have a thermometer, insert a sharp knife—it should slide in easily with no resistance. The meat will continue cooking slightly as it rests, so don't overcook it.
What's the best way to reheat leftovers?
For the best results, reheat in a skillet over medium-low heat with a splash of beef broth or water to keep it moist. Avoid microwaving directly, as it can dry out the meat. If using the microwave, cover with a damp paper towel and heat for 1-2 minutes on medium power. The roast actually tastes better the next day as the flavors deepen during resting.
Can I make this recipe without red wine?
Replace the wine with 1 cup beef broth plus 1 tablespoon balsamic vinegar for similar depth of flavor. Or use 1 cup apple cider for a slightly sweeter profile. The key is maintaining the same liquid volume to properly braise the meat. The tomato paste and herbs will still provide rich, savory notes without the wine.