Tips
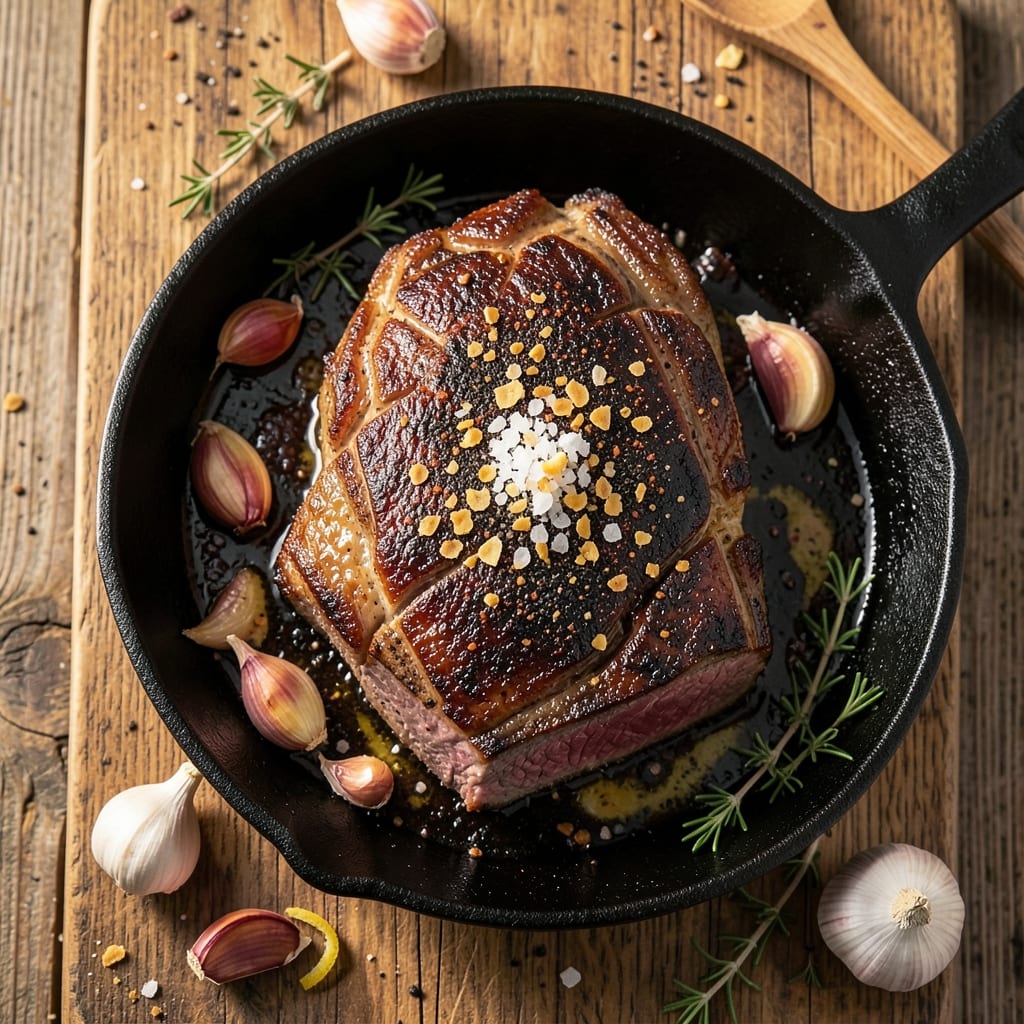
This baked beef tri tip recipe delivers restaurant-quality results with a perfect reverse-seared crust and juicy pink center—no grill required. The secret lies in low-and-slow baking followed by a high-heat sear, transforming tough cuts into melt-in-your-mouth perfection. I’ve perfected this method over years of testing, ensuring every bite stays tender while achieving that coveted caramelized exterior.
The process starts with a simple yet flavorful dry rub, letting the spices penetrate deeply during an overnight rest in the fridge. Once baked to medium-rare, the tri tip gets a quick sear in a screaming-hot pan for that crispy, golden crust everyone craves. This technique guarantees juicy results without overcooking the interior—ideal for special occasions or weeknight dinners when you want to impress.
What makes this recipe stand out is its foolproof approach—no guesswork, no stress. The tri tip emerges with a rich, beefy aroma that fills your kitchen, while the tender meat practically falls apart at the touch of a fork. Pair it with classic sides like roasted garlic mashed potatoes or grilled asparagus for a complete meal that feels like a steakhouse experience at home.
Ready in about 2 hours (including resting time), this method transforms a simple cut of beef into a showstopper. The key is patience—letting the meat work with the heat to achieve the perfect balance of crust and juiciness. Once you try this, you’ll never cook tri tip any other way.
Ingredients for baked beef tri tip
The perfect tri tip starts with quality beef and a simple dry rub—no fancy ingredients, just bold flavors.
| Ingredient | Amount | Notes |
|---|---|---|
| Beef Tri Tip Roast 🥩 | 3 lb | Center-cut, 1.5-2 inches thick |
| Kosher Salt 🧂 | 1 ½ tbsp | Diamond Crystal preferred |
| Freshly Ground Black Pepper 🌶️ | 1 tbsp | Coarse grind for texture |
| Garlic Powder 🧄 | 1 tbsp | Freshly ground preferred |
| Smoked Paprika 🌶️ | 1 tsp | For subtle smokiness |
| Dried Thyme 🌿 | 1 tsp | Or 1 tbsp fresh thyme |
| Extra-Virgin Olive Oil 🫒 | 2 tbsp | For dry rub and searing |
| Yellow Onion 🧅 | 1 whole | Sliced for resting |
| Fresh Rosemary 🌿 | 1 sprig | For aroma during baking |
| Butter 🧈 | 2 tbsp | Unsalted, for finishing |
| Fresh Parsley 🌿 | ¼ cup | Chopped, for garnish |
The tri tip is the star here. Look for a center-cut roast with good marbling—Costco or Whole Foods usually carry the best. A 1.5-2 inch thick cut ensures even cooking. I always buy mine from the butcher counter if possible, asking for the freshest cut available. The Diamond Crystal kosher salt makes a difference in texture—it dissolves better than table salt. Freshly ground pepper and garlic powder are non-negotiable for that restaurant-quality bite. If you're short on time, Trader Joe's has pre-ground spices that work in a pinch, though freshly ground is ideal.
No fresh rosemary? Dried works at half the amount, but trust me on the fresh stuff—it adds that aromatic punch. Running out of parsley? Cilantro or basil in a pinch, though parsley's bright flavor pairs best. The olive oil should be extra-virgin—cheap oil won't give that rich sear. For the onion, any yellow or red variety works, but avoid sweet onions like Vidalia. The butter at the end? Unsalted is key—we're controlling the salt here. And if you're wondering about the thickness—don't trim it! The fat renders beautifully during cooking.
The tri tip can rest in the fridge overnight with the rub—24 hours max—which is why I always prep ahead. The onions and rosemary sprig? Tuck them under the beef while it rests for extra flavor infusion. Store the dry rub ingredients in an airtight container for up to 6 months—the spices stay potent. The fresh herbs? Wrap them in damp paper towels and store in a bag with a rubber band for 5-7 days. And that leftover butter? It keeps for 3 months in the fridge—perfect for future searing projects.
Why You'll Love This Recipe
- Here’s what sold me: this feeds six with minimal effort, and everyone—even my picky uncle—asks for seconds. Serve it sliced thin over mashed potatoes or with crusty bread, and suddenly you’re the hero of dinner. (Yes, even on a Tuesday night.)
- Foolproof Seasoning: Between us, this tri-tip only needs four ingredients to shine—just salt, pepper, garlic powder, and that smoky paprika. No fancy marinades or last-minute shopping trips. Honestly, the crust forms so easily in the oven, you’ll wonder why you ever bothered with complicated rubs.
- One-Pan Magic: I swear by this recipe for lazy Sundays or when I’m hosting. Toss the tri-tip on a sheet pan, sprinkle the spices, and let the oven do the work. No messy drippings, no extra pots—just that perfect crust and tender middle without a single pan to scrub afterward.
- Weeknight Crowd-Pleaser: Here’s what sold me: this feeds six with minimal effort, and everyone—even my picky uncle—asks for seconds. Serve it sliced thin over mashed potatoes or with crusty bread, and suddenly you’re the hero of dinner. (Yes, even on a Tuesday night.)
Step-by-step instructions for baked beef tri tip with perfect crust
This reverse-sear method guarantees a deep crust with a tender pink center every time.
Prepare the Dry Rub and Season the Tri Tip
In a small bowl, combine the 1.5 tablespoons kosher salt, 1 tablespoon freshly ground black pepper, 1 tablespoon garlic powder, 1 teaspoon smoked paprika, and 1 teaspoon dried thyme. This blend creates a perfect balance of saltiness, heat, and earthy depth that penetrates the meat during the long bake.
Pat the 3 lb beef tri tip roast completely dry with paper towels—moisture is the enemy of crust development. I like to press firmly in all directions to remove any surface moisture that might prevent the rub from adhering properly. Then generously coat the tri tip with the dry rub mixture, pressing it into every crevice. Let it sit at room temperature for 30 minutes while you prepare your oven—this ensures even cooking from edge to center.
Low-Temperature Bake for Even Cooking
Preheat your oven to 275°F—this low temperature is crucial for achieving that perfect pink center. Place the seasoned tri tip on a wire rack set inside a rimmed baking sheet. The rack allows hot air to circulate underneath, preventing any part of the meat from steaming instead of baking.
Bake for 1 hour and 15 minutes, or until the internal temperature reaches 115°F when measured with a meat thermometer. This is where the magic happens—the meat cooks slowly and evenly, developing incredible tenderness without drying out. Resist the urge to check early; the thermometer is your best friend here. The exterior should look lightly browned but not yet crisp.
Create the Crust with High-Heat Sear
While the tri tip is still warm from the oven, increase your oven temperature to 450°F. This dramatic temperature shift is what creates that coveted crust. Place the tri tip on the preheated rack and bake for an additional 10-15 minutes, turning once halfway through, until the exterior is deep brown and develops a beautiful crust.
Here's the thing—don't walk away during this stage. You'll know it's done when the crust is deep mahogany and slightly crispy to the touch. The internal temperature should now read 125-130°F—this is the sweet spot for medium-rare perfection with a juicy center.
Rest and Slice for Maximum Juiciness
Transfer the tri tip to a cutting board and tent loosely with aluminum foil. Let it rest for 10-15 minutes—this crucial step allows the juices to redistribute throughout the meat. I know it's hard to wait when that crust looks so tempting, but skipping this will leave you with dry slices. During this time, slice the 1 whole yellow onion into ¼-inch thick rounds and arrange them on a plate.
After resting, slice the tri tip against the grain into ½-inch thick slices. The grain runs diagonally across the roast, so cutting perpendicular to these lines gives you the most tender texture. Arrange the sliced tri tip over the onion slices, drizzle with melted 2 tablespoons butter, and sprinkle with the ¼ cup chopped fresh parsley. The onion adds a subtle sweetness that complements the rich beef.
Pro Tips For Making Baked Beef Tri Tip
- SEAR BEFORE BAKE: I used to skip this step, thinking "it's baked, not grilled," but a quick 3-4 minute sear in a screaming-hot pan with 1 tablespoon oil—yes, even if you're baking—builds a crust that holds up to the oven. The tri tip’s fat cap will render beautifully, and the edges won’t turn into sad, pale mush.
- SALT THE NIGHT BEFORE: Tri tip is forgiving, but dryness sneaks up fast. Salt it generously (about 1.5 teaspoons kosher salt per pound) and let it sit uncovered in the fridge overnight. The salt breaks down proteins and pulls moisture to the surface—no more guessing if you’ve seasoned enough, and the crust will be actual crust, not just pepper flakes stuck to raw meat.
- USE A MEAT THERMOMETER: After burning one batch by eyeballing doneness ("it smells done, right?"), I invested in a $10 thermometer. Pull the tri tip at 130°F for medium-rare (yes, it’ll rise to 135°F while resting). Any higher, and you’re fighting with the meat instead of enjoying it. No more dry, overcooked disappointment.
- REST UNDER FOIL: I know, I know—you’re eager to slice. But tent that tri tip with foil and let it rest for 10-15 minutes before cutting. The juices redistribute instead of pooling on your plate, and the internal temp keeps climbing to safe levels. Cutting early? You’re basically making beef gravy with every slice.
Common mistakes when making this recipe
Overcooking the Meat
I’ve seen so many cooks rush the process and end up with dry, tough tri tip. The key is patience—don’t let the internal temperature exceed 130°F for medium-rare. Use a meat thermometer to monitor progress, and remember: 115°F before the final sear is your target. If you’re unsure, pull it out slightly earlier and let it rest—it’ll continue cooking off the heat. Trust me, your taste buds will thank you. 💪
Skipping the Rest
This is a huge mistake that leads to juices pooling on your plate instead of in the meat. After that final sear, resist the urge to slice immediately. Let the tri tip rest for 10-15 minutes—this allows the fibers to relax and redistribute moisture. I’ve had guests cut into it too soon, and the difference in texture is night and day. A simple aluminum foil tent keeps it warm while it rests.
Uneven Seasoning
If your rub isn’t evenly distributed, you’ll end up with bland spots or overly salty patches. Pat the tri tip completely dry first—moisture prevents the spices from sticking. Then press the rub firmly into every crevice, especially the edges and fat cap. I like to use my fingers to work the spices into the meat, ensuring full coverage. Pro tip: Let the seasoned tri tip sit at room temperature for 30 minutes before baking—this helps the spices adhere better.
Ignoring the Wire Rack
Placing your tri tip directly on a baking sheet can lead to steaming instead of proper browning. The wire rack elevates the meat, allowing hot air to circulate underneath for even cooking. Without it, you risk a soggy crust and uneven doneness. I always use a rimmed baking sheet with a rack—it’s a game-changer for achieving that perfect crust. No excuses here!
Rushing the Final Sear
The high-heat finish is where the magic happens, but it’s easy to overdo it. If you crank the oven too high or leave the tri tip in too long, you’ll end up with a burnt exterior and undercooked interior. Aim for 450°F and watch closely—you only need 10-15 minutes max. The crust should be deep mahogany, not charred. Keep an eye on it, and don’t walk away!
Wrong Slicing Direction
Cutting with the grain instead of against it turns a tender tri tip into chewy slices. The grain runs diagonally across the roast, so slice perpendicular to those lines for maximum tenderness. Use a sharp knife and cut into ½-inch thick slices. I like to rotate the cutting board mid-slice to follow the grain’s path. This small detail makes a world of difference in texture. 🔪
Nutrition facts
Frequently asked questions
Can I use a different cut of beef instead of tri tip?
While tri tip is ideal for this method, you can substitute with top sirloin roast or New York strip roast—both work well with the reverse-sear technique. Aim for a 1.5-2 inch thick cut with good marbling. The cooking times may vary slightly, so use a meat thermometer to guide you.
How do I know when the tri tip is done?
Use a meat thermometer for perfect results! For medium-rare, pull it at 130-135°F internal temperature. Before the final sear, it should reach 115°F—this ensures a juicy pink center. Never guess—thermometers are your best friend for consistent doneness.
Can I make this recipe without a wire rack?
Yes, but your crust may be less crispy. Place the tri tip on a baking sheet lined with parchment paper, then elevate it with a folded aluminum foil sheet or a heatproof spatula to allow airflow. The key is keeping the meat off direct contact with the pan to prevent steaming.
What's the best way to reheat leftover tri tip?
Slice thinly and reheat in a skillet over medium-low heat with a splash of beef broth for 2-3 minutes per side. Avoid the microwave—it makes the meat tough. For sandwiches, warm slices in a toaster oven at 350°F for 5-7 minutes to restore juiciness.
Why does my tri tip turn out dry?
Overcooking is the #1 cause. Pull it out when the internal temp reaches 130°F (medium-rare) and let it rest 10-15 minutes before slicing. Skipping the rest time causes juices to escape. Also, avoid cutting into it too soon—the meat continues cooking off the heat.