
Breakfast & Brunch
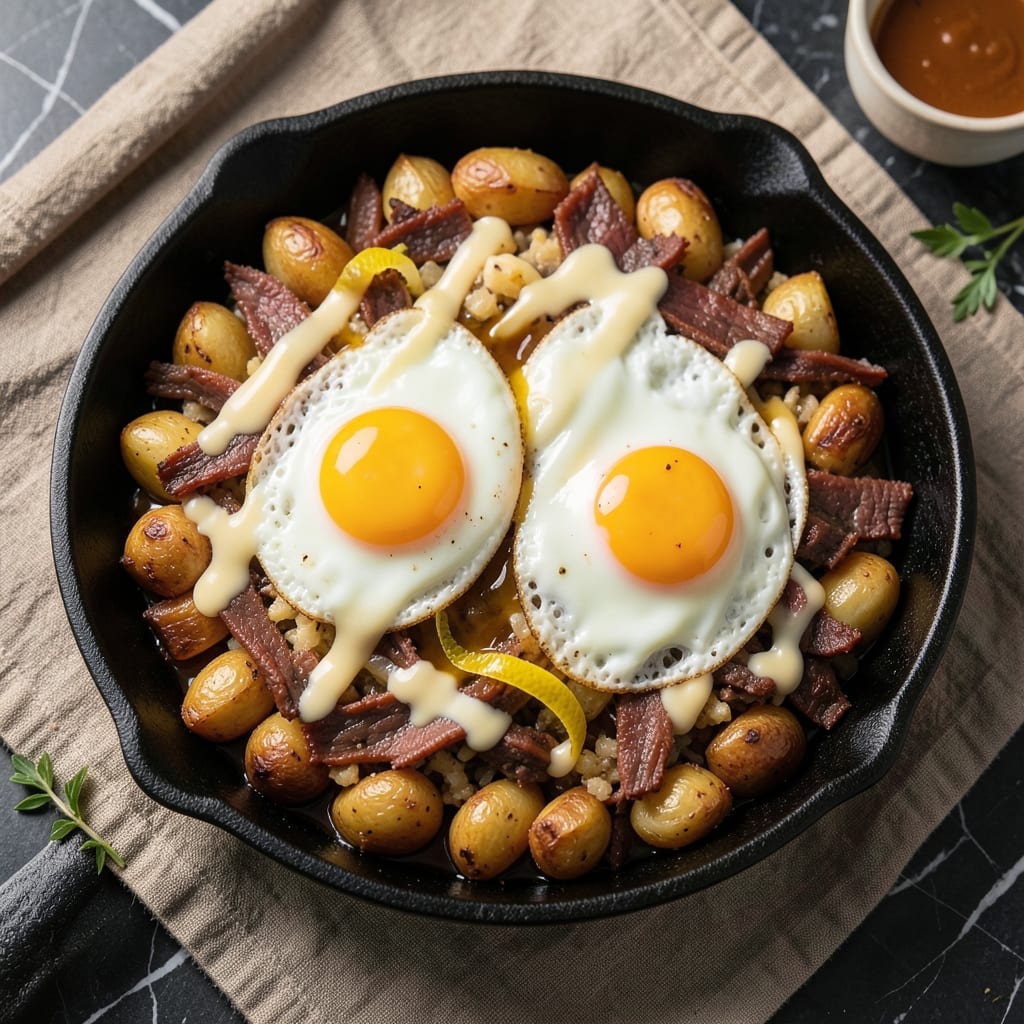
This baked corned beef hash and eggs recipe transforms brunch into a hearty, crispy masterpiece that’s ready in under 30 minutes. The secret lies in layering diced potatoes and corned beef with sharp cheddar, then baking until golden and bubbling—while the eggs fry to perfection in the same pan. I developed this after craving a dish that combined the comfort of corned beef hash with the simplicity of fried eggs, and it’s become a weekend staple in my kitchen.
The magic starts with high-heat baking to create that crispy potato crust, while the corned beef adds deep, savory depth. The dish balances rich flavors with the freshness of fried eggs, making it a satisfying meal that feels both indulgent and balanced. No fancy techniques—just a foolproof method that delivers restaurant-quality results at home, even on busy mornings.
What you’ll end up with is a crispy, cheesy hash topped with perfectly fried eggs, their yolks still runny and golden. The dish stays hot long enough to serve as a family meal, and leftovers reheat beautifully for quick lunches. This is the kind of brunch that makes lazy Sundays feel special without requiring hours in the kitchen.
Pair it with pickled vegetables or a dollop of sour cream for extra brightness, or keep it simple with a sprinkle of fresh parsley. The recipe scales easily for a crowd, but the fast prep time means you’ll still have time to enjoy your meal instead of spending it cooking. Let’s get started!
Ingredients for baked corned beef hash and eggs
Crispy potatoes, savory corned beef, and golden fried eggs—just 12 ingredients for brunch perfection.
| Ingredient | Amount | Notes |
|---|---|---|
| Russet Potatoes 🥔 | 2 ½ lb | Diced into 1/2-inch pieces |
| Corned Beef 🥩 | 1 lb | Diced, high-quality deli cut |
| Sharp Cheddar Cheese 🧀 | 1 cup | Shredded, aged for flavor |
| Large Eggs 🥚 | 4 whole | Fresh, cold from fridge |
| Unsalted Butter 🧈 | 3 tbsp | Melted for crispy potatoes |
| Yellow Onion 🧅 | 1 whole | Diced, medium size |
| Garlic Cloves 🧄 | 4 cloves | Minced, fresh preferred |
| All-Purpose Flour 🌾 | 2 tbsp | For crispy potato crust |
| Salt 🧂 | 1 ½ tsp | Kosher or sea salt |
| Black Pepper 🌶️ | ½ tsp | Freshly ground |
| Fresh Parsley 🌿 | ¼ cup | Chopped, for garnish |
| Vegetable Oil 🫒 | 2 tbsp | For frying eggs |
The potatoes are non-negotiable here. Russets give you that crispy crust—Yukon Golds work too, but Russets hold their shape better. Grab a 2.5 lb bag from the grocery store's produce section, or pre-cut diced potatoes if you're short on time. The corned beef? Deli counters have the best selection—look for thick-cut, high-quality brisket or pastrami if you want to switch it up. Fresh parsley is optional but adds that bright pop of color, so I always grab a bunch when I'm at the store.
No corned beef? Deli ham or leftover roast beef work in a pinch, but the flavor won't be quite the same. Running low on sharp cheddar? Pepper Jack or Gruyère add different but delicious layers. The eggs should be cold from the fridge—room temperature makes them harder to fry perfectly. For the potatoes, if you can't find Russets, Idaho potatoes are your next best bet. And if you're feeling fancy, swap the vegetable oil for duck fat—it adds an insane amount of richness.
This dish reheats like a dream—just pop it in the oven at 375°F for 10 minutes to crisp it back up. Store leftovers in the fridge for 3 days or freeze for up to 2 months. I always make a double batch because it disappears fast. The eggs are best fried fresh, but you can prep the hash ahead and fry them right before serving. That crispy potato crust? Worth the extra minute of baking time to get it golden.
Why You'll Love This Recipe
- One-Pan Magic: I swear by this trick—just toss diced potatoes, leftover corned beef, and butter on a sheet pan, bake, then crack eggs right into the hot hash. No flipping, no fuss, and honestly? The crispy edges on those potatoes? Chef’s kiss.
- Salty-Savory Dream: That sharp cheddar melts into gooey perfection while the corned beef adds briny depth, and the eggs? Sunny-yolk perfection tying it all together. It’s like a hug for your taste buds—rich, tangy, and just a little indulgent.
- Leftovers? No Problem: Between us, this dish tastes even better the next day. Reheat slices of corned beef and hash in a skillet, top with a fried egg, and boom—breakfast for lunch or dinner for breakfast. My lunchbox’s new best friend.
- Budget Breakfast Win: Russets and corned beef stretch this meal for days, and sharp chedddar adds that chef’s touch without breaking the bank. I’ll be real: it’s my go-to when grocery money’s tight, but no one ever guesses it’s “frugal.”
Step-by-step instructions for baked corned beef hash and eggs
Here's how to turn simple ingredients into a hearty breakfast with crispy potatoes and perfectly fried eggs.
Prep and Par-Cook the Potatoes
Preheat your oven to 425°F. In a large bowl, toss the 2.5 lb diced russet potatoes with the 3 tbsp melted unsalted butter, 1.5 tsp salt, and 0.5 tsp black pepper. Spread them evenly on two rimmed baking sheets, leaving space between pieces. Bake for 20 minutes until they begin to soften but aren't browned.
Here's the thing—par-cooking the potatoes first ensures they get properly tender without turning mushy. You want them soft enough to mash slightly when pressed, but still holding their shape. This step also prevents a watery hash later. Remove the potatoes and let them cool slightly while you prep the rest.
Build the Hash Layer
In a large skillet, heat the 2 tbsp vegetable oil over medium-high heat. Add the 1 lb diced corned beef and cook for 4-5 minutes until heated through. Remove and set aside. In the same skillet, add the 1 whole diced yellow onion and cook for 3 minutes until softened.
Add the 4 cloves minced garlic and cook for 30 seconds until fragrant. Stir in the 2 tbsp all-purpose flour and cook for 1 minute to remove the raw flour taste. Return the corned beef to the skillet and mix everything together. Transfer this mixture to a 9x13-inch baking dish.
Layer and Bake the Hash
Spread the par-cooked potatoes evenly over the corned beef mixture in the baking dish. Sprinkle the 1 cup shredded sharp cheddar cheese evenly over the top. Bake at 425°F for 20-25 minutes until the potatoes are golden brown and the cheese is bubbly.
I like to press down gently on the potatoes during the first 5 minutes of baking—this prevents them from puffing up too much and ensures even browning. You'll know it's ready when the edges are crispy and the cheese has melted completely into a gooey layer on top.
Fry the Perfect Eggs
While the hash bakes, heat a separate skillet over medium-low heat with 1 tbsp vegetable oil. Crack the 4 cold eggs directly into the skillet (no pre-cracking in bowls). Cook for 3-4 minutes until the whites are set but the yolks are still runny. Remove and set aside on a warm plate.
This is the moment that matters: cold eggs from the fridge help create those perfect runny yolks. Don't walk away—watch the heat carefully. The oil should be hot enough to sizzle gently but not so hot that the eggs cook too quickly. You want that classic sunny-side-up look with just-set whites.
Serve with Crispy Topping
Once the hash is done, let it rest for 5 minutes to set. Use a fork to fluff the potatoes slightly, creating a rustic texture. Garnish with the 0.25 cup chopped fresh parsley and serve immediately with the fried eggs on top.
Here's the best part: the crispy potato crust on top contrasts perfectly with the creamy cheese and tender corned beef. Each bite delivers that satisfying crunch followed by warm, savory hash. And those runny yolks? They're the perfect finishing touch to tie everything together.
Pro Tips For Making Baked Corned Beef Hash And Eggs
- CRANK THE OVEN HIGH: Start your potatoes and corned beef at 425°F (220°C) for the first 20 minutes—this gets them crispy on the outside before they steam. I used to bake at 375°F and ended up with soggy potatoes every time.
- CUBE THE POTATOES UNEVENLY: Cut them into chunks ranging from 1-inch to ½-inch—this ensures some pieces crisp faster while others stay tender. My grandmother swore by this, and she was right: uniform cubes turn to mush.
- DRAIN THE CORNED BEEF WELL: Pat it dry with paper towels before dicing—wet meat steams instead of browning. I learned this the hard way after a batch of pale, sad hash that tasted more like a stew.
- SALT THE POTATOES BEFORE BAKING: Toss them with 1 teaspoon of salt (and pepper) before adding cheese—it seasons the edges as they crisp. Skip this, and you’ll be chasing flavor with extra salt after baking.
Essential equipment for perfect results
Oven Essentials
You’ll need a 9x13-inch baking dish—I use Ceramic Non-Stick from Ozeri—to hold the hash while it bakes. The dish should be oven-safe and deep enough to handle the potato layers without spilling. For the 425°F baking, a convection oven (if available) ensures even browning and crispiness. If you don’t have one, just rotate the dish halfway through baking. 🔥
Skillet Must-Haves
A 12-inch cast-iron skillet is your best friend for both the corned beef and eggs. I swear by a Lodge Pre-Seasoned skillet—it retains heat perfectly and develops a natural non-stick surface over time. For the eggs, a non-stick frying pan (like GreenPan) works too, but cast iron gives that classic crispy edge. Avoid aluminum—it heats unevenly and can ruin your eggs.
Prep Tools
Grab a sharp chef’s knife (I use Mercer Culinary Genesis) and a cutting board for dicing the potatoes, onions, and corned beef. A mandoline speeds up the potato prep if you’re making this often, but a knife works fine. For mincing garlic, a garlic press saves time, but a knife works too. Don’t skip the measuring spoons—precise amounts of salt, pepper, and flour make all the difference. ✨
Optional Upgrades
For extra crispiness, a wire cooling rack helps drain excess oil from the potatoes before baking. A digital meat thermometer (like Thermoworks Smoke) ensures the hash reaches 165°F safely. If you love runny yolks, a slotted spoon makes it easy to transfer fried eggs without breaking them. And for serving, a wooden spoon adds rustic charm to fluff the hash. 💡
Budget-Friendly Swaps
No cast-iron skillet? A stainless steel pan works for the corned beef, though it may need more oil. For eggs, a non-stick spray (like Pam) on a regular pan prevents sticking. Skip the mandoline and use a potato ricer or fork to mash the potatoes slightly. A baking sheet can replace the 9x13-inch dish if you’re short on space—just spread the hash in a single layer. Every kitchen has these basics!
Nutrition facts
Frequently asked questions
Can I make this hash ahead of time?
The hash actually tastes even better the next day. Assemble and bake it as directed, then store in an airtight container in the fridge for up to 3 days. Reheat in a 375°F oven for 10 minutes to restore crispiness before serving. The eggs are best fried fresh, but you can prep the hash ahead and fry them right before eating.
What if I don't have corned beef?
No problem! Use deli ham, pastrami, or even leftover roast beef as substitutes. For extra flavor, try smoked sausage or bacon (cooked and crumbled). Just reduce the cooking time slightly since these meats may be pre-cooked. The dish will still be delicious—just with a different flavor profile.
How do I get the potatoes extra crispy?
The secret is in the par-cooking and flour coating. After par-baking, toss the potatoes with 1 tbsp flour before adding them to the baking dish. This creates a crispy crust. Also, bake on the middle rack for even heat circulation, and press down gently with a spatula during the first 5 minutes to prevent puffing.
Can I make this dish in a smaller baking dish?
Yes, but you'll need to adjust the baking time. Use a 9x9-inch dish instead of 9x13-inch, but reduce the oven temperature to 400°F and bake for 25-30 minutes. The smaller surface area means the edges will crisp faster, so watch closely. For best results, spread the hash in a single even layer rather than piling it high.
What's the best way to reheat leftovers?
For maximum crispiness, reheat in the oven. Place leftovers on a baking sheet and bake at 375°F for 10-12 minutes until heated through. If using the microwave, cover with a damp paper towel and heat in 30-second intervals until warm—this prevents sogginess. The eggs don't reheat well, so always fry fresh ones when serving leftovers.