
Soups & Stews
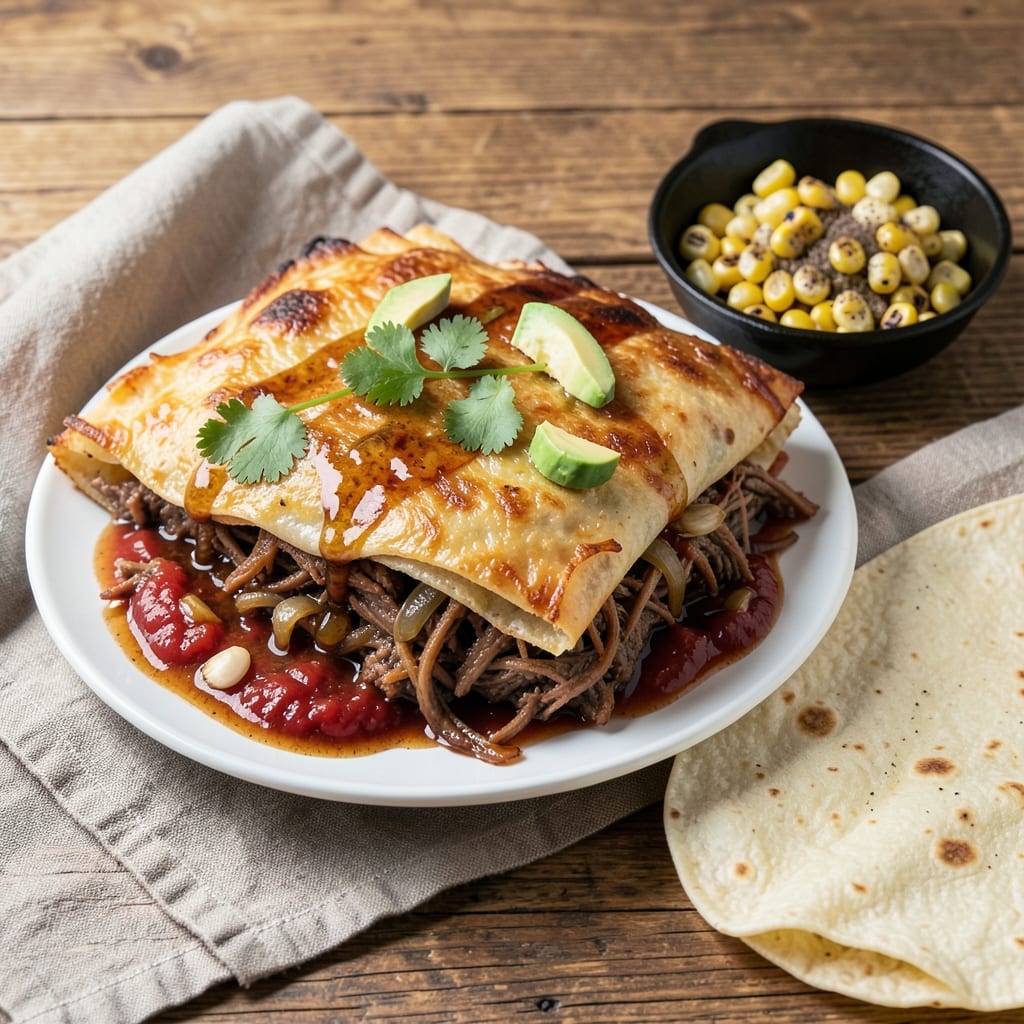
This baked shredded beef chimichanga recipe transforms a simple weeknight meal into a restaurant-worthy showstopper with its crispy golden crust and gooey melted cheese. The secret lies in slow-braised beef that practically falls apart, wrapped in warm tortillas and baked until the edges are perfectly crispy—no deep-frying required. I developed this version after craving that satisfying crunch without the mess, and it’s become a staple for game days and casual dinners alike.
The beauty of this recipe is its balance: tender, flavorful beef at the core, encased in a crispy tortilla shell that holds up to every bite. You’ll start with a simple braise for the beef—just onions, garlic, and spices simmered until the meat shreds easily—then assemble everything between layers of cheese and tortillas. The baking step is where the magic happens, turning soft tortillas into a crispy, golden-brown shell that’s impossible to resist.
What you’ll end up with is a dish that’s hearty enough for a main course but easy enough to make on a weeknight. The beef stays moist and packed with flavor, the cheese melts into a creamy blanket, and the tortilla crust achieves that restaurant-quality crunch without any fuss. Serve it with your favorite toppings—sour cream, guacamole, or pico de gallo—and watch it disappear from the table.
This recipe works equally well for feeding a crowd or meal prepping for the week. The leftovers reheat beautifully, making it a practical choice for busy schedules. Whether you’re hosting a party or just craving comfort food, this chimichanga delivers big on flavor and texture. Let’s get started!
Ingredients for baked shredded beef chimichanga
Sixteen ingredients transform simple beef into crispy, cheesy chimichanga magic—no deep-frying required.
| Ingredient | Amount | Notes |
|---|---|---|
| Chuck Roast Beef 🥩 | 2 ½ lb | Center-cut for best texture |
| Yellow Onions 🧅 | 2 whole | Medium, thinly sliced |
| Garlic Cloves 🧄 | 6 cloves | Freshly minced for aroma |
| Beef Broth 💧 | 2 cups | Low-sodium preferred |
| Tomato Paste 🍅 | ¼ cup | Smooth, not chunky |
| Cumin Ground 🌿 | 1 ½ tsp | Toasted for depth |
| Chili Powder 🌶️ | 1 ½ tsp | Medium heat preferred |
| Oregano Dried 🍃 | 1 tsp | Mexican oregano ideal |
| Salt 🧂 | 1 ½ tsp | Diamond Crystal preferred |
| Black Pepper 🌶️ | ½ tsp | Freshly cracked |
| Flour Tortillas 🍞 | 12 whole | Large, 10-inch size |
| Shredded Monterey Jack Cheese 🧀 | 3 cups | Freshly shredded |
| Sour Cream 🥛 | ½ cup | Full-fat for creaminess |
| Olive Oil 🫒 | 2 tbsp | For brushing tortillas |
| Lemon Juice 🍋 | 1 tbsp | Freshly squeezed |
The chuck roast is non-negotiable here—it’s got the perfect balance of fat and lean for that fall-apart texture. Costco or Walmart usually have it pre-cut, but if you’re buying a whole roast, ask the butcher to trim off any large fat caps. Look for good marbling—those little white streaks of fat are what keep the beef juicy during the long braise. I always grab the center-cut section if given a choice, as it’s more tender. For the onions, yellow onions work best—they caramelize beautifully and add a touch of sweetness that balances the spices. Fresh garlic is a must, but if you’re short on time, garlic powder at half the amount will work in a pinch.
No beef broth? Low-sodium chicken broth is a solid swap, but add a pinch of Worcestershire sauce (check for vegetarian if needed) to deepen the flavor. The tomato paste can be tricky—some brands are ultra-thick, so if yours is dry, add a splash of water to thin it out before mixing. For the spices, Penzeys or the bulk bins at Whole Foods are great for quality, but honestly, the store-brand stuff works fine if it’s fresh. The tortillas? Mission or La Tortilla Factory are my go-tos—they hold up best to the baking process. If you can’t find large 10-inch ones, use two 6-inch tortillas layered together. And for the cheese, Monterey Jack melts beautifully, but cheddar works too if that’s what you’ve got.
The braised beef keeps in the fridge for 4 days—make extra for tacos or quesadillas. Tortillas lose crispiness after 2 days, so assemble chimichangas fresh or freeze unbaked ones for up to 3 months. For reheating, cover with foil and bake at 375°F for 10-15 minutes until crispy again. I always portion the cheese separately so it doesn’t get soggy if I’m prepping ahead. The sour cream and lemon juice can be made into a quick dipping sauce—just mix them with a pinch of salt and serve on the side.
Why You'll Love This Recipe
- One-Pan Magic: I swear by this recipe—just toss the chuck roast, onions, and garlic on a sheet pan, bake, then shred. No pots, no pans, no stress. The beef broth and tomato paste caramelize right into a sticky, flavorful glaze that takes zero extra effort.
- Deep, Savory Bite: That chuck roast? It’s the star. Slow-baked until tender but still holding its shape, then shredded into perfect strands that soak up every bit of the garlic-onion-tomato paste sauce. Honestly, the first time I tasted it, I forgot it was supposed to be a chimichanga—it’s just that good.
- Weeknight Hero: Between us, this is my go-to when I need something hearty but hands-off. Throw it in the oven while I prep sides or even just scroll through my phone. It’s the kind of dish that makes me feel like I actually cooked something impressive, even if it’s just a sheet pan and 30 minutes.
- Budget Win: A pound of chuck roast stretches for days—this recipe feeds four easily, and leftovers reheat like a dream. I’ll be real: my freezer is always stocked with extra portions because it’s cheaper than takeout and way better than a sad deli meat sandwich. Plus, the ingredients? Basic, affordable, and always on hand.
Step-by-step instructions for baked shredded beef chimichanga
Here's how to transform simple ingredients into a showstopping dish with irresistible texture.
Build the Flavorful Beef Filling
In a large Dutch oven, heat the 2 tablespoons olive oil over medium-high heat. Add the 2 whole yellow onions and cook for 5-6 minutes until softened and translucent. Add the 6 cloves minced garlic and cook for 30 seconds until fragrant—don't let it brown or it'll turn bitter.
Push the onions to one side and add the 2.5 lb chuck roast beef, cutting it into large chunks. Sear for 3-4 minutes until browned on all sides. Return the onions to the pan and stir in the 0.25 cup tomato paste, scraping up any browned bits from the bottom. Add the 2 cups beef broth, 1.5 teaspoons cumin, 1.5 teaspoons chili powder, 1 teaspoon oregano, 1.5 teaspoons salt, and 0.5 teaspoon black pepper. Bring to a simmer, cover, and cook for 2-2.5 hours until the beef shreds easily with two forks.
Once tender, remove the beef and shred it directly in the pot, discarding any large fat pieces. Return the shredded beef to the pot and stir in the 1 tablespoon lemon juice. Simmer uncovered for 5 minutes to let the flavors meld and the sauce thicken slightly. This acidity brightens the rich beef and balances the spices.
Assemble the Chimichanga Layers
Preheat your oven to 375°F. Lay out 6 of the 12 flour tortillas on a clean work surface. Divide the shredded beef evenly among them, spreading each portion into a ¼-inch thick layer. Sprinkle ½ cup of the shredded Monterey Jack cheese over each beef layer.
Top each tortilla with another 6 tortillas, brushing the top surface with a thin layer of 2 tablespoons olive oil (divided equally). This oil creates the crispy crust we're after. Fold each tortilla in half, then in thirds to form a compact rectangle. Place the folded chimichangas seam-side down on a parchment-lined baking sheet.
Here's the thing—don't overstuff these. If you pack too much filling, the chimichangas will steam instead of crisp. The oil on top is what creates that golden, crackly crust, so brush it evenly. This is where the magic happens for that perfect texture.
Bake to Golden Perfection
Bake the chimichangas for 20-25 minutes until the edges are deep golden brown and the cheese is fully melted. You'll know they're ready when the tortillas develop a crispy, almost papery texture at the edges. If they brown too quickly, tent them loosely with foil for the last 5 minutes to prevent burning.
Remove from the oven and let them rest for 5 minutes before serving. This resting period allows the filling to set slightly and prevents the chimichangas from falling apart when you cut into them. The cheese should be bubbly and gooey inside, with that perfect crispy crust on the outside.
Finish with Sour Cream and Serve
While the chimichangas rest, warm the remaining 0.5 cup sour cream in a small saucepan over low heat for 2-3 minutes until slightly thickened. Stir in 1 tablespoon lemon juice and season with a pinch of salt and black pepper. This tangy topping cuts through the richness of the beef and cheese.
Slice each chimichanga into 6 wedges and serve immediately with the warm sour cream drizzled on top. The contrast between the crispy exterior and melty interior is what makes this dish unforgettable. Serve with a simple side salad or some warm corn chips for scooping up any extra filling.
Pro Tips For Making Baked Shredded Beef Chimichanga
- SEAR THE CHUCK FIRST: Slap that chuck roast in a screaming-hot skillet with 1 tablespoon of oil for 3-4 minutes per side before baking. The Maillard reaction kicks in, and that crust locks in flavor—no more bland, gray shreds. (Yes, even if you’re impatient like me, resist the urge to rush this.)
- CHOP ONIONS SMALLER THAN YOU THINK: Dice those yellow onions into 1/4-inch pieces, not the usual 1/2-inch chunks. They’ll soften faster in the braise and blend seamlessly into the shredded beef mixture—no chewy surprises when you’re rolling your chimichangas. I learned this the hard way after biting into a tough onion in my first attempt.
- DON’T SKIP THE REST: Let the cooked chuck roast rest for 15 minutes under foil after pulling it from the oven. The fibers relax, making shredding effortless and preventing a dry, stringy texture. I used to skip this and ended up fighting with my fork—now I just wait, and the beef falls apart like butter.
- UPGRADE WITH A SPLASH OF BEER: Swap half the beef broth for a dark beer (like stout or porter) when deglazing the pan. The maltiness cuts through the richness of the tomato paste and beef, adding depth without extra effort. (Your future self will thank you—trust me.)
Dietary considerations for these flavors
Gluten-Free Adaptations
For a gluten-free version, replace the flour tortillas with corn tortillas or certified gluten-free flour tortillas like Siete or Mission Gluten-Free. These hold up well during baking and create a crispy exterior. Just brush them with olive oil and bake as directed—no adjustments needed to the beef filling or cheese. 🌶️
If you prefer a gluten-free crust alternative, try using large collard green leaves or butternut squash slices as the wrap. Layer the beef and cheese between them, then bake at 375°F for 25-30 minutes until tender and slightly crispy. This adds a unique twist while keeping the dish gluten-free.
Dairy-Free Options
To make this recipe dairy-free, skip the Monterey Jack cheese and use a vegan cheese alternative like Miyoko’s or Violife. These melt beautifully and provide the same creamy texture. For extra richness, add ¼ cup cashew cream (blend soaked cashews with water) to the beef filling before assembling. 🥛
Another option is to omit the cheese entirely and focus on the flavorful beef filling. Top with avocado slices or dairy-free sour cream (like Kite Hill) for creaminess. The crispy tortilla shell still delivers that satisfying crunch without relying on dairy.
Lower-Carb Modifications
For a lower-carb version, reduce the number of tortillas to 4 per chimichanga (instead of 6) and use low-carb tortillas like Mission Carb Balance or Siete Low Carb. This cuts carbs by nearly half while keeping the crispy texture. The beef filling remains the same, so the flavor stays rich and satisfying. 🌿
Alternatively, wrap the beef and cheese in romaine lettuce leaves for a zero-carb option. Bake at 375°F for 15-20 minutes until the edges are crispy. This works best for individual servings and adds a fresh, light element to the dish.
Protein Swaps
If you’re avoiding beef, try shredded chicken or pulled pork for a different protein base. Cook the chicken or pork with the same spices and braising method, then assemble into the tortillas. For a vegetarian version, use mushrooms or jackfruit shredded and seasoned with the same cumin, chili powder, and oregano blend. 🌱
For a seafood twist, swap the beef for shredded rotisserie chicken or poached shrimp (seasoned with the same spices). The tortilla and cheese assembly stays identical, but the flavor profile becomes lighter and brighter—perfect for a summer meal.
Nutrition facts
Frequently asked questions
Can I use corn tortillas instead of flour tortillas?
Corn tortillas work but won't achieve the same crispy texture as flour. For best results, stick with flour tortillas—specifically 10-inch size for that perfect balance of flavor and crispiness. If you must use corn, brush them extra generously with olive oil and bake at 400°F for 5-10 minutes longer to compensate for their denser texture.
How do I prevent the chimichangas from getting soggy?
Sogginess happens when moisture escapes during baking. To avoid it: pat the beef dry before assembling, use freshly shredded cheese (pre-shredded contains anti-caking agents), and don't overfill the tortillas. Also, bake on a wire rack over a baking sheet to allow air circulation underneath. The 5-minute rest after baking is crucial—it lets the filling set!
Can I make these ahead of time?
Yes! Assemble the chimichangas up to 24 hours ahead and refrigerate unbaked. Bake straight from the fridge at 375°F for 30-35 minutes, adding 5 extra minutes to account for the cold start. For freezing, wrap unbaked chimichangas tightly in plastic wrap and foil, then freeze for up to 3 months. Thaw overnight in the fridge before baking as directed.
What's the best way to reheat leftovers?
Reheat in a 350°F oven for 10-15 minutes until the edges are crispy again. For extra crunch, place them on a baking sheet and broil for 1-2 minutes at the end. Avoid microwaving—they'll lose that perfect crispy texture. If reheating from frozen, add 5-10 extra minutes to the baking time.
Can I make these in an air fryer?
For air fryer chimichangas, assemble as directed but cut each folded tortilla into 4 wedges before air frying. Spray lightly with oil and cook at 375°F for 8-10 minutes, flipping halfway, until golden and crispy. This method works best for individual servings and gives you that coveted crunch without using the oven.