
Soups & Stews
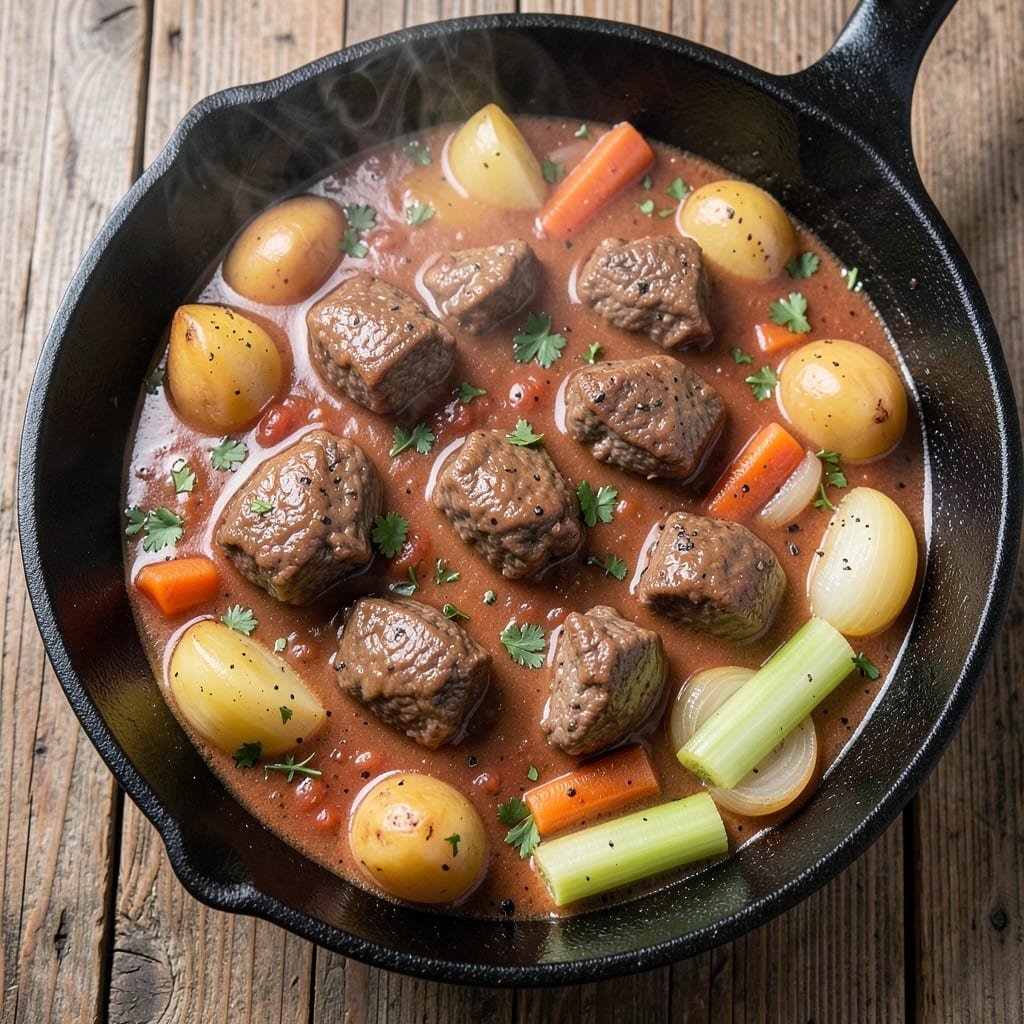
Ball canning beef stew transforms a comforting classic into pantry-ready meals that preserve both flavor and nutrition. The secret lies in slow-cooked beef, tender vegetables, and a rich broth sealed safely through pressure canning—creating hearty portions perfect for winter emergencies or quick weeknight dinners. This method captures all the depth of traditional stew while ensuring food safety for long-term storage.
What sets this recipe apart is the balance between rustic tradition and modern canning science. You'll start with a foolproof beef stew base—chuck roast, carrots, potatoes, and onions simmered until melt-in-your-mouth tender—before transferring it to sterilized jars and processing it at the correct temperature and time. The result? Stew that maintains its texture, flavor, and nutritional value for up to a year.
Safety is paramount, so we'll cover every critical step: proper jar preparation, pressure canner operation, and processing times based on altitude. Once sealed, your pantry becomes a treasure trove of home-cooked meals ready at a moment's notice. The aroma alone will transport you back to the stove where it began.
This isn't just about preservation—it's about recreating the warmth of a home-cooked meal in every jar. Whether you're preparing for winter storms, building a disaster supply, or simply stocking your pantry with homemade goodness, these pressure-sealed stews deliver restaurant-quality comfort without the last-minute effort. Let's get started on creating your pantry essentials.
Ingredients for ball canning beef stew
Pantry staples meet pressure canning for hearty stew that lasts up to a year.
| Ingredient | Amount | Notes |
|---|---|---|
| Chuck Roast 🥩 | 3 lb | Cut into 1.5-inch cubes, trimmed of fat |
| Yellow Onions 🧅 | 2 whole | Medium size, sliced into half-moons |
| Carrots 🥕 | 4 whole | Medium size, peeled and cut into chunks |
| Russet Potatoes 🥔 | 4 whole | Medium size, peeled and quartered |
| Celery Stalks 🥬 | 4 whole | Cut into 1-inch pieces |
| Tomato Paste 🍅 | 6 oz | High-quality canned, unsweetened |
| Dried Thyme 🌿 | 1 tbsp | Or 1 tbsp fresh thyme leaves |
| Garlic Cloves 🧄 | 6 cloves | Minced or finely chopped |
| Bay Leaves 🍃 | 2 whole | Fresh preferred |
| Salt 🧂 | 2 tsp | Diamond Crystal kosher salt |
| Ground Black Pepper 🌶️ | 1 tsp | Freshly ground preferred |
| Beef Broth 💧 | 4 cups | Low-sodium preferred |
| Ball Mason Jars 🍶 | 7 jar | Pint size, new and sterilized |
| Lid Gaskets 🔒 | 7 whole | New for each canning session |
| Two-Piece Canning Lids 🍯 | 7 whole | New for each jar |
The chuck roast is non-negotiable—it's the only cut with enough marbling to stay tender after canning. Costco or local butchers usually have it pre-cubed, but if you're buying a whole roast, ask for the chuck section. Look for good marbling (white flecks of fat) and avoid any pieces with grayish edges. The tomato paste? Muir Glen is my go-to—it's unsweetened and smooth. For the jars, Ball brand is the gold standard, but any new, sterilized pint jars will work. Pro tip: wash the jars in hot, soapy water, then boil them for 10 minutes before filling.
No beef broth? Homemade stock works too—just simmer beef bones with veggies for 6-8 hours. Fresh thyme is ideal, but dried at 1:1 ratio is fine in a pinch. Running low on bay leaves? Crushed red pepper flakes add depth without overpowering. The potatoes should be waxy (like Yukon Gold) to avoid turning mushy. For altitude adjustments, check the USDA canning guidelines—processing times increase above 1,000 feet. And if you're short on jars, quart jars work for larger portions, just adjust processing time accordingly.
Once sealed, these jars keep for up to a year in a cool, dark pantry. The stew actually improves with time—flavors meld beautifully. Store jars upright to prevent lid warping. Need to use some early? Reheat on the stove over medium heat, stirring occasionally. Freezing isn't recommended for canned goods, but if you must, transfer to freezer-safe containers with 1-inch headspace. Label each jar with the date—trust me, you'll forget!
Why You'll Love This Recipe
- No-Chop Shortcuts: I swear by the "diced but no knife" trick—just toss whole onions, carrots, and celery straight into the pot with the chuck roast. They’ll soften perfectly while you prep the jars, and honestly? The flavor’s richer that way.
- Deep, Slow Magic: That chuck roast turns into melt-in-your-mouth perfection after hours in the pressure canner, while the potatoes develop a just-right texture—not mushy, not hard. Between us, the first bite out of a jar feels like a hug.
- Meal Prep MVP: Between the jars and the bulk pot version, this stew is my weeknight lifesaver. Reheat a jar for lunch or dump the whole pot into slow cooker mode for a crowd. My college kid still texts me asking for "that stew" every time he visits.
- Budget-Friendly Pantry Hero: A 3-pound chuck roast and a bag of potatoes stretch to feed six, and the jars last months. I’ll be real: I’ve pulled one out after a long day to prove even the simplest meal can taste like you slaved over it. (Spoiler: It does.)
Step-by-step instructions for pressure-canning beef stew
A hearty beef stew that seals perfectly in jars for pantry-ready meals.
Prepare and Pre-Cook the Meat and Vegetables
In a large Dutch oven, combine the 3 lb chuck roast cut into 1.5-inch cubes, the 2 whole yellow onions sliced into half-moons, 4 whole carrots cut into chunks, 4 whole russet potatoes quartered, and 4 whole celery stalks chopped into 1-inch pieces. This combination creates the stew's flavorful base.
Add 4 cups beef broth, 6 oz tomato paste, 6 cloves garlic cloves minced, 2 whole bay leaves, 1 tbsp dried thyme, 2 tsp salt, and 1 tsp ground black pepper. Stir everything together until the vegetables are well coated in the broth. Bring the mixture to a boil over medium-high heat, then reduce to a simmer and cover partially. Let it cook for 2 to 2.5 hours until the meat is fork-tender and the vegetables are soft. This pre-cooking step ensures the flavors meld beautifully before canning.
I know it's tempting to rush this step, but patience here is key. The longer the stew simmers, the deeper the flavors become. Stir occasionally to prevent sticking, and add a splash of water if the mixture becomes too dry.
Sterilize Jars and Prepare for Canning
While the stew cooks, prepare the 7 pint-sized Ball Mason jars by washing them thoroughly with hot, soapy water. Place the jars in a large pot and cover them with water. Bring the water to a boil and let the jars sterilize for 10 minutes. This step ensures a clean, safe environment for your preserved stew.
Remove the jars from the pot using a jar lifter and place them on a clean kitchen towel. Keep them upright and covered with a clean cloth to maintain sterility. Also, prepare the 7 whole lid gaskets and 7 whole two-piece canning lids by boiling them in a separate pot of water for 10 minutes. This softens the gaskets and ensures a proper seal.
Here's the thing—sterilizing your jars and lids is non-negotiable. Skipping this step can lead to contamination and spoilage, so don't cut corners. Once sterilized, keep everything hot until you're ready to fill the jars.
Fill Jars with Stew and Seal Properly
Using a ladle, carefully fill each of the 7 sterilized jars with the hot beef stew, leaving about 1-inch headspace at the top. This space is crucial for the jars to seal properly. Use a non-metallic utensil to remove any air bubbles by gently tapping the side of each jar or running the utensil around the inside edge.
Wipe the rims of the jars with a clean, damp cloth to ensure no food particles interfere with the seal. Place the lid gaskets on each jar, followed by the two-piece canning lids. Screw the bands down fingertip-tight—don't overtighten, as this can prevent a proper seal.
This is the moment that matters: ensuring the jars are filled correctly and sealed tightly. If the stew isn't hot enough, the jars may not seal properly. The headspace and clean rims are critical for a successful canning process.
Process Jars in a Pressure Canner
Load the filled jars into your pressure canner, ensuring the canner is on a level surface and the jars are upright. Add water to the canner until it reaches the recommended fill line, usually about halfway up the sides of the jars. Place the canner lid on top and secure it tightly.
Turn the heat to medium-high and bring the water to a boil. Once boiling, place a 10-pound weight on the vent pipe and let the steam escape for 10 minutes to purge any air from the canner. Then, close the vent pipe and continue cooking for 75 minutes at 10 pounds of pressure for pint-sized jars. This processing time ensures the stew is safely preserved and free from harmful bacteria.
Don't walk away during this step. Keep an eye on the pressure gauge to ensure it maintains the correct level. If the pressure drops, adjust the heat accordingly. Once the processing time is complete, turn off the heat and let the pressure drop naturally—never force the canner to depressurize quickly.
Cool, Check Seals, and Store
Once the pressure canner has fully depressurized, carefully remove the jars using a jar lifter and place them on a clean towel. Let them cool at room temperature for 12 to 24 hours. During this time, you'll hear a satisfying "ping" as the jars seal. This sound indicates that the lids have created an airtight vacuum.
After cooling, check each jar to ensure the lids are sealed by pressing down on the center of the lid. If the lid doesn't pop back up, the jar is sealed properly. If any jars don't seal, refrigerate and use the stew within a few days. Store the sealed jars in a cool, dark place for up to 12 months.
Real talk: Properly sealed jars will keep beautifully in your pantry, ready to be opened and enjoyed whenever you need a comforting meal. The rich, savory flavors will transport you right back to the moment you first made this stew.
Pro Tips For Making Ball Canning Beef Stew
- SEAR THE CHUCK ROAST FIRST: I learned this the hard way—skipping the sear means flavorless stew. Brown that chuck roast in batches over medium-high heat until it’s deep golden, not just pink. The crust locks in meaty richness that won’t dissolve into the broth later. (Yes, even if you’re impatient like me.)
- CUT POTATOES UNIFORM: Russets break down into mush if they’re not the same size. Aim for 1.5-inch chunks—big enough to stay intact but small enough to soften in the canning time. Uneven pieces mean some will be rock-hard while others turn to glue. (Your future self will curse you if you skip this.)
- DON’T OVERLOAD THE JARS: Packing jars too tightly traps steam and risks botulism. Leave a 1-inch headspace—no exceptions. Tap the jar on the counter to settle veggies, then adjust before sealing. I’ve seen jars explode because someone “just needed to fit one more carrot.” (Spoiler: It’s not worth it.)
- USE A MEAT THERMOMETER: Chuck roast needs to hit 160°F before canning—no guessing. Undercooked meat in jars is a food safety nightmare. Slow-cook until the internal temp is solid, then proceed. (Your pressure canner won’t tell you if the meat’s safe; the thermometer will.)
Wine and beer pairings for this ball canning beef stew
Rich Red Wine
A bold Cabernet Sauvignon from Napa Valley or a Syrah from the Rhône Valley pairs beautifully with this hearty beef stew. The tannins in these reds stand up to the deep, savory flavors and help cut through the richness of the beef. I always reach for a 2018 Chateau Montelena Cabernet Sauvignon—its dark fruit notes and subtle oak complement the stew's caramelized onions and tender meat. Serve slightly chilled to let the wine's structure shine alongside the preserved dish. 🍷
Malty Amber Ale
For beer lovers, a Belgian-style amber ale or a German Märzen brings out the stew's caramelized notes and malty depth. The Allagash Amber from Portland, Maine, is my go-to—its balanced sweetness and subtle spice notes enhance the stew's thyme and tomato undertones. If you prefer something lighter, a crisp German Pilsner like Weihenstephaner cleanses the palate between bites. Keep the beer at 45-50°F to preserve its crispness. 🍺
Full-Bodied Port
After dinner, warm up a glass of Ruby Port to pair with your canned stew. The Graham's 10-Year-Old offers rich berry and chocolate notes that mirror the stew's depth while adding a luxurious finish. The slight sweetness balances the savory beef, making it a perfect dessert pairing. Serve at room temperature to let the flavors meld together beautifully. 🍷
Spiced Wine Pairing
For a cozy twist, heat red wine with 1 cinnamon stick, 2 star anise pods, and 1 strip of orange peel for 10 minutes before serving. This aromatic blend enhances the stew's herbal notes and adds warmth. I love using Cabernet Franc for this method—its peppery finish pairs wonderfully with the thyme and bay leaves in the stew. 🌟
Nutrition facts
Frequently asked questions
Can I use water bath canning instead of pressure canning for beef stew?
No, you should always use a pressure canner for beef stew. The low acidity of meat and vegetables requires higher temperatures to kill harmful bacteria like Clostridium botulinum. Water bath canning only reaches 212°F, while pressure canning reaches 240-250°F—the only safe method for low-acid foods like stew.
How do I know if my pressure canner is working properly?
Test your gauge annually using a test kit from the USDA or manufacturer. Look for these signs during use: steady pressure at 10 pounds (for dial gauges) or 15 psi (for weighted gauges), and a consistent stream of steam from the petcock. Never use a canner with a cracked or damaged gauge—safety first!
What should I do if a jar doesn't seal during processing?
Check the seal immediately after cooling. If the lid pops up when pressed, refrigerate the stew and use it within 3-5 days. Never re-process or eat from unsealed jars—they're unsafe for long-term storage. Common causes include insufficient headspace, dirty jar rims, or under-processing.
Can I add fresh herbs to the jars before sealing?
No, fresh herbs should be added to the stew during cooking, not canning. They break down during processing and can cause spoilage. Stick to dried herbs (like thyme) or add fresh parsley as a garnish after opening. The same goes for fresh garlic—use minced garlic during cooking instead of whole cloves in jars.
How do I adjust processing time for high altitudes?
Add 5 minutes to processing time for every 1,000 feet above sea level (up to 3,000 feet). For example, at 5,000 feet, process for 90 minutes instead of 75 minutes. Always check the USDA's altitude adjustment chart for exact times—safety depends on proper processing!