
Main Courses
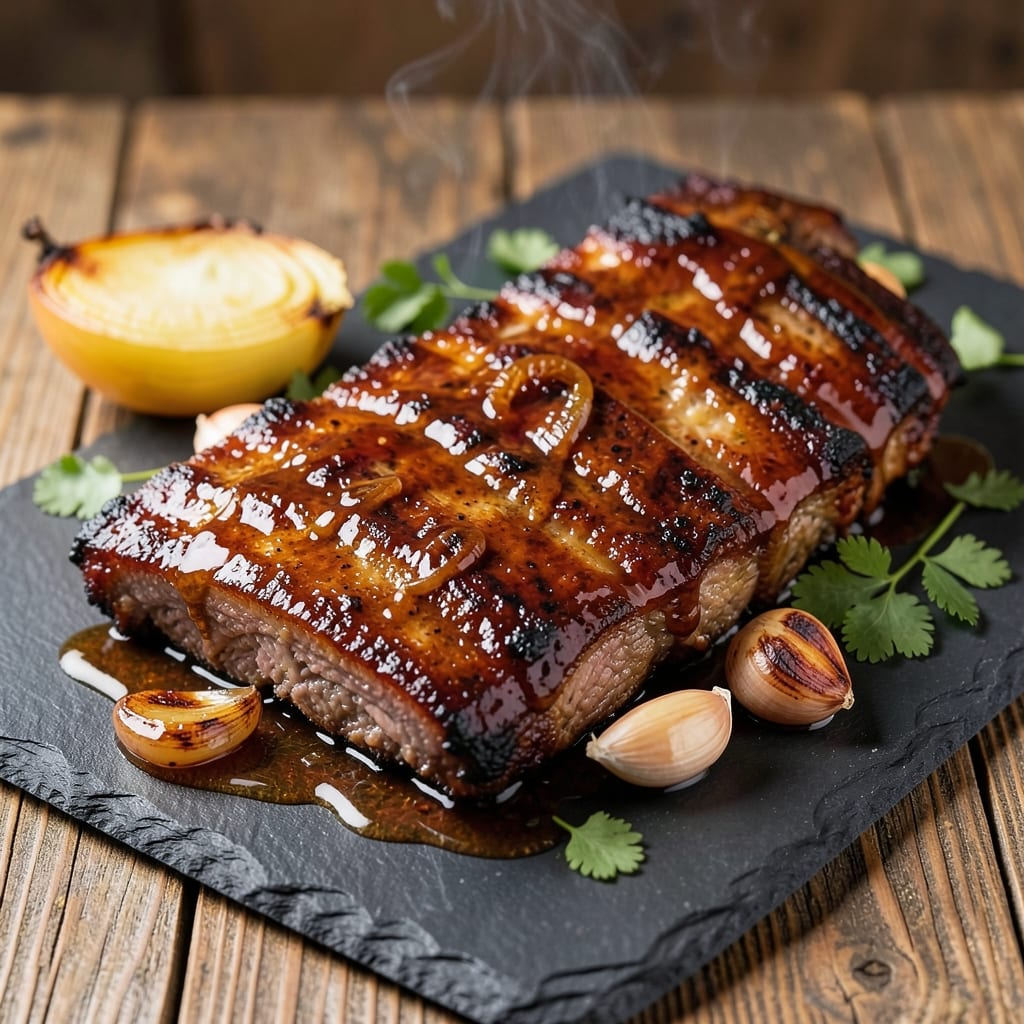
This barbecue beef back ribs recipe delivers the perfect balance of smoky bark and fall-off-the-bone tenderness—the kind that makes your taste buds sing and your guests ask for seconds. 🔥 After years of perfecting my technique, I’ve cracked the code for ribs that are juicy inside, perfectly seasoned, and encased in that coveted caramelized crust. The secret? A 3-2-1 method that builds layers of flavor without requiring a full day of smoking.
What sets this recipe apart is the foolproof approach that works whether you’re using a smoker, grill, or even your oven. I’ll walk you through every step—from trimming the ribs and applying the rub to monitoring internal temperatures and resting them properly. No guesswork, no dry meat, just restaurant-quality ribs that taste like they’ve been slow-cooked all day, even if you’re short on time.
The result? Ribs so tender they pull apart with a fork, with a deep, smoky flavor that lingers long after the last bite. The bark is crispy yet sticky, the perfect contrast to the meat underneath. This isn’t just another ribs recipe—it’s the one you’ll make again and again, because it actually delivers on that fall-off-the-bone promise every single time.
Pair them with classic sides like coleslaw, cornbread, or baked beans, and you’ve got a full spread that’ll have everyone at the table begging for more. Let’s get started on making ribs that’ll leave your guests impressed—and your taste buds satisfied.
Ingredients for barbecue beef back ribs
Four pounds of meaty ribs plus a few pantry staples. That's all it takes for ribs with perfect bark and tender meat.
| Ingredient | Amount | Notes |
|---|---|---|
| Beef Back Ribs 🥩 | 4 lb | Bone-in, meaty ends preferred |
| Yellow Onion 🧅 | 1 whole | Chopped into large chunks |
| Garlic Cloves 🧄 | 8 cloves | Peeled, smashed for flavor |
| Apple Cider Vinegar 🍎 | ¼ cup | For tenderizing bath |
| Brown Sugar 🍚 | ½ cup | Light or dark variety |
| Smoked Paprika 🌶️ | 2 tbsp | For deep smoky flavor |
| Chili Powder 🌶️ | 1 tbsp | Medium heat preferred |
| Ground Black Pepper 🌶️ | 1 tbsp | Freshly cracked preferred |
| Kosher Salt 🧂 | 2 tbsp | Diamond Crystal preferred |
| Yellow Mustard 🍯 | 2 tbsp | For initial coating |
| Wood Chips 🌳 | 1 cup | Hickory or oak preferred |
| Apple Juice 🍎 | ½ cup | For spritzing during cook |
| Butter 🧈 | 2 tbsp | Unsalted, for finishing |
The ribs matter most—look for meaty ends with good marbling. Costco or your local butcher are the best bets for quality cuts. If you're buying a whole packer, trim the membrane off the bones first (it's that silvery sheet you can peel back easily). The apple cider vinegar is non-negotiable for tenderizing—it breaks down the meat fibers before cooking. For the wood chips, Traeger or Cookshack have great pre-packaged options, but any hickory or oak chips from the grocery store will work. Pro tip: soak them in water for 30 minutes before using.
No apple cider vinegar? White vinegar or lemon juice in a pinch, but reduce to 1/4 cup. Short on brown sugar? White sugar plus 1 tsp molasses mimics the caramelization. The mustard is just for initial adhesion—if you're avoiding it, skip it entirely. For the wood chips, cherry or pecan add sweetness, but stick with hickory for classic smoky flavor. Freshly ground pepper and kosher salt make all the difference—don't use pre-ground spices. And if you're doing this in the oven, use a disposable foil pan for easy cleanup.
Ribs keep best in the fridge for 3 days if you've got leftovers—wrap tightly in foil. For longer storage, freeze them up to 3 months by wrapping each rack separately. The bark gets tough when reheated, so plan to eat these fresh. If you're making a big batch, cook them in batches and hold in a 200°F oven while finishing the rest. The butter at the end? Worth every second—it makes the bark shine and adds richness.
Why You'll Love This Recipe
- Fewer Messy Steps: I swear by this recipe because it’s actually simple—just ribs, onions, and garlic tossed in a pan with vinegar and brown sugar. No brining, no wrapping, no stress. Honestly, I’ve made ribs that took all day, but this? Thirty minutes of hands-off cooking.
- Sweet-Savory Magic: That apple cider vinegar and brown sugar combo? It’s the secret weapon. The vinegar cuts through the richness while the caramelized sugar creates this perfect balance—tangy, sticky, and just sweet enough. (Yes, even on a Tuesday night.)
- Leftovers That Don’t Suck: These ribs reheat like a dream—tender, sticky, and just as good cold in a sandwich the next day. I’ll be real: most leftover ribs dry out, but not these. They’re my go-to for packed lunches or a lazy dinner.
- Budget-Friendly Feast: A full rack of beef back ribs feeds four (or two very hungry people) without breaking the bank. The ingredients are basic, but the flavor? Ridiculously good. It’s my secret weapon for feeding a crowd without the restaurant price tag.
Step-by-step instructions for smoky beef back ribs
Here's how to transform tough cuts into melt-in-your-mouth ribs with perfect bark.
🔥 Step 1: Prepare the Tenderizing Bath
In a large resealable bag, combine the 4 lb beef back ribs, 1 whole yellow onion (chopped), 8 cloves garlic cloves (smashed), 0.25 cup apple cider vinegar, and 0.5 cup brown sugar. Seal the bag and massage everything vigorously for 2 minutes to coat the ribs completely. This marinade works magic by breaking down tough fibers while adding sweetness.
Let the ribs sit in the fridge for 4-6 hours (overnight is even better). You'll notice the meat becoming more pliable and the marinade turning into a syrupy glaze. This step is non-negotiable for tenderness—don't skip it, even if you're short on time.
👨🍳 Step 2: Build the Dry Rub and Prep the Smoker
In a medium bowl, whisk together 2 tbsp smoked paprika, 1 tbsp chili powder, 1 tbsp ground black pepper, and 2 tbsp kosher salt. Once the ribs are out of the marinade, pat them dry thoroughly with paper towels—this is crucial for bark formation. Then generously coat all surfaces with the dry rub, pressing it into the meat so it sticks.
While the ribs rest for 30 minutes (this helps the rub adhere), set up your smoker. Add 1 cup wood chips (hickory or oak) and soak them in water for 30 minutes beforehand. Preheat the smoker to 225°F—this low-and-slow approach is key to even cooking without drying out the meat.
🔥 Step 3: Smoke the Ribs Low and Slow
Place the rubbed ribs bone-side down on the smoker grates. Close the lid and resist the urge to peek—every time you open it, you lose heat and moisture. Smoke the ribs for 3 hours, then flip them bone-side up. This gives you that perfect balance of bark on the meaty side and tenderization on the bone side.
After 3 more hours (total 6 hours of cooking), check the internal temperature. It should reach 195-203°F in the thickest part of the meat. If it's not there yet, continue smoking. The ribs are done when they're fork-tender and the connective tissue has broken down into gelatin.
🍳 Step 4: Wrap and Finish for Maximum Tenderness
When the ribs hit 195°F, wrap them tightly in heavy-duty aluminum foil with 2 tbsp yellow mustard and 0.5 cup apple juice. The mustard adds tangy flavor while the apple juice helps keep the meat moist during the final cook. Return the wrapped ribs to the smoker and cook for another 1-2 hours until they reach 203°F.
This wrapping technique, called the "Texas crutch," helps push the ribs through the stall and ensures they're fork-tender. The mustard and apple juice also create a beautiful sheen on the meat. Don't skip this step—it makes all the difference in texture.
🔪 Step 5: Rest and Serve with Finishing Butter
Remove the ribs from the smoker and let them rest for 15-20 minutes before unwrapping. This resting period allows the juices to redistribute throughout the meat. Once unwrapped, brush all surfaces with melted 2 tbsp butter for extra richness and shine.
Slice between the bones to serve, being careful not to cut through the meat. Each bite should be incredibly tender with a perfect balance of smoky, sweet, and tangy flavors. Serve with extra barbecue sauce on the side if desired—these ribs are so tender they practically fall apart.
Pro Tips For Making Barbecue Beef Back Ribs
- Trim the Fat First: Beef back ribs come with a thick fat cap that can turn greasy if you skip this. Use a sharp knife to slice through the membrane between the meat and fat, then peel it off—this keeps your ribs tender and prevents a soggy crust later. ---
- Char the Onions Low: I used to burn my onions trying to hurry them, and they’d turn bitter. Instead, cook them on medium-low heat for 10-12 minutes until deeply caramelized—just soft enough to mash into the sauce. Patience here makes the sauce richer. ---
- Don’t Rush the Vinegar: Apple cider vinegar needs time to mellow in the sauce. If you add it late, the acidity will overpower everything. Simmer it in for at least 15 minutes with the brown sugar and onions—this balances the tang and deepens the flavor. ---
- Wrap Them Tight at 225°F: After the initial sear, wrap your ribs in foil with a splash of water or broth. The steam breaks down collagen, but only if the oven stays steady. If your house is drafty, use an oven thermometer—225°F is non-negotiable for tender ribs.
Dietary considerations for this barbecue beef back ribs
Gluten-Free Adaptations
These ribs are naturally gluten-free, but there are a few adjustments to ensure every step stays safe. The apple cider vinegar and brown sugar used in the tenderizing bath are both gluten-free, but always check labels—some brands add gluten-containing additives. For the dry rub, ensure your smoked paprika, chili powder, and kosher salt are certified gluten-free. I recommend Penzeys Spices for their reliable gluten-free options. The yellow mustard and apple juice are typically safe, but verify the mustard brand—some contain gluten as a preservative.
Low-Carb Considerations
If you're watching carbs, this recipe is already low-carb friendly! The only carb-heavy ingredient is the brown sugar in the marinade. Swap it for erythritol or monk fruit sweetener (about ¼ cup) to keep the sweetness without the carbs. The mustard and apple juice add minimal carbs, so you can enjoy these ribs guilt-free. Just be mindful of any barbecue sauce you serve on the side—opt for sugar-free varieties if needed.
Dairy-Free Options
The only dairy in this recipe is the butter used for finishing. For a dairy-free version, skip the butter or substitute with vegetable oil or dairy-free butter spray. The ribs will still be delicious—the butter just adds richness. If you want to keep the sheen, brush with olive oil instead. The smoky, tangy flavors from the rub and marinade will shine through even without dairy.
Allergen-Friendly Tips
For those with allergies, this recipe is highly adaptable. If you're avoiding sulfites, check your smoked paprika and chili powder—some brands add them as preservatives. For nut allergies, ensure your wood chips are nut-free (some hickory chips are processed in facilities with nuts). Always double-check labels, especially for vinegar and mustard, which can sometimes contain hidden allergens. Cross-contamination is key—use clean utensils and surfaces if allergies are a concern.
Protein-Packed Boost
These ribs are already packed with protein—about 40 grams per pound—but if you're looking to boost it further, serve them with a side of cauliflower mash or zucchini noodles instead of traditional potato sides. The ribs themselves are a complete protein, so no extra adjustments are needed for a high-protein diet. Just be mindful of portion sizes if you're tracking macros—these ribs are rich and satisfying on their own.
Nutrition facts
Frequently asked questions
Why do you recommend the 3-2-1 method for beef back ribs?
The 3-2-1 method creates perfect bark while keeping the meat incredibly tender. First, you smoke the ribs 3 hours bone-side down to build bark on the meaty side. Then flip them 2 hours bone-side up to tenderize the bone side. Finally, wrap them for 1 hour to melt collagen into gelatin. This approach prevents drying while developing that coveted crust.
Can I cook these ribs in the oven instead of a smoker?
Preheat your oven to 225°F and place a water pan on the bottom rack. Use a disposable foil pan to hold the ribs and wood chips (soaked in water). Follow the same timing (3-2-1 method) and wrap them in foil with apple juice and mustard when they hit 195°F. The oven method works great for indoor cooking—just monitor the temperature closely.
What's the best way to store leftover ribs?
Wrap the ribs tightly in aluminum foil and refrigerate for up to 3 days. For longer storage, freeze them for up to 3 months by wrapping each rack separately. To reheat, bake at 275°F for 15 minutes wrapped in foil. The bark will soften slightly, but the meat stays tender. Never microwave—it dries out the ribs completely.
How do I know when the ribs are fully tender?
Use the fork test or meat thermometer. The ribs are done when they reach 203°F internally and the meat pulls apart easily with a fork. If they're not falling apart at 195°F, wrap them and cook another 30-60 minutes. The connective tissue should have broken down into gelatin, making each bite incredibly tender.
What's the difference between beef back ribs and baby back ribs?
Beef back ribs come from the lower part of the ribcage and are larger with more meat, while baby back ribs are from the upper ribs and have less meat but more flavor. Beef back ribs are meatier and better for this recipe, but baby backs cook faster (2-3 hours total). The bark develops differently—beef back ribs get thicker bark due to their size and fat content.