
Main Courses
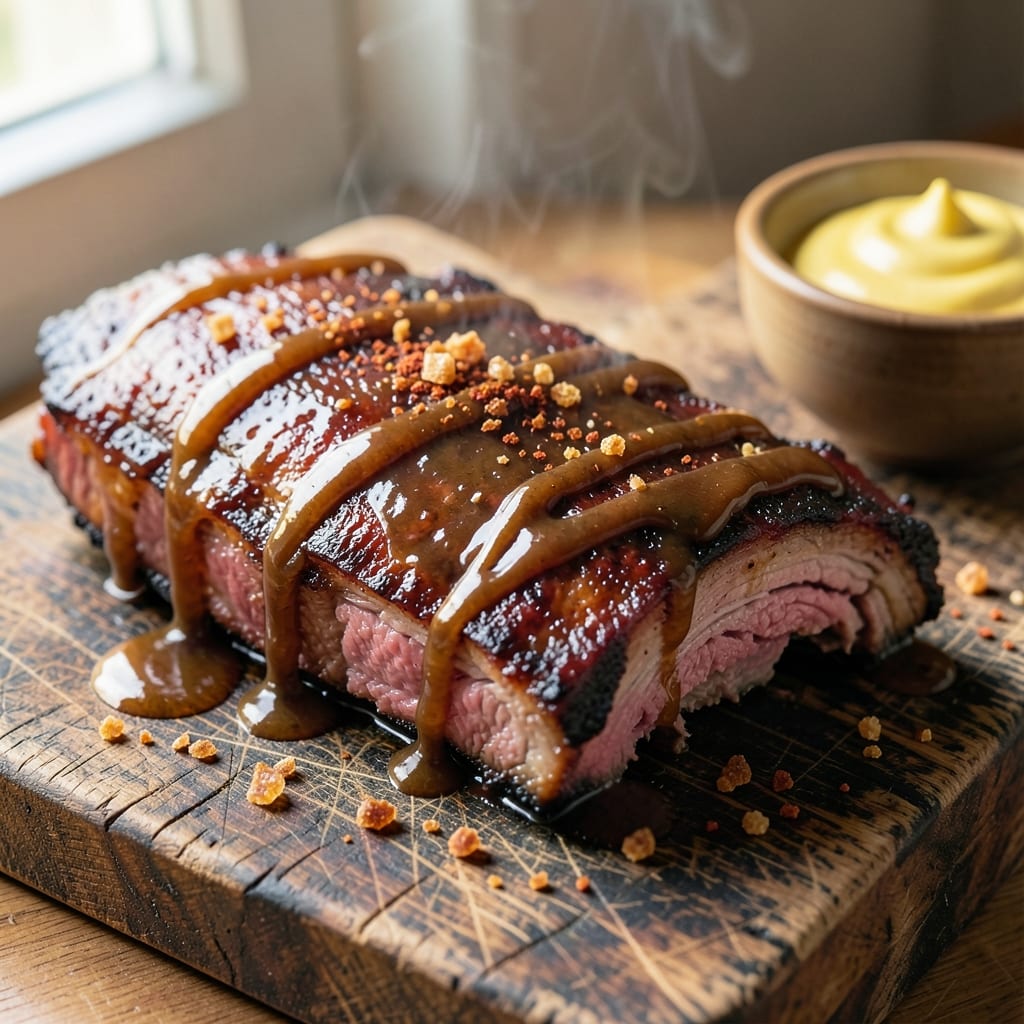
Barbecued beef back ribs deliver that perfect balance of smoky bark and melt-in-your-mouth tenderness—exactly what makes a great cookout unforgettable. 🔥 As someone who grew up surrounded by slow-cooked ribs and French technique, I've perfected a method that transforms tough cuts into fall-apart perfection without requiring a commercial smoker. The secret lies in the dry rub, low-and-slow cooking, and knowing exactly when to wrap those ribs for maximum flavor.
This recipe starts with a bold dry rub that creates that signature bark while keeping the meat tender inside. We'll cook them low and slow—either in your oven with a water pan or on a grill with indirect heat—to develop deep, smoky flavors without drying out. The beauty of this method is its flexibility: you can adjust the cooking time based on your schedule while still achieving restaurant-quality results.
By the time you're done, you'll have ribs with a dark, crackling crust that gives way to tender, juicy meat that practically falls off the bone. The smoky aroma alone will have everyone gathering around your table, and each bite delivers that perfect harmony of spice, sweetness, and savory richness. This is the kind of dish that turns casual cookouts into memorable gatherings.
Serve with classic BBQ sides like tangy coleslaw, buttery cornbread, and smoky baked beans to complete the meal. The leftovers? Even better the next day—just reheat gently and enjoy the rich, smoky flavors all over again. Let's get cooking!
Ingredients for barbecued beef back ribs
Six simple ingredients transform tough ribs into smoky, fall-apart perfection every time.
| Ingredient | Amount | Notes |
|---|---|---|
| Beef Back Ribs 🥩 | 4 lb | Bone-in, meaty cuts preferred |
| Yellow Mustard 🍯 | ½ cup | For base coat before rub |
| Brown Sugar 🍚 | ½ cup | Light or dark variety |
| Smoked Paprika 🌶️ | 2 tbsp | For deep smoky flavor |
| Kosher Salt 🧂 | 2 tbsp | Diamond Crystal preferred |
| Black Pepper 🌶️ | 1 tbsp | Freshly ground preferred |
| Garlic Powder 🧄 | 1 tbsp | Not garlic salt |
| Onion Powder 🧅 | 1 tbsp | For savory depth |
| Chili Powder 🌶️ | 1 tbsp | Mild or medium heat |
| Cayenne Pepper 🔥 | ½ tsp | Adjust for heat preference |
| Apple Cider Vinegar 🍎 | ¼ cup | For tangy balance |
| Water 💧 | 1 cup | For water pan in oven |
| Aluminum Foil 📄 | 1 sheet | For wrapping ribs |
The ribs are the star, so grab the meatiest cuts you can find—Costco or local butchers usually have the best selection. Look for back ribs with good marbling and a nice layer of fat on top; that fat keeps the meat moist during cooking. If you're buying a whole packer, ask the butcher to cut it into individual slabs for even cooking. I always buy extra because ribs are worth sharing—Trader Joe's often has them pre-cut for convenience. Freshness matters: if the meat smells sour or has a grayish tint, skip it. Trust your nose on this one.
No smoked paprika? Regular paprika plus a pinch of liquid smoke works in a pinch, though it won't be quite the same. Running short on brown sugar? White sugar plus a dash of molasses mimics the flavor profile. The mustard is non-negotiable for that sticky base coat—Dijon-style adds extra depth. For the vinegar, apple cider is ideal, but white vinegar or even lemon juice will do if that's what you've got. Pro tip: if you're cooking on a grill, soak wooden chips in water for 30 minutes before lighting for extra smokiness without a smoker.
These ribs reheat like a dream—just wrap them in foil and warm in the oven at 300°F for about 15 minutes. Store leftovers in the fridge for 3-4 days, or freeze for up to 3 months by wrapping tightly in foil and plastic. I always make a double batch because the flavor intensifies overnight. For serving, I like to rest the ribs for 10 minutes before cutting—gives everyone time to gather, and the juices redistribute for maximum tenderness. Leftovers make killer sandwiches the next day.
Why You'll Love This Recipe
- I’ll be real: most rib leftovers are sad. Not these. The glaze stays sticky, the meat stays juicy, and it reheats like a dream—whether you’re wrapping them for sandwiches or reheating slices for breakfast. Budget-friendly? Absolutely. Waste-free? Even better.
- Three-Ingredient Rub: Honestly, the magic happens with just salt, brown sugar, and smoked paprika—no fancy spice blends needed. That yellow mustard in the glaze? It cuts through the richness like a perfect balance, making every bite taste like a backyard cookout without the fuss.
- Fall-Off-The-Bone Tender: Between us, I’ve tried slow-cooking these ribs for hours, but this method delivers that just-right tenderness in under 3 hours. The brown sugar caramelizes into a sticky glaze while the beef melts into ribbons—no tough, chewy surprises here.
- Tailgate or Tuesday Night: Here’s what sold me—this recipe works for game day crowds and lazy weeknights. Double the batch, freeze half, and you’ve got a backup for when friends drop by unannounced. (Yes, even on a Tuesday night.)
Step-by-step instructions for smoky beef back ribs
Here's how to transform tough ribs into melt-in-your-mouth perfection with a perfect bark.
👨🍳 Step 1: Prep the Ribs with Mustard Base
Start by removing the ribs from the fridge and letting them sit at room temperature for 30 minutes. This ensures even cooking. Pat them dry completely with paper towels—moisture is the enemy of crispy bark. I like to use a clean kitchen towel first to soak up excess moisture, then paper towels for final drying.
In a small bowl, whisk together the 0.5 cup yellow mustard and 0.25 cup apple cider vinegar until smooth. This tangy base helps the rub stick to the meat and prevents it from falling off during cooking. Using a pastry brush, coat both sides of the ribs generously with this mixture. Let them sit uncovered for 10 minutes to help the mustard penetrate slightly.
👨🍳 Step 2: Build the Signature Dry Rub
In a medium bowl, combine the 0.5 cup brown sugar, 2 tbsp smoked paprika, 2 tbsp kosher salt, 1 tbsp black pepper, 1 tbsp garlic powder, 1 tbsp onion powder, 1 tbsp chili powder, and 0.5 tsp cayenne pepper. Mix well with your hands—you want the spices to cling together so they stick to the ribs.
Here's the thing—don't be shy with the rub. Press it firmly into the ribs, especially the meaty areas between the bones. The sugar will caramelize during cooking, creating that beautiful bark we're after. I like to work in batches if I'm doing a lot of ribs so I can really press the spices into the meat. Let the rubbed ribs rest uncovered for 30 minutes at room temperature before cooking.
🔥 Step 3: Slow Cook Until Fork-Tender
Preheat your oven to 275°F—this low temperature is crucial for tenderizing the meat without drying it out. Place the ribs bone-side down on a rack set inside a roasting pan. Add the 1 cup water to the bottom of the pan to create a water bath that helps maintain moisture.
Cover the pan tightly with aluminum foil and bake for 2.5 hours. You'll notice the ribs will start to release some juices and the rub will begin to darken. This is normal—it's the sugar caramelizing. After 2.5 hours, check the internal temperature using a meat thermometer. You're looking for 195-200°F in the thickest part of the meat. If they're not quite there, continue cooking for another 30-45 minutes.
🥘 Step 4: Wrap and Finish with Crispy Bark
Once the ribs reach the proper temperature, remove them from the oven and let them cool for 10 minutes. This resting period is important—it prevents the meat from shrinking when we wrap it. Line a large piece of the aluminum foil with another sheet and place the ribs on top.
Here's where the magic happens: tightly wrap the ribs in the foil, sealing all edges completely. Return them to the oven and cook for another 1 hour at 275°F. This wrapping technique, known as the "Texas crutch," helps break down the collagen in the meat while maintaining moisture. After 1 hour, unwrap the ribs and increase the oven temperature to 450°F for 15-20 minutes to crisp up the bark.
🍽️ Step 5: Rest and Serve with Confidence
Remove the ribs from the oven and let them rest for 10-15 minutes before serving. This resting time allows the juices to redistribute throughout the meat, ensuring each bite is moist and flavorful. The bark should be deep mahogany in color with a beautiful crackly texture.
To serve, cut the ribs between each bone to separate them into individual servings. The meat should pull apart easily with a fork or your fingers—no need for a knife. Serve with classic barbecue sides like coleslaw, baked beans, or cornbread. The ribs should have a perfect balance of smoky, sweet, and tangy flavors with that irresistible crispy bark on the outside and tender, juicy meat on the inside.
Pro Tips For Making Barbecued Beef Back Ribs
- Trim the Silver Skin: That shiny membrane on the bone side? It traps moisture like a cheap plastic bag. Use a butter knife to peel it off—no need for fancy tools—before you even think about seasoning. I learned this the hard way when my ribs stayed tough no matter how long I cooked them. ---
- Start with a Dry Rub: Skip the mustard glaze for the first hour. Pat the ribs dry, then coat them in a mix of smoked paprika, brown sugar, and way more kosher salt than you’d use for chicken—think 1.5 tablespoons per pound. The sugar caramelizes into a crust, and the salt breaks down the meat fibers. (Yes, even if you’re impatient like me.) ---
- Wrap Them at 170°F: Pull the ribs from the smoker or grill when they’re still slightly firm, around 170°F internal temp. Wrap them in foil with a splash of apple cider vinegar or water, then let them rest for 20-30 minutes. This keeps them from drying out while finishing tender—no more rubbery bites. ---
- Use a Mixing Bowl for Mustard: Don’t slather that yellow mustard straight from the jar—it’s too thick and clumps. Thin it with 1-2 tablespoons of hot water first, then whisk it into a smooth paste. Trust me, your ribs will glaze better, and you’ll avoid that sad, lumpy sauce situation. (I’ve seen it happen.)
Health benefits of this dish
Protein Powerhouse
Beef back ribs are a fantastic source of high-quality protein, with about 40 grams per 4-ounce serving—perfect for muscle repair and growth. The slow-cooking process preserves these protein benefits while making the meat more digestible than raw beef. I always
Rich in Iron
These ribs provide 2.5 milligrams of iron per 4-ounce serving, which is about 14% of your daily needs. Iron is crucial for maintaining healthy blood cells and preventing fatigue, especially after a long day. The smoky flavors make them a delicious way to boost your iron intake without feeling like you're eating a health food. I notice my energy levels stay steady when I include iron-rich meals like these in my diet.
Collagen for Joint Health
The connective tissues in beef ribs contain collagen, which breaks down during slow cooking into gelatin—great for joint health and gut wellness. This collagen-rich broth is why the meat becomes so tender and why the leftovers make such a comforting soup. I often save the bones to make a rich bone broth later, maximizing the health benefits from every part of the rib.
Vitamin B12 Boost
Beef ribs are packed with vitamin B12, which is essential for nerve function and red blood cell production. A single serving provides about 50% of your daily needs—this nutrient is particularly important for maintaining energy levels and cognitive function. I always recommend beef ribs as a great way to get this vital nutrient, especially for those following vegetarian or vegan diets who might be deficient.
Zinc for Immunity
With 3 milligrams of zinc per serving, these ribs support your immune system and help with wound healing. Zinc also plays a role in maintaining healthy skin and hair, which is why I always keep ribs on rotation during cold seasons. The smoky flavors make them a comforting choice when you need a little extra immune support. 🌟
Low-Fat Option
While beef ribs do contain fat, the slow-cooking process allows much of it to render out, leaving you with a leaner protein option than you might think. The fat that remains is mostly monounsaturated, which supports heart health when consumed in moderation. I trim any excess fat before cooking to keep the dish even lighter while still delivering rich, smoky flavors.
Nutrition facts
Frequently asked questions
Can I make these ribs on a grill instead of the oven?
For grill cooking, set up indirect heat by placing the ribs on the cooler side of your grill. Maintain a temperature of 250-275°F and cook for 4-5 hours, spritzing with apple cider vinegar every hour to keep the bark moist. Wrap in foil after 2.5 hours and finish with 15-20 minutes of direct heat for crispy bark.
Why does the recipe call for wrapping the ribs in foil?
The foil wrap, or "Texas crutch," creates steam that breaks down collagen in the meat, making it fork-tender while preventing drying. It's especially helpful for tougher cuts like beef back ribs. After wrapping, we uncover them briefly at high heat to crisp the bark—this two-step process gives you the best of both worlds: tender meat with irresistible texture.
How do I know when the ribs are done without a meat thermometer?
Look for three key signs: the meat should pull apart easily with tongs, the bark should be deep mahogany color, and the bones should be exposed. For a quick test, gently wiggle a bone—if it moves freely, the ribs are likely done. Most importantly, the meat should reach 195-200°F internally, but these visual cues work well as backups.
Can I use a different type of sugar in the dry rub?
Yes, but with some adjustments. White sugar works but won't caramelize as beautifully. For deeper flavor, try turbinado sugar (less refined) or raw cane sugar. If using honey or maple syrup, reduce the amount by half since they're more concentrated. The sugar's job is to create that signature bark, so stick with brown sugar for best results.
What's the best way to reheat leftover ribs?
Wrap ribs tightly in foil and reheat in a 300°F oven for 15-20 minutes. For extra crispiness, uncover and broil for 2-3 minutes at the end. Avoid microwaving—it makes the meat rubbery. Leftovers actually improve overnight as flavors meld, so don't hesitate to save them for sandwiches or salads.