
Soups & Stews
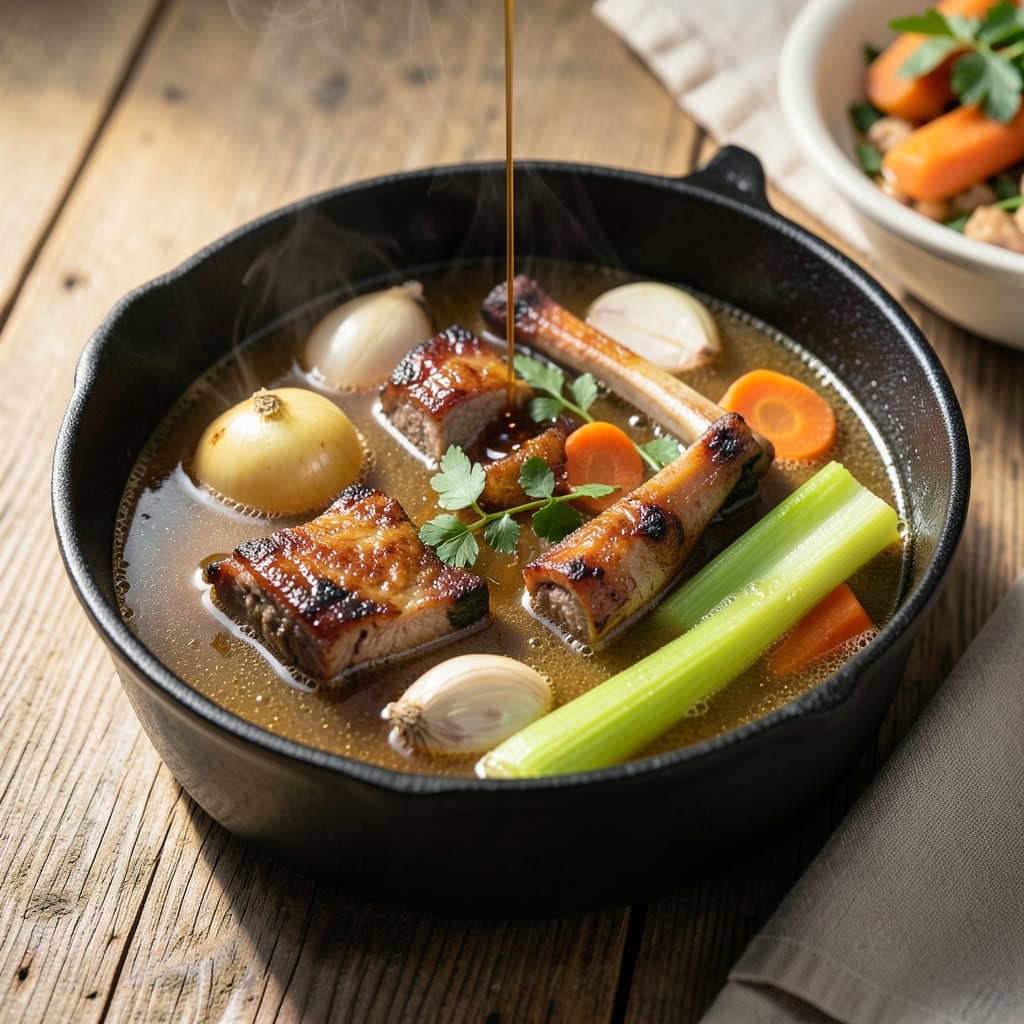
This basic beef bone broth recipe transforms simple ingredients into a rich, golden elixir that forms the backbone of countless meals. The process is straightforward yet transformative—roasting bones unlocks deep umami flavors while a slow simmer extracts collagen for silky texture. What begins as a pile of bones becomes a fragrant, nutrient-packed liquid that elevates soups, stews, and sauces to restaurant-quality depth.
The key to success lies in patience and technique: roasting bones until caramelized intensifies flavor, while a gentle simmer prevents cloudiness. This method delivers 24 hours of simmering that transforms tough bones into a versatile ingredient—no pressure cooker required, though one cuts time dramatically. The result? A broth so rich it deserves a place in your freezer, ready to enhance any dish.
What makes this recipe truly special is its adaptability. Add aromatics like onions, carrots, and celery for classic depth, or experiment with herbs and citrus for brightness. The broth reduces naturally as it simmers, concentrating flavor without added salt. Store it properly, and you'll have a pantry staple that turns ordinary meals into extraordinary ones.
Whether you're prepping for a week of hearty soups or building flavor layers for sauces, this broth is your secret weapon. The process may take time, but the payoff—rich, complex flavor in every spoonful—is unmatched. Let's get started on creating your foundational cooking liquid.
Ingredients for basic beef bone broth
Transform raw bones and simple aromatics into a rich, golden broth through slow simmering.
| Ingredient | Amount | Notes |
|---|---|---|
| Beef Bones (Kneecaps, Feet, or Marrow) 🦴 | 4 lb | Raw, uncooked, organic preferred |
| Yellow Onions 🧅 | 2 whole | Peeled, halved, root end trimmed |
| Carrots 🥕 | 4 whole | Scrubbed, cut into 2-inch chunks |
| Celery Stalks 🌿 | 4 whole | Trimmed, cut into 2-inch pieces |
| Garlic Cloves 🧄 | 8 cloves | Peeled, smashed for deeper flavor |
| Apple Cider Vinegar 🍋 | ¼ cup | Deglazes pot, prevents cloudiness |
| Fresh Rosemary 🌿 | ¼ cup | Stems removed, loosely packed |
| Fresh Thyme 🌿 | ¼ cup | Stems removed, loosely packed |
| Bay Leaves 🍃 | 4 whole | Dried, standard size |
| Black Peppercorns 🌶️ | 1 tbsp | Whole, lightly crushed |
| Kosher Salt 🧂 | 1 tsp | Diamond Crystal preferred |
| Cold Water 💧 | 16 cups | Filtered if possible |
The bones are the foundation—kneecaps, feet, or marrow bones yield the most collagen and gelatin. Local butchers often sell these at discounted prices, and Costco carries them pre-packaged. Organic bones ensure no antibiotics or hormones interfere with flavor. Avoid bones with meat still attached, as they can make the broth cloudy. If you can't find these cuts, beef marrow bones are a solid alternative. The more surface area the better—this is where flavor extraction begins.
No fresh rosemary or thyme? Dried works at one-third the amount, but fresh imparts a brighter aroma. The apple cider vinegar is non-negotiable—it helps extract minerals from the bones and prevents cloudiness during simmering. Substitute lemon juice if absolutely necessary, but vinegar's acidity is superior. For the aromatics, parsnips or fennel can replace carrots if you're experimenting. The bay leaves should be standard size—giant leaves take forever to infuse. If you're using a pressure cooker, reduce simmer time but keep all ingredients identical for best results.
Store the finished broth in glass jars or airtight containers—it keeps for 5 days refrigerated or 6 months frozen. Label with the date, as flavor deepens over time. For maximum richness, use within 3 months of freezing. Reheat gently on the stove or microwave in 30-second bursts. This broth is your flavor multiplier—use it in soups, sauces, or even as a base for risotto. The longer it simmers, the more collagen-rich it becomes, so don't rush the process.
Why You'll Love This Recipe
- No-Chop Necessary: I swear by this—just toss in whole onions, carrots, and celery (no peeling required) and let the pot do the work. The bones render all the flavor on their own, so you’re basically setting it and forgetting it.
- Deep Umami Magic: That first sip? Pure satisfaction. The marrow bones melt into rich, velvety goodness while the garlic and onions caramelize slowly, layering in complexity without any extra seasoning.
- Weeknight Workhorse: Use it for quick soups, grain bowls, or even a fancy risotto—just reheat and go. I keep a batch in the fridge for lazy nights when I need something hearty but zero effort.
- Pantry Goldmine: A single pot yields gallons, and it freezes like a dream. Honestly, I’ve used the same batch for months—soup one day, braising liquid the next, and still tasting fresh. Cheaper than takeout, too.
Step-by-step instructions for simmered beef bone broth
Transform raw bones into deeply flavorful broth through precise technique and patience.
Prepare the Bones and Aromatics
Preheat your oven to 450°F and place the 4 lb beef bones (kneecaps, feet, or marrow) on a baking sheet. Roast for 30 minutes until they develop a deep golden brown color—this caramelization jumpstarts flavor extraction. While they roast, peel and halve the 2 whole yellow onions, scrub and cut the 4 whole carrots and 4 whole celery stalks into 2-inch chunks.
Peel and smash the 8 cloves garlic with the side of a chef's knife to release their oils. Remove stems from the 0.25 cup fresh rosemary and 0.25 cup fresh thyme, then crush the 1 tbsp black peppercorns lightly between your palms. These aromatics will infuse the broth with complexity as they simmer.
Build the Broth Base
Transfer the roasted bones to a large stockpot or Dutch oven. Add the prepared vegetables, smashed garlic, herbs, bay leaves, and 0.25 cup apple cider vinegar. The vinegar helps extract minerals from the bones and prevents cloudiness in the finished broth. Pour in the 16 cups cold water—using cold water preserves collagen instead of cooking it out immediately.
Bring the mixture to a boil over high heat, then immediately reduce to a gentle simmer. The liquid should bubble softly without vigorous boiling—this prevents the broth from becoming murky. Skim off any foam or impurities that rise to the surface during the first 15 minutes of simmering.
Simmer for Maximum Flavor Extraction
Cover the pot and maintain a low simmer for 20-24 hours. I recommend using a slow cooker on low for this step—it maintains consistent temperature without requiring attention. The broth should reduce slightly, developing a rich, amber color and deep umami aroma. Check periodically to ensure the water level hasn't dropped below the bones.
If using a stovetop, simmer uncovered for the first 8 hours to allow impurities to rise and evaporate, then cover for the remaining time. The longer simmer time breaks down collagen and gelatin, creating that signature silky texture. The bones should become tender enough to pull apart with a fork by the end.
Strain and Finish
Once fully simmered, turn off the heat and let the broth sit for 10 minutes to allow any settled particles to sink. Line a fine-mesh strainer with cheesecloth or a coffee filter for clearer results, then carefully strain the broth into a large bowl or clean pot. Discard the solids or compost them—they're nutrient-rich.
Season the strained broth with the 1 tsp kosher salt, tasting as you go. The broth should have a deep, meaty flavor with subtle herbal notes from the rosemary and thyme. For best results, store in airtight containers in the refrigerator for up to 5 days or freeze for up to 6 months. The flavor continues to develop as it cools.
Pro Tips For Making Basic Beef Bone Broth
- CHAR THE BONES FIRST: After burning three batches of broth with pale, bland bones, I finally cracked this: Roast the beef bones uncovered at 450°F for 20-30 minutes before simmering. The caramelized crust isn’t just for looks—it unlocks deeper flavor when it hits the water. (Yes, even kneecaps and feet benefit.) ---
- SKIP THE CROWDED POT: I used to jam all the bones and veggies into one pot, thinking more surface area meant faster cooking. Wrong. Pack them loosely—bones should fit like a puzzle with gaps. Tight packing traps heat and turns your broth murky. Start with a big pot or do two batches if needed. ---
- CRUSH THE MARROW BONES: Marrow bones are the flavor bombs of broth, but their power gets wasted if left whole. Crack them open with a meat mallet or heavy pan before adding to the pot. The exposed marrow melts into the broth, giving it a rich, velvety depth that no other bone can match. ---
- SAVE THE GARLIC PEELS: I was skeptical until I tried it: Toss the garlic peels (yes, the papery outer layers) into the pot with the cloves. They add a subtle, complex aroma without overpowering. No extra prep—just peel the cloves normally and drop the whole thing in. Your broth will taste like it simmered for days.
Best sauces and condiments for basic beef bone broth
Classic Gravy Base
Use your finished broth as the foundation for restaurant-quality gravy. Simmer 2 cups broth with 2 tbsp cornstarch and 1 tbsp butter until thickened—about 5 minutes. For depth, add 1 tsp Worcestershire sauce and a pinch of black pepper. This works perfectly with roasted meats or mashed potatoes. 🍲
Umami Sauce Booster
Elevate any sauce by reducing 1 cup broth with 1 tbsp soy sauce, 1 tsp fish sauce, and ½ tsp grated ginger. Simmer until syrupy—this adds a savory depth to stir-fries, marinades, or even pasta. I love using it in beef stir-fry sauces for that restaurant-style richness.
Soup Enhancer
Transform simple soups with a splash of broth. Add ½ cup to minestrone or lentil soup just before serving—it deepens flavor without overpowering. For cream-based soups, use ¼ cup to balance richness. The collagen-rich broth also adds a silky texture that's impossible to replicate with water-based stocks.
Deglazing Elixir
After searing meat, deglaze your pan with 1 cup hot broth instead of wine or water. The caramelized fond dissolves beautifully, creating a flavor-packed pan sauce in minutes. Add a splash of balsamic vinegar for tang—perfect for steak or pork chops. This is my go-to for quick, flavorful sauces.
Risotto Upgrade
Replace water or stock with broth in risotto for instant depth. Use 2 cups per recipe, adding it gradually as the rice absorbs liquid. The umami richness balances creamy textures—try it with mushroom risotto or parmesan risotto. For extra luxury, finish with a drizzle of truffle oil and fresh parsley.
Braised Meat Magic
Braise tough cuts like beef short ribs or pork shoulder in broth instead of water. The gelatin-rich liquid keeps meat tender while infusing flavor. Simmer for 2-3 hours, then reduce the cooking liquid by half for a glossy, flavorful sauce. This is how I make fall-apart tender braised beef every time. 💫
Nutrition facts
Frequently asked questions
Can I use chicken or turkey bones instead of beef?
While you can make broth from chicken or turkey bones, the flavor and texture will differ significantly. Beef bones contain more collagen and gelatin, creating a richer, silkier broth perfect for hearty dishes. Chicken broth is lighter and works better for soups or sauces needing a delicate base. If you're set on poultry, use chicken feet or backs for maximum gelatin.
How do I know when the broth is ready?
The broth is done when the bones are tender enough to pull apart with a fork and the liquid has reduced to a deep amber color. This typically takes 20-24 hours on the stovetop or 12-16 hours in a pressure cooker. The aroma should be intensely savory with herbal notes—if it smells like cooked meat, it's not ready yet.
Can I make this broth in a pressure cooker?
A pressure cooker cuts the time dramatically to about 2-3 hours on high pressure. Use the same ingredients, but reduce the simmer time by 80%. For best results, follow the manufacturer's guidelines and avoid overfilling the pot. The high heat extracts flavor quickly, but you'll miss some of the deep collagen development from slow simmering.
What if my broth turns cloudy?
Cloudiness usually means impurities weren't skimmed properly or the broth boiled too vigorously. To fix it, strain the broth through a coffee filter or cheesecloth for a clearer result. Prevent cloudiness by skimming foam during the first 15 minutes of simmering and maintaining a gentle simmer—not a rolling boil.
How much broth will this recipe yield?
This recipe typically yields about 6-8 cups of rich, flavorful broth. The exact amount depends on bone size and simmer time—longer simmering reduces volume as collagen dissolves. For larger batches, double the ingredients and use a bigger pot. Store extras in airtight containers for future use.