
Soups & Stews
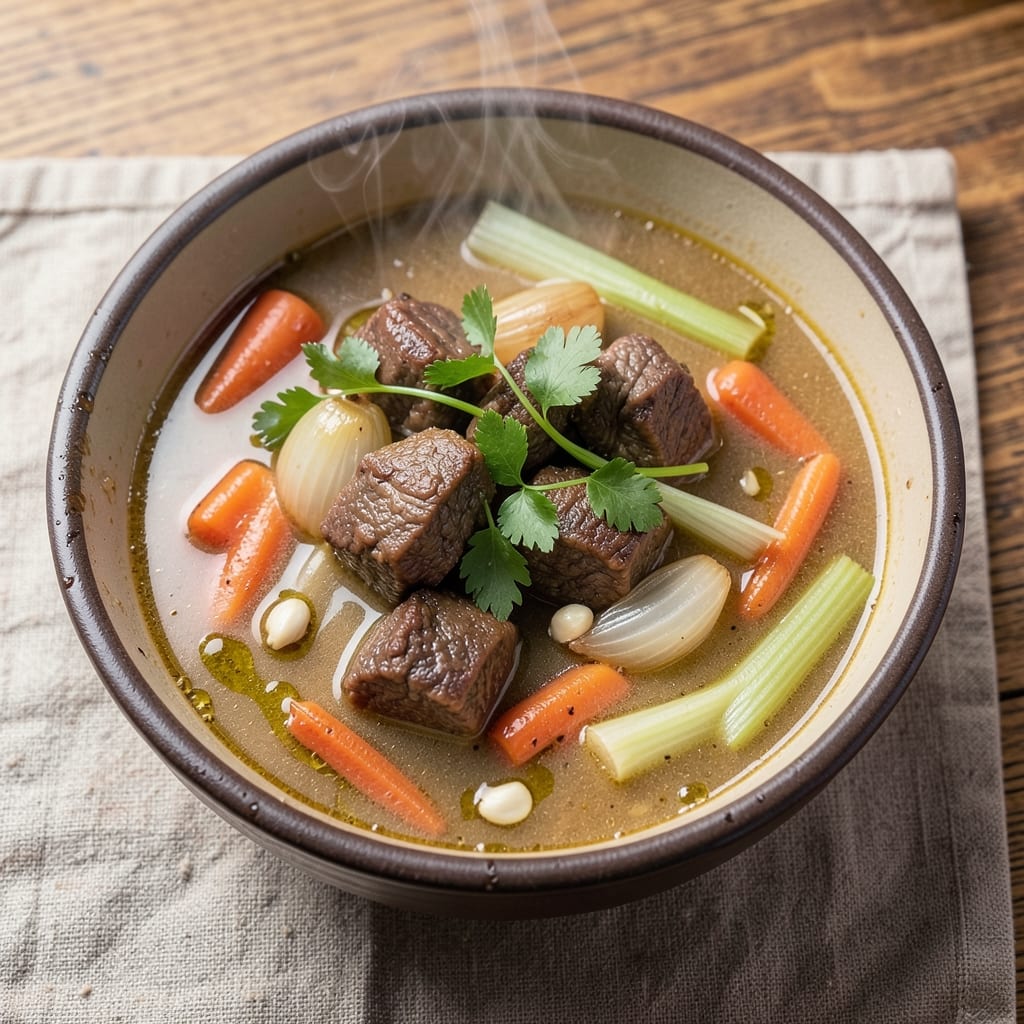
This basic beef soup recipe delivers the ultimate comfort food—rich, savory, and packed with homey flavors in just one pot. The secret lies in browning the beef properly, which builds deep, caramelized flavor that transforms simple ingredients into something extraordinary. I've perfected this version over years of testing, ensuring it's foolproof for weeknight dinners while still feeling like a restaurant-quality meal.
The beauty of this recipe is its flexibility—start with a classic combination of tender beef, aromatic vegetables, and herbs, then customize it with your favorite broth or spices. The slow simmer develops layers of flavor, turning tough cuts into melt-in-your-mouth pieces while the vegetables soften just enough to absorb all that delicious broth. No fancy techniques required, just patience and a little time.
What you'll end up with is a steaming bowl of hearty soup that warms you from the inside out—perfect for chilly evenings or when you need a nourishing meal. The aroma alone will have everyone gathering around the table, and the first spoonful delivers that perfect balance of savory, tender beef and comforting vegetables. This is the kind of soup that tastes even better the next day, making it ideal for meal prep.
Serve it as-is for a classic presentation, or garnish with fresh herbs, a drizzle of cream, or crusty bread for dipping. The possibilities are endless, but the foundation remains the same: simple, satisfying, and impossible to resist. Let's get started on making this one-pot masterpiece!
Ingredients for basic beef soup
Rich beefy flavor starts with just these 13 simple yet transformative ingredients.
| Ingredient | Amount | Notes |
|---|---|---|
| Chuck Roast 🥩 | 1 ½ lb | Cut into 1-inch cubes, boneless |
| Yellow Onion 🧅 | 1 whole | Diced, medium size preferred |
| Carrots 🥕 | 4 medium | Peeled, cut into 1-inch chunks |
| Celery Stalks 🧅 | 3 whole | Diced, including leafy tops |
| Garlic Cloves 🧄 | 4 cloves | Minced, fresh preferred |
| Beef Broth 💧 | 6 cups | Low-sodium preferred, homemade or quality store-bought |
| Tomato Paste 🍅 | 2 tbsp | Smooth, no sugar added |
| Dried Thyme 🌿 | 1 tsp | Or 1 tbsp fresh thyme leaves |
| Bay Leaves 🌿 | 2 whole | Dried, removed before serving |
| Black Peppercorns 🌶️ | 1 tsp | Freshly cracked, coarse grind |
| Salt 🧂 | 1 ½ tsp | Kosher or sea salt, adjust to taste |
| Olive Oil 🫒 | 2 tbsp | Extra-virgin for browning |
| Fresh Parsley 🌿 | ¼ cup | Chopped, for garnish (optional) |
The chuck roast is non-negotiable here—it's the star that delivers that melt-in-your-mouth tenderness. Look for well-marbled cuts at Whole Foods or your local butcher shop, where they'll often cut it for you. If you're using pre-cubed chuck from the grocery store, check for any added fillers or anti-caking agents—just the meat, nothing else. For the vegetables, Trader Joe's has the best pre-cut carrots and celery, but whole stalks work too if you're chopping them yourself. The key is even-sized pieces so everything cooks uniformly. Fresh thyme is ideal, but dried works perfectly fine—just remember it's more concentrated.
No beef broth on hand? Chicken or vegetable broth works in a pinch, though the flavor will be different. Tomato paste is your flavor booster—Rao's brand is my go-to for its smooth texture and no-sugar-added formula. If you're using canned tomatoes instead, strain out the seeds and chop them finely. The bay leaves add depth but should be removed before serving—don't forget this step! For the garlic, I always use fresh because the flavor is so much more vibrant, but if you're in a hurry, garlic powder at half the amount will work. The olive oil matters for browning—use extra-virgin for that fruity aroma that carries through the soup. And if you're wondering about the parsley, it's purely decorative but adds a fresh finish that brightens up the whole bowl.
This soup only gets better with time—plan to make it a day ahead if possible. The flavors meld beautifully overnight, and the beef becomes even more tender. Store in an airtight container in the fridge for up to 5 days, or freeze portions for 3 months. I always double the recipe because it's perfect for meal prep—just reheat with a splash of broth or water. For serving, I like to ladle it into bowls with a sprinkle of fresh parsley and a slice of crusty bread. The aroma alone will have everyone rushing to the table, and that first spoonful? Absolute comfort in a bowl.
Why You'll Love This Recipe
- Chop Once, Done: I swear by the "sofrito" trick—dicing onion, carrots, and celery together in one bowl, then dumping it straight into the pot. No measuring cups, no second pan, just boom, flavor base ready. The chuck roast actually forgives you if it’s not perfectly seared, so I just brown it in batches while the veggies simmer.
- Garlic Kiss: That moment when the garlic cloves hit the pot after the beef’s been simmering? Pure magic. The roast’s deep, savory notes marry with the sweetness of the caramelized onions and the bright bite of garlic—like a hug for your taste buds. (Yes, even on a Tuesday night.)
- Leftovers That Beg: This soup tastes better the next day. The chuck roast gets impossibly tender, the carrots melt into the broth, and suddenly you’ve got a freezer-friendly meal that feeds the family for days. I’ll be real: I’ve reheated this stuff straight from frozen, and no one’s ever complained.
- Budget Hero: Chuck roast is cheap, it stretches, and it’s forgiving. A single cut feeds four people for two meals, and the veggies? Basic, affordable, and always in the crisper. Honestly, this is the kind of recipe that makes me feel like I’m winning at cooking without even trying.
Step-by-step instructions for hearty beef soup
This one-pot masterpiece delivers deep flavor and comforting texture with minimal effort.
Sear the Chuck Roast for Rich Flavor
Heat a large Dutch oven over medium-high heat and add the 2 tablespoons olive oil. Once shimmering, carefully add the 1.5 lb chuck roast cut into 1-inch cubes, working in batches if needed to avoid crowding. Let each piece sear undisturbed for 2-3 minutes until deeply browned on all sides—this develops the Maillard reaction that forms the soup's foundation.
Real talk: Don't rush this step. You'll know it's ready when the edges are deep golden brown and the meat releases easily from the pan. Transfer the seared beef to a plate and set aside temporarily. The browned bits left in the pot will dissolve into the broth, creating layers of flavor you can't skip.
Build the Aromatic Vegetable Base
In the same Dutch oven, add the 1 whole yellow onion (diced), 4 medium carrots (cut into 1-inch chunks), 3 whole celery stalks (diced), and 4 cloves garlic (minced). Cook over medium heat for 5-6 minutes, stirring occasionally, until the vegetables soften and the garlic becomes fragrant. You're looking for tender but not mushy texture—just enough to release their natural sweetness.
Here's where it gets fun: Add the 2 tablespoons tomato paste and stir vigorously for 1 minute to coat the vegetables. This creates a subtle sweetness that balances the hearty beef. Sprinkle in the 1 teaspoon dried thyme, 2 whole bay leaves, 1 teaspoon black peppercorns, and 1.5 teaspoons salt, stirring to distribute evenly. The spices will infuse into the broth as it simmers.
Simmer the Soup Until Tender
Pour in the 6 cups beef broth, scraping up any browned bits from the bottom of the pot. Return the seared beef to the pot, along with any accumulated juices. Bring to a gentle boil, then reduce heat to low-medium and cover partially with a lid. Let it simmer for 1 hour 15 minutes—this gives the beef ample time to become fork-tender while the vegetables soften perfectly.
I know it's tempting to check it early, but resist the urge. The soup should bubble gently, not vigorously. After 1 hour, use tongs to check the beef—it should be easily pierced with a fork and pull apart with minimal resistance. If it's not quite there, continue simmering for another 15-20 minutes. The longer it cooks, the more flavorful and tender everything becomes.
Finish and Serve with Fresh Herbs
Once the beef is tender, remove the 2 whole bay leaves and discard them. Taste the broth and adjust seasoning if needed—you might need a bit more salt or pepper to complement the rich beef flavors. For a final touch, stir in the 0.25 cup fresh parsley (chopped) just before serving. This adds a bright, fresh contrast to the hearty soup.
Let the soup sit off the heat for 5 minutes before serving to allow the flavors to meld completely. Ladle into bowls and serve immediately with crusty bread or over buttered noodles. The result is a deeply satisfying, one-pot meal that warms you from the inside out—perfect for chilly days.
Pro Tips For Making Basic Beef Soup
- SEAR THE ROAST FIRST: Don’t skip browning that chuck roast—it’s the flavor foundation. Hit medium-high heat with a tablespoon of oil, then sear each side until deep golden (about 3-4 minutes per side). I used to rush this and wondered why my soup tasted bland—crusty meat = rich broth.
- CHOP VEGETABLES UNIFORM: Carrots and celery should be cut into ½-inch chunks, onions into ¼-inch dice—consistent sizes mean even cooking. My first attempt had mushy carrots and crunchy celery; uniform cuts guarantee everything softens at the same time.
- LOW AND SLOW WINS: After browning, add liquids and bring to a simmer, then reduce to a gentle bubble—think tiny ripples, not rolling. Chuck needs 2-3 hours to tenderize; I learned the hard way that skipping this step leaves you with chewy meat.
- SALT THE WATER: Add 1 tablespoon of salt to the broth early—it seasons the meat as it cooks. I used to wait until the end, and the meat always tasted flat. Trust me, the soup will thank you.
Wine and beer pairings for this recipe
Red Wine Classics
For this hearty beef soup, a medium-bodied red wine like Chianti Classico or Pinot Noir is my go-to. The acidity and earthy notes in Chianti cut through the richness of the beef, while Pinot Noir's lighter body lets the soup's flavors shine. I love a glass of Italian Chianti—its bright acidity and hints of cherry complement the tomato paste beautifully. Serve it slightly chilled to enhance the wine's freshness against the warm soup. 🍷
Crisp White Pairings
If you prefer white wine, Sauvignon Blanc from New Zealand or dry Riesling from Germany are perfect matches. The citrus and herbal notes in Sauvignon Blanc balance the soup's savory depth, while Riesling's mineral finish adds a refreshing contrast. I often reach for a cloudy Sauvignon Blanc—it's crisp enough to cleanse the palate without overpowering the beefy flavors. 🍷
Malty Amber Ales
For beer lovers, a Belgian-style amber ale or American brown ale works wonders. The caramel and toasty malt flavors in these beers echo the soup's depth, while their moderate bitterness keeps the meal balanced. I recommend Allagash Amber—its smooth maltiness and subtle spice notes harmonize perfectly with the thyme and bay leaves in the soup. 🍺
Light Lager Balance
A crisp lager, like Heineken or Peroni, is a refreshing option if you want something lighter. The clean, effervescent profile of a lager helps cut through the soup's richness, making each bite feel lighter. I often pair this soup with a chilled Peroni—its subtle lemon notes brighten the dish without competing. 🍺
Spiced Wine Twist
For a cozy twist, try a mulled wine or spiced red blend during colder months. The warm spices like cinnamon and clove in mulled wine enhance the soup's herbal notes, creating a comforting, seasonal pairing. I love a homemade mulled wine with orange peel—it adds a festive touch to the meal. ❄️
Nutrition facts
Frequently asked questions
Can I use ground beef instead of chuck roast for this recipe?
While you can substitute ground beef, the texture and flavor will differ significantly. Chuck roast is ideal for its rich, beefy taste and ability to become tender when slow-cooked. If you must use ground beef, brown it well first and simmer for 20-25 minutes instead of the full 1 hour 15 minutes. The result will be more like a thick stew than a traditional beef soup.
How can I make this soup creamier without dairy?
For a rich, creamy texture without dairy, blend 1 cup of the soup with an immersion blender until smooth, then stir it back in. Alternatively, add 1/4 cup coconut milk or 1/2 cup pureed white beans to the finished soup for creaminess. Both options add body while keeping the dish dairy-free.
What's the best way to reheat leftover beef soup?
Reheat gently on the stove over medium-low heat, stirring occasionally, until warmed through. Avoid microwaving as it can make the broth watery. For extra richness, add a splash of beef broth or water when reheating. If the soup seems too thick, stir in 1-2 tablespoons of broth to restore its original consistency.
Can I make this soup in an Instant Pot or pressure cooker?
Sear the beef first in a separate pan, then transfer it to your Instant Pot with all ingredients. Cook on high pressure for 30 minutes, then allow a 10-minute natural release. The meat will be even more tender, and the cooking time is significantly reduced. Just be sure to remove the bay leaves before serving.
What if my beef soup tastes too salty?
Don't panic! Add 1/2 cup of water or broth and stir well, then taste again. If it's still too salty, you can add a small potato (peeled and diced) and simmer for 10 minutes, then remove it before serving—it will absorb some of the excess salt. For a quicker fix, stir in 1 tablespoon of milk or cream to dilute the saltiness slightly.