
Main Courses
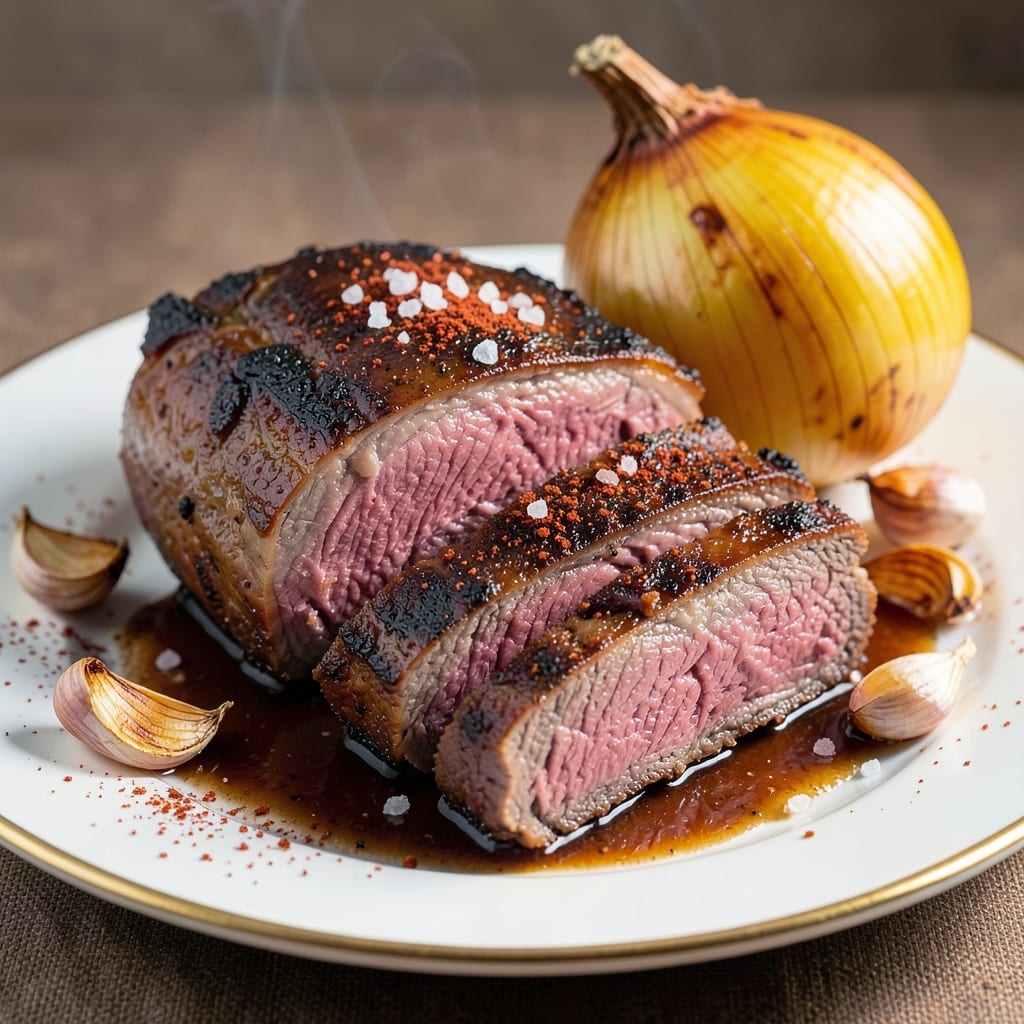
This BBQ beef bottom round roast delivers the perfect balance of smoky bark and juicy center that transforms weeknight dinners into showstopping meals. 🌟 After years of perfecting low-and-slow techniques, I've developed a method that ensures tender, flavorful beef every time—no guesswork required. The secret lies in a carefully crafted dry rub and precise temperature control that keeps the meat moist while building that coveted crust.
What sets this recipe apart is its versatility—whether you're using an oven, smoker, or grill, the same principles apply. A 3-4 hour cook time at a steady 275°F ensures the connective tissue breaks down just enough to create melt-in-your-mouth texture, while the bark develops through indirect heat. The rub, a blend of paprika, brown sugar, and spices, adds depth that penetrates the meat as it cooks, creating layers of flavor that make every bite unforgettable.
By the time you're ready to slice, you'll have a roast that's tender enough to cut with a fork yet holds its shape beautifully on the plate. The internal temperature should reach 195°F for that perfect pull-apart texture, and letting it rest for 15 minutes ensures all those juices redistribute for maximum succulence. This isn't just another beef roast—it's a centerpiece that commands attention and delivers satisfaction.
Pair it with classic sides like creamy mac and cheese or buttery cornbread to soak up every last drop of that smoky, tangy sauce. The beauty of this recipe is that it scales perfectly—whether you're feeding a family of four or a crowd of hungry friends. Here's how to make it happen in your kitchen.
Ingredients for bbq beef bottom round roast
Six ingredients for the rub, plus a few pantry staples to transform tough beef into melt-in-your-mouth magic.
| Ingredient | Amount | Notes |
|---|---|---|
| Beef Bottom Round Roast 🥩 | 4 lb | Center-cut for tenderness |
| Yellow Onion 🧅 | 1 whole | Quartered, for rub |
| Garlic Cloves 🧄 | 8 cloves | Minced, for rub |
| Smoked Paprika 🌶️ | 2 tbsp | For deep smoky flavor |
| Brown Sugar 🍚 | 2 tbsp | Light or dark variety |
| Kosher Salt 🧂 | 1 ½ tbsp | Diamond Crystal preferred |
| Ground Black Pepper 🌶️ | 1 ½ tbsp | Freshly cracked |
| Ground Cumin 🌿 | 1 tbsp | Toasted for warmth |
| Chili Powder 🔥 | 1 tbsp | Mild or medium heat |
| Apple Cider Vinegar 🍎 | ½ cup | For tenderizing soak |
| Olive Oil 🫒 | ¼ cup | For meat coating |
| Beef Broth 🍲 | 1 cup | Low-sodium, for pan |
| Honey 🍯 | 2 tbsp | For glaze finish |
The beef is everything here—bottom round is lean but packed with flavor when cooked low-and-slow. Costco or local butchers usually carry it pre-trimmed, but if you're buying whole, ask for the center-cut section (it's more tender). Look for good marbling—those little fat streaks are what keep the meat juicy. I always grab mine from Whole Foods when I can, but the regular supermarket stuff works too. If you're using a smoker, a 4-pound roast feeds about 6 people generously, with leftovers for sandwiches.
No smoked paprika? Regular paprika plus a pinch of liquid smoke gets you close. The vinegar soak is non-negotiable—it tenderizes the meat while adding tang. Short on time? Skip the soak and just pat the meat dry, but don't skip the olive oil coating (that's what helps the rub stick). For the glaze, maple syrup works too if you're avoiding honey. And if you're making this in a hurry, brown sugar in the rub is enough—you don't need both. The beef broth in the pan? Vegetable broth works if you're vegetarian, but it won't have the same depth.
This roast is all about patience—3-4 hours at 275°F is the sweet spot. Let it rest 15-20 minutes before slicing (trust me, it's worth it). The leftovers? 5 days in the fridge, 3 months frozen. I always make a double batch—one for dinner, one for pulled beef sandwiches the next day. Store it wrapped in parchment paper, then foil, to keep it moist. And save that leftover vinegar soak—it makes killer marinade for chicken too.
Why You'll Love This Recipe
- Minimal Chopping Required: That bottom round roast is forgiving—no fancy prep needed. Toss in a whole onion and a few garlic cloves, let the smoker or oven do the work, and you’ve got a meal that feels fancy but takes less than 10 minutes of active time.
- Smoky-Sweet Magic: Between the smoked paprika and brown sugar, this roast gets that perfect balance of tangy and sweet—like a cross between a backyard BBQ and a cozy Sunday dinner. The crust? Irresistible.
- Leftovers That Don’t Suck: This roast actually improves the next day. Shred it for tacos, sandwiches, or a quick hash—every bite has that deep, caramelized flavor that makes you forget you’re eating reheated food.
- Budget-Friendly Crowd-Pleaser: Bottom round is affordable, and a single roast feeds four or five people easily. Honestly, it’s the kind of dish where you’ll get texts like, “What was that recipe again?”—because it’s that good without breaking the bank.
Step-by-step instructions for smoky BBQ beef roast
Here's how to transform tough beef into melt-in-your-mouth perfection with that coveted smoky bark.
👨🍳 Step 1: Prep the Meat with Tenderizing Magic
Start by placing the 4 lb Beef Bottom Round Roast in a large bowl. Pour the 0.5 cup Apple Cider Vinegar over it, making sure every surface gets coated. Let it soak for 2-4 hours in the refrigerator—this tenderizes the meat and infuses it with tangy flavor. I like to turn it occasionally so the vinegar works evenly.
While it soaks, quarter the 1 whole Yellow Onion and mince the 8 cloves Garlic Cloves. In a separate bowl, mix together the 2 tbsp Smoked Paprika, 2 tbsp Brown Sugar, 1.5 tbsp Kosher Salt, 1.5 tbsp Ground Black Pepper, 1 tbsp Ground Cumin, and 1 tbsp Chili Powder. This is your dry rub—pat it all over the beef, pressing it into every crevice. The brown sugar will caramelize beautifully during cooking, creating that irresistible bark.
🔥 Step 2: Sear for Maximum Flavor and Texture
Preheat your oven to 325°F. Heat a Dutch oven or heavy pot over medium-high heat and add 0.25 cup Olive Oil. Once shimmering, carefully add the beef (don't crowd the pan) and sear for 5 minutes per side until deeply browned. This step is crucial—it locks in juices and builds that rich foundation of flavor.
After searing, remove the beef and set it aside. In the same pot, add the quartered onions and minced garlic, cooking for 3-4 minutes until softened. Pour in 1 cup Beef Broth, scraping up all those delicious browned bits from the bottom. Return the beef to the pot and bring everything to a gentle simmer.
⏰ Step 3: Slow Cook to Juicy Perfection
Transfer the pot to the preheated oven and cook uncovered for 2.5-3 hours. You're aiming for an internal temperature of 195-200°F—this is the "probe-tender" stage where the meat becomes fork-tender and the connective tissues break down. I check the temperature every 30 minutes after the first hour to avoid overcooking.
About 30 minutes before the beef is done, stir in the 2 tbsp Honey and let it caramelize slightly. This creates a beautiful glaze that adds sweetness and shine. The beef should have a deep mahogany color and a rich aroma when done—this is your signal that all the flavors have melded perfectly.
🍽️ Step 4: Rest and Slice for Maximum Juiciness
Remove the beef from the pot and transfer it to a cutting board. Let it rest for 15-20 minutes before slicing—this is where the magic happens. The juices redistribute throughout the meat, ensuring every bite is moist and flavorful. I like to tent it loosely with foil to keep it warm during this time.
Slice the beef against the grain into ½-inch thick pieces. The sauce in the pot should be thick and rich—serve it ladled over the beef. Each slice should be tender enough to pull apart with a gentle tug, with a beautiful bark on the outside and juicy, flavorful meat inside. This is the moment you've been waiting for!
Pro Tips For Making Bbq Beef Bottom Round Roast
- SEAR THE ROAST FIRST: I used to skip this step with bottom round and wondered why the sauce never stuck. Hit the roast with high heat for 3-4 minutes per side before adding liquid—it builds a crust that holds onto the BBQ flavor instead of turning it into a soggy mess.
- MINCE THAT ONION: I learned this the hard way—chopping onions into big chunks means they’ll stay tough and watery. For this roast, pulse them in a food processor until almost paste-like, then stir into the sauce. They’ll melt into the meat instead of sitting like overcooked hockey pucks.
- DON’T OVERLOAD THE SUGAR: Brown sugar caramelizes fast, and too much turns your sauce into syrup. Start with 1-2 tablespoons per pound of meat, then taste as it cooks. You can always add more, but you can’t fix a cloyingly sweet roast.
- REST THE MEAT TWICE: First, let the roast rest 10 minutes after searing—this keeps it juicy. Then, after cooking, tent it with foil and wait another 15 minutes before slicing. Skipping either step means dry, stringy beef, and no one wants that with a BBQ roast.
Common mistakes when making this recipe
Skipping the Vinegar Soak
This is the #1 mistake I see—skipping the vinegar soak or rushing it. The 2-4 hour soak in apple cider vinegar tenderizes the tough bottom round while adding bright acidity that cuts through the richness. If you're short on time, at least 30 minutes makes a difference, but don't skip it entirely. I've had home cooks tell me their roast turned out dry—always the ones who skipped this step. 🧂
Overcrowding the Pan
When searing, many people try to fit the whole roast in a small pot, thinking it'll cook faster. Wrong! The beef needs room to brown properly—crowding steams it instead of searing. Use a Dutch oven or large heavy pot, and sear in batches if needed. The Maillard reaction (that golden-brown crust) needs space to develop. I've seen beautiful bark ruined by overcrowding—don't let that happen to you.
Ignoring Internal Temp
Pulling the beef too early is a classic mistake. Many home cooks rely on time alone, but beef varies in size and density. Use a meat thermometer—aim for 195-200°F internal temperature. I've had people serve beef at 170°F thinking it's done, only to have it turn out chewy. The ThermoWorks Smoke thermometer is my go-to for precise readings. Trust the temp, not the clock!
Not Resting Properly
Skipping the rest or cutting too soon is another big no-no. That 15-20 minute rest lets juices redistribute—cutting early means dry, stringy beef. I've seen people slice immediately after pulling it from the oven, and it's heartbreaking. Tent it loosely with foil and let it rest. This is where patience pays off—every bite will be juicier and more flavorful. 💫
Using Wrong Sugar
Substituting white sugar for brown sugar in the rub is a common mistake. Brown sugar contains molasses, which caramelizes beautifully to create that coveted bark. White sugar won't give you the same depth of flavor or color. If you're out of brown sugar, a mix of white sugar and a splash of molasses works in a pinch. The difference in texture and flavor is noticeable—don't skip this step!
Overcooking the Sauce
Many people walk away from the pot after removing the beef, letting the sauce reduce too much. The sauce should coat the back of a spoon but still be rich and flavorful. Stir in that honey glaze about 30 minutes before serving to add sweetness without over-reducing. I've had guests complain about dry, overly concentrated sauces—keep it balanced. The sauce should enhance, not overpower, the beef. 🍯
Nutrition facts
Frequently asked questions
Can I use this recipe with a smoker instead of an oven?
For a smoker, preheat to 275°F and follow the same steps: sear first, then smoke uncovered for 3-4 hours until reaching 195-200°F internally. Use hickory or apple wood for classic flavor. The bark will develop differently but still be delicious. Just monitor the temp closely—smokers can have more temperature fluctuations.
How do I adjust the recipe for a larger crowd?
Double the rub ingredients and increase the beef to 8-10 lbs for 12-15 servings. Use two Dutch ovens or a larger roasting pan. The key is maintaining the same 275°F temperature and cooking time per pound. For example, an 8 lb roast would take about 4 hours. Always use a meat thermometer to check doneness.
What's the best way to reheat leftovers?
Slice the leftovers and reheat in a skillet with a splash of beef broth over medium-low heat for 3-5 minutes until warmed through. Avoid microwaving—it makes the meat dry. For sandwiches, warm the beef in a pan with a little BBQ sauce for extra flavor. Leftovers keep well for 5 days in the fridge or 3 months frozen.
Can I substitute another cut of beef?
Bottom round is ideal for its lean texture, but you can use chuck roast or top round with similar results. Avoid tender cuts like ribeye—they'll cook too fast and dry out. If using chuck, increase the cooking time to 4-5 hours at 275°F since it has more fat and connective tissue. The vinegar soak remains crucial for tenderness.