
Main Courses
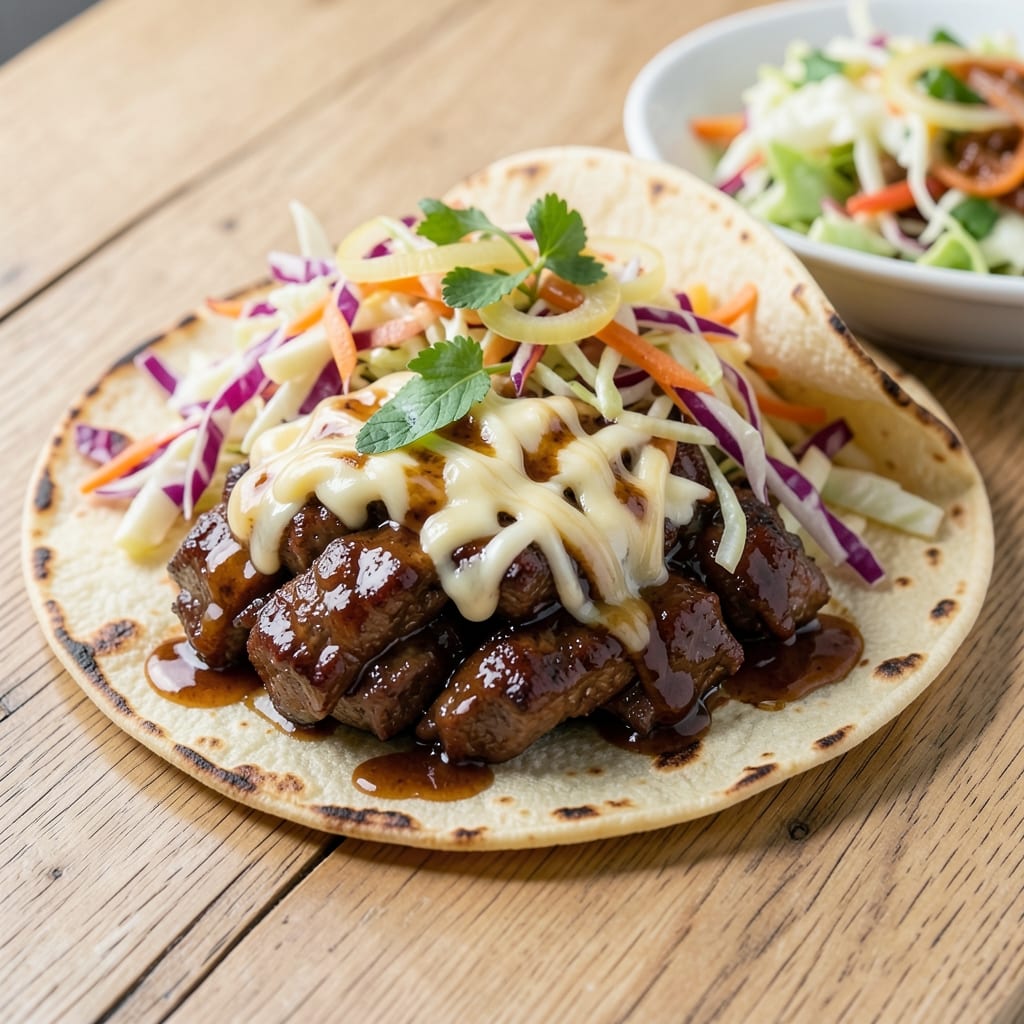
This BBQ beef burrito recipe delivers smoky, tender beef wrapped in a toasted tortilla—packed with all the comfort of a Texas roadhouse but ready in just 20 minutes. The secret lies in slow-cooked beef that practically melts in your mouth, balanced by a crisp tortilla that holds every bite together. I perfected this after years of testing—no shortcuts, just layers of flavor that make every forkful worth it.
What sets this apart is the technique: the beef cooks low and slow until fork-tender, then gets a final char on the grill for that perfect smoky crust. Meanwhile, the tortilla toasts just enough to stay sturdy without getting soggy—critical for that satisfying first bite. The fillings are simple but strategic: creamy cheese, cool slaw, and a drizzle of that same smoky BBQ sauce that ties everything together.
By the time you wrap that last burrito, you'll have a meal that feels indulgent yet balanced—rich enough to satisfy cravings but light enough for a weeknight dinner. The beef stays juicy, the tortilla stays crisp, and the flavors? Perfectly harmonized. This isn't just comfort food; it's a restaurant-quality experience you can make at home.
Serve with a side of chips for crunch, a quick coleslaw for freshness, or warm cornbread to soak up every last drop of that BBQ sauce. The best part? Leftovers reheat beautifully, making this the ultimate meal-prep solution for busy weeks. Let's get cooking!
Ingredients for bbq beef burrito
The secret to restaurant-quality BBQ beef burritos starts right here—smoky, tender beef and crisp tortillas.
| Ingredient | Amount | Notes |
|---|---|---|
| Beef Chuck Roast 🥩 | 1 ½ lb | Pre-cubed, 1-inch pieces |
| BBQ Sauce 🍅 | 1 cup | Smoky, medium thickness |
| Large Flour Tortillas 🌯 | 4 whole | 10-inch size, preferred |
| Shredded Cheddar Cheese 🧀 | 1 ½ cups | Medium or sharp cheddar |
| Coleslaw Mix 🥬 | 2 cups | Pre-shredded cabbage/carrot |
| Yellow Onion 🧅 | 1 whole | Diced, medium size |
| Garlic Cloves 🧄 | 4 cloves | Minced, fresh preferred |
| Olive Oil 🫒 | 1 tbsp | For searing beef |
| Beef Broth 💧 | ½ cup | Low-sodium preferred |
| Brown Sugar 🍚 | 1 tbsp | Light or dark variety |
| Smoked Paprika 🌶️ | 1 tsp | For smoky depth |
| Salt 🧂 | 1 tsp | Kosher or sea salt |
| Black Pepper 🌶️ | ½ tsp | Freshly ground |
| Mayonnaise 🥄 | 2 tbsp | For coleslaw dressing |
| Apple Cider Vinegar 🍎 | 1 tbsp | For slaw tang |
The beef is everything. Chuck roast gives you that melt-in-your-mouth texture—sirloin stays tough. Grab the pre-cubed kind from the meat counter (saves time), or cube your own if you're feeling fancy. For the best flavor, Costco or local butchers often have better cuts. The key is slow cooking—this isn't a quick sear. If you're in a rush, slow cooker on low for 6 hours works perfectly. And trust me, the smoked paprika makes all the difference—it's what gives that authentic BBQ vibe.
No BBQ sauce? Mix ½ cup ketchup, 1 tbsp brown sugar, 1 tbsp apple cider vinegar, ½ tsp smoked paprika, and ½ tsp garlic powder—it's a game-changer. The tortillas are non-negotiable—Mission or La Tortilla Factory are my go-tos, but any sturdy 10-inch flour tortilla works. For the coleslaw, pre-shredded mix saves time, but if you're making it fresh, cabbage and carrots with a splash of vinegar keep it crisp. The cheese? Sharp cheddar melts best, but Monterey Jack works too. And if you're short on time, pre-shredded cheese is totally fine—just don't use the powdery kind.
Beef keeps for 4 days in the fridge—freeze portions for 3 months. Tortillas? Wrap in foil and freeze if you're not using them all at once. The sauce reheats beautifully, but add a splash of water if it thickens. Pro tip: Assemble burritos ahead of time, wrap tightly in foil, and reheat in a skillet for 2 minutes per side—keeps everything crisp. Leftovers? Double the batch—these disappear fast, and they reheat like a dream.
Why You'll Love This Recipe
- Slow-Cooker Magic: I swear by my Instant Pot for this—just dump in the chuck roast, a splash of BBQ sauce, and let it melt down to fork-tender perfection. No babysitting, no mess, and that deep, smoky flavor? Worth every minute of hands-off time.
- Tortilla Hugs: The moment I wrap that shredded beef in a warm flour tortilla with melty cheddar and crunchy coleslaw? Pure satisfaction. It’s like a hug for your taste buds—messy, hearty, and impossible to resist.
- Lunchbox Hero: Between us, this is my go-to for meal prep. Assemble a few ahead of time, wrap in foil, and they stay fresh for days. Toss one in your bag for a no-fuss lunch that still feels like a restaurant meal.
- Budget Stretch: A pound of chuck roast feeds my whole family, and the BBQ sauce stretches further than you’d think. Add coleslaw mix for crunch, and suddenly you’ve got a filling, flavorful dinner that won’t break the bank.
Step-by-step instructions for BBQ beef burritos
Here's how to build these hearty, smoky burritos with tender beef and crisp slaw—fast and satisfying!
Sear and Braise the Beef Chuck Roast
Heat a large skillet over medium-high heat and add the 1 tablespoon olive oil. Working in batches if needed, sear the 1.5 lb beef chuck roast (pre-cubed) for 3-4 minutes per side until deeply browned. You want those pieces to develop a rich crust—this builds flavor that'll shine through the BBQ sauce.
Once browned, transfer the beef to a bowl and set aside. In the same skillet, add the diced yellow onion and cook for 3 minutes until softened. Stir in the 4 cloves minced garlic and cook for 30 seconds until fragrant. Pour in the 0.5 cup beef broth, scraping up any browned bits from the bottom of the pan—this is where all the flavor hides.
Return the beef to the skillet, add the 1 cup BBQ sauce, 1 tablespoon brown sugar, 1 teaspoon smoked paprika, 1 teaspoon salt, and 0.5 teaspoon black pepper. Stir everything together, then bring to a gentle simmer. Cover and cook for 10-12 minutes until the beef is fork-tender and the sauce has thickened slightly. The beef should pull apart easily when pierced with a fork.
Prepare the Crisp Coleslaw Topping
While the beef braises, make the coleslaw by combining the 2 cups coleslaw mix in a medium bowl. In a small separate bowl, whisk together the 2 tablespoons mayonnaise and 1 tablespoon apple cider vinegar until smooth. Pour the dressing over the coleslaw mix and toss gently to coat.
Let the slaw sit for 5 minutes while you finish the burritos—this gives the flavors time to meld. The vinegar will brighten the flavors and cut through the richness of the mayonnaise, creating a perfect balance. If you prefer a crunchier slaw, you can skip this waiting step and eat it immediately, but I find the 5-minute rest makes all the difference.
Assemble the Burritos Like a Pro
Warm the 4 large flour tortillas by placing them on a clean kitchen towel and covering with another towel. Microwave for 20-30 seconds or wrap in a damp towel and warm in a dry skillet over low heat for 1 minute per side. This step is crucial—warm tortillas are more pliable and less likely to crack when you add all the fillings.
Divide the braised beef evenly among the tortillas, spreading it out toward the bottom third. Sprinkle each with about 0.375 cups shredded cheddar cheese (reserve a little for topping). Add a generous spoonful of the coleslaw mix to each burrito, then fold the sides inward and roll tightly from the bottom up. The cheese will melt slightly as you eat, creating a gooey, flavorful center.
Serve Immediately with Extra Toppings
Transfer the assembled burritos to a plate and let them rest for 2 minutes—just enough time for the fillings to settle and the cheese to begin melting slightly. This brief rest prevents the burritos from falling apart when you cut into them. Serve each burrito cut in half or whole, with any remaining coleslaw mix and shredded cheddar cheese on the side for extra crunch and flavor.
For the ultimate experience, serve these burritos with a side of extra BBQ sauce for dipping. The combination of tender beef, crisp slaw, and melted cheese creates a perfect balance of textures and flavors—smoky, tangy, and comforting all at once. Don't forget to save some of that delicious braising liquid to drizzle over the top before serving!
Pro Tips For Making Bbq Beef Burrito
- SEAR THE ROAST FIRST: I learned this the hard way—skipping the sear means flavorless beef. Hit the chuck roast with a hot cast-iron or heavy skillet for 3-4 minutes per side before slow cooking. The crust locks in juices and adds depth that BBQ sauce alone can’t match.
- USE A MEAT THERMOMETER: Chuck roast needs patience—pull it at 203°F (not 160°F). I used to eyeball it and ended up with dry, stringy meat. The low-and-slow cook turns it tender, but the thermometer guarantees perfect texture every time.
- WARM THE TORTILLAS RIGHT: Cold tortillas = sad burritos. Wrap the flour tortillas in a damp towel and microwave for 20 seconds or warm them dry in a 300°F oven for 3-4 minutes. They’ll stay pliable and hold the filling like a pro.
- SHRED BEFORE SLICING: After cooking, let the beef rest 10 minutes, then shred it with forks—don’t slice. The fibers stay intact, soaking up BBQ sauce better. If you slice, the juices escape, and the burritos get soggy. (Yes, even if you’re impatient like me.)
Pro cooking tips for perfect results
Sear First, Braise Slow
This isn't your average quick sear—think of it as the foundation for all that smoky goodness. I swear by searing the beef chuck in batches over medium-high heat until it's deeply browned on all sides. That crust? It's what locks in the juices and builds the depth of flavor that makes these burritos sing. After searing, I transfer the beef to a bowl and set it aside while I sauté the onions and garlic in the same pan—this way, I don't lose any of that precious browned beef flavor that sticks to the bottom.
Once the onions are soft and the garlic is fragrant, I pour in the beef broth and scrape up every last bit of those browned bits from the pan. That's where the magic happens—those bits are packed with flavor. Then I return the beef to the pan, add the BBQ sauce, and let it all simmer gently. The key here is patience: 10-12 minutes of covered simmering turns that tough chuck into fork-tender beef that practically melts in your mouth. 🔥
Tortilla Tricks
Warm tortillas are the secret to burritos that don't fall apart at the first bite. I like to warm mine by wrapping them in a damp towel and heating them in a dry skillet over low heat for 1 minute per side. This makes them pliable and prevents cracking when you add all those fillings. If you're short on time, the microwave works too—just 20-30 seconds on a damp paper towel.
Here's a pro move: spread the beef toward the bottom third of the tortilla. This creates a sturdy base that won't unwrap when you take that first bite. I also like to sprinkle a little extra cheese on top before rolling—it melts just enough to act as a glue that holds everything together. And always fold the sides inward first before rolling tightly from the bottom up. This technique keeps the fillings secure and makes for clean, professional-looking burritos. ✨
Sauce Balance
The BBQ sauce in these burritos does double duty—it braises the beef AND becomes the final drizzle. I always save about 2 tablespoons of that delicious braising liquid to drizzle over the top before serving. It adds that perfect smoky-sweet finish that ties all the flavors together. If your sauce is too thick after braising, just add a splash of water or beef broth to loosen it up.
For an extra kick, I like to add a pinch of cayenne pepper or a dash of hot sauce to the reserved braising liquid before drizzling. It cuts through the richness of the beef and cheese beautifully. And if you're feeling fancy, a sprinkle of fresh cilantro or green onions adds a bright, fresh contrast to the smoky flavors. The goal is balance—smoky, tangy, and just a little heat to keep things interesting. 💫
Make-Ahead Magic
One of my favorite things about these burritos is how well they reheat. Assemble them ahead of time, wrap tightly in foil, and store them in the fridge for up to 2 days. When you're ready to eat, simply reheat them in a skillet over medium heat for 2-3 minutes per side until the tortilla is crisp again. The beef stays juicy, and the cheese melts just enough to make it feel fresh.
For even longer storage, freeze the assembled burritos (unwrapped) on a tray for 1 hour to firm up, then transfer to a freezer bag for up to 3 months. To reheat from frozen, bake at 350°F for 20 minutes or microwave for 2-3 minutes until heated through. The tortilla might get a little soft, but it's still delicious. And trust me, having a batch of these ready to grab and go makes busy weeknights a whole lot easier. 💡
Nutrition facts
Frequently asked questions
Can I use ground beef instead of chuck roast?
While you can use ground beef, it won't have the same tender texture. Chuck roast breaks down beautifully during braising, creating that melt-in-your-mouth quality. If you're set on ground beef, try mixing it with 10% beef broth to keep it moist, and cook it for 8-10 minutes instead of braising. The flavor will be different but still delicious!
How do I keep the tortillas from getting soggy?
Warm your tortillas properly first—either in a dry skillet for 1 minute per side or microwave with a damp towel for 20-30 seconds. Then, spread the beef toward the bottom third of the tortilla, and add cheese on top of the fillings. The cheese melts slightly and acts like glue. Finally, let the burritos rest for 2 minutes before cutting!
What are the best sides to serve with BBQ beef burritos?
Classic choices include crispy tortilla chips with extra BBQ sauce for dipping, a refreshing coleslaw (just like the one in the recipe), or warm cornbread to soak up the smoky flavors. For something lighter, try a simple green salad with lime dressing. The key is balancing textures—crunchy, creamy, and crispy all work perfectly!
Can I make these burritos ahead of time?
Assemble them fully, wrap tightly in foil, and refrigerate for up to 2 days. To reheat, warm in a skillet over medium heat for 2-3 minutes per side until crisp. For freezing, wrap individually and store for 3 months. Thaw overnight in the fridge, then reheat in a skillet or oven at 350°F for 20 minutes.
What if I don't have smoked paprika?
No problem! Use ½ teaspoon regular paprika plus ¼ teaspoon liquid smoke for a similar effect. If you're avoiding liquid smoke, try adding ½ teaspoon chipotle powder or an extra pinch of cayenne for heat. The smoky flavor will still shine through—just with a slightly different profile!