
Soups & Stews
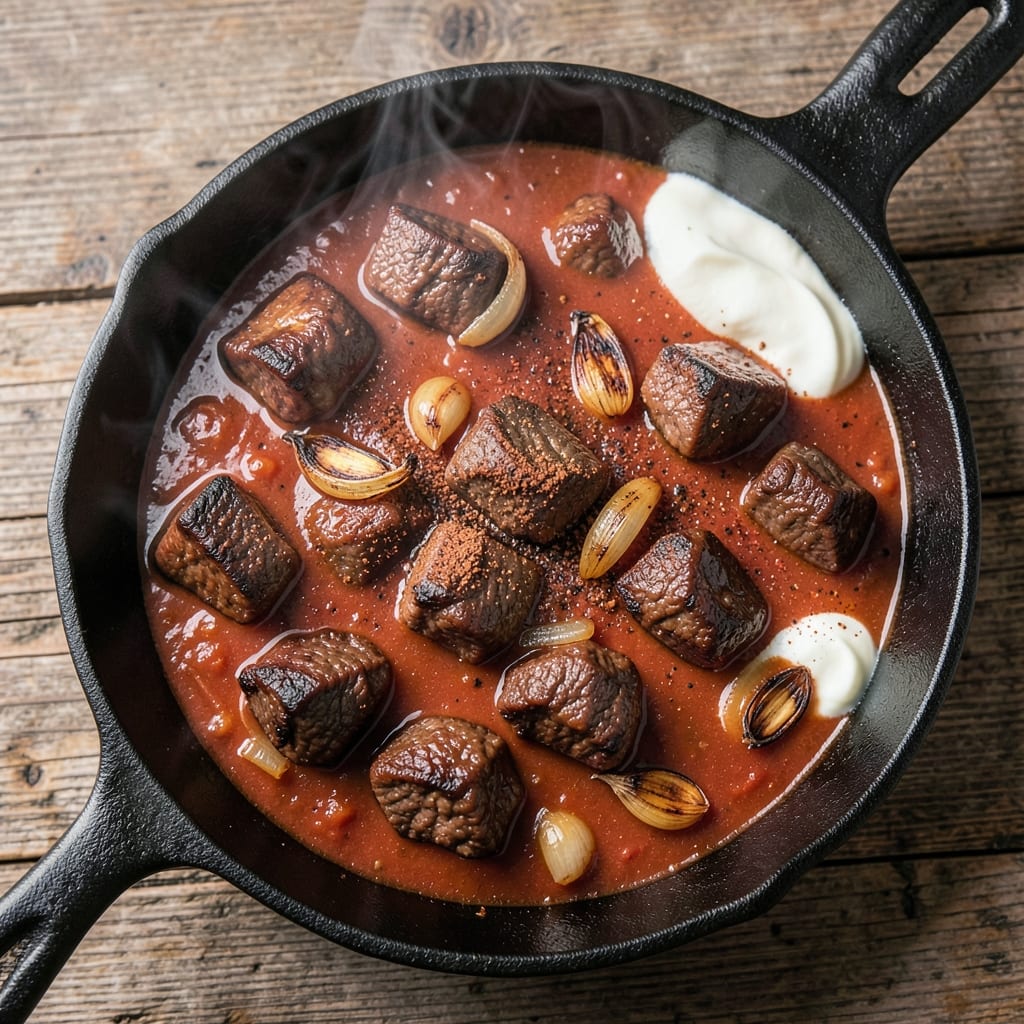
This BBQ beef chili recipe delivers that deep, smoky, slow-cooked flavor that turns a simple weeknight dinner into a hearty centerpiece. The secret lies in browning the beef properly—creating that rich, caramelized crust that forms the flavor base for hours of simmering. I've perfected this one-pot method over years of testing, balancing traditional techniques with modern shortcuts to ensure every bite is packed with meaty depth and smoky warmth.
The beauty of this recipe is its simplicity: just a few hours of hands-off simmering transforms tough cuts of beef into tender, flavorful chunks swimming in a thick, aromatic sauce. We're talking layers of spices—smoked paprika, cumin, and chili powder—that mingle with the natural sweetness of the beef and the tang of tomato. The result? A chili so rich and satisfying, it becomes the star of any meal without needing fancy sides.
What makes this chili truly special is how it evolves as it cooks—the longer it simmers, the deeper the flavors meld together. By the time you're ready to serve, you'll have a pot of chili that's hearty enough for a crowd but simple enough for a weeknight. The one-pot approach means minimal cleanup, and the flavors only get better with time, making it perfect for meal prep or feeding hungry guests.
Serve it up with all the classic toppings—sour cream, shredded cheese, or fresh cilantro—and watch it disappear faster than you can say "second bowl." This isn't just chili; it's a flavor-packed, smoky, comforting masterpiece that brings the soul of a backyard cookout to your dinner table. Let's get cooking!
Ingredients for bbq beef chili
Six core ingredients plus a few pantry staples—this chili builds flavor as it simmers.
| Ingredient | Amount | Notes |
|---|---|---|
| Chuck Roast 🥩 | 2 ½ lb | Cut into 1-inch cubes |
| Yellow Onion 🧅 | 2 whole | Chopped, medium dice |
| Garlic Cloves 🧄 | 6 cloves | Minced, fresh preferred |
| Canned Tomato Sauce 🍅 | 2 cups | San Marzano if possible |
| Beef Broth 💧 | 2 cups | Low-sodium preferred |
| Smoked Paprika 🌶️ | 2 tbsp | For authentic smokiness |
| Ground Cumin 🌿 | 1 tbsp | Toasted for depth |
| Chili Powder 🌶️ | 1 ½ tbsp | Medium heat preferred |
| Brown Sugar 🍚 | 1 tbsp | Light or dark works |
| Apple Cider Vinegar 🍎 | 1 tbsp | For tangy balance |
| Black Coffee ☕ | 1 cup | Cold, for depth (optional) |
| Kosher Salt 🧂 | 1 ½ tsp | Diamond Crystal preferred |
| Ground Black Pepper 🌶️ | 1 tsp | Freshly ground |
| Dark Brown Ale 🍺 | ½ cup | For malty richness (optional) |
The chuck roast is non-negotiable—it's the only cut that gives you that melt-in-your-mouth tenderness after hours of cooking. Costco usually has it pre-cut, but if you're buying a whole roast, ask the butcher to cube it for you. Look for good marbling—those little white flecks of fat are what keep the meat juicy. I've tried this with sirloin, and honestly, it's just not the same. The onions and garlic? Yellow onions have more sweetness than red, and fresh garlic always wins over jarred. If you're short on time, those pre-minced garlic jars work, but fresh is better. The tomato sauce? San Marzano is the gold standard—sweeter and less acidic than regular canned tomatoes.
No smoked paprika? Regular paprika plus a pinch of liquid smoke gets you close. The coffee and beer might sound weird, but trust me—they add depth that regular chili can't match. Short on beer? Stout or porter works best, but even a splash of dark cola helps. The brown sugar might seem out of place, but it balances the acidity and caramelizes beautifully. No brown sugar? Maple syrup at half the amount works in a pinch. The spices are where the magic happens—toast the cumin seeds in a dry pan for 30 seconds before grinding for maximum flavor. If you're spice-averse, cut the chili powder to 1 tbsp and add a pinch of cayenne for heat later.
This chili tastes even better the next day—honestly, the flavors meld together perfectly after a good night's rest. Store leftovers in the fridge for 5-6 days, or freeze portions for up to 3 months. I like to portion it into individual containers so I can grab a bowl for lunch without reheating the whole pot. If you're making this ahead for a party, assemble everything except the beef, refrigerate overnight, then brown and simmer—the flavors develop even more. The longer it cooks, the richer it gets, so don't rush it.
Why You'll Love This Recipe
- Slow-Simmered Magic: I swear by that deep, caramelized flavor from browning the chuck roast—no fancy cuts, just tender, melt-in-your-mouth beef that practically falls apart. The garlic and onion? Sautéed low and slow until they’re sweet, not burnt, which makes all the difference.
- Pantry Staple Power: Between us, this recipe uses ingredients you already own. Chuck roast on sale? Grab it. Canned tomato sauce gathering dust? Use it. Even the beef broth isn’t special—just the good stuff from the store. It’s the kind of meal that doesn’t demand a shopping trip.
- Leftovers That Win: Honestly, I make this on Sunday because the second batch is even better. The flavors meld overnight, and reheating it? Just add a splash of broth and a minute on the stove. My kids beg for it cold in sandwiches—yes, really.
- Game Day Ready: This isn’t just dinner. Tailgate? Check. Football night? Done. The smoky-sweet BBQ twist (thanks to that tomato sauce and slow cook) makes it feel special without the fuss. Serve it with cornbread, and you’ve got a crowd-pleaser that costs less than takeout.
Step-by-step instructions for BBQ beef chili
Here's how to build a rich, smoky chili that tastes like it's been simmering all day.
Brown the Chuck Roast for Deep Flavor
Heat a large Dutch oven over medium-high heat. Add the 2.5 lb chuck roast cut into 1-inch cubes in a single layer, letting them sear undisturbed for 3-4 minutes until deeply browned on all sides. This step creates the Maillard reaction that builds rich, meaty flavor.
Once browned, remove the meat and set it aside. Add the 2 whole yellow onions chopped into medium dice to the same pot and cook for 5 minutes until softened and golden. You'll use these onions later to build the chili base.
Build the Smoky Spice Base
In the same Dutch oven, reduce heat to medium and add 6 cloves minced garlic. Cook for 30 seconds until fragrant but not browned. Then add 2 tbsp smoked paprika, 1 tbsp ground cumin, 1.5 tbsp chili powder, 1 tbsp brown sugar, 1 tbsp apple cider vinegar, 1.5 tsp kosher salt, and 1 tsp ground black pepper. Stir constantly for 1 minute to toast the spices and release their aromas.
Pour in 2 cups canned tomato sauce and 2 cups beef broth, scraping up any browned bits from the bottom. This deglazing step captures all the flavor you just built. Bring to a gentle simmer and let it cook for 5 minutes until slightly thickened.
Simmer the Chili Low and Slow
Return the browned chuck roast to the pot. Stir in 1 cup cold black coffee (if using) and 0.5 cup dark brown ale (if using). The coffee adds depth while the ale contributes malty richness. Bring everything to a boil, then reduce heat to low and cover partially.
Simmer for 2.5 to 3 hours, stirring occasionally, until the meat is fork-tender and falling apart. The chili should have thickened to a rich, hearty consistency. If it gets too thick before the meat is done, add ¼ cup water at a time to maintain proper texture.
Adjust and Serve
Taste the chili and adjust seasoning if needed. I usually add a pinch more salt or a splash of apple cider vinegar for brightness. Let it sit off heat for 10 minutes to allow flavors to meld completely.
Serve hot with all the fixings - shredded cheese, sour cream, chopped green onions, and crusty bread. This chili tastes even better the next day as the flavors continue to develop. Store leftovers in the refrigerator for up to 5 days or freeze for 3 months.
Pro Tips For Making Bbq Beef Chili
- Sear the Chuck Roast: Don’t skip this step—high heat for 3-4 minutes per side until deep brown. I learned this the hard way: skipping the sear means bland, gray meat instead of rich, caramelized flavor that carries through the whole dish. Use a heavy pot and don’t crowd the beef.
- Sweat Onions, Don’t Burn Them: Cook onions low and slow until translucent (about 8-10 minutes) before adding garlic. After burning three batches, I finally figured out that patience here prevents bitterness—no one wants ashy onions in their chili. A splash of broth at this stage keeps them tender.
- Deglaze with Broth Early: After searing the meat, immediately pour in 1 cup of beef broth and scrape the browned bits off the bottom. This isn’t the prettiest method, but it works: those bits pack serious flavor, and skipping it means losing depth. Do it while the pan’s still hot.
- Simmer Long and Low: Cover and cook on low heat (or in a 275°F oven) for at least 3 hours—yes, even if the recipe says less. I was skeptical until I tried it: the meat becomes fork-tender, and the flavors meld into something hearty, not just "meat in tomato sauce." Check occasionally to avoid drying out.
Pro cooking tips for this dish
Protein Prep Mastery
Never skip browning that chuck roast—this isn't just about cooking, it's about building flavor. I cut the 2.5 lb chuck into 1-inch cubes because larger chunks stay tender longer during the long simmer. Use a sharp chef's knife and work in batches if needed to avoid crowding the pan. The goal is deep, caramelized crust on each piece—this creates the Maillard reaction that forms the flavor foundation. 🔥
Pro tip: If your roast has excess fat, trim it before browning. Too much fat in the pot can make the chili greasy. I like to pat the cubes dry with paper towels first—this helps them sear better and creates more surface area for that flavor-building crust.
Spice Toasting Secrets
The difference between good chili and extraordinary chili often comes down to how you treat your spices. Toast the cumin seeds in a dry pan for 30 seconds until fragrant—this releases their essential oils and deepens their flavor profile. Then grind them fresh with a mortar and pestle or coffee grinder for maximum impact. Store-bought ground cumin loses potency quickly.
For that authentic BBQ smokiness, smoked paprika is non-negotiable. If you're using regular paprika, add ½ teaspoon of liquid smoke to the pot during simmering. I like Penzeys brand smoked paprika—it's consistently high-quality and has a perfect balance of smokiness without overpowering.
Liquid Balance Act
The coffee and beer additions might seem unusual, but they're game-changers. The 1 cup cold black coffee adds depth and cuts through the richness, while the ½ cup dark brown ale contributes malty sweetness. If you're avoiding alcohol, use non-alcoholic stout or even dark cola in a pinch. The key is adding these liquids after the initial simmer—this prevents them from cooking off too quickly.
Don't be afraid to adjust the liquid ratio during cooking. If your chili gets too thick before the meat is tender, add ¼ cup water or broth at a time. The texture should be rich but still spoonable—think of it like a thick stew rather than a paste.
Low-and-Slow Timing
This isn't a recipe for rushing. The 2.5 to 3 hours of simmering at low heat is what transforms tough chuck roast into fork-tender perfection. I set my stove to low heat and maintain a gentle simmer—you should see just a few bubbles breaking the surface occasionally. The longer it cooks, the more the flavors meld together beautifully.
If you're short on time, you can use a slow cooker on low for 6-8 hours—just brown the meat and onions first in a separate pan. The slow cooker method actually works better for some people because it's more hands-off, and the meat often comes out even more tender.
Final Flavor Boost
Before serving, let your chili rest off the heat for 10 minutes—this allows all the flavors to settle and the meat to reabsorb some juices. Taste and adjust seasoning one last time. I usually add a pinch more kosher salt or a splash of apple cider vinegar for brightness. The vinegar cuts through the richness and adds a nice tangy finish.
For an extra layer of complexity, finish with a drizzle of hot honey or a sprinkle of crumbled blue cheese. These unexpected toppings take your chili from backyard favorite to restaurant-worthy dish. The beauty of this recipe is how much room there is for personalization—make it your own! ✨
Nutrition facts
Frequently asked questions
Can I use ground beef instead of chuck roast?
You can, but the texture will be different. Ground beef cooks much faster and won't give you those tender, meaty chunks. For a similar result, use 1 lb of beef stew meat instead—it holds up better during simmering and creates satisfying bite-sized pieces. If you must use ground beef, brown it well first and reduce the simmering time to 1.5 hours.
Why does my chili taste too acidic or bitter?
This usually happens from overcooking the onions or adding too much vinegar. To fix it, stir in 1 tbsp brown sugar or 1 tsp honey to balance the acidity. For bitterness, a splash of beef broth or a pinch of salt often helps. Always taste as you go—adjust gradually rather than dumping in large amounts at once.
Can I make this chili in an Instant Pot?
Brown the meat and onions first in a separate pan, then transfer everything to your Instant Pot. Use 1 cup liquid (tomato sauce + broth) and cook on high pressure for 40 minutes. Quick-release the pressure and let it rest for 10 minutes before serving. The texture will be slightly different but still delicious—just add a little extra broth if it's too thick.
What's the best way to reheat leftovers?
Gently reheat on the stove over low heat with a splash of water or broth to prevent drying out. Never microwave directly from the fridge—this can make the chili rubbery. For best results, reheat just until warm (165°F) and let it sit for 5 minutes off heat. The flavors actually improve after reheating, making it perfect for meal prep!
How can I make this vegetarian?
Swap the beef for 1 lb portobello mushrooms or 2 cups lentils. For mushrooms, slice them thickly and brown well first. For lentils, use brown or green varieties and add them during the final 30 minutes of cooking. Boost the umami with 1 tbsp soy sauce or 1 tsp miso paste—these will help replace the meaty depth. The coffee and beer additions still work beautifully!