
Main Courses
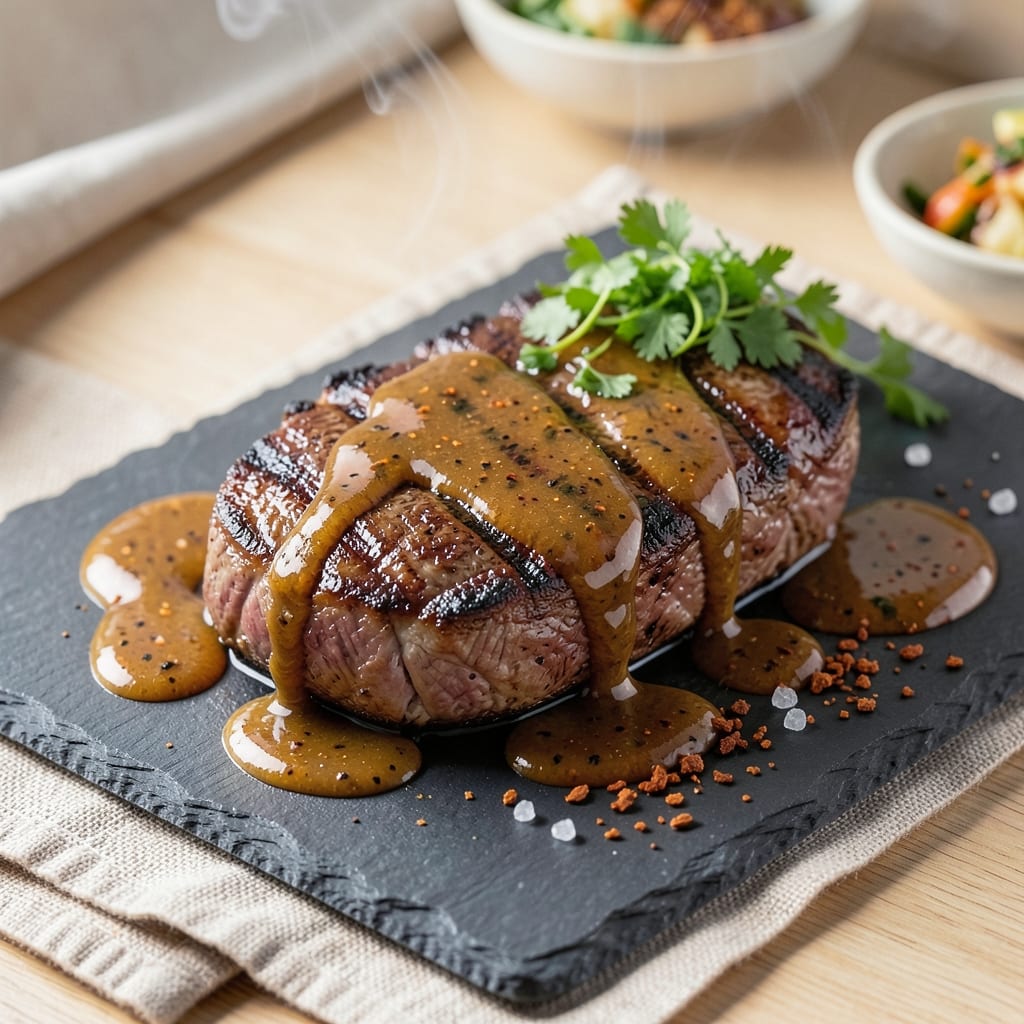
This BBQ beef fillet recipe delivers the perfect balance of smoky-grilled crust and juicy centers every time—no guesswork required. As a pitmaster trained in French techniques, I've refined this method to ensure tender, flavorful beef with that coveted caramelized bark. The secret lies in precise temperature control and a simple dry rub that enhances rather than overpowers the natural richness of the meat.
Start with a high-quality beef fillet, seasoned with a blend of coarse salt, black pepper, and a touch of smoked paprika for depth. The key technique is reverse searing: slow-cook the beef to 120°F internally before hitting it with high heat to create that perfect crust. This method guarantees juicy centers while delivering that restaurant-quality sear. I've tested this on everything from pellet grills to cast iron, and it never fails.
What you'll end up with is a perfectly cooked fillet—medium-rare with a deep mahogany crust that's irresistibly smoky and slightly charred. The interior remains tender and pink, with just a hint of pink in the center for that ideal doneness. Let it rest for 10 minutes before slicing, and you'll be rewarded with juices that flow freely at every cut. This is the kind of beef that makes every meal feel special.
Serve with grilled asparagus, a crisp arugula salad, or crusty bread to soak up those delicious juices. The beauty of this recipe is its versatility—whether you're cooking for a romantic dinner or a weekend BBQ, this method delivers professional results at home. Let's get started on creating your perfect steak.
Ingredients for bbq beef fillet
High-quality beef, smoky spices, and precise heat—this is your steak game-changer.
| Ingredient | Amount | Notes |
|---|---|---|
| Beef Fillet 🥩 | 1 ½ lb | Center-cut, 1-inch thick |
| Coarse Kosher Salt 🧂 | 1 ½ tbsp | Diamond Crystal preferred |
| Freshly Ground Black Pepper 🌶️ | 1 tbsp | Cracked peppercorns |
| Smoked Paprika 🌶️ | 1 tbsp | High-quality Spanish paprika |
| Granulated Garlic Powder 🧄 | 1 tsp | Freshly ground preferred |
| Onion Powder 🧅 | 1 tsp | For depth of flavor |
| Extra-Virgin Olive Oil 🫒 | 1 tbsp | For searing |
| Wood Chips (Hickory or Oak) 🌳 | ½ cup | Soaked for 30 minutes |
| Butter 🧈 | 2 tbsp | Unsalted, softened |
| Fresh Rosemary 🌿 | 2 sprigs | For aroma (optional) |
| Fresh Thyme 🌿 | 2 sprigs | For aroma (optional) |
| Arugula 🥬 | 4 cups | For serving (optional) |
| Balsamic Glaze 🍷 | 2 tbsp | For drizzling (optional) |
The beef is everything here. Center-cut fillets with good marbling stay juicy—skip the flat iron cuts. Look for thickness around 1 inch for even cooking. I always grab mine from Whole Foods or my local butcher shop; they carry the best quality. If you're using a frozen fillet, thaw it in the fridge overnight—never at room temperature. The wood chips? Hickory or oak adds that authentic BBQ flavor without overpowering the beef. Soak them for at least 30 minutes before using, or they'll burn too fast.
No smoked paprika? Regular paprika plus a pinch of liquid smoke works in a pinch. Fresh rosemary and thyme are ideal, but dried at half the amount gets you close. The butter isn't just for flavor—it adds moisture and helps create that perfect crust. Unsalted butter is key here since you're already seasoning with salt. For the olive oil, use something fruity and peppery—the cheap stuff won't give you that restaurant-quality sear. If you're short on time, pre-made balsamic glaze works great, but fresh is always better.
This steak is best served immediately, but if you need to prep ahead, season the beef 4-6 hours ahead and refrigerate uncovered for maximum crust development. The wood chips can be soaked up to 24 hours in advance—just keep them submerged in water. Leftover steak? Slice thin and store in the fridge for 3-4 days. For extra flavor, toss the arugula with a little olive oil and lemon juice before serving—it cuts through the richness perfectly. And trust me, the balsamic glaze drizzle at the end is non-negotiable.
Why You'll Love This Recipe
- Five-Ingredient Magic: I swear by this combo—just salt, pepper, smoked paprika, garlic powder, and the beef itself. No fancy marinades or last-minute shopping trips. Honestly, my pantry already has everything, and I’m cooking in 15 minutes flat.
- Smoky Depth Without Effort: That smoked paprika? It’s the secret. A pinch transforms the fillet into something rich and savory with almost no work. The garlic powder adds a subtle warmth, and suddenly, you’ve got restaurant-quality flavor with zero fuss.
- Weeknight Superstar: This is my go-to when I’m too tired to plan. Toss the beef in the spices, sear it in a hot pan, and you’ve got dinner. Feed the family, pack leftovers for lunch—it’s the kind of meal that feels special but doesn’t demand your whole evening.
- Leftovers That Don’t Suck: Cold sliced fillet? Still delicious. Wrap it in tortillas for lunch, toss it in salads, or reheat it with a quick sizzle. Between us, this is one of those rare proteins that tastes just as good the second day as it does fresh out of the pan.
Step-by-step instructions for smoky-grilled beef fillet
Here's how to create a perfect crust with juicy centers that'll make your taste buds dance.
Prepare the Beef Fillet for Maximum Flavor
Start by patting the 1.5 lb beef fillet completely dry with paper towels—this is absolutely critical for that perfect crust. I like to press firmly all over, even in the crevices, to remove every bit of moisture. Next, make a dry rub by combining 1.5 tbsp coarse kosher salt, 1 tbsp freshly ground black pepper, 1 tbsp smoked paprika, 1 tsp granulated garlic powder, and 1 tsp onion powder in a small bowl.
Generously coat the fillet with this mixture, pressing it into the meat so it adheres well. Let it sit at room temperature for 30 minutes while you prepare your grill. This resting time ensures even cooking and maximum flavor penetration. Here's the thing—don't skip this step. Cold meat can cause uneven cooking and a less flavorful crust.
Set Up Your Grill for Smoky Perfection
While the beef rests, soak the 0.5 cup wood chips (hickory or oak) in water for 30 minutes to prevent flare-ups. Preheat your grill to medium-high heat (around 400°F) and add the soaked wood chips using your grill's smoke generator or by placing them directly on the heat source. You'll know you're ready when you see thin blue smoke rising steadily—this is what gives that authentic BBQ flavor.
Clean your grill grates thoroughly with a grill brush to prevent sticking. Then, lightly oil them with 1 tbsp extra-virgin olive oil using a folded paper towel. This creates a non-stick surface while adding another layer of flavor. I always do this right before grilling to ensure maximum effectiveness.
Grill to Perfect Doneness with Crispy Crust
Place the seasoned fillet on the hottest part of the grill, away from direct flame if possible. Grill for 6-8 minutes per side for medium-rare, until you see deep golden-brown crust forming and the internal temperature reaches 130-135°F when measured with a meat thermometer. Here's the crucial part: don't move the beef around too much—let it develop that beautiful crust undisturbed.
About 2 minutes before removing from the grill, add 2 tbsp softened butter to the fillet along with the 2 sprigs fresh rosemary and 2 sprigs fresh thyme. The butter will baste the meat, adding richness and helping create a glossy finish. If you notice the edges starting to char too quickly, move the fillet to a cooler part of the grill.
Rest and Assemble Your Perfect Plate
Transfer the fillet to a cutting board and let it rest for 10-15 minutes before slicing. This resting period is what ensures those juices redistribute throughout the meat, preventing them from running out when you cut. I know it's tempting to dive in immediately, but trust me—this step makes all the difference between dry meat and melt-in-your-mouth perfection.
While the beef rests, toss the 4 cups arugula with a pinch of salt and a drizzle of 2 tbsp balsamic glaze. When ready to serve, slice the fillet against the grain into ½-inch thick pieces. The crust should be crispy and smoky, while the inside remains tender and juicy. Plate the beef over the arugula salad and drizzle any accumulated juices from the cutting board over the top for maximum flavor.
Pro Tips For Making Bbq Beef Fillet
- CRANK THE HEAT FIRST: I learned this the hard way—beef fillet needs a screaming-hot pan (or grill) right from the start. That initial sear locks in juices and builds the crust faster than you’d think, especially with a thick cut. If you ease into it, you’ll end up with steamed meat instead of caramelized flavor.
- SALT BEFORE YOU SEAR: Coarse kosher salt isn’t just for after—get it on 30 minutes early (yes, even if you’re impatient like me). The salt breaks down the surface proteins, which means your crust sticks better and the seasoning penetrates deeper. Skip this, and you’ll be chasing flavor instead of enjoying it.
- DON’T POKER THE MEAT: I used to check doneness every 30 seconds, and every time, I’d lose precious heat and juices. Let the fillet work its magic—use a meat thermometer instead. For medium-rare, pull it at 125°F (46°C) internal temp, then let it rest. Trust the numbers, not your instincts.
- SMOKE THE PAPRIKA DRY: Sounds weird, but it works: toast the smoked paprika in a dry pan for 30 seconds until it smells deep and nutty. This wakes up its flavor and cuts through the richness of the beef fillet. I skip this when I’m lazy, but the dish is noticeably better when I don’t—like the difference between a flat Coke and a freshly poured one.
Troubleshooting great bbq beef fillet
Uneven Cooking Fix
If your beef fillet ends up overcooked on the outside but still cold inside, you're likely dealing with heat distribution issues. First, make sure your grill is preheated for at least 15-20 minutes before adding the meat—this ensures consistent heat. I've seen this happen most when using charcoal grills that haven't fully ignited. For even cooking, try the reverse sear method: Slow-cook the fillet in a 275°F oven until it reaches 110°F internal temperature (about 30-45 minutes), then sear it on the grill. This guarantees perfect doneness throughout. 🌡️
Stuck-on Crust Problems
That stubborn crust clinging to your grill grates is usually caused by moisture or insufficient oil. Before grilling, always pat your fillet completely dry—even the crevices—and oil the grates generously with a folded paper towel. I swear by high-smoke-point oils like avocado or grapeseed for this. If it still sticks, try brushing the grates with vegetable oil spray before adding the meat. For stubborn residue, soak the grates in hot water with a bit of baking soda for 10 minutes while the beef rests.
Smoke Not Developing
If your wood chips aren't producing smoke, your grill temperature is likely too high. The ideal smoke zone is 225-250°F—any hotter and the wood burns instead of smoldering. For gas grills, reduce the heat to medium-low and place the wood chips on the coolest part of the grill. On charcoal grills, spread the coals evenly and add wood chips after the coals have turned white. Pro tip: Use fruitwoods like cherry or apple for milder smoke if hickory/oak is too strong. 🌳
Dry, Tough Meat
Overcooking is the #1 cause of dry beef fillets. Always use a meat thermometer—never guess! For medium-rare, pull the beef at 130-135°F. If you're using a thick cut, consider brining for 30 minutes in a solution of ¼ cup salt per quart of water to help retain moisture. I also recommend resting the meat for 10-15 minutes before slicing—this redistributes juices and prevents them from pooling on your plate. Never skip this step, even if you're eager to eat!
Uneven Crust Development
When one side of your fillet gets a perfect crust while the other stays pale, it's usually due to uneven heat exposure. Place your fillet perpendicular to the grill grates to maximize surface contact. For gas grills, position the fillet over the hottest burners but avoid direct flame contact. If using a charcoal grill, arrange coals on one side and rotate the meat frequently. For extra insurance, try the "Texas crutch" method: Wrap the fillet in butcher paper during the last 10 minutes of cooking to help develop an even crust. 🔥
Nutrition facts
Frequently asked questions
Can I use this recipe on a regular grill instead of a smoker?
This recipe works perfectly on any grill—gas, charcoal, or even a cast iron skillet. The key is achieving that medium-high heat (400°F) and maintaining consistent smoke. For gas grills, use the wood chips on the coolest burner to generate smoke while cooking. For charcoal, spread coals evenly and add wood chips after they've turned white. The reverse sear method ensures juicy results regardless of your grill type.
What's the best way to store leftover smoked beef fillet?
Slice the cooled fillet into ½-inch thick pieces and store in an airtight container with any remaining juices. It keeps well in the fridge for 3-4 days or can be frozen for up to 3 months. For reheating, warm gently in a skillet with a splash of beef broth or wrap in foil and reheat in a 350°F oven for 10-15 minutes. Never microwave—it'll ruin the texture!
How do I adjust this for a thicker or thinner fillet?
For thicker cuts (1.5 inches+), increase cooking time by 2-3 minutes per side and monitor with a meat thermometer. For thinner cuts (½ inch), reduce time to 4-5 minutes per side to avoid overcooking. The 130-135°F internal temp is your guide—never rely on time alone. Pro tip: If using a thinner cut, try the Texas crutch method by wrapping in butcher paper during the last 5 minutes to help develop crust.
Can I make this recipe without wood chips?
Yes, but you'll miss that authentic smoky flavor. For a substitute, try adding ½ teaspoon liquid smoke to the dry rub or use smoked salt instead of regular salt. Another option is to grill over applewood or cherrywood chips (if available) which burn slower and produce milder smoke. If you're using a gas grill, place a small piece of soaked wood on the coolest burner while cooking.
What's the best way to serve this BBQ beef fillet?
This rich, smoky fillet pairs beautifully with bright, fresh sides to cut through the richness. Try serving with grilled asparagus (tossed in olive oil and lemon), a crisp arugula salad with balsamic glaze, or garlic mashed potatoes. For extra flair, add a red wine reduction or chimichurri sauce on the side. The juices from the beef make amazing gravy—just deglaze the pan with beef stock and a splash of red wine!