
Main Courses
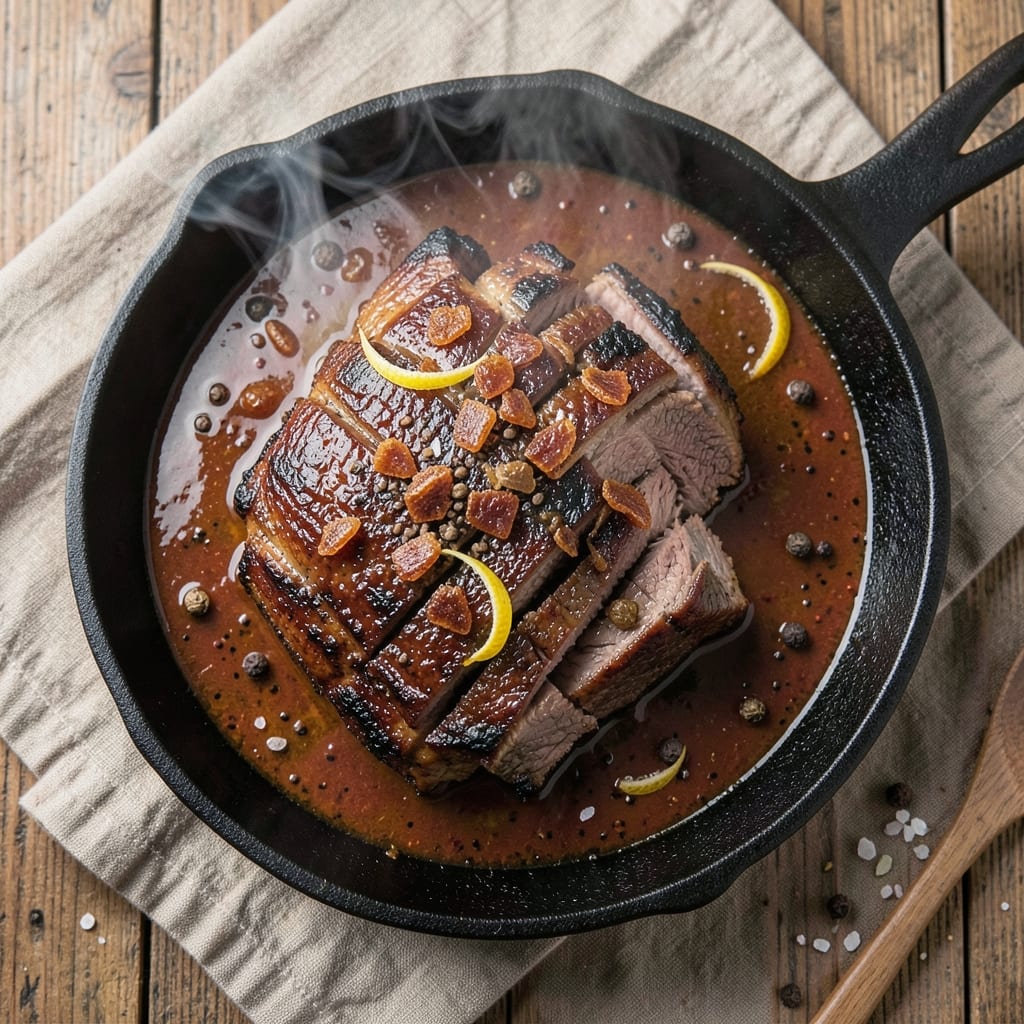
This BBQ beef in pressure cooker recipe transforms tough cuts into melt-in-your-mouth perfection—no smoker or slow-cooker needed. I developed it after years of perfecting my pitmaster techniques, adapting them for home cooks who crave that deep, smoky-sweet flavor without the wait. The pressure cooker's magic lies in its ability to break down collagen quickly while locking in juices, giving you restaurant-quality results in just 60 minutes.
The secret starts with the right cut—chuck roast or short ribs work best—and a dry rub that balances sweet, smoky, and spicy notes. I use a blend of brown sugar, smoked paprika, and coffee grounds for depth, letting it sit overnight so the flavors penetrate deeply. The pressure cooker then does the heavy lifting, creating tender meat that falls apart at the touch of a fork while maintaining that signature bark from the rub.
What you'll end up with is beef so tender it practically dissolves in your mouth, coated in a glossy, caramelized crust that's packed with flavor. The aroma alone will have everyone gathering around your kitchen, and the versatility means it works equally well for sandwiches, tacos, or served over mashed potatoes. This is the kind of dish that turns a simple weeknight into a memorable meal.
Safety and technique are critical here—we'll cover proper liquid ratios, natural vs. quick releases, and how to avoid common pressure cooker pitfalls. Trust me, once you master this method, you'll never go back to traditional slow cooking. Let's get started on creating that fall-apart tenderness.
Ingredients for bbq beef in pressure cooker
These 14 ingredients deliver restaurant-quality BBQ beef in your pressure cooker.
| Ingredient | Amount | Notes |
|---|---|---|
| Beef Chuck Roast 🥩 | 2 lb | Bone-in preferred for flavor |
| Brown Sugar 🍚 | ½ cup | Light or dark variety |
| Smoked Paprika 🌶️ | 2 tbsp | For deep smoky flavor |
| Ground Coffee ☕ | 2 tbsp | Finely ground, enhances depth |
| Kosher Salt 🧂 | 1 ½ tbsp | Diamond Crystal preferred |
| Black Peppercorns 🌶️ | 1 tbsp | Freshly cracked |
| Garlic Powder 🧄 | 1 tbsp | Not garlic salt |
| Onion Powder 🧅 | 1 tbsp | For balanced flavor |
| Apple Cider Vinegar 🍎 | ½ cup | For tangy brightness |
| Beef Broth 💧 | 1 ½ cups | Low-sodium preferred |
| Yellow Onion 🧅 | 1 whole | Sliced for aromatics |
| Fresh Thyme 🌿 | 2 sprigs | Or 1 tsp dried thyme |
| Olive Oil 🫒 | 1 tbsp | For searing |
| BBQ Sauce 🍅 | ½ cup | For finishing glaze |
The beef cut matters most here. Chuck roast is ideal—it's tough enough to benefit from the pressure cooker's magic but breaks down beautifully. Short ribs work too if you want extra richness. Grab it from the butcher section at Whole Foods or your local grocery store's meat counter. Look for good marbling and avoid pre-trimmed cuts—the fat renders down for flavor. I usually buy mine from Costco when I'm doing a big batch, but a 2-pound roast is perfect for this recipe. Pat it dry before seasoning—this helps the rub stick and creates that coveted bark later.
No smoked paprika? Regular paprika plus a pinch of liquid smoke gets you close. The coffee grounds add depth, but instant espresso powder at half the amount works in a pinch. Fresh thyme is ideal, but dried thyme at one-third the quantity saves you a trip to the store. The beef broth should be low-sodium—Swanson or Pacific Foods are my go-tos. If you're using pre-made BBQ sauce, check the ingredients—some brands add sugar or preservatives that can alter the texture. For a homemade version, mix ketchup, vinegar, brown sugar, and spices. The apple cider vinegar adds tang, but red wine vinegar works too if that's what you've got.
This dish reheats beautifully—honestly tastes better the next day once everything melds together. Store leftovers in an airtight container for 4-5 days in the fridge or freeze for 3 months. I like to portion it into meal prep containers so I can grab it for quick lunches. The rub can be made a day ahead and stored in an airtight container. The beef broth can be prepped in advance too—just keep it refrigerated until you're ready to cook. If you're short on time, use frozen beef broth (thaw it first) or even bouillon cubes dissolved in water.
Why You'll Love This Recipe
- One-Pot Magic: I swear by this recipe on busy nights—the pressure cooker does all the work while I sip my coffee. Just dump in the chuck roast, brown sugar, and smoked paprika, then let the machine handle the rest. No flipping, no basting, no stress.
- Smoky Coffee Kiss: Between us, adding ground coffee to the rub is my secret weapon. It deepens the BBQ flavor in a way that’s rich but not overpowering, and the brown sugar caramelizes into this sticky, slightly sweet glaze that clings to every bite. (Yes, even my coffee-loving husband approves.)
- Meal Prep MVP: This makes perfect leftovers—shred it once, and you’ve got sandwiches, tacos, or pasta night covered for days. I’ll be real: I’ve pulled this from the fridge for lunch three times this week, and it’s still just as tender and flavorful.
- Budget-Friendly Feast: A chuck roast stretches forever, and the spices cost pennies. You’re feeding a crowd for less than takeout, with meat so tender it falls apart at the touch. Honestly, it’s the kind of meal that makes you feel like you’re treating people without breaking the bank.
Step-by-step instructions for pressure cooker BBQ beef
This method transforms tough chuck roast into melt-in-your-mouth perfection using just your pressure cooker.
Season and Sear the Beef Chuck Roast
Start by patting the 2 lb Beef Chuck Roast dry with paper towels—this helps the seasoning stick and creates better browning. In a large bowl, combine the 0.5 cup Brown Sugar, 2 tbsp Smoked Paprika, 2 tbsp Ground Coffee, 1.5 tbsp Kosher Salt, 1 tbsp Black Peppercorns, 1 tbsp Garlic Powder, and 1 tbsp Onion Powder. Rub this mixture all over the beef, pressing it into the crevices so every bite gets flavor.
Heat 1 tbsp Olive Oil in your pressure cooker over medium-high heat until shimmering. Add the seasoned roast and sear it on all sides for 3-4 minutes per side until it develops a deep golden-brown crust. This step locks in juices and builds flavor—don't skip it, even if you're eager to pressure cook. The crust will become the tender, caramelized exterior of your finished dish.
Sauté Aromatics and Deglaze
Remove the seared roast and set it aside. In the same pot, add the 1 whole Yellow Onion, sliced into half-moons, and cook for 3-4 minutes until softened and lightly golden. Add the 2 sprigs Fresh Thyme and cook for another 30 seconds until fragrant. This step builds layers of flavor that will infuse the beef during cooking.
Pour in the 0.5 cup Apple Cider Vinegar and scrape up any browned bits from the bottom of the pot with a wooden spoon. These bits, called fond, are packed with flavor. Let the vinegar simmer for 1-2 minutes until it reduces by about half and the aroma becomes tangy and rich. This step balances the sweetness of the brown sugar and adds brightness to the final dish.
Pressure Cook to Fork-Tender Perfection
Return the roast to the pressure cooker. Add the 1.5 cups Beef Broth and secure the lid. Set the pressure cooker to high pressure and cook for 45 minutes. This low-and-slow approach breaks down the tough connective tissue in the chuck roast, transforming it into tender, pull-apart meat. The pressure cooker does all the work while you prepare the rest of your meal.
Once the cooking time is complete, allow the pressure to release naturally for 15 minutes, then quick-release the remaining pressure. This gradual release prevents the meat from becoming tough. When the pressure is fully released, carefully remove the roast and let it rest on a cutting board for 10 minutes. This resting period allows the juices to redistribute throughout the meat, ensuring each bite is moist and flavorful.
Finish with BBQ Sauce and Serve
While the roast rests, place it back in the pressure cooker and pour the 0.5 cup BBQ Sauce over the top. Cover and cook on high heat for 5 minutes to let the sauce caramelize slightly and cling to the meat. This step adds a glossy finish and deepens the smoky-sweet flavor profile. The sauce should coat the roast evenly, creating a sticky, flavorful exterior.
Slice the roast against the grain into ¼-inch thick pieces for maximum tenderness. Serve immediately with the pan juices spooned over the top. Each bite should be fall-apart tender with a perfect balance of smoky, sweet, and tangy flavors. This dish is ideal for meal prep—store leftovers in the refrigerator for up to 4 days or freeze for up to 3 months. The flavors only get better as it sits!
Pro Tips For Making Bbq Beef In Pressure Cooker
- SEAR FIRST, THEN PRESSURIZE: I learned this the hard way—skipping the sear means bland, gray beef. Hit the chuck roast with high heat until it’s deep brown on all sides (about 3-4 minutes per side) before adding liquid. The Maillard reaction kicks in, locking in flavor that no amount of coffee or paprika can replicate.
- GRIND THAT COFFEE FRESH: Store-bought grounds lose their punch fast. Grind a tablespoon of dark roast coffee beans right before adding it to the pot—it adds depth and cuts through the sweetness of the brown sugar without tasting like instant coffee. (Yes, even if you’re impatient like me.)
- DON’T SKIP THE NATURAL RELEASE: After cooking, let the pressure drop naturally for at least 15 minutes. Rushing it with a quick release turns your tender chuck into shredded, watery beef. Patience here guarantees that pull-apart texture you’re craving.
- BROWN THE SUGAR FIRST: This isn’t the prettiest method, but it’s the tastiest. Caramelize the brown sugar in the pot for 2-3 minutes before adding anything else—it deepens the flavor and prevents clumping. (Your future self will thank you when the sauce isn’t grainy.)
Best sauces and condiments for this bbq beef in pressure cooker
Classic BBQ Sauce
Use a thick, tangy BBQ sauce like Sweet Baby Ray's Original or Stubb's Original for that signature sweet-and-smoky finish. I love adding a splash of the pan juices to the sauce before glazing the beef—this boosts depth and ties all the flavors together. For a homemade version, simmer ½ cup ketchup, ¼ cup apple cider vinegar, 2 tbsp brown sugar, 1 tbsp Worcestershire sauce, and ½ tsp smoked paprika for 10 minutes until thickened. 🍅
Spicy Chipotle Glaze
For heat lovers, swap the BBQ sauce for a chipotle glaze. Mix ½ cup BBQ sauce with 1 tbsp adobo sauce (from canned chipotles), 1 tsp honey, and ½ tsp cayenne pepper. Simmer for 5 minutes to meld flavors. This adds a smoky kick that pairs perfectly with the tender beef. Trust me, your taste buds will thank you! 🌶️
Honey-Mustard Mustard
Craving something lighter? A honey-mustard glaze cuts through the richness beautifully. Whisk together ¼ cup Dijon mustard, 2 tbsp honey, 1 tbsp apple cider vinegar, and ½ tsp garlic powder. Brush this over the beef during the final 5 minutes of cooking. The tangy-sweet balance is pure magic. 🍯
Smoky Maple Reduction
For a refined touch, make a smoky maple reduction. Combine ¼ cup pure maple syrup, 1 tbsp apple cider vinegar, ½ tsp smoked paprika, and ¼ tsp black pepper. Simmer until slightly thickened, then drizzle over the sliced beef. This adds a sophisticated sweetness without overpowering the smoky rub. 🍁
Caramelized Onion Topping
Want extra texture? Caramelize 1 cup thinly sliced yellow onions in 1 tbsp butter until golden and jammy. Spoon these over the sliced beef right before serving. The sweet, jammy onions contrast perfectly with the smoky-sweet flavors and add a gourmet touch. 🧅
Pan Juices Gravy
Never waste those flavorful pan juices! Strain them into a small saucepan and reduce by half over medium heat. For extra richness, whisk in 1 tbsp cornstarch mixed with 2 tbsp water until thickened. Drizzle this gravy over the beef or use it as a dip for sandwiches. Every drop of flavor counts! 🥄
Nutrition facts
Frequently asked questions
Can I use a different cut of beef besides chuck roast?
Yes! Short ribs or brisket work beautifully—they have more connective tissue that breaks down wonderfully. For sirloin or tenderloin, reduce cooking time to 20-25 minutes since these cuts are naturally more tender. Bone-in pieces add extra flavor, but boneless works too. Just adjust the cooking time based on your cut's size and tenderness.
Why does my pressure cooker say "burn" or "food stuck" after cooking?
This happens when the liquid level is too low—pressure cookers need at least 1 cup of liquid to build proper pressure. Always use the full 1.5 cups of beef broth as called for. If you see browned bits stuck to the bottom, simply scrape them up with a wooden spoon—they're packed with flavor! For stubborn bits, add a splash of vinegar and let it simmer for 1 minute before serving.
How do I know when the beef is fully cooked and tender?
The meat should be fork-tender and easily pull apart with minimal resistance. For chuck roast, the internal temperature should reach 203°F—this is the "probe-tender" stage where collagen fully breaks down. If it's still slightly firm, cook for another 5-10 minutes. The natural release method helps achieve this perfect texture without drying out the meat.
Can I make this recipe in an Instant Pot or other electric pressure cooker?
The method is identical—just follow the same steps using your electric model's settings. For Instant Pot specifically, use the "High Pressure" function for 45 minutes, then let it release naturally for 15 minutes before quick-releasing. The only difference is that electric models often have built-in timers, so you can set it and walk away. Always check your manual for model-specific guidelines.
What's the best way to reheat leftovers without drying them out?
Reheat in the same pressure cooker for 5 minutes on high heat with 2 tablespoons of beef broth to restore moisture. For oven reheating, wrap the beef in foil with a splash of broth and bake at 300°F for 15-20 minutes. Microwaving works too—just cover with a damp paper towel and heat in 30-second intervals until warmed through. The key is always adding liquid to prevent drying.