
Main Courses
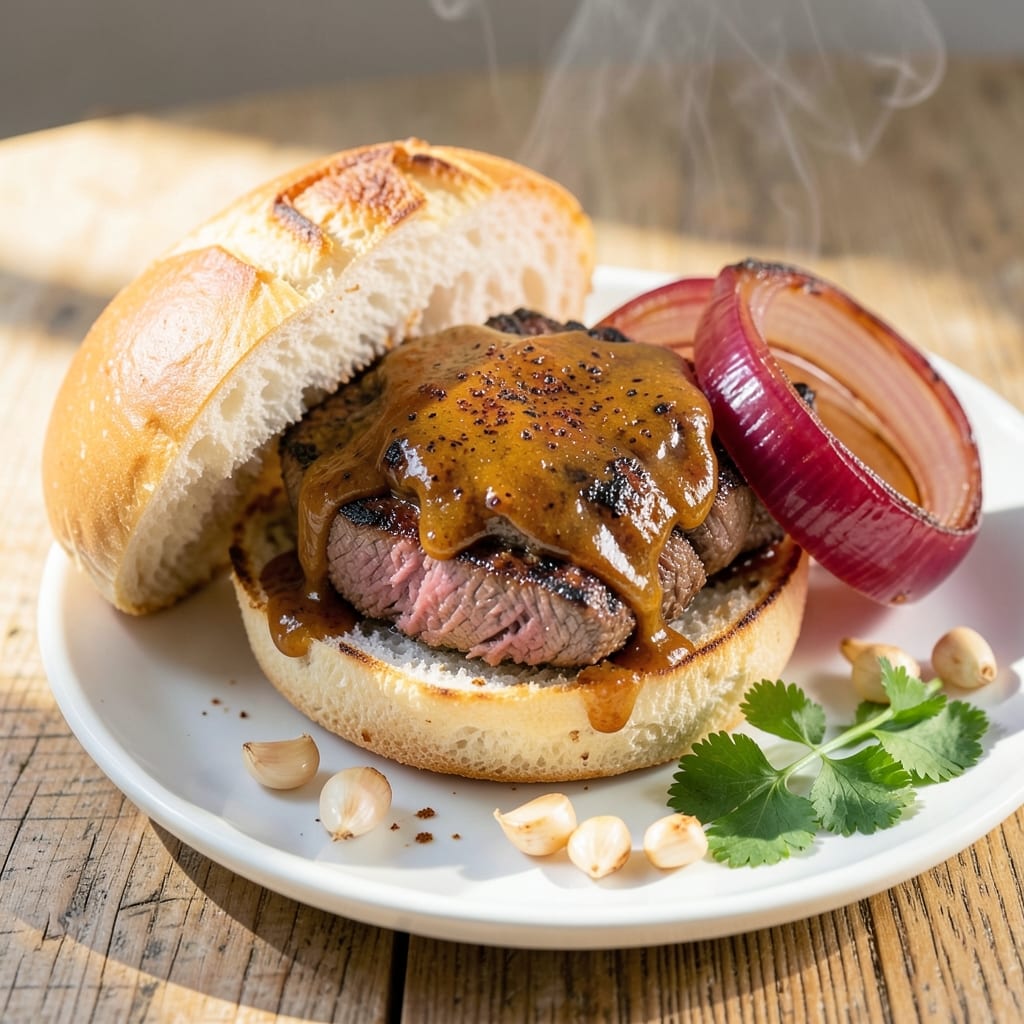
This BBQ beef on a bun recipe delivers the perfect balance of smoky-sweet crust and juicy center that makes every bite unforgettable. 🔥 I developed it after years of perfecting Texas-style brisket techniques, but with a method that works for any cut of beef—from chuck roast to ribeye. The secret lies in a dry rub that builds deep flavor while keeping the meat tender, and a grilling technique that ensures crisp edges without drying out the interior.
What sets this recipe apart is the attention to texture and flavor layers. The beef gets marinated overnight in a blend of spices and vinegar, then slow-cooked to develop rich, caramelized edges while staying tender inside. Meanwhile, the buns are toasted just enough to add structure without overpowering the beef. This isn't just another sandwich—it's a restaurant-quality experience you can recreate at home.
By the time you assemble everything, you'll have a sandwich with perfectly balanced flavors: smoky from the rub, sweet from the glaze, and tangy from the pickles. The beef falls apart with just a gentle press, while the bun stays soft enough to hold every bite. This is the kind of recipe that transforms a simple meal into something special, whether you're feeding a crowd or treating yourself to a weekend indulgence.
The best part? It's versatile enough to adapt to different occasions. Use it for game day gatherings, picnic lunches, or as the centerpiece of your weekend BBQ spread. Once you try this method, you'll never settle for store-bought again. Let's get started on creating your perfect BBQ beef sandwich.
Ingredients for bbq beef on a bun
Pantry staples meet smoky magic for the ultimate BBQ beef sandwich experience.
| Ingredient | Amount | Notes |
|---|---|---|
| Beef Chuck Roast 🥩 | 2 lb | Pre-cut into 1-inch cubes |
| Yellow Onion 🧅 | 1 whole | Medium, sliced into wedges |
| Garlic Cloves 🧄 | 8 cloves | Peeled, smashed for marinade |
| Apple Cider Vinegar 🍎 | ½ cup | For tenderizing marinade |
| Brown Sugar 🍚 | ¼ cup | Packed, for caramelization |
| Smoked Paprika 🌶️ | 2 tbsp | For deep smoky flavor |
| Ground Cumin 🌿 | 1 ½ tbsp | Toasted for warmth |
| Dried Oregano 🍃 | 1 tbsp | Mexican oregano preferred |
| Kosher Salt 🧂 | 1 ½ tbsp | Diamond Crystal preferred |
| Black Peppercorns 🌶️ | 1 tsp | Freshly cracked |
| Honey 🍯 | ¼ cup | For glaze sweetness |
| Balsamic Vinegar 🍷 | ¼ cup | For glaze tang |
| Hamburger Buns 🍞 | 4 whole | Potato buns for extra softness |
| Dill Pickle Slices 🥒 | ½ cup | For tangy crunch |
| Red Onion 🧅 | ¼ cup | Thinly sliced for topping |
| Mayonnaise 🥫 | ¼ cup | For quick spread |
The beef is where it all starts—chuck roast gives you that melt-in-your-mouth texture, but ribeye or brisket work too if you're feeling fancy. I grab mine from Costco when I'm making a big batch, but the regular supermarket chuck works just fine. Look for good marbling—those little white streaks are flavor gold. The onions and garlic? Fresh is best, but frozen chopped will work in a pinch. The key here is the apple cider vinegar marinade—it tenderizes the beef overnight while building that smoky-sweet foundation. Don't skip the overnight soak, trust me on this.
No smoked paprika? Substitute regular paprika plus a pinch of liquid smoke—it's a game-changer. Running low on balsamic vinegar? A splash of red wine vinegar works in a bind. The honey in the glaze can be swapped for maple syrup if you're vegan-friendly, but honey gives that perfect caramelized crust. For the buns, potato buns stay soft longer than regular hamburger buns, but use whatever you've got. The pickles and red onion are non-negotiable for that tangy crunch—Trader Joe's has the best dill pickles if you're hunting for quality. And if you're short on time, pre-sliced red onion from the grocery store is a lifesaver.
This beef keeps beautifully—reheat the leftovers in a skillet with a splash of beef broth to keep it juicy. The buns toast best fresh, but you can warm them in the oven at 350°F for 5 minutes if needed. Store the cooked beef in the fridge for up to 5 days or freeze for 3 months—it actually tastes better the next day once all the flavors meld. Portion the buns separately to keep them soft, and assemble just before serving so they don't get soggy. Double batch the glaze—it's perfect for drizzling on fries or roasted veggies too.
Why You'll Love This Recipe
- Slow-Cooker Magic: That chuck roast practically melts itself—just toss it in with onions, garlic, and a splash of apple cider vinegar, then let the slow cooker do the work. No chopping, no stress, just hands-off richness that turns tough beef into fork-tender perfection.
- Sweet-Savory Balance: The brown sugar and vinegar create this perfect tangy-sweet glaze that clings to every bite, while the garlic infuses deep, aromatic heat. It’s the kind of flavor that makes you slow down mid-bite—no takeout needed.
- Tailgate or Tuesday: This recipe works for game day crowds or a lazy night in—just adjust the bun size and serving style. Between us, the leftovers reheat like a dream, so you’ll end up feeding half the block without even trying.
- Budget Stretch: A chuck roast is cheaper than steak but packs just as much flavor, and the slow-cooked method means you’re not wasting a thing. Honestly, I’ve made this for $8 a serving and still had my husband begging for seconds.
Step-by-step instructions for smoky-sweet BBQ beef on a bun
Here's how to transform tough chuck roast into melt-in-your-mouth beef with a perfect smoky-sweet crust.
🔥 Step 1: Marinate the Beef for Maximum Tenderness
In a large bowl, combine the 2 lb beef chuck roast (pre-cut into 1-inch cubes), 1 whole yellow onion (sliced into wedges), 8 cloves garlic cloves (peeled and smashed), 0.5 cup apple cider vinegar, 0.25 cup brown sugar, 2 tbsp smoked paprika, 1.5 tbsp ground cumin, 1 tbsp dried oregano, 1.5 tbsp kosher salt, and 1 tsp black peppercorns. Mix everything thoroughly with your hands—this ensures the spices cling to every beef cube.
The apple cider vinegar does double duty here: it tenderizes the meat while adding bright acidity. Let the mixture marinate in the refrigerator for at least 4 hours (overnight is even better). You'll know it's ready when the beef absorbs the marinade and the liquid takes on a deep reddish hue from the spices.
🍳 Step 2: Sear the Beef for Deep Flavor
Preheat your oven to 375°F. Heat a large Dutch oven or heavy skillet over medium-high heat. Remove the beef from the marinade (reserve the marinade) and sear the cubes in batches for 2-3 minutes per side until they develop a deep brown crust. The onions and garlic will caramelize slightly—this builds incredible flavor.
Here's the thing—don't crowd the pan. Work in batches if needed so the beef gets that perfect sear. As you sear, you'll notice the spices sticking to the pan, creating a flavorful crust that'll later blend into your glaze. Transfer the seared beef to a plate and set aside.
🥘 Step 3: Slow-Cook Until Fork-Tender
Pour the reserved marinade into the Dutch oven, scraping up all those delicious browned bits from the bottom. Return the beef to the pot, add enough water to come about halfway up the beef (about 1 cup), then cover and transfer to the preheated oven. Braise for 2.5-3 hours until the beef is fork-tender and the sauce has reduced to a thick, glossy consistency.
I check for doneness by piercing a beef cube—it should feel like butter. If it's not quite there, add ¼ cup water, cover, and cook another 20-30 minutes. The slow cooking transforms tough chuck into melt-in-your-mouth beef while developing that perfect smoky-sweet sauce.
🍯 Step 4: Create the Perfect Glaze
While the beef cooks, make the glaze by combining 0.25 cup honey, 0.25 cup balsamic vinegar, and 1 tbsp smoked paprika in a small saucepan. Bring to a simmer over medium heat and cook for 5-7 minutes until it thickens slightly and becomes syrupy. You're looking for a glaze that coats the back of a spoon but isn't too thick.
The honey adds sweetness while the balsamic vinegar provides tangy depth. This glaze will give your beef that perfect balance of sweet and smoky flavors that make it irresistible. Keep it warm until you're ready to use it.
🥪 Step 5: Assemble the Perfect BBQ Beef Sandwich
Once the beef is tender, drain it carefully (reserve the cooking liquid) and return it to the Dutch oven. Stir in the honey-balsamic glaze and simmer for 2-3 minutes until everything is well-coated and glossy. Taste and adjust seasoning if needed—you might want to add a pinch more salt or a splash of vinegar.
Toast the 4 whole hamburger buns until they're golden and crisp. Spread each bun with 1 tablespoon mayonnaise (using the 0.25 cup total) and layer with ¼ of the beef mixture, 2 tablespoons dill pickle slices, and 1 tablespoon red onion. The pickles cut through the richness while adding that classic tangy crunch.
Pro Tips For Making Bbq Beef On A Bun
- Sear the Chuck First: I learned this the hard way—skipping the sear means flavor hiding in the sauce instead of the meat. Pat the chuck dry, then hit it with a screaming-hot pan (cast iron if you have it) for 3-4 minutes per side until deep brown. That crust is where the BBQ magic sticks.
- Slice Against the Grain: Your beef will either fall apart like a dream or fight you like a stubborn mule—it’s all in the cut. After cooking, let the chuck rest 10 minutes, then slice against the grain with a sharp knife. Thinner slices (¼-inch) soak up sauce better and make each bite tender.
- Deglaze with Vinegar Early: Don’t wait until the end to toss in that apple cider vinegar—add it while the onions and garlic are sweating. The acid cuts through the sugar’s caramelization faster, giving you a smoother, less grainy sauce. Plus, it keeps the brown sugar from burning before the beef is done.
- Use a Meat Thermometer: I used to guess, and that’s how you end up with beef that’s either rubbery or raw in the center. Chuck needs to hit 195°F internally for that pull-apart tenderness. Once it’s done, tent it with foil and let it rest—no peeking, or you’ll lose all that juicy goodness.
Make-ahead tips for this recipe
Prep Ahead
Marinate the beef overnight—this is where the magic happens. I always prep the marinade the night before and let it sit in the fridge while I'm sleeping. The longer it marinates, the more tender and flavorful the beef becomes. Use a ziplock bag or airtight container to keep it contained and prevent spills. 🥩
Cooking in Batches
Make the glaze first—it only takes 5-7 minutes and can sit at room temperature while you cook. I like to double the recipe and store the extra in the fridge for up to 2 weeks. It's perfect for drizzling on roasted veggies or even as a glaze for grilled chicken. The buns can be toasted fresh, but if you're prepping ahead, store them in a paper bag at room temperature for up to 2 days—they'll stay soft and fresh.
Storage Secrets
Cooked beef keeps beautifully in the fridge for 5 days if stored in an airtight container with the cooking liquid. The flavors actually deepen over time, so leftovers often taste even better. For longer storage, freeze the beef in portion-sized bags—thaw overnight in the fridge before reheating. When reheating, add a splash of beef broth to keep it moist and prevent drying out. 💪
Game Day Prep
This recipe is a crowd-pleaser for game days or parties. Prep everything ahead of time: marinate the beef, make the glaze, and toast the buns. Store components separately in individual containers—beef in one, glaze in another, and toppings in a third. When game time rolls around, just reheat the beef, warm the buns, and assemble. I like to set up a DIY sandwich station with all the toppings so guests can customize their own.
Freezing for Later
Freeze the cooked beef in single-serving portions for easy grab-and-go meals. Thaw overnight in the fridge, then reheat in a skillet with a splash of water or broth. The buns don't freeze well, so always toast them fresh. If you're freezing the glaze, store it in an ice cube tray for easy portioning—just pop out what you need and reheat. This is a great way to save time on busy weeknights. ✨
Reheating Leftovers
Reheat beef in a skillet over medium heat with a splash of beef broth or water to keep it moist. Add the glaze back in during the last 2 minutes of reheating to restore that glossy finish. For the buns, warm them in the oven at 350°F for 5 minutes to keep them soft. Assemble the sandwiches fresh to prevent sogginess. Leftovers make great lunches or quick dinners—just grab and go! 🍽️
Nutrition facts
Frequently asked questions
Can I use a different cut of beef instead of chuck roast?
For a richer flavor, try ribeye or brisket—both work beautifully. If you're short on time, sirloin or flank steak (cut into strips) can be marinated for 2-4 hours instead of overnight. Just reduce the cooking time to 1.5-2 hours for quicker cuts. The key is tenderness, so adjust marinating time accordingly.
How do I keep the buns from getting soggy?
Toast the buns just before assembling and spread mayonnaise on the bottom half only. For extra insurance, place the beef on a paper towel-lined plate before adding the top bun. If reheating leftovers, toast the buns fresh and assemble immediately—the contrast between warm beef and crispy buns is what makes this sandwich shine.
What's the best way to reheat leftovers?
Reheat beef in a skillet over medium heat with 2 tablespoons beef broth per 1 cup of beef. Cover for 3-4 minutes to retain moisture, then add the glaze back in during the last 2 minutes of heating. Warm buns separately in the oven at 350°F for 5 minutes to keep them soft. Assemble fresh to maintain that perfect texture.
Can I make this recipe in a slow cooker?
Yes! After searing the beef, transfer everything (including reserved marinade) to your slow cooker. Cook on low for 6-8 hours or high for 3-4 hours. The slow cooker method works especially well for tougher cuts like chuck roast. Finish with the glaze as directed in the recipe for that signature sweet-smoky flavor.
What are the best toppings to add?
Classic toppings include dill pickle slices (for tang), thinly sliced red onion (for crunch), and a drizzle of extra glaze. For extra richness, add cheddar cheese or blue cheese crumbles. If you love heat, sprinkle with hot sauce or crushed red pepper flakes. The key is balancing textures—crunchy, creamy, and tangy elements all work together.