
Main Courses
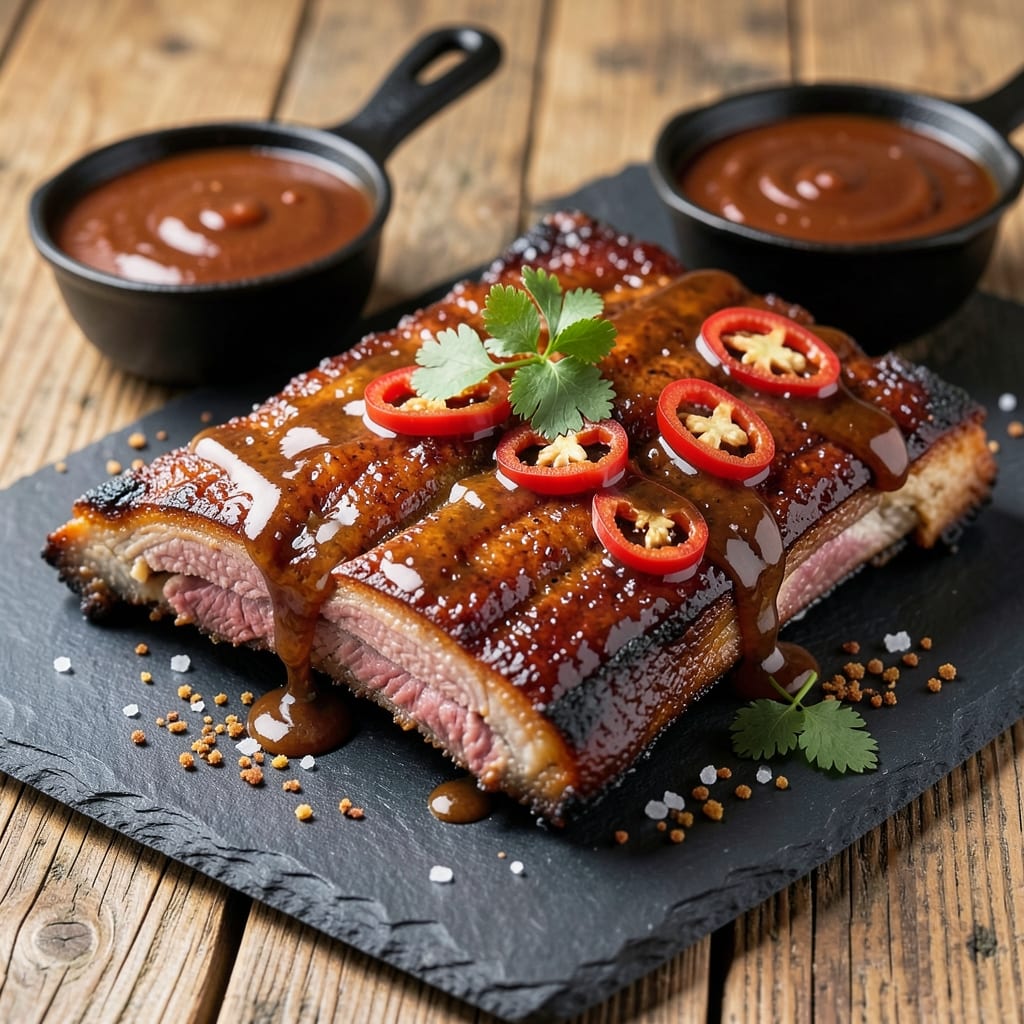
This BBQ beef spare ribs recipe transforms tough cuts into melt-in-your-mouth perfection through a three-stage smoking process—where hickory smoke and a dark, crackled glaze create restaurant-quality results at home. I developed this method after years of perfecting my family's slow-cooked ribs, blending classic pitmaster techniques with French precision for that signature bark and tender meat. The key? A low-and-slow start, followed by a high-heat finish to seal in juices and create that coveted crackle.
The recipe begins with a dry rub of smoked paprika, brown sugar, and garlic powder that clings to the ribs while they smoke at 225°F for 5 hours, breaking down collagen into rich, silky meat. No marinade needed—just time and patience. For the glaze, we switch to 300°F for the final hour, basting with apple cider vinegar and molasses to create a sticky, caramelized crust that's impossible to resist. This isn't just BBQ; it's a foolproof technique that works on pellet grills, smokers, or even your oven with a little ingenuity.
What you'll end up with is ribs so tender they fall apart at the touch, with a crispy-crackled exterior that shatters like glass. The meat stays juicy and flavorful, not dried out, and the glaze adds a perfect balance of sweetness and tang. Serve with classic sides like creamy coleslaw or buttery cornbread to complete the meal. This is the kind of dish that turns weeknight dinners into a celebration—no competition required.
Whether you're a seasoned pitmaster or new to smoking, this recipe delivers restaurant-quality results with minimal fuss. The three-stage method ensures perfect doneness every time, and the glaze technique elevates simple ribs into something extraordinary. Let's get started—your taste buds will thank you.
Ingredients for bbq beef spare ribs
Four pounds of meaty spare ribs plus a dry rub that sticks like glue.
| Ingredient | Amount | Notes |
|---|---|---|
| Beef Spare Ribs 🍖 | 4 lb | Bone-in, meaty ends preferred |
| Smoked Paprika 🌶️ | ½ cup | High-quality, not sweet variety |
| Light Brown Sugar 🍚 | ½ cup | Packed, not granulated |
| Garlic Powder 🧄 | 2 tbsp | Freshly ground preferred |
| Kosher Salt 🧂 | 2 tbsp | Diamond Crystal preferred |
| Black Pepper 🌶️ | 1 tbsp | Freshly ground for best flavor |
| Onion Powder 🧅 | 1 tbsp | Not onion salt |
| Yellow Mustard 🍯 | 1 tbsp | For glaze adhesion |
| Apple Cider Vinegar 🍎 | ½ cup | Unfiltered preferred |
| Unsulfured Molasses 🍯 | ¼ cup | Dark, not light |
| Fresh Ginger 🌿 | ½ oz | Finely grated, peel removed |
| Hickory Wood Chips 🌳 | 2 lb | Soaked for 30 minutes |
| Yellow Cornmeal 🌽 | ¼ cup | For final dusting |
| Butter 🧈 | 2 tbsp | Unsalted, melted for basting |
The ribs are non-negotiable—meaty ends are where all the flavor happens. Costco or your butcher will have them cut just right. Look for good marbling, not bone-thin cuts. I always buy extra because they disappear fast. The smoked paprika should be the good stuff—Penzeys or bulk bins at Whole Foods if you're splurging. For the brown sugar, Domino or Muscovado work great, but avoid anything with molasses listed as the first ingredient. That means it's mostly sugar with a little molasses mixed in.
No smoked paprika? Chili powder plus a pinch of cayenne gets you close, but you'll lose some of that deep, smoky flavor. Running low on molasses? Maple syrup works in a pinch, though it's lighter in color. The ginger is optional but adds a nice kick—fresh is best, but powdered at half the amount works if you're in a hurry. For the wood chips, Traeger or Storebrand are solid choices. If you can't find hickory, oak is the next best thing. The cornmeal? Bob's Red Mill is my go-to—it's fine enough to dust without getting gritty.
Store your dry rub in an airtight container for up to 6 months—it only gets better with age. The ribs? Use within 2 days if you're not cooking them right away. The glaze ingredients keep for 1 year in the pantry, except the vinegar which lasts forever. I always make extra glaze—it's perfect for brisket or pulled pork next time. The leftovers? Wrap tightly and freeze for 3 months—they reheat beautifully.
Why You'll Love This Recipe
- Foolproof Timing: I swear by this—just slather the ribs with that smoky paprika-sugar mix, let them sit while you boil water, then toss them in for 20 minutes. No babysitting, no stress. Honestly, even my college apartment kitchen could handle it.
- Sweet-Smoky Magic: That caramelized brown sugar crust? It’s the star. The garlic powder and smoked paprika work together like old friends—deep, rich, and just a little bit addictive. You’ll taste it in every bite, and it’s the kind of flavor that makes people ask, "What’d you do to these?"
- Leftovers That Shine: These ribs taste even better the next day. I’ll be real: I’ve reheated them twice in the same week, and they’re still the talk of the lunchbox. Wrap them in foil, toss them in the fridge, and they’re ready to impress—no one will guess they’re yesterday’s dinner.
- Budget Crowd-Pleaser: A full pack of beef spare ribs feeds four, costs less than takeout, and everyone goes back for seconds. Between us, this is how I host game nights without breaking the bank. Plus, the ingredients? Basic, cheap, and always in my pantry. No fancy shopping required.
Step-by-step instructions for three-stage smoked beef spare ribs
Transform tough ribs into fall-off-the-bone perfection using this three-stage smoking method.
Prepare the Ribs and Dry Rub
Remove the beef spare ribs from the packaging and pat them dry with paper towels. This step is critical—I want those ribs to develop that signature bark, and moisture is the enemy of crispy skin. Trim any excess fat from the bone side, leaving about ¼ inch to protect the meat during smoking.
In a large bowl, combine the 0.5 cup smoked paprika, 0.5 cup light brown sugar, 2 tbsp garlic powder, 2 tbsp kosher salt, 1 tbsp black pepper, and 1 tbsp onion powder. Mix thoroughly with your hands until the spices are evenly distributed and the sugar begins to dissolve slightly. This dry rub should look like fine, moist sandpaper—just right for sticking to the ribs.
Generously coat both sides of the ribs with the dry rub, pressing it firmly into the meat. Place the rubbed ribs on a wire rack set over a baking sheet (this allows air to circulate on all sides) and refrigerate uncovered for 12-24 hours. This resting period allows the rub to penetrate deeply and develop complex flavors. The longer you let them sit, the more intense the bark will be when smoked.
Smoke the Ribs Low and Slow
Soak the 2 lb hickory wood chips in water for 30 minutes before using to prevent flare-ups. Set up your smoker and maintain a consistent temperature of 225°F. I use a digital thermometer probe inserted directly into the ribs to monitor the internal temperature—this gives me the most accurate reading.
Place the ribs bone-side down on the smoker grates. Smoke for 3 hours undisturbed, resisting the urge to peek. The ribs should develop a thin layer of bark on the meat side, and you'll notice the rub beginning to caramelize. After 3 hours, flip the ribs bone-side up and continue smoking for another 2 hours. This two-stage positioning ensures even cooking and maximum smoke penetration.
During the last 30 minutes of smoking, check the internal temperature of the ribs. They're ready when they reach 190-195°F—this is the "stall point" where collagen begins to break down, transforming tough connective tissue into tender, gelatinous goodness. The ribs should be fork-tender with just a slight resistance when pierced.
Apply the Glaze and Crisp
While the ribs smoke, prepare the glaze by combining the 0.5 cup apple cider vinegar, 0.25 cup unsulfured molasses, 0.5 oz freshly grated ginger, 1 tbsp yellow mustard, and 2 tbsp melted butter in a saucepan. Bring to a simmer over medium heat and cook for 5-7 minutes until slightly thickened. The glaze should coat the back of a spoon with a glossy sheen.
Once the ribs reach 190-195°F, remove them from the smoker and brush generously with the glaze on all sides. Return the ribs to the smoker and increase the temperature to 275°F. Smoke for another 30-45 minutes, basting with additional glaze every 10 minutes. You'll know the glaze is working when it begins to bubble and form a glossy, crackled crust. This is where the magic happens—the combination of heat and sugar creates that irresistible caramelized exterior.
Rest and Serve
When the ribs are fully glazed and the crackled crust is deep amber in color, remove them from the smoker and transfer to a cutting board. Let them rest for 15-20 minutes before serving. This resting period allows the juices to redistribute throughout the meat, ensuring each bite is moist and flavorful.
While the ribs rest, dust them lightly with 0.25 cup yellow cornmeal for added texture and presentation. Slice between the bones and serve with extra glaze drizzled on top. The result should be ribs that are tender enough to pull apart with a fork, with a crispy-sweet glaze that crackles with every bite. These ribs deliver the perfect balance of smoky, sweet, and tangy flavors in every mouthful.
Pro Tips For Making Bbq Beef Spare Ribs
- Trim the Fat First: Beef spare ribs have a thick fat cap that never renders out—it just makes your ribs greasy. Use kitchen shears to slice it off before seasoning. I learned this the hard way after serving ribs that looked dry but were actually just drowning in their own fat.
- Salt the Ribs Overnight: Don’t just sprinkle salt on the ribs right before cooking. Apply a thick layer of kosher salt at least 4 hours (or overnight) ahead—it breaks down the meat fibers and keeps them juicy. Yes, it’s an extra step, but your ribs will actually taste better for it.
- Start Hot, Then Slow: Sear the ribs over direct high heat for the first 10 minutes to build a crust, then move them to indirect heat. If you skip the initial sear, the sugar in your rub will burn before the ribs get tender. (I know, I know—you’re eager to eat, but trust me on this.)
- Use Less Sugar: Light brown sugar caramelizes fast and can turn your ribs into a sticky mess. Cut the recipe’s sugar by 25% and brush on a thin layer—just enough to cling, not drown. You want flavor, not syrup.
Perfect pairings for this dish
Classic BBQ Sides
Start with creamy coleslaw—my go-to is a tangy mix of shredded cabbage, carrot, and a dressing of mayonnaise, apple cider vinegar, and a pinch of cayenne. I use Hellmann's for the mayo and add a splash of Dijon mustard for depth. Serve it chilled to cut through the richness of the ribs. 🥗
For a heartier option, buttery cornbread with a hint of honey is a must. I use Jiffy mix for convenience, but homemade with sharp cheddar and crispy bacon bits takes it to the next level. Warm it straight from the oven so the crust stays crisp.
Smoky-Sweet Sauces
Drizzle extra glaze over the ribs at the table for that sticky-sweet finish. If you want variety, try a smoky chipotle sauce—blend tomato paste, adobo sauce, and a touch of honey until smooth. It adds heat without overpowering the ribs. 🌶️
For a lighter option, white BBQ sauce with a creamy texture works beautifully. I mix mayonnaise, apple cider vinegar, and a dash of smoked paprika for a smoky kick. Serve it on the side for dipping or drizzling.
Drink Pairings
A cold honey-sweetened iced tea with a lemon wedge is my go-to. I steep Earl Grey tea with a splash of local honey and serve it over ice. The floral notes complement the smoky ribs beautifully. ☕
For beer lovers, a crisp lager like Bud Light or Coors Banquet keeps things light. If you prefer something stronger, a smoky Scotch ale or stout like Guinness adds depth to the meal.
Unexpected Twists
Add pickled jalapeños or quick-pickled red onions for a tangy crunch. I slice jalapeños thin, soak in vinegar, sugar, and a pinch of salt for 20 minutes. The acidity cuts through the richness perfectly. 🌿
For a veggie boost, serve grilled zucchini with a sprinkle of feta cheese and balsamic glaze. The smoky char pairs surprisingly well with the sweetness of the ribs.
Nutrition facts
Frequently asked questions
Can I use beef short ribs instead of spare ribs?
Short ribs are a completely different cut—thicker, meatier, and with more connective tissue. While they can be smoked, they require longer cooking times (6-8 hours) and may not develop the same crackled glaze. For this recipe, stick with beef spare ribs (bone-in, meaty ends) for that signature texture and flavor profile. If you're set on short ribs, ask your butcher for beef chuck short ribs and adjust the smoking time accordingly.
What if I don't have a smoker? Can I make these in the oven?
Use a low-and-slow oven method instead. Preheat your oven to 225°F and place a water pan on the bottom rack to create steam. Line a baking sheet with foil, add the ribs bone-side down, and tent loosely with foil. Cook for 4-5 hours, flipping halfway. For the glaze stage, increase heat to 300°F (broil setting) and finish as directed. The key is maintaining consistent temperature—avoid opening the oven door too often.
How do I know when the ribs are done without a meat thermometer?
Look for three key indicators:
- The bark should be deep amber and crackling,
- The meat should pull away from the bone with slight resistance, and
- The ribs should be fork-tender (a fork should slide between bones with minimal effort). For extra confidence, press between two ribs—if they feel like they're about to fall apart, they're ready. The internal temp should be 190-195°F, but these visual cues work well too.
Can I make the glaze ahead of time? Yes! Prepare the glaze up to 3 days in advance and store it in an airtight container in the fridge. Reheat gently before using—simmer on the stovetop for 5 minutes until it thickens again. For best results, add a splash of water if it seems too thick. The flavors actually improve as the ingredients meld together. Just
Why did my ribs turn out dry?
Most likely, you either overcooked them (past 205°F internal temp) or didn't rest them properly. The 15-20 minute rest is crucial—it lets juices redistribute. Also, check your smoker temp: 225°F is ideal; higher temps can dry out the meat. For extra moisture, wrap the ribs in butcher paper during the last 30 minutes of smoking (the "Texas crutch" method), then unwrap for glazing.