
Soups & Stews
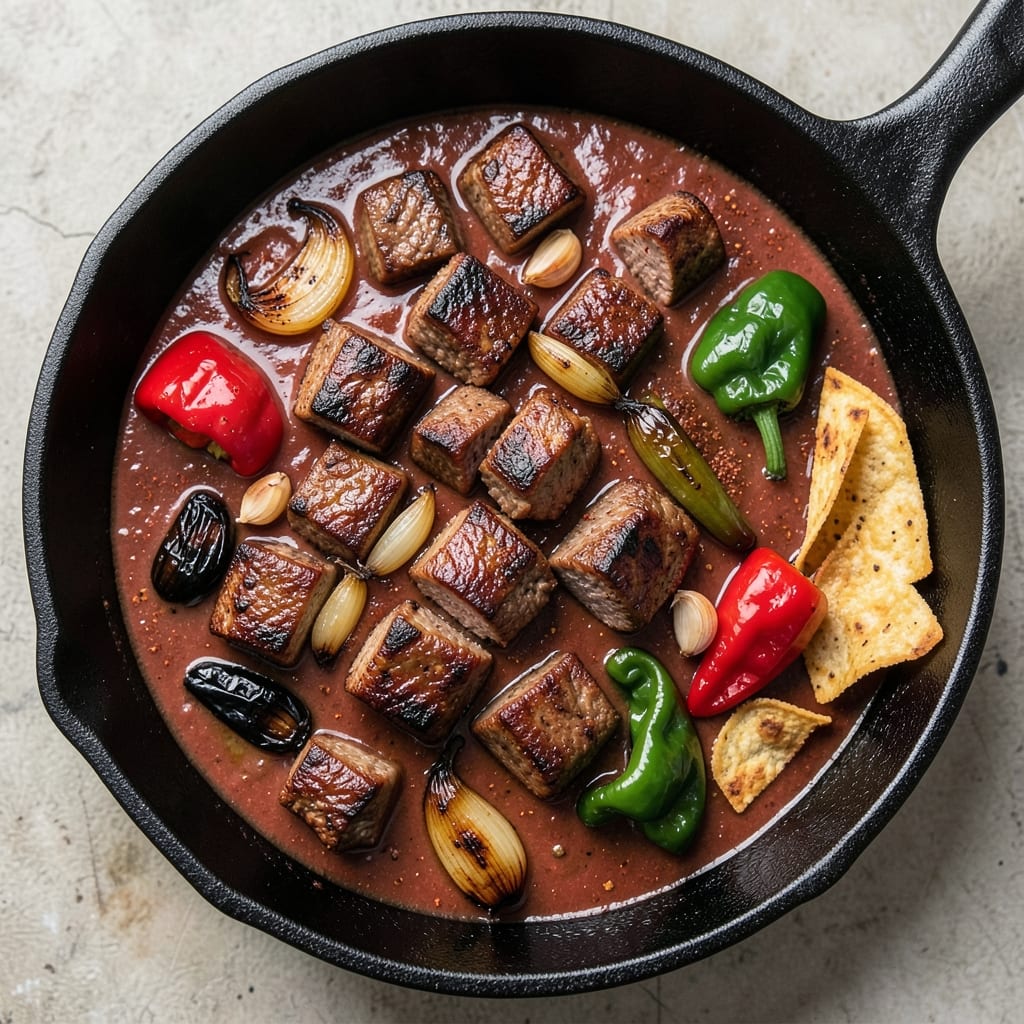
This beanless beef chili recipe delivers all the deep, smoky heat of a classic chili—without a single bean in sight. The secret lies in slow-cooked beef, caramelized onions, and a carefully balanced blend of spices that create rich, layered flavor. After years of perfecting this technique, I’ve developed a method that transforms tough cuts into tender, melt-in-your-mouth bites while keeping the sauce thick, hearty, and full of smoky depth.
The foundation starts with browning the beef in batches (never crowd the pan!) to build a flavorful crust, then simmering it low and slow with tomatoes, bell peppers, and a touch of cocoa powder for complexity. This approach ensures the chili develops the same depth as traditional recipes, but with a texture that’s meat-forward and satisfying. The spices—cumin, chili powder, and a hint of cayenne—are toasted just enough to wake up their flavors without overpowering the beef.
By the time it’s done, you’ll have a chili that’s thick, smoky, and packed with tender beef chunks, all while staying true to its roots. The slow cooking process ensures every bite is rich and flavorful, with just the right balance of heat and savory notes. Serve it as-is for a clean, meaty chili, or top with cheese, sour cream, or fresh cilantro for extra texture and brightness.
This recipe works perfectly in a Dutch oven, slow cooker, or Instant Pot—giving you flexibility for any cooking method. Whether you’re feeding a crowd or meal prepping for the week, this beanless chili delivers restaurant-quality results with minimal effort. Let’s get cooking!
Ingredients for beanless beef chili
Sixteen ingredients. Six hours. Smoky, meaty chili without a single bean.
| Ingredient | Amount | Notes |
|---|---|---|
| Chuck Roast 🥩 | 3 lb | Trimmed of excess fat |
| Yellow Onions 🧅 | 2 whole | Diced, caramelized for depth |
| Bell Peppers 🌶️ | 2 whole | Mixed colors, diced |
| Garlic Cloves 🧄 | 6 cloves | Minced, toasted lightly |
| Canned Tomato Sauce 🍅 | 2 cups | San Marzano preferred |
| Chili Powder 🌶️ | 2 tbsp | Smoked variety for depth |
| Ground Cumin 🌿 | 1 ½ tbsp | Toasted for aromatic punch |
| Cocoa Powder 🍫 | 1 tbsp | Unsweetened, for complexity |
| Cayenne Pepper 🔥 | ½ tsp | Adjust for heat preference |
| Beef Broth 💧 | 2 cups | Low-sodium preferred |
| Dark Brown Sugar 🍯 | 1 tbsp | Balances acidity |
| Olive Oil 🫒 | 2 tbsp | Extra-virgin for browning |
| Salt 🧂 | 1 ½ tsp | Diamond Crystal preferred |
| Black Pepper 🌶️ | ½ tsp | Freshly ground |
The chuck roast is non-negotiable here—it's the only cut with enough fat and connective tissue to deliver that melt-in-your-mouth texture after slow cooking. Costco or Walmart usually have it pre-cut into chunks, which saves time, but if you're buying a whole roast, ask the butcher to cube it for you. Look for good marbling—those white fat streaks are what render down into flavor. For the San Marzano tomato sauce, Trader Joe's carries the 28-ounce cans in their Italian section, but any high-quality canned tomatoes will work. The bell peppers should be firm with no soft spots, and the onions? Yellow or red, but avoid sweet varieties like Vidalia—they'll make your chili taste too mild.
No chili powder? Mix 1 tbsp smoked paprika with 1 tsp cayenne for a close substitute. Running low on cumin? Ground coriander at half the amount adds a similar earthiness. The cocoa powder is what gives this chili that deep, almost molasses-like richness—don't skip it. If you're sensitive to heat, reduce the cayenne to a pinch, but trust me on the cocoa. For the beef broth, low-sodium is key—you'll be adding salt later, and you don't want to overdo it. The brown sugar might seem odd, but it cuts through the acidity of the tomatoes and balances the heat perfectly. If you're measuring by volume, pack your spices tightly into the spoon for accurate amounts.
This chili tastes even better the next day as the flavors meld. Store in an airtight container in the fridge for up to 5 days, or freeze portions for 3 months. For meal prep, I double the recipe and freeze half—just thaw overnight in the fridge before reheating. The slow cooker method? Dump everything in raw, cook on low for 8 hours, and you'll have the most tender beef you've ever eaten. Leftovers reheat beautifully—just add a splash of beef broth if it gets too thick. And if you're serving a crowd, make it in batches—this chili doesn't play well when rushed.
Why You'll Love This Recipe
- One-Pot Magic: Honestly, this chili comes together in the same pot you’ll serve it from—no extra dishes, no fuss. Just brown the chuck roast, toss in the onions and peppers, add the garlic and tomato sauce, and let it simmer. My slow cooker does all the work while I’m folding laundry.
- Rich Without Beans: Between us, the chuck roast gets tender in that tomato sauce, and the onions caramelize right into the pot. That deep, meaty flavor? It’s like a hug in a bowl—no beans needed to make it satisfying.
- Game Day Ready: Serve it in bowls with shredded cheese and sour cream, or let it cool for potlucks. My football crew devours this every fall—it’s hearty enough for a crowd but still feels special.
- Budget Stretch: A single chuck roast feeds six for under $15. The canned tomato sauce and bell peppers keep it cheap, and leftovers taste just as good reheated. My wallet (and my freezer) thank me every time.
Step-by-step instructions for beanless beef chili
Here's how to build rich, meaty chili without beans—deep flavor comes from slow-cooked chuck and layered spices.
Sear the Chuck Roast for Deep Flavor
Pat the 3 lb chuck roast dry with paper towels and cut it into 1.5-inch cubes. Heat 2 tablespoons olive oil in a 6-quart Dutch oven over medium-high heat until shimmering. Working in batches, sear the chuck roast for 3-4 minutes per side until deeply browned and caramelized. This step develops the rich, smoky base that carries the entire dish.
Don't overcrowd the pan—if needed, work in two batches. The goal is to create a dark, flavorful crust on each piece. Transfer the browned meat to a plate and set aside. Real talk: this is where the magic happens, so don't rush it.
Build the Aromatic Base
In the same Dutch oven, add the 2 whole diced yellow onions and 2 whole diced bell peppers. Cook over medium heat for 6-8 minutes, stirring occasionally, until the onions soften and the peppers begin to release their sweetness. Add the 6 minced garlic cloves and cook for another 30 seconds until fragrant.
This is where the foundation sets. The onions should be translucent but not browned—just sweet and tender. If they start to stick, add a splash of beef broth to deglaze. The peppers should soften but retain some texture. Sprinkle with 1.5 teaspoons salt and 0.5 teaspoon black pepper now to season the vegetables.
Bloom the Spices and Add Liquids
Reduce heat to medium-low and stir in the 2 tablespoons chili powder, 1.5 tablespoons ground cumin, 1 tablespoon cocoa powder, and 0.5 teaspoon cayenne pepper. Cook for 1-2 minutes, stirring constantly, until the spices are fragrant and the cocoa powder dissolves. This step unlocks the full depth of flavor—don't skip it.
Pour in the 2 cups canned tomato sauce and 2 cups beef broth, scraping up any browned bits from the bottom of the pot. Stir in the 1 tablespoon dark brown sugar to balance the acidity. Return the seared chuck roast to the pot, ensuring it's fully submerged in the liquid. Bring the mixture to a gentle simmer.
Slow Cook Until Tender
Cover the Dutch oven and transfer it to a 325°F oven for 3-4 hours. The chili should simmer gently, with the liquid just bubbling at the edges. Check after 2 hours—the meat should be fork-tender, pulling apart easily. If it's not quite there, continue cooking for another 30-60 minutes.
Here's the thing—patience is key. The chili will thicken as it cooks, and the flavors will meld into a rich, smoky harmony. Avoid stirring too often, as this can break down the meat prematurely. The goal is tender, melt-in-your-mouth chuck roast with a sauce that clings to every bite.
Adjust and Serve
Once the chili is fully cooked, taste and adjust the seasoning. You may need to add more salt, black pepper, or even a pinch of cayenne pepper for heat. The chili should be thick but still saucy—if it's too thick, stir in a splash of beef broth or water to reach your desired consistency.
Let the chili rest for 10 minutes before serving. This allows the flavors to settle and the sauce to thicken slightly. Serve hot, garnished with extra chili powder or a dollop of sour cream if desired. Each spoonful should deliver layers of smoky, spicy, and slightly sweet flavors—proof that beans aren't necessary for a hearty, satisfying chili.
Pro Tips For Making Beanless Beef Chili
- SEAR THE CHUCK ROAST: Ditch the slow start—crank the heat to medium-high and sear the chuck roast in 2 tablespoons of oil until it’s deep brown on all sides. I used to rush this, and the chili always tasted flat; the crust locks in flavor and keeps the meat tender. (Yes, even if you’re impatient like me.)
- SWEAT THE ONIONS LOW: Don’t rush the onions—cook them over low heat for 15-20 minutes until they’re translucent and caramelized. I learned this the hard way: burning them adds bitterness that no tomato sauce can fix. If they stick, add a splash of water and keep stirring.
- CHOP PEPPERS SMALL: Dice the bell peppers into ¼-inch pieces so they cook evenly and don’t turn mushy. I skip this sometimes, and the chili ends up with big, undercooked chunks—no one wants that texture fight. A sharp knife and a steady hand make all the difference.
- SIMMER LONG AND LOW: After adding the tomato sauce, reduce the heat to a bare simmer and let it cook uncovered for at least 2 hours. I used to speed it up, and the sauce turned watery; patience gives the flavors time to meld. The chili will thicken as it cools—trust the process.
Essential equipment for great beanless beef chili
Dutch Oven Essentials
A 6-quart Dutch oven is your best friend for this chili—it distributes heat evenly and handles the long simmer beautifully. I swear by the Le Creuset Signature Round Dutch Oven (26cm) for its durable stoneware exterior and tight-fitting lid that locks in moisture. For budget-friendly options, the Lodge 5.5-Quart Pre-Seasoned Cast Iron Dutch Oven works just as well and develops a natural non-stick patina over time. Avoid non-stick Dutch ovens—they can't handle the high heat needed for proper browning. 🔥
Slow Cooker Shortcut
If you're short on time, a 6-quart slow cooker (like the Hamilton Beach Programmable Slow Cooker) transforms this recipe into a set-it-and-forget-it meal. Simply brown the beef separately, then add everything to the slow cooker and cook on low for 8 hours or high for 5 hours. The slow cooker maintains consistent temperature without monitoring, making it perfect for weeknight dinners. Pro tip: Use a meat thermometer to check doneness—aim for 205°F for fork-tender beef.
Instant Pot Adaptation
The Instant Pot Duo 6-Quart is a game-changer for this chili, cutting cook time to just 30 minutes (plus pressure release). Sear the beef in the Instant Pot's sauté function, then add all ingredients and cook on high pressure for 25 minutes. Quick-release the pressure, then stir in ½ cup beef broth if the chili is too thick. The Instant Pot's pressure cooking creates an ultra-tender texture while preserving all the smoky depth. Just avoid overfilling—never exceed the ⅔ capacity mark. ⚡
Essential Tools
Invest in a sharp chef's knife (I love the Mercer Culinary Genesis 8-inch) for dicing onions and peppers efficiently. A wooden spoon (like OXO Good Grips) is ideal for stirring—it won't scratch your Dutch oven. For measuring spices precisely, use a spice scale (the OXO Good Grips Digital Scale) to avoid packing errors. And don't skip a meat thermometer—the Thermoworks Smoke is my go-to for checking internal temperatures accurately. These tools make all the difference in consistency. 💡
Nutrition facts
Frequently asked questions
Can I use ground beef instead of chuck roast for this chili?
You can, but the texture will be different. Ground beef cooks much faster and won't develop the same melt-in-your-mouth tenderness. If you do use it, brown it thoroughly first, then simmer for only 1-1.5 hours instead of the full 3-4 hours. For best results, use a 1 lb mix of 80/20 ground beef and chuck roast cubes to get some of that slow-cooked richness.
Why does my chili turn out too thick or too thin?
Thickness comes down to cooking time and liquid balance. If it's too thick, stir in ½ cup beef broth at the end. For a thinner chili, add more broth during cooking. The cocoa powder and brown sugar help thicken naturally as it cooks—if you're using a slow cooker, start with 1 extra cup of broth to account for the longer cooking time.
How can I make this chili spicier without cayenne?
For extra heat, add ½ teaspoon chipotle powder or 1 tablespoon hot sauce at the end. For smoky heat, swap ½ teaspoon smoked paprika for regular chili powder. If you love fresh heat, stir in 1 chopped jalapeño with the peppers. Remember: you can always add more heat later, but you can't take it out!
Can I make this chili in a regular pot on the stovetop?
Yes, but it requires more attention. Use a 4-5 quart heavy pot and simmer uncovered on low heat for 2.5-3 hours, stirring occasionally. Keep the heat low to prevent boiling—you want a gentle simmer. The Dutch oven's lid helps trap heat better, so you may need to add ¼ cup broth if it gets too thick.
What are the best toppings for beanless beef chili?
Classic toppings work perfectly: shredded cheddar, sour cream, diced avocado, or fresh cilantro. For extra crunch, try crushed tortilla chips or toasted pepitas. The smoky depth of this chili pairs especially well with pickled jalapeños or a squeeze of lime juice. Serve with cornbread or crusty bread to soak up every last bit!