
Soups & Stews
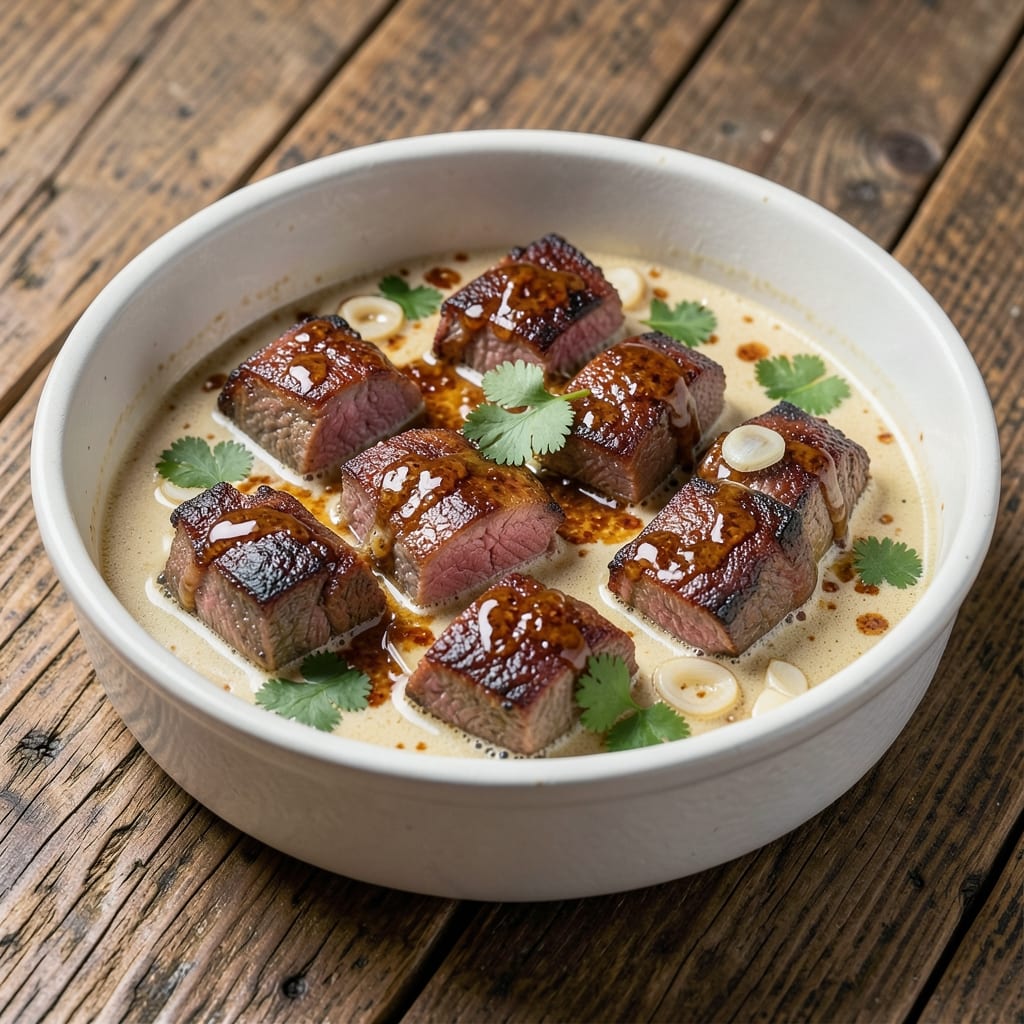
This beef adobo sa gata recipe brings the rich, velvety comfort of Filipino home cooking to your table, where tender beef simmers in a luscious coconut milk sauce infused with vinegar and soy. The secret lies in the slow braising process—coconut milk (gata) transforms the dish from tangy adobo to a creamy, deeply satisfying stew that pairs perfectly with steamed rice. I’ve perfected this version to balance traditional flavors with foolproof technique, ensuring every bite delivers that signature silky texture and bold umami.
The magic happens in layers: first, the beef marinates in a tangy blend of vinegar, soy sauce, and sugar to tenderize and build flavor. Then, as it braises in coconut milk, the sauce thickens into a velvety consistency that clings to the meat, creating a dish that’s both hearty and elegant. Unlike traditional adobo, the coconut milk adds a luxurious richness that makes this version a standout—ideal for special occasions or when you want to impress without fuss.
By the time you serve this, you’ll have fork-tender beef swimming in a glossy, aromatic sauce that’s perfectly balanced—savory from the soy, tangy from the vinegar, and creamy from the coconut milk. The dish is complete with a side of atchara (pickled papaya) to cut through the richness, but the star is undeniably the beef and sauce. This is the kind of meal that turns weeknights into celebrations.
Ready in about 2 hours (mostly hands-off braising time), this recipe is designed for home cooks who want restaurant-quality results without complicated techniques. The key is patience—letting the flavors meld and the sauce develop into that signature velvety perfection. Let’s get cooking!
Ingredients for beef adobo sa gata
Pantry staples meet Filipino comfort—just 13 ingredients for rich, velvety beef in coconut milk sauce.
| Ingredient | Amount | Notes |
|---|---|---|
| Beef Chuck Roast 🥩 | 2 lb | Cut into 1.5-inch cubes |
| Canned Coconut Milk 🥥 | 1 can | Full-fat, unsweetened |
| White Vinegar 🍶 | ½ cup | Distilled preferred |
| Soy Sauce 🥄 | ½ cup | Dark soy for color |
| Brown Sugar 🍯 | ½ cup | Packed, light brown |
| Garlic Cloves 🧄 | 8 cloves | Minced, fresh preferred |
| Onion 🧅 | 1 whole | Yellow, chopped |
| Bay Leaves 🌿 | 2 whole | Dried, crushed |
| Black Peppercorns 🌶️ | 1 tsp | Crushed, fresh preferred |
| Olive Oil 🫒 | 2 tbsp | Extra-virgin for richness |
| Salt 🧂 | 1 ½ tsp | Kosher or sea salt |
| Water 💧 | 1 cup | For thinning sauce |
| Green Onions 🧅 | 4 whole | Sliced, for garnish |
The beef makes or breaks this dish. Chuck roast is ideal—it stays tender while braising, unlike leaner cuts. Grab it from the butcher counter if possible, or look for pre-cubed beef in the meat section (the Costco or Trader Joe's versions work great). For coconut milk, Aroy-D or Goya brands are my go-to—they’re full-fat and unsweetened, which is key for that authentic texture. If you can’t find full-fat, use half-and-half instead of water to thin the sauce later. The soy sauce? Dark soy adds that gorgeous color, but regular soy works in a pinch.
No dark soy? Extra Worcestershire sauce gives a similar depth. Vinegar substitutes? Cane vinegar or apple cider vinegar work, but distilled is the most neutral. Brown sugar substitutes? White sugar plus 1 tsp molasses for depth. The garlic and onion can be pre-minced from a jar (like Trader Joe's or Goya brands), but fresh is worth the extra 5 minutes if you’ve got it. For the bay leaves, crush them lightly before adding—they’ll release more flavor. And if you’re short on time, start with 1 bay leaf and add another later if needed.
This sauce gets better the next day—honestly, double the batch if you can. Store leftovers in the fridge for 5 days or freeze for 3 months. The beef stays fork-tender, and the sauce thickens even more overnight. To reheat, add 2 tbsp water per cup of sauce and simmer gently. The green onions are just for garnish, but if you’ve got cilantro or chives, they work too. Serve with steamed rice—jasmine or long-grain absorbs the sauce perfectly.
Why You'll Love This Recipe
- Five-Ingredient Magic: I swear by this recipe because it’s that simple—just beef, coconut milk, vinegar, soy sauce, and sugar. No chopping, no fuss, and the flavors build themselves while you sip your coffee.
- Rich, Tangy, Sweet: That first bite? The vinegar’s sharp kick softens into a velvety coconut-sweet sauce clinging to tender beef. It’s the kind of dish that makes you groan in the best way—no sad, dry meat here.
- Leftovers for Days: Between us, this tastes better the next day. I make a double batch on Sundays, and by Wednesday, it’s still the star of my lunch. Freeze half for when you’re too tired to cook.
- Budget-Friendly Feast: A single chuck roast stretches for four meals, and the rest of the ingredients cost pennies. Plus, the leftover sauce? Perfect for rice, noodles, or even scrambled eggs—no waste, all flavor.
Step-by-step instructions for beef adobo sa gata
Here's how to create this rich, velvety dish with tender beef and creamy coconut milk.
Prepare the Beef and Aromatics
Start by cutting the 2 lb beef chuck roast into 1.5-inch cubes—this ensures even cooking and maximum tenderness. In a large Dutch oven or heavy pot, heat 2 tablespoons olive oil over medium-high heat. Add the beef cubes in a single layer, letting them sear undisturbed for 3-4 minutes until they develop a deep golden-brown crust. This step builds incredible flavor through the Maillard reaction.
Once the beef is browned, remove it from the pot and set it aside. In the same pot, add the 1 whole chopped onion and 8 minced garlic cloves. Sauté for 2-3 minutes until the onions become translucent and the garlic releases its fragrant aroma. Here's the thing—don't let the garlic burn, or it will turn bitter and ruin the delicate balance of flavors in this dish.
Build the Adobo Base
To the pot with the onions and garlic, add 0.5 cup soy sauce, 0.5 cup white vinegar, 0.5 cup packed brown sugar, 1.5 teaspoons salt, and 1 teaspoon crushed black peppercorns. Stir everything together and bring the mixture to a gentle boil. Let it simmer for 5 minutes until the sugar dissolves completely and the liquid reduces slightly, creating a thick, flavorful base.
This is where the magic happens—the vinegar tenderizes the beef while the soy sauce and sugar create that perfect balance of sweet, salty, and tangy flavors. The brown sugar also helps caramelize slightly, deepening the sauce's richness. Don't rush this step; let the flavors meld together for that authentic adobo taste.
Braise the Beef
Return the beef cubes to the pot and add 1 cup water and 2 whole crushed bay leaves. Stir gently to combine, then bring the mixture to a boil. Once boiling, reduce the heat to low and cover the pot with a tight-fitting lid. Let the beef braise for 1.5 hours, turning the cubes occasionally to ensure even cooking and prevent sticking to the bottom.
Here's the key to tender beef—keep the heat low and maintain a gentle simmer. You'll know it's ready when the beef is fork-tender and easily pulls apart with minimal resistance. If the sauce starts to reduce too much before the beef is fully cooked, simply add a splash of water to maintain the right consistency.
Add Coconut Milk and Finish
After the beef has braised, stir in the 1 can full-fat unsweetened coconut milk. The sauce will immediately thicken and become luxuriously creamy. Return the heat to medium-low and let the mixture simmer uncovered for another 20-25 minutes, stirring occasionally. This allows the coconut milk to fully incorporate and any remaining liquid to reduce slightly, creating that perfect velvety texture.
Taste the sauce and adjust the seasoning if needed—you might want to add a bit more soy sauce for saltiness or a touch of brown sugar for sweetness. The coconut milk should be fully integrated, and the sauce should coat the back of a spoon. If it's too thick, you can add a splash of water to reach your desired consistency.
Garnish and Serve
Remove the 2 whole bay leaves from the pot and discard them. Stir in the 4 sliced green onions, reserving a few slices for garnish. Let the beef adobo sa gata rest for 5 minutes before serving to allow the flavors to fully meld together. This resting period also helps the sauce thicken slightly, making it even more luxurious.
Serve the beef adobo sa gata hot, garnished with the reserved green onion slices. The tender beef should be falling apart, and the sauce should be silky and rich with coconut milk. This dish pairs beautifully with steamed rice, which helps soak up every last drop of that delicious sauce. Enjoy your homemade version of this classic Filipino comfort food!
Pro Tips For Making Beef Adobo Sa Gata
- Brown the Meat First: Skip the raw beef in sauce—sear your chuck roast in a hot pan until deep golden before adding liquids. I learned this the hard way: skipping this step leaves your stew bland and watery. The crust locks in flavor and keeps the meat tender when it braises. ---
- Use Two Cans of Coconut Milk: Don’t scrimp on the coconut milk—split one can for the sauce and reserve the other for thickening at the end. The first batch cooks off, leaving a richer base, while the second adds creaminess without curdling. (Yes, even if you’re impatient like me.) ---
- Simmer, Don’t Boil: Keep the heat low enough that tiny bubbles just break the surface—no violent rolling. I used to rush it, and the vinegar turned harsh, while the sugar burned. Patience here means a balanced, silky sauce, not a sour mess. ---
- Deglaze with Soy-Vinegar Mix: After browning the beef, splash in ¼ cup soy sauce and vinegar right away—this lifts stuck-on bits into the sauce. I was skeptical until I tried it: the sauce gets deeper color and a cleaner, brighter taste without extra effort.
Pro cooking tips for great beef adobo sa gata
Coconut Milk Magic
The secret to that velvety texture lies in using full-fat unsweetened coconut milk—never low-fat or sweetened. Brands like Aroy-D or Goya are my go-to because they’re rich and creamy without added sugars that can throw off the balance. When you add the coconut milk after braising, stir it in gently over medium-low heat to avoid curdling. If the sauce separates, whisk in 1 tablespoon cold water to re-emulsify it smoothly. 🥥
Low-and-Slow Braising
Never rush the 1.5-hour braising time—this is where the beef transforms from tough to fork-tender. Maintain a gentle simmer (small bubbles, not a rolling boil) to prevent the sauce from breaking down too quickly. I use a heavy Dutch oven because it retains heat better than lighter pots. If your beef is still firm after 1.5 hours, add ½ cup water and cover again for another 30 minutes. The key is patience—the longer it braises, the more flavorful the beef becomes.
Sauce Consistency Hacks
If your sauce is too thick after adding coconut milk, thin it with 1-2 tablespoons water at a time until it reaches a pourable but slightly thick consistency (like heavy cream). For extra richness, whisk in 1 tablespoon cornstarch mixed with 2 tablespoons water and simmer for 2 minutes—this gives a glossy finish. Pro tip: Taste as you go! Adjust with ½ teaspoon soy sauce for saltiness or 1 teaspoon brown sugar for sweetness.
Equipment Upgrades
A meat thermometer is a game-changer here—aim for 203°F internal temp for perfectly tender beef. If you don’t have one, cut into a piece: the juices should run clear, not pink. For even cooking, use a large, deep pot (like a Le Creuset Dutch oven)—it prevents overflowing when the sauce thickens. A wooden spoon helps scrape up browned bits from the bottom, adding depth to the sauce. 🔥
Flavor Layering Trick
After braising, let the beef sit in the sauce off-heat for 10 minutes before serving. This lets the flavors meld deeper, and the beef absorbs more of that creamy coconut milk goodness. For extra umami, add 1 teaspoon fish sauce (like Red Boat) when you stir in the coconut milk—it’s a Filipino secret ingredient that elevates the dish. Garnish with toasted garlic cloves or crushed peanuts for texture contrast.
Make-Ahead Mastery
This dish tastes even better the next day! Store leftovers in an airtight container in the fridge for up to 5 days. To reheat, simmer gently on the stovetop with 2 tablespoons water until hot—never microwave, or the sauce will separate. For freezing, portion into single-serving containers and freeze for up to 3 months. Thaw overnight in the fridge before reheating. The flavors only get richer over time! ✨
Nutrition facts
Frequently asked questions
Why does this recipe use coconut milk (gata) instead of vinegar-only adobo?
The coconut milk transforms traditional adobo into a creamy, velvety stew. In Filipino cuisine, sa gata (with coconut milk) versions are popular in regions like Pampanga, where the rich, dairy-like texture balances the tangy vinegar and soy. The coconut milk also adds natural sweetness and a luxurious mouthfeel that makes this dish feel special—perfect for celebrations or when you want to impress.
Can I substitute beef chuck roast with another cut?
For best results, stick with chuck roast or brisket—these cuts stay tender during long braising. If you must use a leaner cut like sirloin, marinate it for 1 hour longer and reduce braising time to 1 hour (check doneness at 160°F). Avoid tough cuts like flank steak—they won’t become tender enough for this dish.
How do I fix a sauce that separated after adding coconut milk?
Whisk in 1 tablespoon cold water while stirring constantly over low heat. If that doesn’t work, blend ½ cup of the sauce with 1 tablespoon cornstarch until smooth, then stir it back in and simmer for 2 minutes. The key is gentle heat—never boil, or the sauce will curdle permanently.
What’s the best way to serve this dish?
Pair it with steamed jasmine rice to soak up the creamy sauce, and serve with atchara (pickled papaya) or steamed greens to cut the richness. For extra flair, garnish with toasted garlic cloves or crushed peanuts. The dish also reheats beautifully—just add 2 tbsp water per cup of sauce when warming.
Can I make this in an Instant Pot?
Yes! Sauté the beef and aromatics first, then add all ingredients except coconut milk. Pressure cook on high for 45 minutes, then quick-release. Stir in coconut milk and simmer on sauté mode for 15 minutes to thicken. The Instant Pot speeds up cooking but may require 1 extra tablespoon cornstarch to achieve the same velvety texture.