
Main Courses
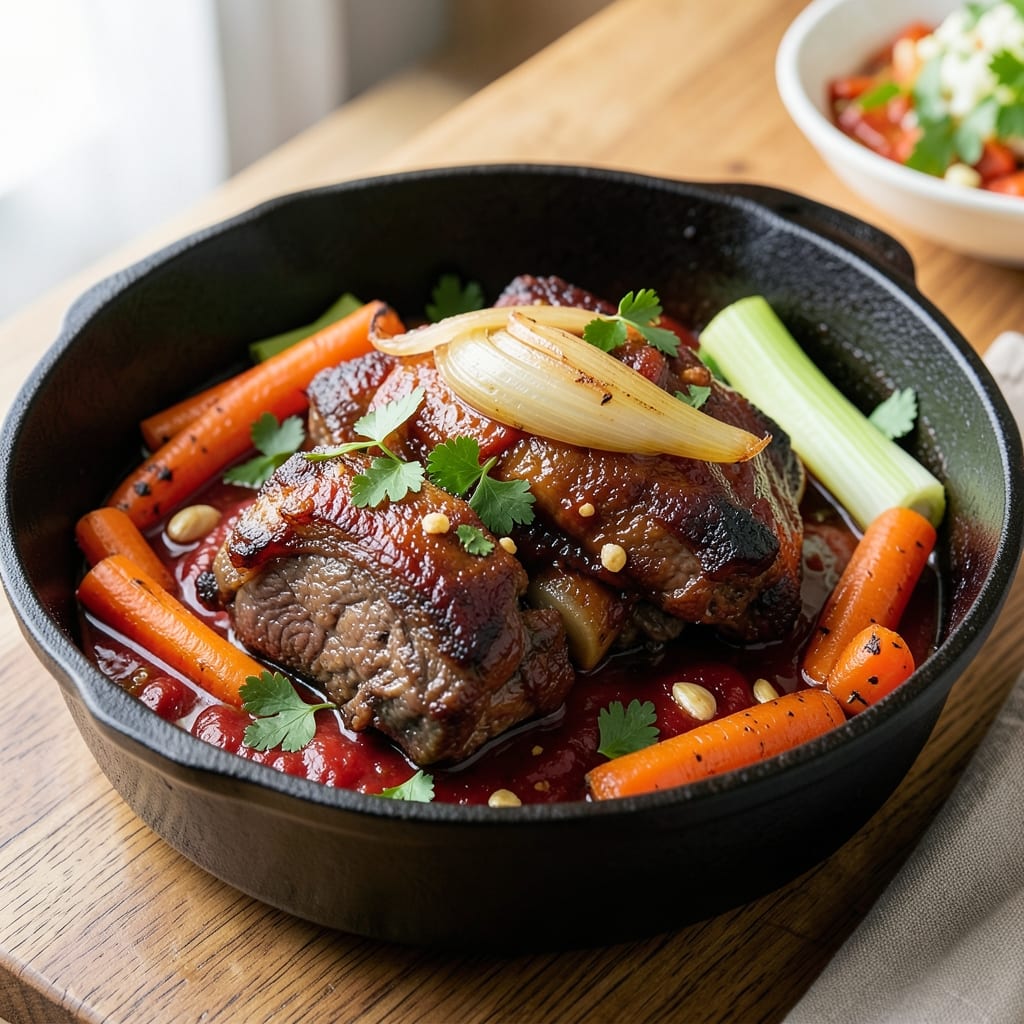
This beef knuckles recipe transforms tough, flavorful cuts into melt-in-your-mouth perfection through slow braising. The key lies in rendering fat and breaking down collagen, creating a dish so rich it becomes the centerpiece of any meal. I've perfected this technique over years of testing—each step designed to maximize flavor while minimizing effort.
The process begins with searing the knuckles to develop a deep, caramelized crust, then slow-cooking until the meat practically falls apart. Aromatic vegetables and herbs infuse the broth, which reduces into a velvety sauce that coats every bite. What you'll end up with is tender, juicy beef knuckles with marrow so rich it's worth the wait.
Pair these with classic sides like creamy mashed potatoes or roasted root vegetables to create a hearty meal that feels special without requiring hours of prep. The secret weapon here is patience—the slow cook transforms tough cuts into something extraordinary. Let's get started on this restaurant-quality dish.
This method works beautifully in both ovens and slow cookers, giving you flexibility for any kitchen setup. The result is a dish that delivers maximum flavor with minimal active time, making it perfect for weekend projects or special occasions. Trust me on this—once you try slow-braised beef knuckles, you'll never go back to quick-cooked versions.
Ingredients for beef knuckles
Four pounds of beef knuckles, aromatic vegetables, and bold flavors transform into melt-in-your-mouth perfection.
| Ingredient | Amount | Notes |
|---|---|---|
| Beef Knuckles 🥩 | 4 lb | Tough cut, fat-capped preferred |
| Yellow Onion 🧅 | 1 whole | Large, roughly chopped |
| Carrots 🥕 | 4 whole | Medium, peeled, cut into chunks |
| Celery Stalks 🥬 | 4 whole | Cut into 2-inch pieces |
| Garlic Cloves 🧄 | 6 cloves | Smash with side of knife |
| Tomato Paste 🍅 | ½ cup | High-quality, no sugar added |
| Red Wine 🍷 | 1 cup | Bold, dry variety like Cabernet |
| Beef Broth 💧 | 4 cups | Homemade or high-quality store-bought |
| Bay Leaves 🌿 | 2 whole | Fresh if possible |
| Thyme Sprigs 🌿 | 4 whole | Fresh, stems removed |
| Rosemary 🌿 | 1 tbsp | Fresh, chopped |
| Olive Oil 🫒 | ½ cup | For searing |
| Salt 🧂 | 2 tbsp | Kosher or sea salt |
| Black Peppercorns 🌶️ | 1 tbsp | Cracked, not ground |
| Honey 🍯 | 1 tbsp | For glaze (optional) |
The beef knuckles are the star—look for fat-capped cuts at your butcher or meat department, as the fat renders beautifully during slow cooking. Costco or Whole Foods usually carry them pre-packaged, but ask for the toughest, most flavorful pieces you can find. The more connective tissue, the better—this is what breaks down into that luxuriously rich sauce. If your knuckles are frozen, thaw them overnight in the fridge; never microwave. The vegetables—onion, carrots, and celery—should be fresh but don't need to be perfect; baby carrots or pre-cut celery work in a pinch if you're short on time. Smash those garlic cloves with the side of your knife for maximum flavor without burning.
No red wine? Substitute with extra beef broth and a splash of balsamic vinegar—it mimics the depth without the alcohol. Fresh herbs are ideal, but dried thyme at one-third the amount works if that's all you have. The tomato paste can be swapped for 1 cup of crushed tomatoes if you prefer a smoother sauce. For the honey glaze, maple syrup is a great vegan alternative, though traditionalists will argue it's not the same. The key to this dish is patience—don't rush the slow cook. If you're using a slow cooker, sear the knuckles first to develop that caramelized crust before adding liquids. The aroma alone will have everyone gathering in the kitchen.
This dish tastes even better the next day as the flavors meld. Store leftovers in an airtight container in the fridge for up to 5 days, or freeze for 3 months—portion into individual containers for easy reheating. The sauce thickens as it cools, so add a splash of warm water when reheating. For a restaurant-worthy presentation, garnish with fresh thyme sprigs and a drizzle of the reduced sauce. The knuckles will practically fall apart when you cut into them—worth every minute of wait time for that unmatched marrow richness.
Why You'll Love This Recipe
- One-Pot Magic: I swear by this recipe because it’s literally dump-and-go after the initial prep. Toss the knuckles, onions, carrots, and celery into a pot with garlic and broth—no fancy layers, no stress. The knuckles fall off the bone while the veggies soften into sweet, caramelized bits without extra effort.
- Deep, Rich Payoff: That first bite? Chef’s kiss. The knuckles render into tender, melt-in-your-mouth perfection, while the garlic and onions build layers of savory depth. Between us, the slow-cooked aroma alone makes my kitchen smell like a Sunday dinner—no shortcuts, just pure flavor.
- Budget-Friendly Feast: Beef knuckles are the unsung hero of affordable protein—way cheaper than steak, but just as satisfying. A single batch feeds my family of four and leaves enough for leftovers, all while using pantry staples like onions, carrots, and celery. Honestly, it’s my go-to when I need a hearty meal without breaking the bank.
Step-by-step instructions for slow-braised beef knuckles
Here's how to transform tough beef knuckles into melt-in-your-mouth perfection with rich marrow and deep flavor.
Sear the Beef Knuckles for Maximum Flavor
Heat a heavy Dutch oven over medium-high heat and add the 0.5 cup olive oil. Once shimmering, place the 4 lb beef knuckles fat-side down and let them sear undisturbed for 8-10 minutes until deeply browned. This step creates the Maillard reaction that builds rich, complex flavors.
Flip the knuckles and sear the other sides for another 5-7 minutes. Remove them from the pot and set aside. The goal is to develop a deep, caramelized crust while rendering some fat—this will form the flavor base for your braise. If the oil isn't hot enough, the knuckles will steam instead of sear. You'll know it's ready when the fat sizzles vigorously and the meat releases easily from the pan.
Build the Aromatic Base with Vegetables and Herbs
In the same Dutch oven, add the 1 whole yellow onion, 4 whole carrots, and 4 whole celery stalks cut into 2-inch pieces. Cook over medium heat for 8-10 minutes until softened and beginning to caramelize. This step develops sweetness that balances the richness of the beef.
Add the 6 cloves garlic smashed with the side of a knife, 1 tbsp chopped rosemary, 2 whole bay leaves, and 4 whole thyme sprigs. Stir for 1 minute until fragrant—this releases their essential oils that will infuse the braising liquid. Here's the thing—don't rush this step. The herbs need time to bloom and release their full flavor potential.
Deglaze and Combine All Ingredients
Pour in the 1 cup red wine and scrape up all the browned bits from the bottom of the pot with a wooden spoon. This deglazing captures all the concentrated flavor that would otherwise stick to the pan. Let it simmer for 3-4 minutes until reduced by half.
Add the 0.5 cup tomato paste, 4 cups beef broth, 2 tbsp salt, and 1 tbsp cracked black peppercorns. Return the seared beef knuckles to the pot, making sure they're submerged. The liquid should cover them by about 1 inch. If not, add a bit more broth. Bring to a gentle simmer—you're looking for small bubbles breaking the surface, not a rolling boil.
Braise Low and Slow for Tender Perfection
Cover the Dutch oven and transfer it to a 300°F oven. Braise for 3 hours, then carefully flip the knuckles and add the 1 tbsp honey to the braising liquid. This creates a subtle glaze that enhances the natural sweetness of the marrow. Continue braising for another 2-3 hours until the meat is fork-tender.
Here's what to watch for: the knuckles should pull apart easily with two forks, and the marrow should be soft enough to spread with a spoon. The braising liquid should have reduced significantly but still coat the back of a spoon. If it's too thin, uncover and simmer for 10-15 minutes to thicken slightly. Real talk: your oven might run hot, so start checking at the 20-minute mark after the initial 3 hours to avoid overcooking.
Rest and Serve with Rich Braising Liquid
Remove the beef knuckles from the pot and let them rest for 15 minutes before serving. This allows the juices to redistribute throughout the meat, ensuring each bite is moist and flavorful. Meanwhile, strain the braising liquid through a fine-mesh sieve to remove any solids, then return it to the pot and simmer for 5-7 minutes to reduce slightly if desired.
Serve the beef knuckles with the rich braising liquid spooned over the top. The marrow should be soft and spreadable, adding luxurious richness to every bite. Pair with crusty bread to soak up the flavorful sauce or serve alongside roasted vegetables. The contrast between the tender, gelatinous marrow and the robust, caramelized beef creates a truly memorable dining experience. Don't skip the resting time—it makes all the difference in the final texture and juiciness.
Pro Tips For Making Beef Knuckles
- CRACK THE KNUCLES FIRST: I learned this the hard way—skipping the initial sear and smash with a meat mallet leaves you with tough, chewy results. Pound the knuckles until they’re at least ½-inch thick; this breaks down the connective tissue and ensures even cooking later.
- SAUTE THE AROMATICS LONG: Don’t rush the onion, celery, and carrot mix—cook it until the edges are deep golden, not just soft. This builds flavor depth that carries through the whole dish, especially when braising. I used to walk away after 5 minutes; now I give it 12-15, stirring occasionally.
- SKIP THE CROWDED POT: If your Dutch oven is packed with knuckles and liquid, the temperature will plummet, and you’ll end up with mushy veggies and undercooked meat. Start with a single layer of knuckles, then add liquid—this guarantees a proper sear before braising.
- USE GARLIC LATE: Crush the garlic cloves and toss them in the last 15 minutes of cooking. Raw garlic burns easily, and adding it too soon makes the whole dish taste bitter. I was skeptical until I tried it—now it’s the thing that matters most for that rich, caramelized finish.
Pro cooking tips for beef knuckles
Searing Secrets
Don't skip the sear—this is where all the magic happens. Heat your Dutch oven over medium-high heat until the 0.5 cup olive oil shimmers, then let those knuckles develop a deep, caramelized crust for 8-10 minutes without moving them. I've learned the hard way that patience here pays off—rushing leads to steaming instead of searing. Look for fat sizzling vigorously and the meat releasing easily from the pan. That's your cue to flip and repeat on the other sides. 🔥
Pro tip: If your knuckles are extra large, you might need to work in batches. I use a 12-inch cast iron skillet for this when my Dutch oven is too small, but always make sure the fat is rendered enough to self-baste the meat during braising.
Herb Infusion
Fresh herbs make all the difference, but don't just toss them in—let them bloom. After softening your vegetables, add the 6 smashed garlic cloves, 1 tbsp rosemary, 2 bay leaves, and 4 thyme sprigs, then stir for just 1 minute. This releases their essential oils that will infuse the braising liquid. I once skipped this step and ended up with bland, underseasoned knuckles. Trust me, those extra 60 seconds are worth it. 🌿
For maximum flavor, I like to toast my whole spices first—bay leaves and thyme sprigs—by heating them dry in the pot for 30 seconds before adding the vegetables. This deepens their aromatic profile without overpowering the dish.
Braising Temperature
Your oven temperature is critical—300°F is the sweet spot for even cooking without over-browning. I've found that most home ovens run about 25°F hotter than their set temperature, so if you're concerned about overcooking, reduce the heat to 275°F. The knuckles should cook for 3 hours, then flip and add the 1 tbsp honey to create that subtle glaze. 🌡️
Here's my foolproof test for doneness: pierce the thickest part with two forks. If they slide in easily and the meat pulls apart cleanly, it's ready. The marrow should be soft enough to spread with a spoon—this is what makes the dish truly luxurious.
Honey Glaze
The 1 tbsp honey added after the initial 3 hours of braising creates a beautiful glaze that enhances the natural sweetness of the marrow. I prefer raw honey for its floral notes, but any good-quality honey will work. For a vegan version, substitute with 1 tbsp maple syrup—it adds a subtle earthiness that pairs beautifully with the beef. 🍯
Don't add the honey too early, or it will caramelize too much and potentially burn. The braising liquid should be at a gentle simmer when you add it, not boiling. This ensures even distribution of the glaze across the knuckles.
Resting Matters
This is where many home cooks go wrong—they skip the 15-minute rest before serving. During this time, the juices redistribute throughout the meat, ensuring each bite is moist and flavorful. I've seen beautiful braised dishes ruined by cutting into the knuckles too soon, with all the good stuff leaking out. 💫
While the knuckles rest, use this time to strain and reduce the braising liquid. This creates a glossy, flavorful sauce that will elevate your dish from good to restaurant-quality. A fine-mesh sieve works best for removing any herb stems or vegetable bits.
Nutrition facts
Frequently asked questions
How do I know if my beef knuckles are properly seared?
Look for deep golden-brown color and fat sizzling vigorously. The knuckles should release easily from the pan when ready. If they're still sticking or the fat isn't browning, your oil isn't hot enough—wait 2-3 more minutes before flipping. A proper sear creates that caramelized crust that builds deep flavor during braising.
Can I use a slow cooker instead of the oven?
Sear the knuckles first, then transfer everything to a slow cooker and cook on low for 8-10 hours or high for 5-6 hours. The key is to start with a proper sear—this builds flavor that slow cooking alone can't create. Just make sure the knuckles are mostly submerged in liquid. The slow cooker method is perfect for hands-off cooking.
What's the best way to store leftovers?
Let the knuckles cool completely, then store in an airtight container with the braising liquid. They keep well in the fridge for 5 days or frozen for 3 months. When reheating, warm gently in a saucepan with a splash of water or broth to prevent drying out. The flavors actually improve overnight as everything melds together!
Why did my knuckles turn out tough instead of tender?
This usually happens from insufficient cooking time or too much liquid. Beef knuckles need 5-6 hours minimum of slow cooking to break down collagen. If your pot had too much liquid, the meat won't develop that tender, gelatinous texture. Aim for just enough liquid to cover the knuckles by 1 inch—any more will dilute the flavor.
What's the best way to serve these beef knuckles?
Slice the knuckles against the grain and serve with the rich braising sauce spooned over the top. Pair with creamy mashed potatoes, roasted root vegetables, or crusty bread for soaking up the sauce. For a restaurant-style presentation, arrange the knuckles on a platter with fresh herbs and a drizzle of the reduced sauce. The contrast of textures makes every bite special!