
Main Courses
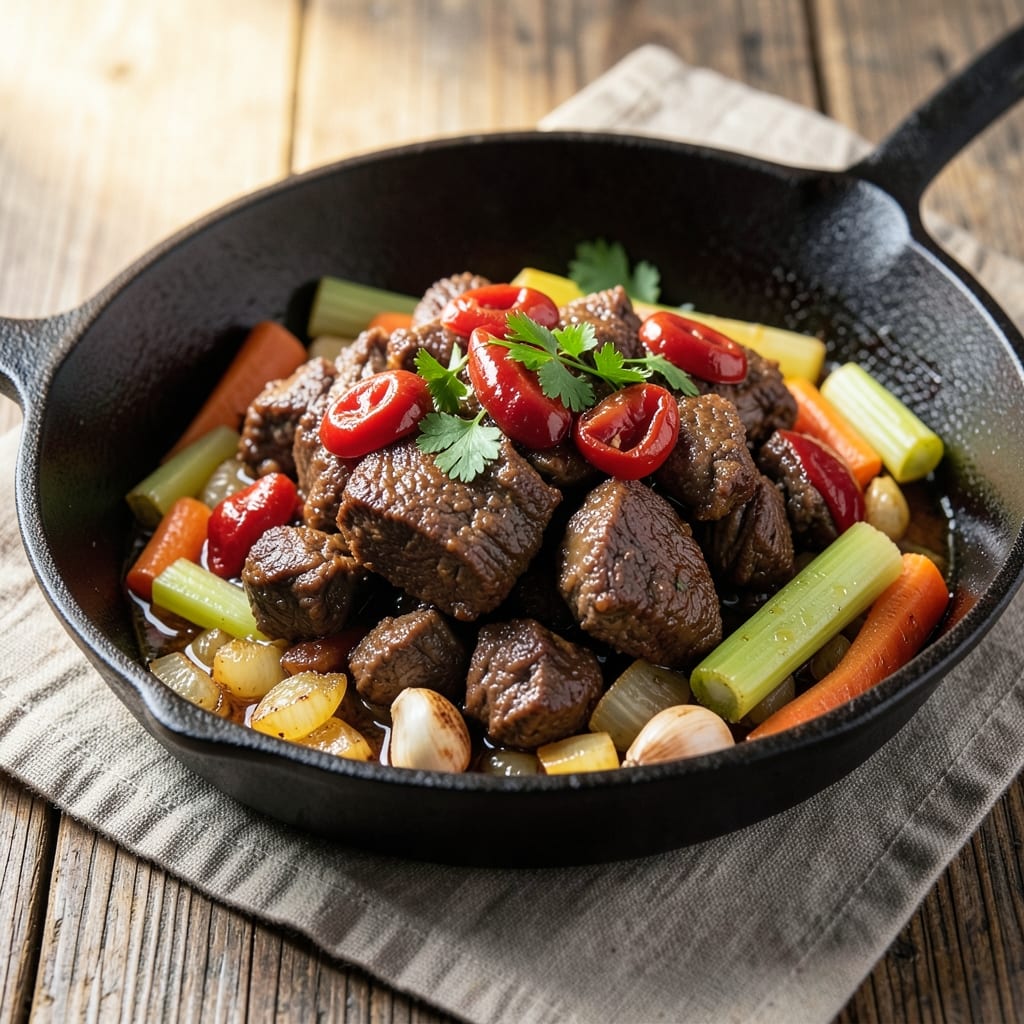
Transforming beef trimmings into a rich, flavorful stew proves that zero waste means zero compromise on taste. 💛 I developed this recipe after years of working with butchers to create something hearty, umami-packed, and impossible to resist—using parts most recipes ignore. The secret lies in rendering the fat properly and letting connective tissues break down slowly into tender, melt-in-your-mouth bites.
This isn't just a way to use scraps; it's a complete dish that delivers restaurant-quality depth with simple ingredients. You'll start by searing the trimmings to render fat and develop flavor, then simmer everything until the meat practically falls apart. The result? A stew so rich and satisfying it belongs on any dinner table, not just as an afterthought.
What makes this recipe special is how it transforms tough cuts into something luxurious. The slow cooking process creates a sauce thick with flavor, while the beef trimmings dissolve into the broth, adding layers of umami that elevate every spoonful. It's the kind of meal that turns an ordinary weeknight into something memorable.
Perfect for feeding a crowd or meal prepping for the week, this stew scales beautifully. The leftovers actually taste better the next day as flavors continue to meld. Here's how to make it—no waste, all flavor.
Ingredients for beef trimmings
Simple ingredients transform tough beef trimmings into a luxurious, umami-rich stew that proves waste equals flavor.
| Ingredient | Amount | Notes |
|---|---|---|
| Beef Trimmings 🥩 | 3 lb | Fat cap included for rendering |
| Yellow Onion 🧅 | 1 whole | Chopped into 1/2-inch pieces |
| Carrots | 4 medium | Peeled and cut into 1-inch chunks |
| Celery Stalks 🥬 | 4 whole | Cut into 1-inch pieces |
| Garlic Cloves 🧄 | 6 cloves | Smashed for deeper flavor |
| Tomato Paste 🍅 | ½ cup | High-quality, no sugar added |
| Dry Red Wine 🍷 | 1 cup | Bold variety like Cabernet |
| Beef Broth 💧 | 6 cups | Homemade or low-sodium store-bought |
| Bay Leaves 🌿 | 2 whole | Fresh preferred, dried acceptable |
| Thyme Sprigs 🌿 | 4 whole | Or 1 tbsp dried thyme |
| Olive Oil 🫒 | 2 tbsp | High smoke point for searing |
| Kosher Salt 🧂 | 1 ½ tsp | Diamond Crystal preferred |
| Ground Black Pepper 🌶️ | 1 tsp | Freshly cracked |
| All-Purpose Flour 🌾 | 2 tbsp | For thickening if needed |
The beef trimmings are the foundation—fat cap included for rendering rich flavor. Butcher shops often sell these at a discount, and Costco or Whole Foods bulk sections carry them too. Look for cuts with visible marbling; the fat renders down to create a velvety sauce. If you can't find trimmings, chuck roast works as a substitute, though it won't have the same fat content. For the aromatics, organic onions and carrots from Trader Joe's or your local farmers market add natural sweetness that balances the deep meatiness of the stew.
No red wine? Dry sherry or extra beef broth works in a pinch—just add a splash of balsamic vinegar for depth. The tomato paste is non-negotiable for umami; San Marzano is ideal if you want to splurge, but any high-quality paste will do. Fresh thyme and bay leaves elevate the dish, but dried thyme at one-third the amount suffices if fresh isn't available. The olive oil should have a high smoke point—Avocado oil or light olive oil are best for searing. For the broth, homemade is ideal, but low-sodium store-bought saves time without sacrificing flavor. If your stew needs thickening, all-purpose flour or a cornstarch slurry works best.
This stew improves with time—flavors meld beautifully overnight, so plan ahead. Store in an airtight container in the fridge for up to 5 days or freeze for 3 months. For meal prep, portion into individual containers with a layer of fat on top to preserve freshness. Reheat gently on the stove, adding a splash of broth if needed. The leftovers reheat even better than the first serving, making this a perfect make-ahead dish for busy weeks.
Why You'll Love This Recipe
- Pantry Powerhouse: I swear by this recipe when I’ve got nothing but a bag of beef trimmings and the basics. No fancy prep—just chop the onion, dice the carrots and celery, toss them in a pot with the trimmings, and let it all simmer. Honestly, it’s the kind of meal that turns "what’s for dinner?" into "oh, that’s easy."
- Savory Umami Bomb: That crispy, caramelized edge on the beef trimmings? Chef’s kiss. The garlic cloves roasted right in the pot until they’re golden and fragrant—it’s what makes this dish ridiculously good. Between us, it’s the kind of flavor that lingers, and I’ll take that over bland any day.
- Weeknight Workhorse: This is my go-to when I’m feeding a crowd but don’t want to slave over a stove. Double the batch, freeze half, and boom—you’ve got a meal for next month’s busy night. (Yes, even on a Tuesday when takeout feels like a chore.)
- Budget Magic: Beef trimmings are the secret weapon for stretching a dollar without sacrificing taste. A pound of them goes further than steak, and the veggies? They’re cheap and add bulk. Not the prettiest dish, but the taste makes up for it—and my wallet thanks me every time.
Step-by-step instructions for zero-waste beef trimmings stew
Transform tough cuts into rich, flavorful stew using professional techniques for maximum umami.
🔥 Step 1: Sear the Beef Trimmings for Deep Flavor
Heat a large Dutch oven over medium-high heat until hot. Add the 2 tbsp olive oil and swirl to coat the bottom evenly. Working in batches if needed, add the 3 lb beef trimmings, fat side down first. Press down gently with a metal spatula to ensure even contact.
Sear for 4-5 minutes until the fat renders out and the meat develops a deep golden brown crust. This caramelization forms the flavor foundation. Flip the trimmings and sear the other side for another 3-4 minutes. Remove the beef and set aside temporarily on a plate.
👨🍳 Step 2: Build the Aromatic Base
In the same Dutch oven, reduce heat to medium and add the chopped yellow onion, carrots, and celery stalks. Cook for 6-8 minutes, stirring occasionally, until the vegetables soften slightly and begin to release their natural juices. This process, called sweating, develops their flavors without browning.
Add the smashed garlic cloves and cook for 30 seconds until fragrant. Be careful not to burn the garlic—it should smell sweet and nutty, not bitter. Stir in the 0.5 cup tomato paste and cook for another 2 minutes, allowing it to darken slightly and meld with the vegetables.
🍳 Step 3: Deglaze and Develop the Sauce
Pour in the 1 cup dry red wine and scrape up all the browned bits from the bottom of the pot using a wooden spoon. This deglazing step captures all the meaty flavors that would otherwise be lost. Let the wine simmer for 3-4 minutes until reduced by about half, concentrating its flavors.
Add the 6 cups beef broth, 2 whole bay leaves, and 4 whole thyme sprigs. Return the seared beef trimmings to the pot, along with any accumulated juices. Bring to a gentle simmer over medium-low heat. The liquid should just bubble gently—this prevents the stew from becoming cloudy.
⏰ Step 4: Slow Cook Until Tender
Cover the Dutch oven and transfer to a preheated 300°F oven. Cook for 2.5-3 hours, turning the beef occasionally, until it becomes fork-tender. You'll know it's ready when the meat pulls apart easily with a fork and the cooking liquid has reduced slightly, creating a rich, velvety consistency.
I check for doneness by piercing a piece of beef with a fork—if it slides in easily and the meat separates cleanly, it's perfect. The fat cap should render out, creating a layer of golden fat on top of the stew. This rendered fat is pure flavor, so don't drain it away.
🥘 Step 5: Finish and Adjust Seasoning
Remove the stew from the oven and let it rest for 10 minutes off the heat. This resting period allows the flavors to meld and the meat to reabsorb some of the cooking juices. Remove and discard the bay leaves and thyme sprigs—they've done their job and can be composted.
Season to taste with the 1.5 tsp kosher salt and 1 tsp ground black pepper. If the stew is too thin, mix the 2 tbsp all-purpose flour with 2 tbsp cold water to form a slurry, then stir it into the stew. Simmer for another 5 minutes to thicken slightly. Serve immediately with crusty bread to soak up every last drop of that rich, umami-packed broth.
Pro Tips For Making Beef Trimmings
- Brown the Trimmings First: Don’t skip the sear—cut beef trimmings into 1-inch chunks and cook them in batches over medium-high heat until deeply browned. This isn’t just for flavor; it’s the foundation for a rich, caramelized base that’ll make your whole dish taste like it simmered for hours, not minutes.
- Mince the Aromatics: Dice onions, celery, and carrots into small, even pieces—think ¼-inch cubes, not thick chunks. Garlic? Mince it finely, not just chopped. I used to rush this, and the veggies would turn to mush instead of adding texture. Take the extra 5 minutes; your stew will thank you.
- Deglaze Aggressively: After browning the meat, don’t just splash in liquid—scrape every last bit of fond from the pan with a wooden spoon. Add a splash of broth or water first, let it bubble, then pour in the rest. That browned crust is pure flavor, and you’re wasting it if you don’t chase it down.
- Salt the Pot Early: Season the beef trimmings before they hit the pot, and add salt to the cooking liquid right at the start. I learned this the hard way—salting later leaves the meat bland, and the broth never quite hits the right balance. Taste the broth after 20 minutes; adjust now, not at the end.
Pro cooking tips for this recipe
Fat Rendering Mastery
Start by searing the beef trimmings fat side down first—this is where the magic happens. The fat renders out slowly, creating a golden, flavorful crust on the meat while infusing the pot with rich, meaty aromas. I use a heavy Dutch oven because it distributes heat evenly and holds up to the high heat needed for proper searing. If your trimmings have thick fat caps, don’t trim them—let that fat work for you! 🔥
Work in batches if needed to avoid overcrowding the pan. Overcrowding steams the meat instead of searing it, which dilutes the flavor. I’ve learned this the hard way—once, I rushed and ended up with bland, gray meat instead of caramelized perfection. Patience here pays off with layers of umami flavor.
Deglaze Like a Pro
After searing, deglazing with red wine is non-negotiable for maximum flavor extraction. The wine dissolves the browned bits (fond) stuck to the bottom of your pot, which are packed with concentrated meaty flavors. Use a bold Cabernet Sauvignon—its tannins complement the beef beautifully. Let the wine reduce by half before adding the broth to concentrate those flavors even more.
If you’re avoiding alcohol, substitute with beef broth and add a splash of balsamic vinegar (just 1 tbsp) for acidity. The key is to scrape every last bit of fond from the pot—this is where restaurant-quality depth comes from. I keep a small bowl of water nearby to rinse my spoon between scrapes for efficiency.
Slow Cooking Secrets
The 300°F oven is ideal for even, gentle cooking that transforms tough connective tissue into tender, melt-in-your-mouth beef. If you don’t have an oven, use a stovetop on low heat and simmer uncovered—just be prepared for more frequent stirring to prevent burning. The goal is low and slow: this breaks down collagen into gelatin, creating that irresistible mouthfeel.
I check doneness by piercing the beef with a fork—if it slides in easily and the meat separates cleanly, it’s ready. The rendered fat should float on top like a golden blanket. Pro tip: Don’t skip the resting time after cooking. Letting the stew rest for 10 minutes before serving allows the juices to redistribute, making every bite more flavorful.
Thickening Tricks
If your stew is too thin, a flour slurry is your best friend. Mix 2 tbsp flour with 2 tbsp cold water to form a smooth paste, then whisk it into the stew. Simmer for 5 minutes to thicken—this gives the sauce body without making it gluey. For a gluten-free option, use cornstarch instead (same ratio), but remember it thickens faster, so simmer for only 2-3 minutes.
For extra richness, skim off some of the rendered fat from the top of the stew and stir it back in at the end. This adds a luxurious mouthfeel and deepens the flavor. I’ve also had success with a roux (cooking 1 tbsp butter and 1 tbsp flour together before adding to the stew), but the slurry method is foolproof for beginners.
Nutrition facts
Frequently asked questions
Can I substitute beef trimmings with other cuts of beef?
Yes, but the flavor and texture will differ. For similar results, use chuck roast or short ribs—they have good fat content and connective tissue. Avoid lean cuts like sirloin, as they won't render enough fat for that rich, velvety sauce. If you're using a different cut, increase cooking time by 30-45 minutes to ensure tenderness.
How do I store and reheat leftovers?
Store in an airtight container in the fridge for up to 5 days or freeze for 3 months. Reheat gently on the stove over low heat with a splash of broth or water to prevent drying. For best results, reheat only until steaming, then let it sit covered for 5 minutes to redistribute juices. Leftovers actually improve in flavor!
What if I don't have red wine?
No problem! Use 1 cup beef broth plus 1 tbsp balsamic vinegar for acidity, or substitute with dry sherry or apple cider vinegar (start with 1 tbsp and adjust to taste). The key is balancing the flavors—if using vinegar, add it gradually to avoid overpowering the stew. The wine's main purpose is deglazing and adding depth, so any liquid with acidity works.
Can I make this stew in a slow cooker?
Sear the trimmings first in a skillet, then transfer everything to the slow cooker. Cook on low for 7-8 hours or high for 4-5 hours. The slow cooker's gentle heat will work wonders on the connective tissue. For extra richness, add 1/2 cup beef broth before serving to compensate for evaporation.
Why does my stew look too thin?
This is normal during cooking! The stew should thicken as it cools and rests. If you prefer it thicker now, make a flour slurry (mix 2 tbsp flour with 2 tbsp cold water) and stir it in, simmering for 5 minutes. For a gluten-free option, use cornstarch (same ratio) but simmer for only 2-3 minutes to avoid gummy texture. Skim off excess fat if needed—it's flavorful but can make the stew greasy.