
Main Courses
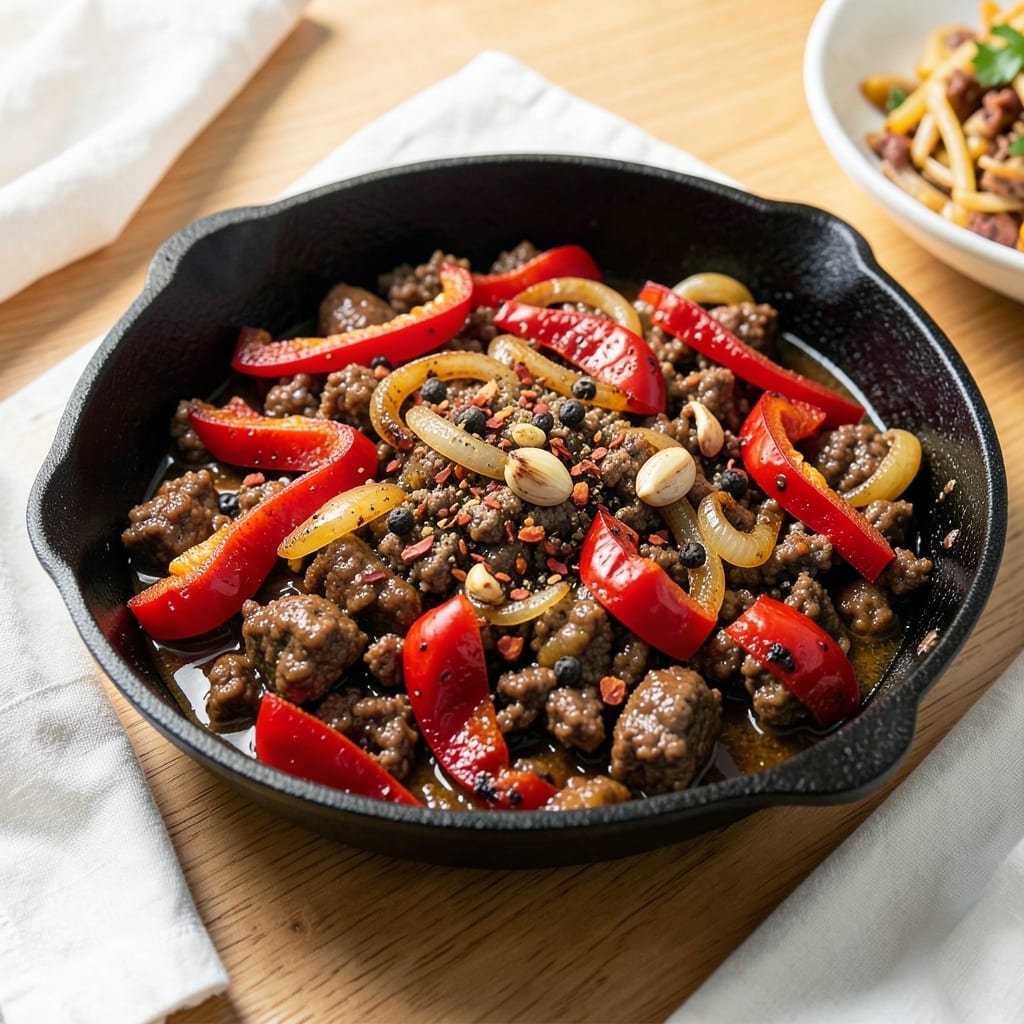
This ground beef pepper recipe delivers juicy meat with a perfectly spiced crust that transforms weeknight dinners into restaurant-worthy meals. 💛 After years of testing different seasoning blends and cooking techniques, I've perfected a method that ensures every bite stays tender while developing a flavorful, slightly crispy exterior. The secret lies in balancing heat and moisture—just enough black pepper and chili flakes to create depth without overpowering the natural beef flavor.
The beauty of this recipe is its one-pan simplicity, making it ideal for busy weeknights when you want dinner on the table without spending hours in the kitchen. We start with ground beef that's seasoned generously but cooked just enough to develop that satisfying crust before finishing with a quick sear. This approach guarantees juicy centers while building layers of flavor through caramelization. The dish pairs beautifully with roasted vegetables or a simple side salad for a complete, balanced meal.
What sets this recipe apart is how versatile it is—adjust the pepper blend to suit your heat preferences, whether you prefer mild black pepper or a kick from jalapeños or chili flakes. The result is a dish that's hearty enough for a family dinner but quick enough for a solo meal. Each bite delivers that perfect contrast of tender meat and flavorful crust, proving that great weeknight cooking doesn't require complicated techniques.
Serve this ground beef pepper recipe with your favorite sides to create a satisfying main course that feels special without the fuss. The method is designed to be foolproof, ensuring consistent results every time. Whether you're feeding a crowd or just treating yourself to a flavorful meal, this recipe delivers on taste and convenience.
Ingredients for ground beef pepper
Juicy beef, bold spices, one pan—this recipe delivers restaurant flavor with zero fuss.
| Ingredient | Amount | Notes |
|---|---|---|
| Ground Beef (80/20 Lean-to-Fat Ratio) 🥩 | 1 ½ lb | Freshly ground preferred |
| Yellow Onion 🧅 | 1 whole | Medium-sized, finely diced |
| Garlic Cloves 🧄 | 4 cloves | Freshly minced for aroma |
| Black Peppercorns 🌶️ | 2 tsp | Freshly cracked for intensity |
| Chili Flakes 🔥 | 1 tsp | Adjust for heat preference |
| Ground Cumin 🌿 | 1 tsp | Toasted for deeper flavor |
| Smoked Paprika 🌶️ | 1 tsp | For smoky depth |
| Kosher Salt 🧂 | 1 ½ tsp | Diamond Crystal preferred |
| Extra-Virgin Olive Oil 🫒 | 2 tbsp | For searing and moisture |
| Fresh Parsley 🌿 | ¼ cup | Chopped for garnish |
| Bell Pepper (Red or Green) 🌶️ | 1 whole | Medium, diced for texture |
| Tomato Paste 🍅 | 2 tbsp | For umami richness |
| Beef Broth 💧 | ½ cup | Low-sodium preferred |
The beef ratio matters here—80/20 lean-to-fat gives you that perfect juicy texture while still developing a flavorful crust. Costco or Trader Joe's usually have the best prices for ground beef, and you'll know it's fresh if it's bright red and not graying at the edges. The onion and bell pepper should be crisp with no soft spots—store-bought is fine, but farmers market produce has better flavor. For the spices, Penzeys or the bulk section at Whole Foods are my go-tos, but honestly any brand works if it's not ancient. Toast your cumin and paprika in the pan for 30 seconds before adding the beef—trust me on this—it adds a whole new layer of flavor.
No smoked paprika? Regular paprika plus a pinch of liquid smoke gets you close. Short on bell pepper? Zucchini or mushrooms work too—just adjust the cooking time. The chili flakes can be swapped for cayenne at half the amount, but be warned—it's hotter. No beef broth? Chicken broth or even water with a pinch of bouillon works in a pinch, though the flavor won't be as deep. The tomato paste is non-negotiable for that umami punch, but if you're avoiding it, a splash of Worcestershire sauce (check for vegetarian-friendly versions) adds similar depth. Fresh parsley is ideal, but dried oregano at a quarter the amount will do if you're in a bind.
This reheats beautifully—honestly tastes better the next day once everything melds. Store in an airtight container with a splash of broth to keep it moist, and it'll keep for 4-5 days in the fridge. For leftovers, portion into single servings so you can grab and reheat—microwave with a damp paper towel for 30 seconds to restore that juicy texture. Freezes for 3 months too, making it perfect for meal prep. The spices lose potency over time, so if you're not using them all, transfer to a small jar and store in a dark cabinet for up to 6 months.
Why You'll Love This Recipe
- One-Pan Magic: I swear by this for nights when I’m too tired to scrub pots—just brown the beef, toss in the onions and garlic, and let the chili flakes work their heat. The fat from the 80/20 beef renders into crispy bits that cling to the meat, so you’re basically getting two flavors for the price of one.
- Peppery Heat Payoff: That first crack of black peppercorns when you crush them fresh? It’s a game-changer. The chili flakes add a slow-building warmth, while the caramelized onions give this dish a depth that’s simple but ridiculously satisfying. Honestly, I’ve made it for people who claim they “don’t like spicy food,” and they still ask for seconds.
- Lunchbox Hero: Between us, this is my go-to for meal prep—it reheats like a dream and keeps its texture for days. Pack it in tortillas for tacos, over rice, or straight from the fridge with a cold beer. My daughter’s favorite? Eating it straight from the jar (yes, I freeze portions in mason jars—no thawing needed).
- Budget Stretch: A pound of 80/20 beef and a single onion stretch to feed four, and the spices cost pennies. I’ll be real: this is the kind of recipe that makes me feel like I’m feeding a crowd without breaking the bank. Plus, the leftovers taste even better the next day—proof that simplicity wins.
Step-by-step instructions for spiced ground beef with crispy edges
Here's how to transform simple ground beef into a dish with perfect texture—crispy crusts and juicy centers.
🍳 Step 1: Sear the Beef Until Deeply Browned
Heat a large skillet over medium-high heat until it's smoking hot. Add the 2 tablespoons extra-virgin olive oil and swirl to coat the pan. Immediately add the 1.5 lb ground beef (80/20) and break it apart with a wooden spoon.
Let the beef cook undisturbed for 5-6 minutes until it forms a deep, dark crust on the bottom of the pan. This is called the "fond," and it's packed with flavor. Only stir occasionally to avoid breaking up the beef too much—you want those meaty chunks to develop that perfect crust. The beef should be 80% cooked through but still slightly pink inside.
👨🍳 Step 2: Build Layers of Flavor with Aromatics
Push the beef to one side of the pan and add the 2 tablespoons tomato paste. Stir it into the fond at the bottom, scraping up all those flavorful browned bits. This is where the magic happens—those bits are pure umami.
Add the 1 whole yellow onion and 1 whole bell pepper, both finely diced, to the empty side of the pan. Cook for 3-4 minutes until softened and slightly caramelized. Then add the 4 cloves garlic cloves, minced, and cook for just 30 seconds—don't let it burn. Stir everything together to combine the beef with the aromatic vegetables.
🔥 Step 3: Season and Simmer to Perfection
In a small bowl, mix together the 1.5 tsp kosher salt, 2 tsp black peppercorns (freshly cracked), 1 tsp chili flakes, 1 tsp ground cumin, and 1 tsp smoked paprika. Sprinkle this spice blend evenly over the beef mixture and stir well to coat every piece.
Pour in the 0.5 cup beef broth and bring the mixture to a gentle simmer. Reduce the heat to medium-low and let it cook uncovered for 8-10 minutes, stirring occasionally. You're looking for the beef to finish cooking through while absorbing all those amazing flavors. The sauce should thicken slightly but still be juicy—not dry.
⏰ Step 4: Finish with Fresh Herbs and Rest
Remove the skillet from heat and stir in the 0.25 cup fresh parsley, chopped. The parsley adds a bright, fresh finish that cuts through the richness of the beef. Give everything one final taste and adjust seasoning if needed—you might need a pinch more salt or a sprinkle of chili flakes depending on your heat preference.
Let the dish rest for 5 minutes before serving. This allows the juices to redistribute throughout the beef, ensuring each bite is perfectly moist. Serve immediately with crusty bread or over rice to soak up all that delicious sauce.
Pro Tips For Making Ground Beef Pepper
- CRANK THE HEAT FIRST: Start your ground beef in a dry, screaming-hot pan—no oil yet. The moment you add the meat, it’ll sizzle and release its own fat, which is your flavor foundation. I used to low-and-slow this, and the beef ended up greasy and dull. High heat for 2-3 minutes breaks down those tough fibers right away.
- MINCE THAT ONION: Skip the rough chop—finely dice that onion so it melts into the beef instead of sitting as chunks. A food processor makes this easy, and you’ll get that silky texture that turns this into a proper pepper sauce. I learned this the hard way when I served my husband a "pepper stew" with onion surprises.
- SALT THE MEAT BEFORE COOKING: Toss the raw ground beef with 1 teaspoon of salt (yes, even before browning) and let it sit 5 minutes. It keeps the meat juicy and lets the seasoning penetrate. I was skeptical until I tried it—now I can’t go back to dry, overcooked beef.
- STIR AND SCRAPE CONSTANTLY: Don’t just toss the beef occasionally—use a wooden spoon to break it up and scrape the browned bits off the bottom every 30 seconds. Those bits are pure flavor, and they’ll turn your simple pepper recipe into something restaurant-worthy. (Yes, it’s annoying, but worth it.)
Pro cooking tips for this recipe
Sear Like a Pro
That initial sear is where all the magic happens—don't rush it! Heat your skillet over medium-high heat until it's smoking hot before adding the 1.5 lb ground beef (80/20). Let it cook undisturbed for 5-6 minutes to build that flavorful crust. I use a 12-inch cast iron skillet from Lodge because it retains heat so well. The beef should form a deep brown crust on the bottom, and that's your fond—those browned bits are pure flavor. 🔥
Spice Blend Timing
Add your spices right after the aromatics but before the broth—this ensures they bloom properly and infuse the beef evenly. I recommend cracking 2 tsp black peppercorns fresh in a mortar and pestle (or using a spice grinder) for maximum intensity. Toast your cumin and smoked paprika in the same pan for 30 seconds before adding the beef—this deepens their flavors dramatically. Stir everything together after adding the broth to distribute those spices perfectly.
Moisture Control
The 0.5 cup beef broth is non-negotiable—it keeps the beef juicy while allowing the spices to meld. If your pan gets too dry during cooking, add 1-2 tablespoons of water to prevent sticking. I always use low-sodium beef broth from Pacific Foods because it has the best balance of flavor without over-salting your dish. The sauce should be thick but still cling to the beef, not dry or watery.
Resting Matters
Never skip the 5-minute rest before serving—this is when the juices redistribute throughout the beef. I learned this the hard way when I served it immediately and ended up with dry bites. Use this time to prep your sides or set the table. The beef will stay hot during this rest, and you'll notice a significant difference in texture and moisture. Trust me on this one! 💫
One-Pan Efficiency
This recipe is designed to be one-pan for maximum convenience, but if you're cooking for a crowd, I recommend using a large Dutch oven—it gives you more surface area for even cooking. The Dutch oven also helps trap heat better, which is perfect for simmering the spices. If you're short on time, you can even finish the dish in the oven at 375°F for 5 minutes to ensure everything is cooked through while keeping the beef juicy.
Heat Adjustments
Want more heat? Add ½ tsp cayenne pepper or 1 diced jalapeño with the aromatics. For a smoky kick, swap the chili flakes for ½ tsp chipotle powder. I usually keep it mild with just the chili flakes, but if you're feeling adventurous, go for it. The beauty of this recipe is how easily it adapts to your heat preferences—just adjust the spices to suit your taste.
Nutrition facts
Frequently asked questions
Can I use leaner ground beef (like 90/10) for this recipe?
I recommend sticking with 80/20 ground beef for the best results—it stays juicier while still developing that flavorful crust. If you must use leaner beef, add 1 tablespoon olive oil to the pan and reduce the cooking time by 2 minutes to prevent dryness. The fat is what creates those delicious browned bits that pack so much flavor!
What's the best way to make this dish spicier? Add ½ teaspoon cayenne pepper or 1 diced jalapeño with the aromatics for immediate heat. For smoky spice, swap the chili flakes for ½ teaspoon chipotle powder or add 1 teaspoon crushed red pepper flakes.
How do I prevent the beef from getting too dry?
Keep the heat at medium-low during the simmering stage and don't overcook it. If the pan gets too dry, add 1-2 tablespoons of beef broth or water to maintain moisture. The 5-minute rest before serving is also crucial—it lets the juices redistribute. For extra insurance, cover the pan with a lid during the last 3 minutes of cooking.
Can I make this recipe in a slow cooker?
Yes! Brown the beef first in a skillet, then transfer everything to your slow cooker. Add the remaining ingredients and cook on low for 3-4 hours or high for 1.5-2 hours. The slow cooking method keeps the beef incredibly tender, though you'll lose some of that crusty exterior. It's perfect for meal prep—just reheat with a splash of broth to restore moisture.
What are the best side dishes to serve with this?
This spiced beef pairs beautifully with crusty bread or garlic toast to soak up the sauce. For a complete meal, try roasted potatoes, cilantro-lime rice, or a fresh mango avocado salad. The bright acidity of the salad cuts through the richness of the beef, while the carbs balance the meal perfectly. Don't forget a simple green salad with vinaigrette for freshness!