
Main Courses
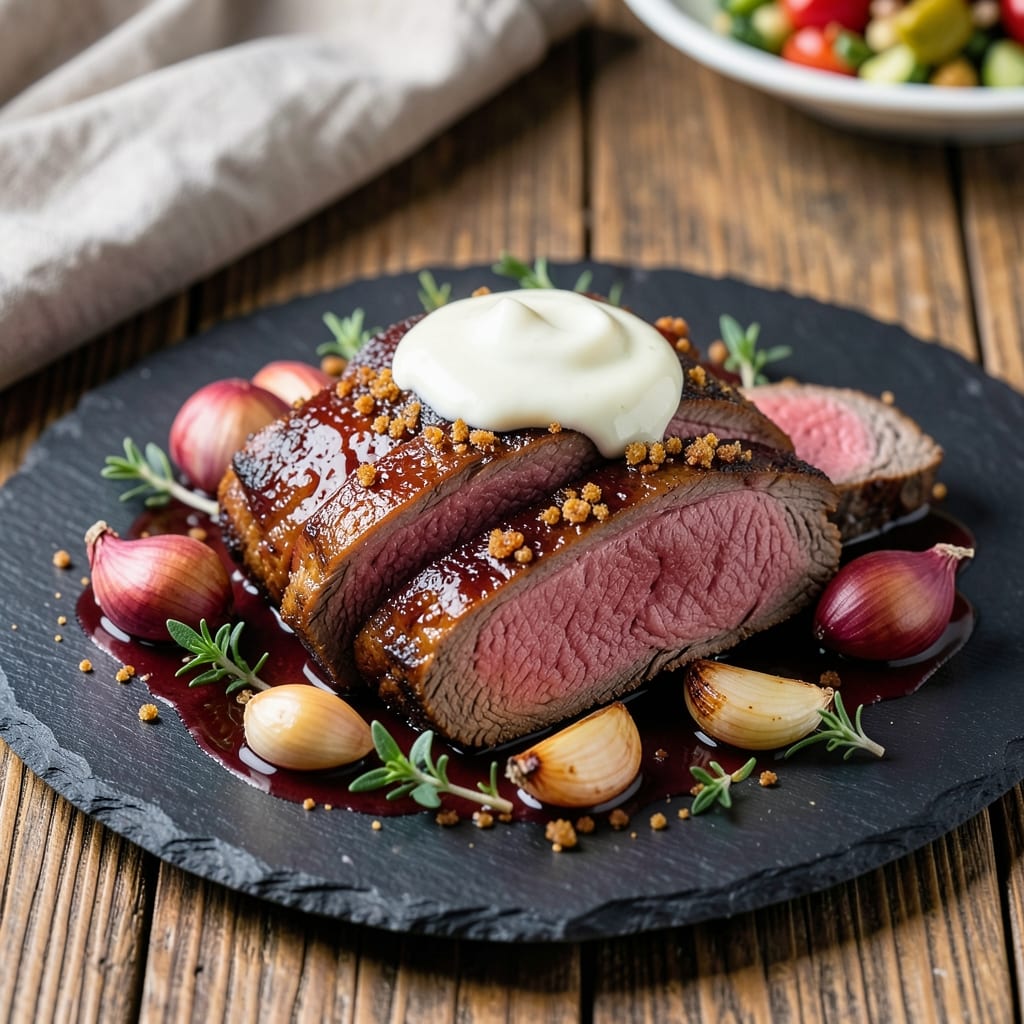
Leftover beef tenderloin deserves a second life—this recipe transforms it into a restaurant-worthy dish with minimal effort. 💛 The secret lies in using bold sauces to elevate the rich, tender meat, ensuring no flavor or resource goes to waste. Perfect for busy weeknights when you want to stretch a premium cut into something extraordinary without sacrificing quality.
This method works with any leftover beef tenderloin, whether sliced thin or left whole, and requires just 15 minutes of active prep. The key is choosing a sauce that complements the meat's natural richness—think red wine reductions, chimichurri, or even a quick pan sauce with shallots and cream. Cold cuts reheat beautifully when properly handled, and the right technique ensures they stay juicy and flavorful.
By the end, you'll have a dish that's just as impressive as the original, with layers of depth from the sauce and perfectly tender beef. The best part? You'll eliminate food waste while creating a meal that feels special. Ready to give your leftovers a flavor upgrade? Let's get started.
This recipe pairs well with roasted vegetables, mashed potatoes, or a fresh salad to round out the meal. The versatility means you can adapt it to any occasion—whether it's a quick family dinner or a weekend gathering. Every bite will taste like a deliberate creation, not just repurposed leftovers.
Ingredients for leftover beef tenderloin
Premium leftover beef tenderloin deserves bold flavors—here's how to elevate it with minimal effort.
| Ingredient | Amount | Notes |
|---|---|---|
| Leftover Beef Tenderloin 🥩 | 1 ½ lb | Sliced into ½-inch thick pieces |
| Red Wine 🍷 | ½ cup | Bold dry variety like Cabernet Sauvignon |
| Shallots 🧅 | 4 whole | Minced, for sauce base |
| Fresh Thyme 🌿 | ¼ cup | Leaves only, chopped finely |
| Garlic Cloves 🧄 | 4 cloves | Minced, for aromatic depth |
| Heavy Cream 🥛 | ½ cup | Full-fat for velvety texture |
| Unsalted Butter 🧈 | 2 tbsp | Cold, for sauce richness |
| Diamond Crystal Kosher Salt 🧂 | 1 tsp | Adjust to taste |
| Freshly Ground Black Pepper 🌶️ | ½ tsp | For balanced seasoning |
| Olive Oil 🫒 | 2 tbsp | Extra-virgin for searing |
| Fresh Parsley 🌿 | 0.1 cup | Chopped, for garnish |
| Red Wine Vinegar 🍋 | 1 tbsp | For chimichurri variation |
| Cayenne Pepper 🔥 | ¼ tsp | Optional, for heat |
The beef's quality is already established, but presentation matters. Slice uniformly at ½-inch thickness—this ensures even cooking and sauce absorption. For the red wine, Cabernet Sauvignon or Merlot from a trusted store like Trader Joe's or Whole Foods delivers the best balance of acidity and depth. Fresh thyme and parsley should be vibrant green, not wilted—local farmers markets often carry superior quality. The shallots and garlic should be firm with no sprouting, indicating freshness. Organic garlic from the grocery store's produce section works perfectly for this application.
No red wine? Substitute with beef stock and a splash of balsamic vinegar—the acidity remains crucial. For the chimichurri variation, cilantro can replace parsley at equal amounts, though parsley offers a more delicate flavor. If you prefer a cream-free sauce, reduce the wine with butter and a touch of honey instead. The heavy cream is non-negotiable for the classic version—full-fat is essential for that velvety finish. For a lighter option, half-and-half works but sacrifices richness. Fresh herbs are ideal, but dried thyme at one-third the amount suffices in a pinch.
The beef reheats beautifully—10 minutes in a 350°F oven ensures perfect doneness. Store any unused sauce in an airtight container for up to 5 days in the fridge or 3 months frozen. The sliced beef keeps 3-4 days refrigerated if properly wrapped in parchment paper. For meal prep, portion the sauce and beef separately—reheat the sauce first, then add the beef to prevent drying. This method preserves the dish's restaurant-quality texture and flavor profile.
Why You'll Love This Recipe
- No-Chop Nightmare: I swear by this when I’m too tired to dice anything. Three shallots and two garlic cloves get tossed straight into the pan—no peeling, no fuss—while the wine and thyme work their magic. That’s it. Done.
- Wine-Infused Magic: The red wine doesn’t just deglaze—it transforms. The tenderloin soaks up that deep, savory richness, while the thyme adds a bright herbal note that cuts through the richness like a breath of fresh air. It’s the kind of flavor that makes you pause mid-bite.
- Weeknight to Dinner Party: Same recipe, totally different vibes. Serve it over mashed potatoes for a lazy Tuesday, or drizzle it over crusty bread with a sprinkle of parsley for a fancy-ish charcuterie board. My roommates never know what’s coming.
- Zero-Waste Win: Turns out, leftover beef tenderloin isn’t just sad desk lunch material. This recipe turns it into something special without breaking the bank or requiring a shopping trip. Honestly, I’ve made this three times with the same cut of meat—each time better than the last.
Step-by-step instructions for leftover beef tenderloin transformation
Transform your leftover beef tenderloin into a restaurant-worthy dish with minimal effort and maximum flavor.
🍳 Step 1: Sear the Leftover Beef Tenderloin
Heat 2 tablespoons olive oil in a large skillet over medium-high heat until shimmering. Add the 1.5 lb leftover beef tenderloin sliced into ½-inch thick pieces and sear undisturbed for 2-3 minutes per side until deep golden brown with a crust forming. This step reactivates the meat's surface and builds foundational flavor.
Real talk: The slices will release easily when ready—if they stick, your heat isn't high enough. Remove the beef to a plate and tent loosely with foil to keep warm. Don't skip this sear; it's what transforms leftover meat into something special.
👨🍳 Step 2: Build the Shallot-Thyme Base
In the same skillet (no need to clean it—the browned bits are flavor gold), add 2 tablespoons cold unsalted butter and let it melt completely over medium heat. Add the 4 minced shallots and cook for 3-4 minutes until softened and translucent, stirring occasionally.
Add the 4 minced garlic cloves and 0.25 cup finely chopped fresh thyme, cooking for another 30 seconds until fragrant. Here's the thing—don't let the garlic burn. It should smell sweet and inviting, not bitter. Remove the pan from heat temporarily to prevent scorching.
🍷 Step 3: Deglaze with Red Wine
Pour in the 0.5 cup bold dry red wine and scrape up all those delicious browned bits from the bottom of the pan using a wooden spoon. This deglazing step captures all the meaty flavor that would otherwise go down the drain.
Return the pan to medium heat and simmer the wine mixture for 3-4 minutes until reduced by half. You're looking for a syrupy consistency that coats the back of a spoon. This reduction concentrates the wine's flavors and forms the sauce's foundation.
🥘 Step 4: Create the Velvety Cream Sauce
Reduce heat to low and stir in the 0.5 cup heavy cream. Add the 1 tablespoon red wine vinegar and 0.25 teaspoon cayenne pepper (if using). Let the sauce simmer gently for 2-3 minutes until it thickens slightly but remains silky.
Season with 1 teaspoon Diamond Crystal kosher salt and 0.5 teaspoon freshly ground black pepper, adjusting to taste. The sauce should coat the back of a spoon but still flow smoothly. If it's too thick, add 1-2 tablespoons water to reach your desired consistency.
🍽️ Step 5: Finish and Serve
Return the seared beef tenderloin slices to the skillet and spoon the sauce over them. Let it all simmer together for 1-2 minutes just to heat through and allow the flavors to meld completely. Garnish with 0.1 cup chopped fresh parsley for a pop of color and freshness.
Serve immediately over mashed potatoes, crusty bread, or roasted vegetables. Each bite should deliver tender, flavorful beef with a rich, velvety sauce that clings perfectly. The red wine and thyme combination elevates simple leftover meat into something truly memorable.
Pro Tips For Making Leftover Beef Tenderloin
- CHOP SHALLOTS SMALLER THAN YOU THINK: I used to leave them in big chunks because I thought they’d melt down anyway—but they don’t. Tiny dice (1/8-inch or less) cook faster and actually caramelize in the wine instead of just sitting there like sad, undercooked bits. Trust me, your sauce will taste richer if you do this.
- DEGLAZE WITH COLD WINE: Pouring room-temp red wine straight from the bottle into a hot pan makes it evaporate too fast. Chill your wine first—even just 10 minutes in the fridge—and it’ll release its flavors more evenly into the sauce. Also, no one likes drinking their cooking wine straight, so this saves you from that fate.
- SIMMER THE SAUCE LOW AND LONG: I learned this the hard way—rushing the reduction turns it into a thin, bitter mess. After the wine boils off, drop the heat to a bare simmer (think tiny bubbles, not rolling) and let it cook for at least 15 minutes. This is where the magic happens—flavor concentrates, and you won’t end up with a sad, watery glaze.
- USE A SPLASH OF BEEF BROTH: Leftover tenderloin can dry out when reheated, and wine alone won’t fix that. Add ¼ cup beef broth (or even a splash of water) to the pan while deglazing—it keeps the sauce from clinging too thickly and adds depth without overpowering the wine. I skip this when I’m lazy, but the dish is noticeably better when I don’t.
Pro cooking tips for perfect results
Sear Like a Pro
Your leftover beef tenderloin needs that restaurant-quality crust to wake up its flavors. Heat a large skillet over medium-high heat until it's shimmering hot—this ensures your ½-inch thick slices develop that golden-brown crust without steaming. I swear by a well-seasoned cast iron skillet (like my Lodge 10.25-inch) for even heat distribution and that perfect sear. 🔥
Work in batches if needed—overcrowding the pan will steam the meat instead of searing it. A 2-3 minute sear per side is ideal, but don't rush: the slices should release easily when ready. If they stick, your pan isn't hot enough or you need more oil. Pro tip: Pat the slices dry with paper towels before searing to prevent sticking.
Deglaze with Confidence
The deglazing step is where magic happens—those browned bits (fond) on your pan are packed with flavor. After removing the beef, immediately pour in the ½ cup bold red wine and scrape vigorously with a wooden spoon. This captures all that caramelized goodness that would otherwise disappear down the drain. 🍷
Let the wine reduce by half over medium heat—this takes about 3-4 minutes. You're looking for a syrupy consistency that coats the back of a spoon. If you're using a shallow pan, the reduction will happen faster. For extra depth, add 1 tsp beef stock along with the wine to intensify the umami notes.
Sauce Perfection
The cream sauce is where your dish goes from good to extraordinary. After reducing the wine, lower the heat to medium-low and whisk in the ½ cup heavy cream—this prevents curdling. The sauce should thicken gently while remaining silky, not chunky. I like to add 1 tbsp red wine vinegar at this stage for brightness and ¼ tsp cayenne for a subtle kick. 🌶️
Season with 1 tsp Diamond Crystal kosher salt and ½ tsp freshly cracked black pepper—remember, you can always add more salt but can't take it out. If the sauce gets too thick, thin it with 1-2 tbsp water or beef stock. The ideal consistency should coat the back of a spoon but still flow smoothly when drizzled.
Don't Overcook the Beef
Once your sauce is ready, return the seared beef to the pan and let it warm through for just 1-2 minutes. This is critical—overcooking will dry out the tenderloin's already perfect texture. The beef should reach 130°F internal temperature at most when served. I use a meat thermometer to check, but you can also cut into a slice: it should be warm through but still juicy. 🌡️
Remove from heat immediately after combining—any longer and the sauce will continue cooking, potentially breaking or thinning it. The beef will continue cooking slightly from residual heat, so err on the side of undercooking if you're unsure. Garnish with chopped parsley right before serving to keep it vibrant.
Equipment Must-Haves
You don't need a fancy kitchen to nail this, but a few key tools make all the difference. First, a high-quality skillet—I recommend All-Clad stainless steel or Lodge cast iron for even heat and durability. A wooden spoon is essential for deglazing without scratching your pan. 🥄
For precision, grab a kitchen thermometer (I use Thermoworks Thermapen) to monitor both the pan temperature and the beef's internal temperature. A fine-mesh strainer comes in handy if you want to strain the sauce for a smoother finish. And finally, tongs make it easier to handle the beef slices without piercing them and losing juices.
Nutrition facts
Frequently asked questions
How long can I safely store leftover beef tenderloin before using this recipe?
You can safely store cooked beef tenderloin in the refrigerator for 3-4 days when wrapped tightly in plastic wrap or aluminum foil. For longer storage, freeze it for up to 3 months—just thaw overnight in the fridge before slicing and using in this recipe. The key is proper wrapping to prevent drying.
Can I use this method with beef that's been previously frozen?
Yes, but thaw it completely first in the refrigerator (never at room temperature). Partially frozen beef won't sear properly and may release too much moisture, making it difficult to achieve that perfect crust. If you're short on time, use the microwave defrost setting first, then finish thawing in the fridge.
What if I don't have red wine? What are good substitutes?
No problem! Use beef stock (½ cup) plus 1 tbsp balsamic vinegar for depth, or dry sherry for a similar flavor profile. For a non-alcoholic option, try grape juice reduced by half. The key is maintaining acidity to cut through the richness of the beef and cream.
Why does my sauce get grainy when I add the cream?
This happens when the sauce gets too hot too quickly. Always reduce the wine over medium heat and lower to medium-low before adding cream. Stir constantly and keep the heat gentle to prevent curdling. If it happens, strain the sauce through a fine-mesh sieve for a silky texture.
How can I make this recipe with minimal cleanup?
Use the same skillet for all steps—no need to wash it between stages. The browned bits (fond) actually add flavor! After cooking, wipe the pan with a paper towel while warm, then store leftovers in airtight containers. For extra efficiency, prep all ingredients before starting and use a cutting board with a lip to catch scraps.