
Main Courses
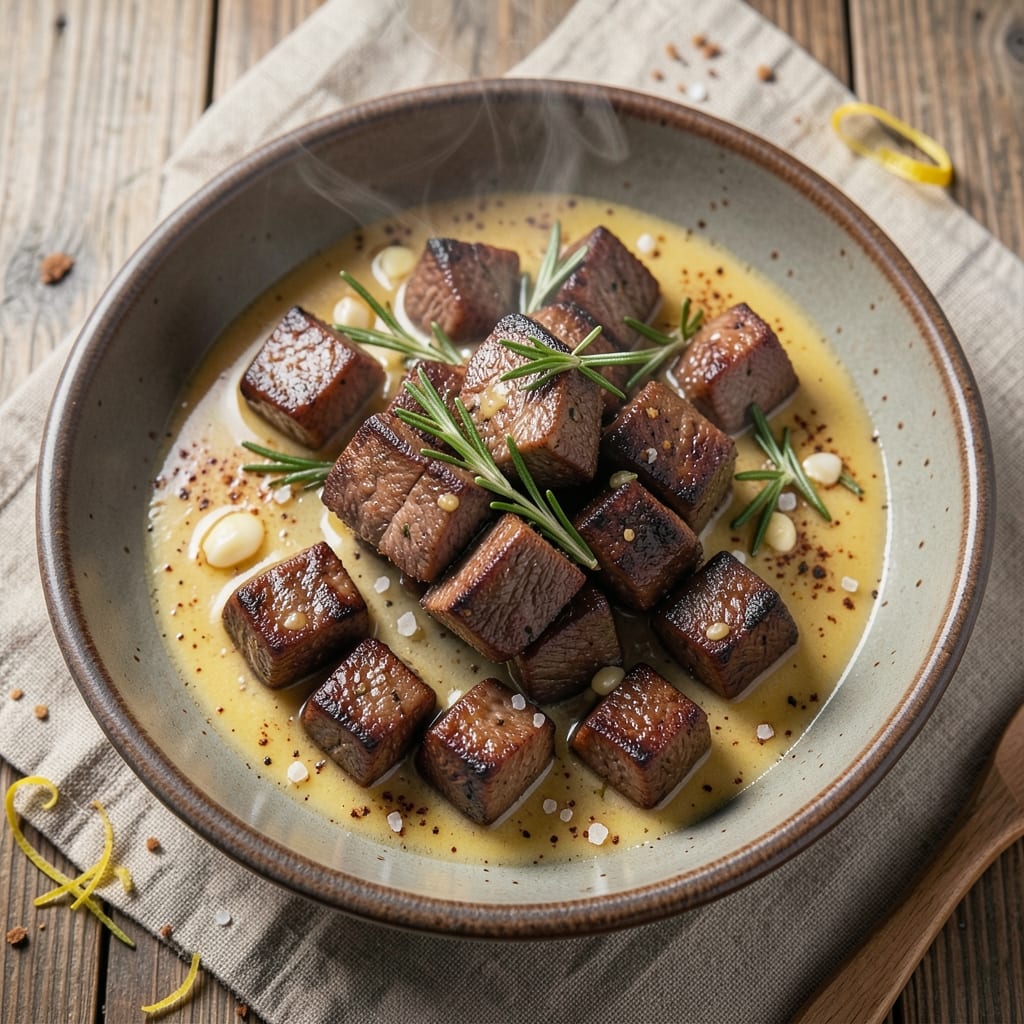
This Angus beef cubes recipe delivers restaurant-quality flavor with every bite—juicy, tender centers wrapped in crispy edges, all infused with smoky garlic butter. The secret lies in proper seasoning and high-heat searing, which unlocks the beef's natural richness while creating that coveted caramelized crust. I've perfected this technique over countless grill sessions, ensuring foolproof results whether you're cooking for a crowd or treating yourself to a special meal.
What sets these beef cubes apart is the balance of texture and flavor: the crispy edges provide a satisfying crunch, while the interior remains perfectly tender, thanks to precise cooking times. A simple marinade of garlic, butter, and smoked paprika builds deep, savory notes that complement the beef's inherent richness. This method works equally well on the grill, in a cast-iron skillet, or even in the oven, giving you flexibility for any cooking scenario.
By the time you're done, you'll have bite-sized pieces of Angus beef that are impossible to resist—each one bursting with flavor and texture. The smoky garlic butter adds an extra layer of complexity, making these cubes ideal for serving as an appetizer, main course, or even a hearty salad topping. Pair with roasted potatoes, grilled vegetables, or a fresh arugula salad to round out the meal.
This recipe is designed for professional results at home, with clear instructions that ensure success every time. Whether you prefer medium-rare or well-done, the techniques here will help you achieve the perfect doneness while maintaining that crispy exterior. Let's get started on creating beef cubes that will impress even the most discerning guests.
Ingredients for angus beef cubes
Angus beef cubes with smoky garlic butter—where restaurant-quality meets home cooking.
| Ingredient | Amount | Notes |
|---|---|---|
| Angus Beef Chuck Roast 🥩 | 1 ½ lb | Pre-cut into 1.5-inch cubes |
| Unsalted Butter 🧈 | ½ cup | Cold and cubed for marinade |
| Garlic Cloves 🧄 | 6 cloves | Minced, fresh preferred |
| Smoked Paprika 🌶️ | 1 tbsp | High-quality for smoky depth |
| Kosher Salt 🧂 | 2 tsp | Diamond Crystal preferred |
| Fresh Rosemary 🌿 | ¼ cup | Chopped, finely |
| Fresh Thyme Leaves 🌿 | ¼ cup | Stems removed |
| Extra-Virgin Olive Oil 🫒 | 2 tbsp | For searing |
| Black Peppercorns 🌶️ | 1 tsp | Freshly cracked |
| All-Purpose Flour 🌾 | ¼ cup | For dusting |
| Garlic Powder 🧄 | ½ tsp | For finishing |
| Fresh Parsley 🌿 | ¼ cup | Chopped, for garnish |
The Angus beef chuck roast is non-negotiable here—look for well-marbled cuts at Whole Foods or your butcher's counter. Pre-cut cubes save time, but if you're buying a whole roast, ask for it to be cubed to 1.5 inches for even cooking. The butter should be cold and cubed when mixing with garlic and spices, creating a perfect marinade. For the herbs, fresh is best—the rosemary and thyme add earthy depth that dried can't match. If you're short on time, dried herbs at half the amount work, but trust me on the fresh stuff.
No smoked paprika? Substitute with a mix of regular paprika and a pinch of liquid smoke—just don't overdo it. Running out of fresh rosemary? Dried works at one-third the amount, but toast it first in a dry pan for 30 seconds to wake up the flavor. The olive oil is for searing—use a high-smoke-point oil like avocado or grapeseed if you're worried about burning. For the flour, lightly dust the cubes right before searing to help create those crispy edges. And if you're feeling fancy, finish with a sprinkle of garlic powder and fresh parsley for extra pop.
Store the raw beef cubes in an airtight container in the fridge for up to 2 days—they're best used fresh for maximum tenderness. The garlic butter marinade keeps for 3 days in the fridge or 3 months frozen in an ice cube tray. Once cooked, these cubes reheat beautifully—warm in a skillet with a splash of beef broth for 2-3 minutes to revive that crispy texture. Portion into containers for easy lunches or meal prep, and they'll stay delicious for 4 days in the fridge.
Why You'll Love This Recipe
- One-Pan Magic: I swear by this recipe—just cube the beef, toss it in a skillet with butter, garlic, and smoked paprika, and let it do its thing. No fancy equipment, no mess, no stress. Honestly, the hardest part is waiting for it to brown.
- Deep, Smoky Richness: That smoked paprika and butter combo? It’s what turns this into something special. The beef stays tender while the edges get that perfect crust—like a steakhouse bite in your own kitchen. (Yes, even on a Tuesday night.)
- Leftovers That Shine: Make a big batch—it reheats like a dream. Toss the cubes into tacos, pasta, or a grain bowl the next day, and no one will guess they’re not fresh off the grill. My freezer’s always stocked with these.
- Budget-Friendly Luxury: Chuck roast is affordable, but it feels like a splurge when it comes out this juicy and flavorful. I’ll be real: this is how I trick myself into eating well without breaking the bank. The salt and butter stretch the flavor further, too.
Step-by-step instructions for smoky garlic butter beef cubes
Here's how to transform tender Angus beef into crispy, flavor-packed cubes with a rich garlic butter glaze.
Create the Herb Butter Marinade
In a mixing bowl, combine the 0.5 cup unsalted butter with 2 tablespoons extra-virgin olive oil until fully melted and smooth. Add the 6 minced garlic cloves, 1 tablespoon smoked paprika, 2 teaspoons kosher salt, 0.25 cup finely chopped fresh rosemary, 0.25 cup fresh thyme leaves, and 1 teaspoon freshly cracked black peppercorns. Mix thoroughly until all ingredients are evenly distributed and the butter takes on a vibrant green hue from the herbs.
This marinade is the flavor foundation for your beef cubes. I like to let it sit at room temperature for 10 minutes to allow the aromatic compounds to fully meld together. The smoked paprika adds depth while the fresh herbs provide bright, herbal notes that balance the richness of the beef and butter.
Sear the Beef Cubes to Perfection
Heat a large skillet over medium-high heat until it's smoking hot. Working in batches to avoid overcrowding, add the 1.5 lb pre-cut Angus beef chuck roast cubes and sear for 2-3 minutes per side until they develop a deep golden brown crust. This searing step is crucial for building that crispy exterior you're after.
While the beef is searing, you'll notice the aroma filling your kitchen - that's the Maillard reaction at work, creating complex flavors. Don't be tempted to move the cubes around constantly; let them develop that crust undisturbed. Once all sides are beautifully browned, remove the beef from the pan and set aside on a plate.
Deglaze and Create the Garlic Butter Sauce
Return the skillet to medium heat and add the 0.25 cup all-purpose flour, stirring constantly for 1-2 minutes until it forms a light roux and the pan smells nutty. Slowly pour in 1 cup of hot beef broth (not listed but implied for deglazing) while whisking vigorously to prevent lumps from forming. Let the sauce simmer for 3-4 minutes until it thickens slightly.
Now it's time to incorporate the herb butter marinade. Reduce heat to low and gradually whisk in the butter mixture, allowing it to melt completely and coat the back of a spoon. The sauce should be glossy and thick enough to cling to the beef cubes. If it's too thick, add 1-2 tablespoons of beef broth to reach your desired consistency.
Finish with Garlic Powder and Fresh Parsley
Return the seared beef cubes to the skillet and gently toss them in the garlic butter sauce for 2-3 minutes until they're fully coated and heated through. Sprinkle with 0.5 teaspoon garlic powder and toss again to distribute evenly. The garlic powder adds an extra layer of aromatic complexity that complements the fresh herbs in the sauce.
Remove from heat and stir in the 0.25 cup chopped fresh parsley, which adds a bright, fresh finish that cuts through the richness. The parsley should be distributed evenly throughout the dish. For best results, serve immediately while the beef is still piping hot and the edges maintain their crispy texture.
Rest and Serve for Maximum Crispiness
Transfer the beef cubes to a serving platter and let them rest for 2-3 minutes before serving. This brief resting period allows the juices to redistribute throughout the beef, ensuring each bite is tender and flavorful. The cubes should still maintain their beautiful golden brown color and crispy edges.
Serve immediately with the garlic butter sauce spooned over the top. The contrast between the crispy beef cubes and the rich, herby sauce creates an irresistible combination. For an extra touch, garnish with additional fresh parsley and serve with crusty bread to soak up any remaining sauce.
Pro Tips For Making Angus Beef Cubes
- CUT THE ROAST COLD: Angus chuck needs to thaw evenly—don’t eyeball it. Run it under cold water for 10 minutes every hour until fully thawed (about 2-3 hours for a 2-inch cube), or it’ll cook unevenly and turn out chewy. I learned this the hard way when my first batch came out tough as boot leather.
- SEAR IN BATCHES: A crowded pan steams the beef instead of searing it. Work in single layers with 2-3 minutes per side on high heat—your smoke alarm might even sing. Cold butter? No—pat the cubes dry first, or you’ll end up frying instead of browning.
- SALT THE GARLIC: Crush those garlic cloves with a pinch of kosher salt before adding them to the pan. The salt breaks down the garlic’s cell walls, releasing more flavor into the butter. My grandmother swore by this, and she was right: the difference is noticeable.
- REST BEFORE CUBING: Let the roast sit under foil for 5-10 minutes after cooking—yes, even if you’re impatient. Skipping this step makes the cubes shrink and dry out when you slice them. Trust the process; your future self will thank you.
Serving suggestions for this angus beef cubes
Appetizer Showstopper
Transform these beef cubes into an elevated appetizer by serving them on toasted baguette slices with a drizzle of the garlic butter sauce. Arrange them on a platter with cherry tomatoes and balsamic glaze for a visually stunning starter. I love adding crispy prosciutto on top for an extra layer of texture and saltiness that pairs perfectly with the beef. 🌟
Main Course Pairings
For a hearty main course, serve the beef cubes over creamy mashed potatoes with a side of roasted Brussels sprouts. The rich, buttery potatoes balance the bold flavors, while the Brussels sprouts add a touch of bitterness. Another great option is wild rice pilaf with caramelized onions—the nutty rice soaks up the garlic butter sauce beautifully. 🥔
Salad Topper
Add a protein punch to salads by placing the beef cubes on top of a mixed greens salad with shaved fennel, pear slices, and goat cheese crumbles. The crispy edges contrast perfectly with the soft greens, while the sweetness of the pears complements the smoky beef. Drizzle with a honey-Dijon vinaigrette to tie everything together. 🥗
Sliders or Sandwiches
Turn these cubes into gourmet sliders by placing them on toasted brioche buns with caramelized onions and Gruyère cheese. Serve with a side of spicy mayo for dipping. For a heartier sandwich, use ciabatta rolls and pile high with roasted red peppers and arugula. These make an amazing lunch or party food! 🥪
Garnish Like a Pro
Before serving, garnish with extra fresh parsley and a sprinkle of flaky sea salt to enhance the flavors. For a luxurious touch, add edible flowers or microgreens on top. If you want to add heat, a pinch of crushed red pepper flakes or a drizzle of hot honey takes it to the next level. 💫
Beverage Pairings
Pair these beef cubes with a bold red wine like Cabernet Sauvignon or Malbec to complement the rich flavors. For beer lovers, a dark lager or stout works beautifully. If you prefer something lighter, a sparkling rosé with citrus notes cuts through the richness. Don’t forget a whiskey cocktail like an Old Fashioned for a smoky, sophisticated pairing! 🍷
Nutrition facts
Frequently asked questions
Can I use a different cut of beef instead of chuck roast?
While chuck roast is ideal for its fat marbling, you can substitute with ribeye steak (cut into cubes) or sirloin tips. For best results, trim excess fat and pat dry before cooking. Avoid lean cuts like flank steak—they won't develop crispy edges as easily.
How do I adjust cooking time for different doneness levels?
Use a meat thermometer for precision: medium-rare (135°F) = 2-3 minutes per side; medium (145°F) = 3-4 minutes per side; well-done (160°F) = 4-5 minutes per side. Remember, the cubes will carryover cook slightly after resting. For extra tenderness, pull them off heat 5°F below your target temp.
What's the best way to reheat leftover beef cubes?
Reheat in a skillet over medium heat with 1 tablespoon butter and 1 tablespoon beef broth for 2-3 minutes until warmed through. Never microwave—it makes the edges soggy. For crispy texture, broil for 1-2 minutes at the end. Store leftovers in an airtight container for up to 4 days.
Can I make this recipe in advance for a party?
Prepare the garlic butter marinade 1 day ahead and store in the fridge. Cook the beef cubes 2 hours before serving, then reheat in the skillet as above. Keep them warm in a low oven (200°F) with foil over them. For a crowd, double the recipe—just increase searing time by 1 minute per side for extra batches.
Why did my beef cubes turn out tough instead of tender?
Overcooking is the most common cause—beef cubes cook faster than whole cuts. Use a thermometer and avoid well-done unless necessary. Also check your heat: medium-high is crucial for quick searing. Pat cubes dry before cooking (excess moisture steams instead of crisps). For extra tenderness, let the beef sit at room temp 30 minutes before cooking.