
Soups & Stews
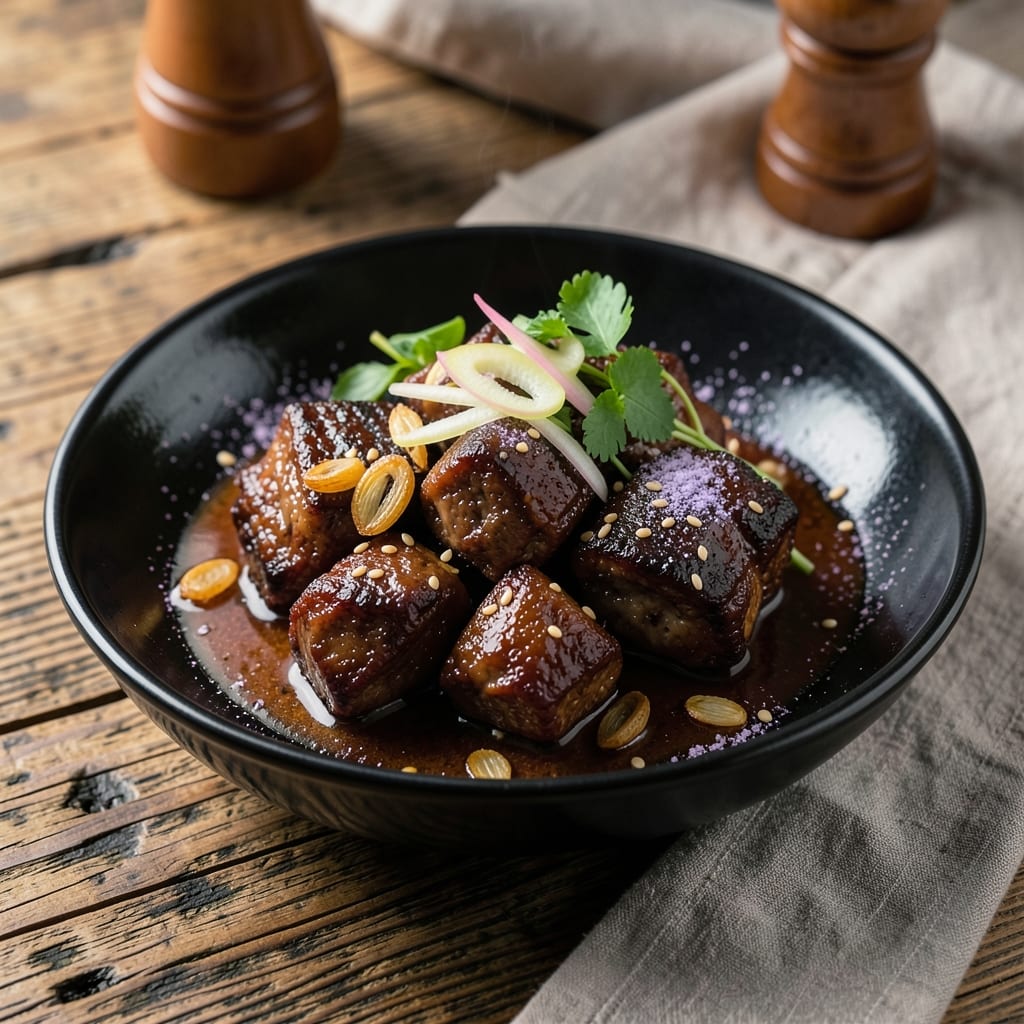
Slow-braised beef shin transforms tough cuts into melt-in-your-mouth silkiness—a technique perfected in Asian kitchens for centuries. This recipe delivers restaurant-quality depth with fragrant five-spice, soy, and star anise, creating a dish that’s rich yet balanced. The long braising process breaks down connective tissue, resulting in tender meat that practically falls apart with every bite.
The secret lies in patience and layering flavors. A simple marinade of soy sauce, garlic, and ginger jumpstarts the process, while the braising liquid—packed with aromatic spices and a touch of sweetness—infuses the meat with complex, savory notes. Unlike quick-cooking cuts, beef shin rewards slow cooking, making it ideal for weekend projects or meal prep.
By the time you serve it, you’ll have a dish that’s deeply flavorful yet not overpowering, with meat so tender it dissolves at the touch of a fork. The fragrant broth can be used for rice or noodles, while pickled vegetables or quick stir-fried greens make perfect sides. This is comfort food at its finest—warm, hearty, and impossible to resist.
Perfect for feeding a crowd or saving leftovers for days, this recipe proves that slow cooking isn’t just a method—it’s an art. Let’s get started on creating something truly special.
Ingredients for asian beef shin
Six aromatic spices and four pounds of beef shin create restaurant-quality silkiness.
| Ingredient | Amount | Notes |
|---|---|---|
| Beef Shin 🥩 | 4 lb | Bone-in, cut into 2-inch chunks |
| Soy Sauce 🍶 | ½ cup | High-quality, preferably Japanese |
| Brown Sugar 🍯 | ¼ cup | Packed, light or dark |
| Garlic Cloves 🧄 | 8 cloves | Peeled, smashed |
| Fresh Ginger 🌿 | 3 tbsp | Grated, peeled |
| Five-Spice Powder 🌶️ | 1 ½ tbsp | Authentic Asian blend |
| Star Anise 🌟 | 2 whole | Lightly crushed |
| Cinnamon Sticks 🌿 | 2 whole | 2-inch pieces |
| Bay Leaves 🍃 | 2 whole | Dried, standard size |
| Red Wine 🍷 | 1 cup | Dry, bold variety |
| Beef Broth 🥫 | 2 cups | Homemade or high-quality |
| Sesame Oil 🫒 | 1 tbsp | Toasted, for finishing |
| Green Onions 🧅 | ¼ cup | Sliced, for garnish |
| Kosher Salt 🧂 | 1 ½ tsp | Diamond Crystal preferred |
| Black Peppercorns 🌶️ | ½ tsp | Freshly cracked |
The beef shin is the star—look for cuts with good marbling at Whole Foods or your local butcher. Costco often has pre-cut chunks, but if buying whole, ask for the bone-in variety. The bone adds depth to the broth, and the connective tissue is what transforms into tender silkiness. Fresh ginger and garlic should be vibrant, with no soft spots or bruising. For five-spice powder, Penzeys or Trader Joe's carry authentic blends that outperform generic supermarket versions. Star anise and cinnamon sticks should be whole and aromatic—crush lightly to release their oils without overpowering the dish.
No red wine? Dry sherry or additional beef broth works just as well. Substitute ground cinnamon for the sticks (1 tsp) if needed, but the sticks add subtle warmth. Fresh ginger can be swapped for 1 tbsp ginger paste, though freshly grated has more punch. For soy sauce, Japanese brands like Kikkoman or Lee Kum Kee deliver the umami depth you need—avoid the lighter American varieties. The sesame oil should be toasted, not the flavored kind; Kadoya is a reliable choice. If you're short on time, pre-sliced green onions from the refrigerated section work fine for garnish.
This dish tastes even better the next day as flavors meld. Store leftovers in an airtight container for up to 5 days in the fridge or 3 months frozen. The braising liquid can be repurposed for rice, noodles, or dumplings—simply strain and reduce it by half for a quick sauce. For meal prep, portion the meat and broth into separate containers. The broth freezes beautifully, while the meat reheats best with a splash of water or broth to restore moisture.
Why You'll Love This Recipe
- One-Pot Magic: I swear by this recipe when I’m too tired to deal with multiple pans. The beef shin simmers right in the same pot as the sauce—no extra cleanup, just deep flavor with minimal effort. Honestly, the only chopping I do is the garlic and ginger, and that’s it.
- Sweet-Savory Bomb: That perfect balance of soy’s umami and brown sugar’s caramelized punch? It’s what makes this dish ridiculously good. The ginger and garlic mellow into the beef as it cooks, leaving you with tender bites that taste like a hug in sauce form.
- Leftovers That Shine: Between us, this recipe actually tastes better the next day. The flavors meld overnight, and I’ve turned last night’s dinner into packed lunches or quick stir-fry additions—no stress, just deliciousness. (Yes, even on a Tuesday night.)
- Budget Hero: Beef shin is one of those secret weapons for stretching meals without sacrificing flavor. A single cut feeds four, and the pantry staples (soy, sugar, garlic) won’t break the bank. I’ll be real: it’s my go-to for feeding a crowd without panic.
Step-by-step instructions for slow-braised Asian beef shin
Transform tough beef shin into tender, aromatic silkiness through precise timing and layered flavors.
Sear the Beef Shin for Deep Flavor Foundation
Heat a heavy Dutch oven over medium-high heat until very hot. Working in batches if needed, add the 4 lb beef shin cut into 2-inch chunks, arranging them in a single layer. Sear undisturbed for 4-5 minutes per side until developing a deep mahogany crust. This initial searing locks in juices and builds complex caramelized flavors.
Real talk: Don't rush this step. You'll know it's ready when the beef releases easily from the pan with a gentle nudge. Transfer the seared beef to a plate as you work. The reason we sear in batches is to prevent overcrowding, which steams the meat instead of browning it properly.
Build the Aromatic Base with Spices and Liquids
In the same Dutch oven, reduce heat to medium and add 1 tablespoon sesame oil. Stir in the 8 cloves smashed garlic and 3 tablespoons grated fresh ginger, cooking for 1 minute until fragrant but not browned. Add the 1.5 teaspoons kosher salt, 0.5 teaspoon cracked black peppercorns, 1.5 tablespoons five-spice powder, 2 lightly crushed star anise, 2 cinnamon sticks, and 2 bay leaves.
Here's where it gets aromatic: Pour in the 1 cup red wine and scrape up all those browned bits from the bottom of the pan. Let it simmer for 3 minutes until the wine reduces by half and the spices release their essential oils. This step creates the flavor backbone of your braise, so don't skip it.
Braise with Patience for Tender Perfection
Return the seared beef to the Dutch oven. Add the 0.5 cup soy sauce and 0.25 cup packed brown sugar, stirring to combine. Pour in the 2 cups beef broth, ensuring all beef is submerged. Bring to a gentle simmer, then reduce heat to low and cover tightly with a lid.
Transfer to a 300°F oven and braise for 3 hours, then increase temperature to 325°F and continue cooking for another 2-3 hours until the beef is fork-tender with no resistance. The reason for the temperature adjustment is to prevent the liquid from evaporating too quickly while ensuring the connective tissue breaks down completely.
Finish and Garnish for Restaurant-Quality Presentation
Remove the beef from the braising liquid and transfer to a clean platter. Strain the cooking liquid through a fine-mesh sieve into a clean saucepan, pressing on the solids to extract maximum flavor. Return the liquid to the pan and simmer over medium heat until slightly thickened, about 8-10 minutes. The sauce should coat the back of a spoon.
Shingle the beef shin slices on serving plates and ladle the reduced sauce over the top. Garnish with 0.25 cup sliced green onions and finish with a drizzle of 1 tablespoon toasted sesame oil. This final touch adds nutty depth and visual appeal that elevates the dish from home-cooked to restaurant-worthy.
Pro Tips For Making Asian Beef Shin
- SEAR IN BATCHES: I learned this the hard way—dumping all those shin chunks in the pan at once just steams them instead of browning. Use two heats if needed: sear half until deep golden (5-6 minutes), set aside, then repeat. That caramelized crust is the thing that matters most for flavor.
- PEEL GINGER THINLY: Sounds weird, but it works: slice that ginger paper-thin (almost translucent) instead of chunking it. The flavor infuses faster, and you won’t end up with chewy bits fighting for space in your sauce. (Yes, even if you’re impatient like me.)
- LOW AND SLOW AFTER SEARING: After the initial sear, drop heat to medium-low and cover the pot. I used to rush this, but beef shin needs time—at least 1.5 hours—to break down. The sauce will reduce naturally, and the meat stays tender instead of turning to shoe leather.
- SWEAT GARLIC FIRST: Toss minced garlic into the pot after the shins are seared but before adding soy sauce. Let it sit for 30 seconds until fragrant—this stops it from burning when the sugar hits. (Your future self will thank you when the dish doesn’t taste like charred regret.)
Essential equipment for this recipe
Dutch Oven
A heavy-duty Dutch oven is your best friend for this recipe—it distributes heat evenly and retains moisture during the long braise. I recommend a Le Creuset or Lodge cast iron (both handle temperature swings beautifully). The deep sides prevent spills, and the tight lid traps steam for perfect tenderness. If you don’t own one, a 6-quart stainless steel pot with a lid works too, but cast iron adds unmatched flavor depth. 🔥
Meat Thermometer
Never guess the doneness—use a digital instant-read thermometer like the ThermoWorks Smoke to monitor internal temperature. The beef shin is ready when it hits 203°F (or when it shreds easily with two forks). A basic oven-safe thermometer works too, but digital models give precise readings faster. Pro tip: Insert the probe into the thickest part of the meat, avoiding bone or fat.
Fine-Mesh Sieve
A fine-mesh sieve (like the OXO Good Grips) is essential for straining the braising liquid cleanly. It removes all solids while preserving the rich, spiced broth. I also use it to drain the cooked meat before slicing, preventing excess liquid from making the meat soggy. For extra clarity, line the sieve with a cheesecloth or coffee filter to catch even the tiniest particles.
Tongs or Meat Claws
Invest in a sturdy pair of tongs or meat claws (like Chicago Cutlery’s) to handle the beef shin during searing and plating. They grip securely without piercing the meat, keeping it intact. I prefer 12-inch tongs for larger pieces—they’re long enough to avoid burns and provide a solid grip. Avoid forks, which can tear the meat during handling.
Kitchen Twine
Use kitchen twine to tie bundles of beef shin together if your pot is too small to fit all pieces at once. This keeps chunks cohesive during searing and braising. I use unbleached cotton twine (like Amazon Basics) because it’s food-safe and easy to remove later. For extra security, tie the bundles loosely—too tight, and the meat won’t render properly.
Optional: Sous Vide Circulator
For precision, a sous vide circulator (like the Anova Precision Cooker) can take the guesswork out of braising. Set it to 165°F for 12-16 hours, then sear and finish as directed. This method ensures even cooking without monitoring. If you skip this step, the oven method still delivers incredible results—just requires more attention to timing and temperature. 💡
Nutrition facts
Frequently asked questions
Why does beef shin need such a long cooking time?
Beef shin contains tough connective tissue that requires 3-5 hours of slow cooking to break down into tender silkiness. The collagen melts during this time, transforming the meat into a rich, velvety texture. Skipping this step leaves the meat chewy—patience is key for that restaurant-quality melt-in-your-mouth result!
Can I substitute beef shin with another cut?
While beef shin is ideal, you can use chuck roast or brisket as substitutes. These cuts have similar connective tissue that benefits from long braising. Avoid lean cuts like sirloin—they’ll dry out. For best results, cut the meat into 2-inch chunks and follow the same braising method.
What if my beef isn't tender after braising?
If the beef still feels firm, extend cooking by 1-2 more hours at 325°F. Check for doneness by inserting two forks—if they slide in easily, it’s ready. For extra tenderness, simmer the meat in the braising liquid for 30 minutes after removing from the oven to finish breaking down fibers.
How can I make this dish quicker?
For a faster version, use a pressure cooker (like Instant Pot) on high pressure for 90 minutes, then finish with a quick sear. The meat won’t be as fall-apart tender, but it’ll still be delicious. Alternatively, marinate the beef overnight in soy sauce, garlic, and ginger to jumpstart flavor development.
What are the best sides to serve with this dish?
This rich braise pairs perfectly with steamed jasmine rice or udon noodles to soak up the sauce. For contrast, serve with quick-pickled vegetables (like cucumbers or radishes) or a simple stir-fried bok choy. The acidity cuts through the richness, balancing the dish beautifully.