
Soups & Stews
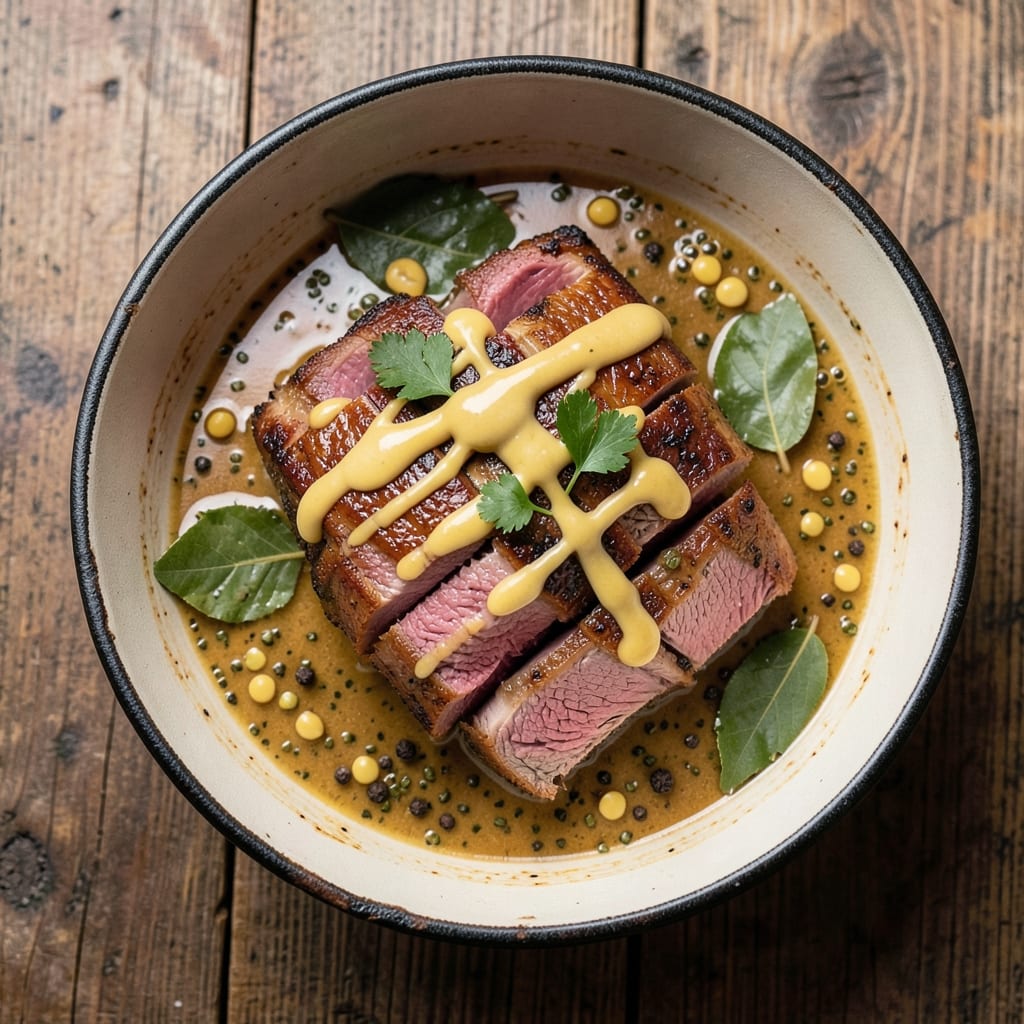
Australian corned beef recipe delivers that signature tender, spiced crust and melt-in-your-mouth heart that’s become a staple at Aussie gatherings. This slow-braised method—inspired by traditional techniques that transform tough cuts into something luxurious—prioritizes spices like mustard seeds and bay leaves for that authentic depth. The beauty lies in the patience: hours of gentle cooking render collagen into rich, velvety juices that keep every slice impossibly moist.
What sets this apart is the brining process, where Australian beer (or a malt vinegar substitute) infuses the meat with subtle malt sweetness while tenderizing it from the inside out. The crust develops a satisfying crackle thanks to a dry rub of coriander, black pepper, and just a pinch of cayenne—enough to add warmth without overpowering. This isn’t your average boiled beef; it’s a dish that carries the soul of a Sunday roast, elevated by technique and time.
By the time it’s done, you’ll have slices so tender they fall apart at the touch, with a crust that’s crisp enough to stand up to pickled onions or mustard sauce. The aroma alone—smoky, spiced, and rich—will have everyone at the table anticipating that first bite. Serve with classic sides like creamy mashed potatoes or buttery cabbage to complete the meal.
The best part? Leftovers reheat beautifully, making this the ultimate make-ahead centerpiece for family dinners or celebrations. Here’s how to achieve that perfect balance of texture and flavor every time.
Ingredients for australian corned beef
Six ingredients transform tough beef into melt-in-your-mouth luxury—slow-braised to perfection with Aussie tradition.
| Ingredient | Amount | Notes |
|---|---|---|
| Beef Chuck Roast 🥩 | 4 lb | Center-cut for even cooking |
| Australian Lager Beer 🍺 | 2 cups | Or malt vinegar substitute |
| Yellow Mustard Seeds 🌶️ | 2 tbsp | Whole, not ground |
| Bay Leaves 🌿 | 4 whole | Fresh preferred |
| Ground Coriander 🌿 | 1 tbsp | Freshly ground for aroma |
| Coarsely Ground Black Peppercorns 🌶️ | 1 tbsp | Freshly cracked |
| Cayenne Pepper 🔥 | ½ tsp | For subtle heat |
| Kosher Salt 🧂 | 1 ½ cups | Diamond Crystal preferred |
| Granulated Sugar 🍚 | ½ cup | For balanced brine |
| Yellow Onions 🧅 | 2 whole | Quartered for braising |
| Carrots 🥕 | 4 whole | Whole, scrubbed |
| Garlic Cloves 🧄 | 6 cloves | Smashed for infusion |
| Fresh Thyme Sprigs 🌿 | 4 whole | Or 1 tsp dried thyme |
| Olive Oil 🫒 | ¼ cup | For crust development |
The beef chuck roast is non-negotiable—center-cut for even cooking and maximum tenderness. Look for good marbling at Costco or your butcher shop; pre-cut roasts work fine, but if buying whole, trim excess fat to ¼-inch thickness for that signature crackly crust. For the Australian lager, XXXX or Victoria Bitter are classic choices—if you can't find them, malt vinegar (½ cup) plus a splash of dark beer (½ cup) mimics the malt sweetness. The mustard seeds should be whole, not ground; toast them lightly in a dry pan for 30 seconds before adding to the brine for deeper flavor. Bay leaves are a must for that authentic depth—skip the dried powder here.
No Australian beer? Malt vinegar plus a splash of dark beer (like Guinness) works surprisingly well. Cayenne can be omitted if you prefer no heat, but trust me—½ tsp is just enough to add warmth without overpowering. The kosher salt is critical; Diamond Crystal dissolves more easily than Morton’s, so if you’re swapping, use ½ cup less. For the onions and carrots, baby carrots or pre-cut veggies save time, but whole roots stay crisp longer. Garlic can be roasted whole for 20 minutes at 400°F before smashing—this adds a sweet, mellow depth that’s worth the extra minute.
This dish reheats beautifully—honestly tastes better the next day once the flavors meld. Store in its braising liquid in a sealed container for 4-5 days in the fridge, or freeze for up to 3 months. For serving, reheat gently in the same liquid over low heat—never microwave, or the crust will turn soggy. Portion into individual containers with a scoop of the braising liquid for easy lunches. The leftovers? Even more tender after resting overnight, making this the ultimate make-ahead centerpiece.
Why You'll Love This Recipe
- One-Pot Magic: I swear by this recipe because it’s literally dump-and-go. Chuck roast, beer, a handful of spices—no fancy prep, no chopping, just simmer until tender. The beer does all the work, and I’m not even joking.
- Deep, Bold Bite: That Aussie lager isn’t just for drinking—it infuses the beef with a malty richness that’s unreal. The mustard seeds add a tiny kick, and the coriander? It’s the secret that makes this taste like a pub meal, not just dinner.
- Budget-Friendly Showstopper: You’re getting a whole roast for less than takeout, and it feeds four easily. The chuck roast is affordable, the beer adds depth without costing a fortune, and the spices are cheap but pack a punch. Fancy dinner for half the price? Yes, please.
Step-by-step instructions for Australian corned beef with spiced crust
This method delivers melt-in-your-mouth tenderness with a signature crispy spiced crust - the secret lies in the slow braise and precise seasoning blend.
Create the Spiced Brine and Cure the Beef
In a large mixing bowl, combine the 1.5 cups kosher salt, 0.5 cup granulated sugar, 1 tbsp ground coriander, 1 tbsp coarsely ground black peppercorns, 0.5 tsp cayenne pepper, 2 tbsp yellow mustard seeds, and 4 whole bay leaves. Mix thoroughly until the salt and sugar dissolve completely, forming a wet cure.
Pat the 4 lb beef chuck roast completely dry with paper towels - this is critical for developing that signature crust. Place the roast in a non-reactive container and pour the spiced brine over it, ensuring it's fully coated. Cover and refrigerate for 24 hours, turning the roast every 8 hours to ensure even curing. The beef will develop a deep pink hue and absorb the flavors completely.
Sear and Layer for Braising
Remove the beef from the fridge and let it sit at room temperature for 30 minutes before cooking. Heat a heavy Dutch oven over medium-high heat and add the 0.25 cup olive oil. Once shimmering, sear the beef on all sides until deeply browned - about 4-5 minutes per side. Remove and set aside.
In the same pot, add the 2 whole yellow onions (quartered), 4 whole carrots (scrubbed), 6 cloves garlic (smashed), and 4 whole fresh thyme sprigs. Sear for 5 minutes until vegetables begin to soften. Pour in the 2 cups Australian lager beer and scrape up any browned bits from the bottom - this creates the flavor base for your braise.
Slow Braise to Perfection
Return the seared beef to the Dutch oven, placing it on top of the vegetables. Pour in enough water to come about halfway up the sides of the beef - approximately 3 cups. Bring to a gentle simmer, then reduce heat to maintain a low bubble (around 300°F on most stovetops). Cover tightly with a lid.
Braise for 3 hours, then carefully flip the beef and add any accumulated liquid from the bottom of the pot. Continue braising for another 3 hours until the beef is fork-tender and pulls apart easily. The vegetables should be completely tender and the liquid reduced by about half. You'll know it's done when the internal temperature reaches 205°F - this ensures maximum tenderness.
Develop the Signature Crust
Remove the beef from the braising liquid and place it on a wire rack set over a baking sheet. Let it rest for 10 minutes to firm up slightly. Preheat your broiler to high.
Brush the beef generously with the reduced braising liquid, then broil for 3-5 minutes until the surface develops a deep golden-brown crust. Watch carefully - you want it to be crispy but not burned. The crust should be firm to the touch and develop a caramelized sheen. This step transforms your tender beef into the signature Australian corned beef experience.
Rest and Serve
Transfer the beef to a cutting board and tent loosely with foil. Let it rest for at least 15 minutes before slicing - this allows the juices to redistribute throughout the meat. The beef should be so tender it practically falls apart with gentle pressure, yet maintain enough structure to hold its shape when sliced.
Slice against the grain into ¼-inch thick portions and serve with the remaining braising liquid reduced by half for a rich gravy. The combination of juicy meat, crispy crust, and aromatic vegetables creates a dish that's truly unforgettable - each bite delivers perfect texture and deep, complex flavors.
Pro Tips For Making Australian Corned Beef
- SEAR THE ROAST FIRST: Don’t skip the brown crust—this is where the flavor lives. After trimming excess fat, hit the chuck roast with a hot pan (no oil needed) until it’s deep golden in spots. I used to rush this, but now I take my time—it makes the beer-braised version actually taste like something from a pub.
- USE FRESH BEER, NOT STALE: That "Australian lager" label means nothing if the beer’s gone flat. Buy it the day you plan to cook and keep it cold until you’re ready to pour. Flat beer makes the dish taste like it’s missing something—like a sad pub snack instead of a proper roast.
- CRUSH THE MUSTARD SEEDS: Whole yellow mustard seeds stay stubbornly intact while braising. Lightly crush them in a mortar or roll a pan over them—just enough to crack the shells. This lets the flavor seep into the meat instead of ending up as tiny crunchy surprises in your bite.
- REST THE MEAT AFTER SEARING: Let the chuck roast sit for 10 minutes after searing—yes, even if you’re eager. This keeps it from falling apart when you add the beer and spices later. I learned this the hard way when my first batch turned into a sad, mushy pile.
Common mistakes when making this recipe
Over-Salting the Brine
This is the #1 mistake I see—using too much salt in the brine can turn your beef into a salty brick. Stick to the 1.5 cups kosher salt measurement (Diamond Crystal preferred) and trust the process. If you're unsure, taste the brine before applying it to the beef; it should be strong but not overwhelming. Remember, the salt will dissolve into the meat over 24 hours, so balance is key. 🧂
Skipping the Resting Period
Rushing the 24-hour brine or the 15-minute rest after cooking is a fast track to dry, stringy beef. The brine needs time to penetrate the meat fibers, and the rest allows juices to redistribute. I’ve learned this the hard way—skipping the rest means losing that melt-in-your-mouth texture. Set a timer and let the beef do its thing. ⏰
Using the Wrong Cut
Not all beef cuts are created equal. A beef chuck roast is non-negotiable for this recipe—its marbling and collagen content are perfect for slow braising. Substituting with a leaner cut like sirloin will leave you with tough, chewy results. If your butcher shop doesn’t carry chuck roast, ask for a center-cut piece to ensure even cooking. 🥩
Ignoring the Crust Development
The signature crispy crust comes from two critical steps: drying the beef thoroughly before brining and broiling at the end. Skipping either step means missing out on that satisfying crackle. Pat the beef dry with paper towels—no shortcuts—and don’t rush the broiling. A 3-5 minute broil at high heat is what transforms your beef into something truly special. 🔥
Boiling Instead of Braising
Boiling your corned beef turns it into a sad, waterlogged mess. The key is low-and-slow braising at 300°F for 6 hours total. This gentle heat renders collagen into rich, velvety juices that keep the meat moist and tender. If you’re in a hurry, you’ll end up with beef that’s tough and flavorless. Patience pays off here—trust me! 💪
Overlooking the Beer Substitute
If you can’t find Australian lager, don’t skip the liquid entirely. A mix of ½ cup malt vinegar and ½ cup dark beer (like Guinness) mimics the malt sweetness and acidity that tenderizes the meat. Using plain water or broth will leave your beef flat and lacking depth. The liquid is what carries those aromatic flavors into the meat. 🍺
Nutrition facts
Frequently asked questions
Why does Australian corned beef taste different from Irish versions?
The key differences lie in the spices and brining liquid. Australian recipes emphasize coriander, mustard seeds, and Australian lager beer (or malt vinegar) for a malt-forward sweetness, while Irish versions often use more black pepper and saltpetre. The slow braising method here creates a crispy crust that's unique to Aussie preparations.
Can I make this recipe without Australian beer?
Use a mix of ½ cup malt vinegar and ½ cup dark beer (like Guinness) to replicate the malt sweetness. The acidity helps tenderize the meat while adding depth. Never skip the liquid entirely—water won't provide the same aromatic flavor profile.
How do I know when the beef is fully tender?
The beef is ready when it reaches an internal temperature of 205°F and a fork slides in with minimal resistance. It should pull apart easily but still hold together when sliced. The braising liquid will reduce significantly, and the vegetables should be fork-tender.
What are the best sides to serve with this dish?
Classic Aussie pairings include creamy mashed potatoes, buttery boiled cabbage, or tangy pickled onions. For extra richness, serve with a mustard sauce made from the reduced braising liquid. The crispy crust stands up well to these hearty accompaniments.
Can I make this in a slow cooker?
Yes! After searing the beef and browning the vegetables, transfer everything to a slow cooker and add 2 cups liquid. Cook on low for 8 hours or high for 5 hours, then finish with the broiling step for the crust. The slow cooker maintains gentle heat, but you'll still need to develop that signature crust separately.