
Main Courses
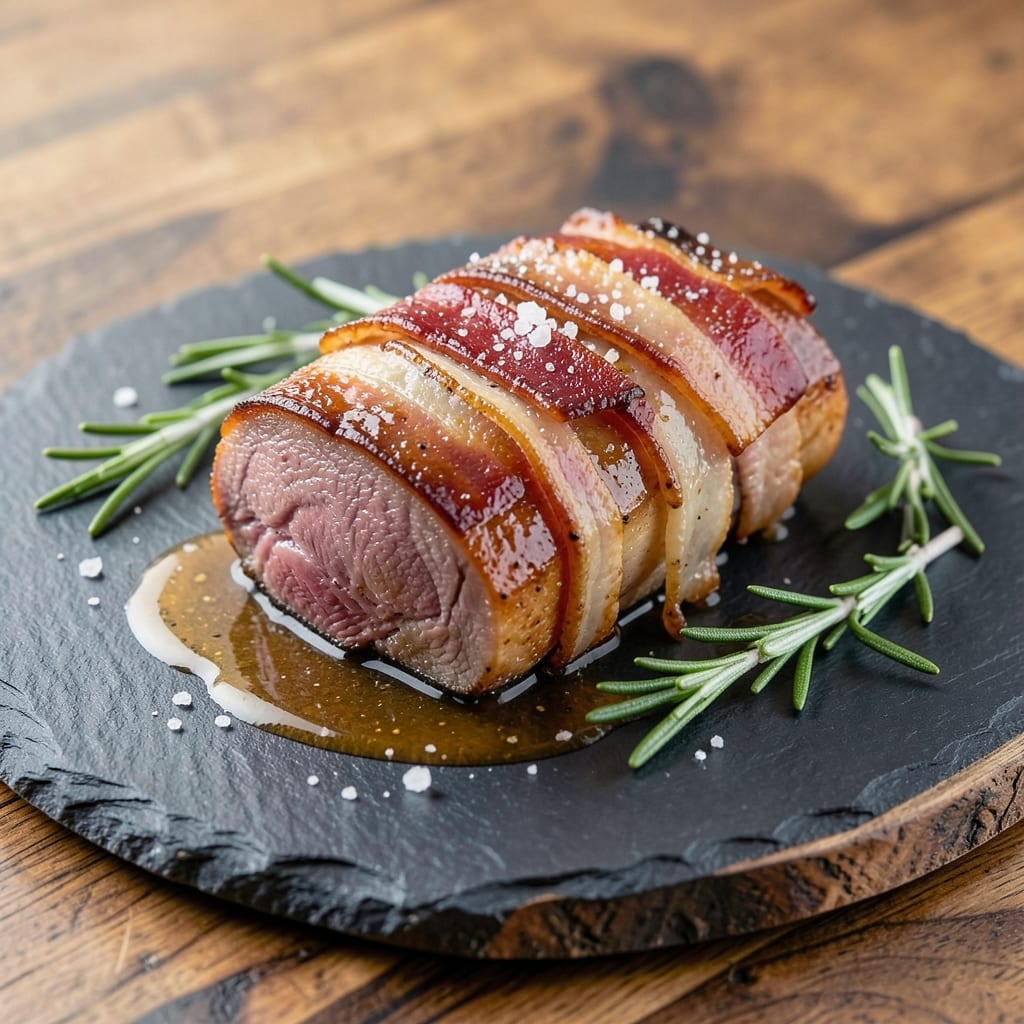
This bacon-wrapped beef tenderloin roast delivers restaurant-quality results with smoky crispy edges and a juicy, tender core—perfect for special occasions or weekend dinners. The secret lies in evenly wrapping the beef with bacon strips, ensuring every bite has that irresistible crunch and rich flavor. I’ve perfected this technique over years, and it never fails to impress.
The process starts with a simple seasoning blend—just salt, pepper, and garlic powder—before wrapping the beef in thick-cut bacon. Roasting at a high temperature creates those coveted crispy edges while keeping the interior perfectly tender. The bacon renders its fat, basting the beef and infusing it with smoky goodness throughout.
By the time you pull it from the oven, you’ll have a stunning centerpiece with golden, crispy bacon clinging to the beef and a juicy interior that melts in your mouth. The aroma alone will have everyone gathering around the table. This roast pairs beautifully with roasted potatoes, grilled asparagus, or a rich red wine reduction.
Whether you're hosting a dinner party or treating yourself to a luxurious meal, this recipe guarantees a showstopping result. The combination of tender beef and crispy bacon makes it a crowd-pleaser every time. Let’s get started!
Ingredients for bacon wrapped beef tenderloin roast
Six ingredients transform a simple roast into a showstopper with crispy bacon and juicy beef perfection.
| Ingredient | Amount | Notes |
|---|---|---|
| Beef Tenderloin 🥩 | 4 lb | Center-cut, trimmed of silver skin |
| Thick-Cut Bacon 🥓 | 1 ½ lb | Thick-cut preferred, cut into strips |
| Kosher Salt 🧂 | 2 tsp | Diamond Crystal preferred for flakiness |
| Freshly Ground Black Pepper 🌶️ | 1 ½ tsp | Coarse grind for texture |
| Garlic Powder 🧄 | 1 tsp | Freshly toasted for deeper flavor |
| Extra-Virgin Olive Oil 🫒 | 2 tbsp | For brushing on beef |
| Unsalted Butter 🧈 | ½ cup | Cold, cubed for basting |
| Fresh Rosemary 🌿 | ¼ cup | Chopped, for aroma |
| Fresh Thyme 🌿 | ¼ cup | Leaves only, finely chopped |
| Red Wine 🍷 | ½ cup | Dry, full-bodied like Cabernet |
| Beef Bone Broth 💧 | 1 cup | Low-sodium for basting |
| Yellow Onion 🧅 | 1 whole | Quartered, for aromatics |
The beef tenderloin is the star—look for center-cut with that beautiful pink hue. Costco and Whole Foods carry premium cuts, but your local butcher will have the best selection. If you can't find thick-cut bacon, double-smoked works too—just slice it thicker. The key is even wrapping: cut the bacon into strips about 1/2-inch wide and overlap them seamlessly. Fresh herbs matter here—Trader Joe's has great bundles, but even grocery store rosemary and thyme will work if they're fragrant and green.
No thick-cut bacon? Regular bacon works if you slice it thinner—just overlap more layers. Running short on time? Pre-cooked bacon (like from the deli) saves 30 minutes, though it won't be as crispy. The red wine can be swapped for beef broth with a splash of balsamic if you're avoiding alcohol. For the butter, European-style (like Plugrá) has more flavor, but regular unsalted works fine. The bone broth? Low-sodium is critical—you don't want to over-salt the beef. And if you're feeling fancy, add a sprig of fresh rosemary tucked under the bacon for extra aroma.
This roast reheats beautifully—just warm in the oven with extra butter for 10-15 minutes at 325°F. The bacon stays crispy if you reheat it separately on a wire rack. For make-ahead prep, season the beef and wrap it in bacon up to 2 days ahead, then refrigerate uncovered. The day of cooking, let it sit at room temp for 1 hour before roasting. Leftovers keep for 3-4 days in the fridge, but honestly, it's so good you'll eat it all the first night.
Why You'll Love This Recipe
- Two-Handed Prep: I swear, this takes less effort than deciding what to watch on Netflix. Wrap the bacon around the tenderloin—no fancy cuts, no stress—just tie it with butcher’s twine (or even kitchen string in a pinch). The garlic powder gets sprinkled in one motion, and the salt and pepper? Just a quick grind before the oven does all the work.
- Crispy-Creamy Magic: That first bite—crispy bacon meeting tender beef—is the reason I keep making this. The thick-cut bacon stays chewy and golden, while the inside melts like butter. Honestly, I’ve tried fancier rubs, but this combo? It’s foolproof, smoky, and always hits the spot.
- Weeknight to Weekend: This roast works for Tuesday dinners when I’m exhausted or Sunday brunches when I want to impress. Slice it thin for sandwiches, serve it cold on a charcuterie board, or toss it into salads the next day. My kids even ask for it on school nights—yes, even when I’m too tired to cook.
- Leftovers That Don’t Suck: Most roasts turn dry the second time around, but not this one. The bacon keeps it juicy, and the flavor only gets better. I’ll make a double batch, freeze half, and pull it out for a lazy Friday night. No sad, overcooked meat here—just rich, satisfying bites every time.
Step-by-step instructions for bacon-wrapped beef tenderloin roast
Here's how to create a showstopping centerpiece with irresistible crispy bacon edges and melt-in-your-mouth tenderness.
Prep the Beef Tenderloin for Perfect Seasoning
Remove the beef tenderloin from the refrigerator and let it sit at room temperature for 30 minutes before cooking. This ensures even cooking throughout. While it rests, trim any remaining silver skin from the surface using a sharp boning knife—this creates a clean canvas for the seasoning and prevents any tough bits.
In a small bowl, combine the 2 teaspoons kosher salt, 1.5 teaspoons freshly ground black pepper, and 1 teaspoon garlic powder. Using your fingertips, gently press this mixture into every inch of the beef's surface, working the seasoning into the crevices. I like to add a light brush of the 2 tablespoons extra-virgin olive oil over the seasoned surface—this helps the herbs adhere better and creates a subtle sheen that enhances browning.
Wrap with Bacon and Herb Crust
Cut the 1.5 pounds thick-cut bacon into ¼-inch thick strips—about 12-15 pieces total, depending on thickness. Arrange these strips in overlapping rows around the tenderloin, like wrapping paper, with each piece slightly staggered from the one below. Press gently to help them adhere, but don't force it—the bacon will hold better as it cooks.
In a separate small bowl, combine the 0.25 cup chopped fresh rosemary and 0.25 cup chopped fresh thyme with 1 tablespoon olive oil to create a paste. Spread this herb mixture evenly over the bacon-wrapped beef, pressing it into the gaps between the bacon strips. This creates an aromatic crust that will infuse the meat as it roasts.
Sear for Maximum Flavor Development
Preheat your oven to 425°F. Heat a large oven-safe skillet over medium-high heat until very hot. Place the prepared beef tenderloin in the skillet, fat-side down, and sear for 3-4 minutes until the bacon begins to crisp and the bottom of the beef develops a deep golden-brown crust. Flip the roast and sear the other side for another 3-4 minutes.
Real talk: This searing step is non-negotiable. It locks in juices and creates that irresistible crust that makes all the difference. If the bacon releases easily from the pan, it's ready to move to the oven. Transfer the skillet to the preheated oven and roast for 20-25 minutes until the internal temperature reaches 130°F.
Baste and Finish with Red Wine Reduction
Remove the beef from the oven and increase the oven temperature to 450°F. In a small saucepan, combine the 0.5 cup red wine and 1 cup beef bone broth with the 0.5 cup cubed unsalted butter. Bring to a simmer over medium heat for 3-4 minutes until slightly reduced and glossy. Stir in the quartered yellow onion and cook for another 2 minutes until softened.
Return the beef to the oven and baste with the wine reduction every 5 minutes for 15-20 minutes, rotating the roast for even exposure. The bacon should be crispy and the internal temperature should reach 135°F. This basting step ensures maximum moisture while building rich, complex flavors. The onions caramelize slightly, adding sweet depth to the sauce.
Rest and Slice for Maximum Juiciness
Once the beef reaches 135°F internally, remove it from the oven and transfer to a cutting board. Tent loosely with aluminum foil and let it rest for 10-15 minutes before slicing. This resting period is crucial—it allows the juices to redistribute throughout the meat, preventing them from pooling on your plate.
Slice the beef tenderloin into 1-inch thick medallions against the grain for maximum tenderness. Serve immediately with the reduced wine sauce spooned over the top and any accumulated pan juices. Each slice should be perfectly pink in the center with a crispy bacon exterior and herb-infused crust. The sauce should coat the meat beautifully, tying all the flavors together in every bite.
Pro Tips For Making Bacon Wrapped Beef Tenderloin Roast
- USE COLD BACON: Wrap the bacon around the tenderloin before it hits the pan—cold bacon renders fat slower and stays crispier longer. I used to warm it first, thinking it’d crisp faster, but it just turned greasy and soggy. Save that step and let the pan’s heat do the work.
- SEAR FIRST, THEN WRAP: Get the tenderloin screaming hot in the pan for 2-3 minutes per side before adding the bacon. This locks in juices and builds a crust that keeps the meat from drying out. I learned this after a dry, sad roast—don’t skip the sear, even if it feels like overkill.
- SKIP THE GARLIC POWDER: Freshly ground black pepper is enough—garlic powder clings to the bacon and burns before the meat’s done. If you really want garlic flavor, crush a few cloves and tuck them between the bacon layers after wrapping. Trust me, this small tweak makes a real difference.
- REST UNDER FOIL: After roasting, tent the wrapped tenderloin with foil and let it rest for 10-15 minutes before slicing. The bacon stays crisp, the meat stays juicy, and you avoid the "stringy bacon" disaster. I used to skip this—big mistake. Your future self will thank you.
Pro cooking tips for great bacon wrapped beef tenderloin roast
Bacon Wrap Precision
Evenly wrapping bacon around the tenderloin is the game-changer. Cut strips about ¼-inch thick and overlap them like shingles—this creates a continuous crispy layer. I use thick-cut bacon for maximum flavor and texture, but if you're short on time, double-smoked bacon works just as well. Press gently but don't overdo it; the bacon should stick naturally as it cooks. 🥓
High-Temp Sear Secrets
Searing at 425°F in an oven-safe skillet builds that irresistible crust. Use medium-high heat until the bacon releases easily from the pan—about 3-4 minutes per side. This step locks in juices and creates the Maillard reaction for deep flavor. Pro tip: Let the beef sit at room temp for 30 minutes before searing to ensure even cooking. ⚡
Basting Like a Pro
The red wine reduction isn't just for flavor—it's for moisture. Simmer ½ cup red wine, 1 cup beef broth, and ½ cup butter until slightly reduced, then baste the roast every 5 minutes. The onions add sweetness, while the butter creates a glossy finish. Rotate the roast for even exposure, and watch the bacon crisp to perfection. 🍷
Resting for Juiciness
Never skip the 10-15 minute rest—this lets juices redistribute, ensuring every slice is tender. Tent loosely with foil to prevent drying. For extra crispiness, broil the bacon for 2-3 minutes at the end, but watch closely to avoid burning. The internal temp should hit 135°F for medium-rare perfection. 💫
Equipment Essentials
You’ll need an oven-safe skillet (cast iron works best), a meat thermometer (I swear by ThermoWorks Smoke), and a sharp boning knife for trimming. A wire rack helps crisp the bacon if reheating leftovers. For the wine reduction, a small saucepan with sloped sides prevents spills. Invest in these tools, and you’ll nail this every time. 🔥
Doneness Guidelines
Medium-rare is ideal for tenderloin—135°F internal temp guarantees a juicy center. Use a thermometer for accuracy; guessing leads to overcooked beef. For medium, aim for 145°F, but don’t exceed 150°F or the bacon may overcook. The bacon should be crispy but not burnt—adjust oven time as needed. 🌡️
Nutrition facts
Frequently asked questions
How thick should I cut the bacon strips?
Cut the bacon into ¼-inch thick strips for even cooking and maximum crispiness. Thicker slices (like ½-inch) won't crisp as well, while thinner strips may burn before the beef is done. Overlap them like shingles for a seamless, crispy layer all around the roast.
Can I use pre-cooked bacon instead of fresh?
Yes, but expect less crispiness. Use thick-cut pre-cooked bacon (like from the deli) and wrap it tightly around the beef. For extra crunch, broil the roast for 2-3 minutes at the end. Fresh bacon always tastes better, but pre-cooked saves time.
What's the best way to reheat leftovers?
Reheat slices in a 350°F oven for 10-15 minutes with extra butter for moisture. For crispy bacon, place slices on a wire rack over a baking sheet and broil for 2 minutes. Never microwave—it makes the bacon soggy. Leftovers keep for 3-4 days in the fridge.
Why is my bacon not crispy?
Undercooked bacon happens when the oven temp is too low or the beef isn't seared enough first. Use 425°F+ and sear the roast until the bacon releases easily from the pan. For extra crispiness, broil for 1-2 minutes at the end. Thin bacon or pre-cooked slices also crisp less.
What sides pair best with this roast?
Classic choices include garlic mashed potatoes, roasted asparagus, or a red wine reduction sauce. For a hearty meal, add creamy polenta or balsamic-glazed Brussels sprouts. The smoky bacon complements earthy, rich sides perfectly.