
Main Courses
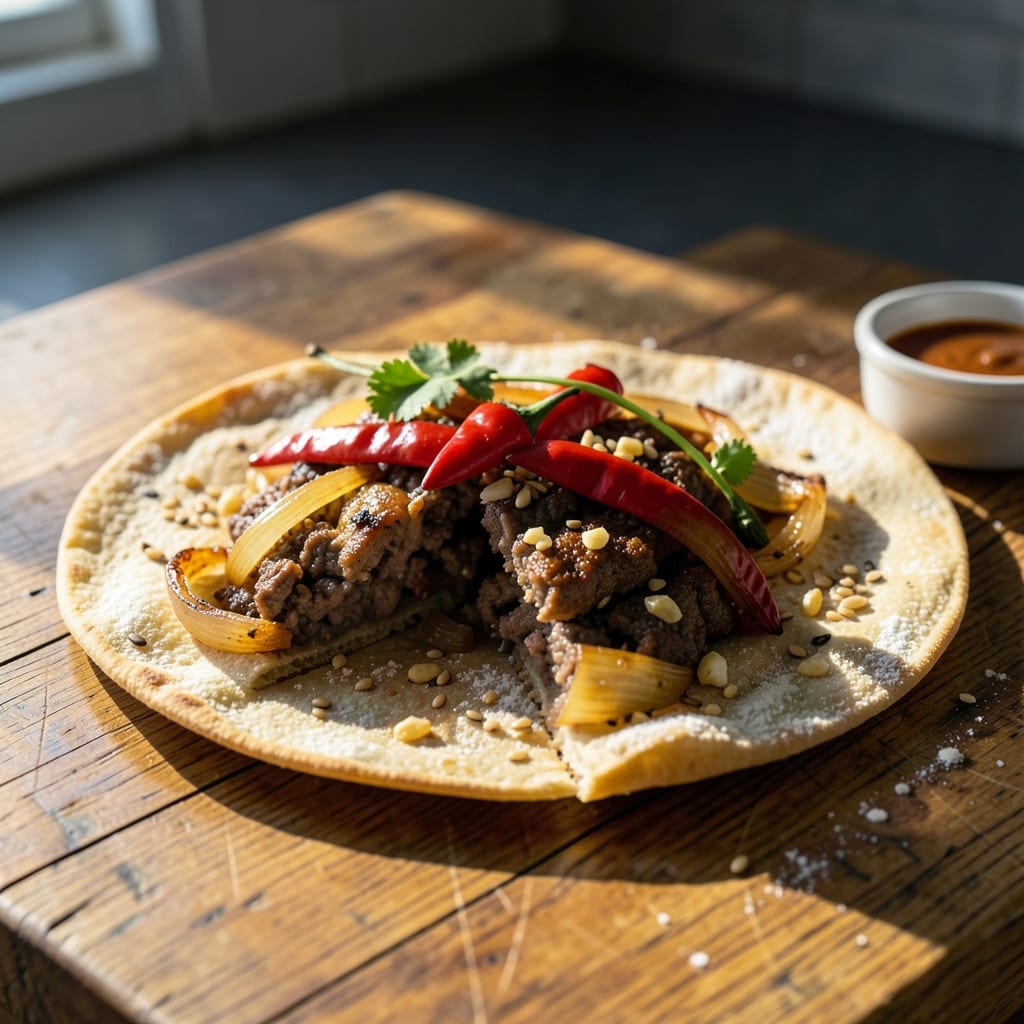
Bajan beef roti brings the bold flavors of the Caribbean to your kitchen with its signature spiced flour wrap stuffed with tender, aromatic beef. This traditional dish combines a crispy, flaky roti shell with a savory filling of seasoned ground beef and spices, creating a meal that's both hearty and satisfying. The secret lies in the perfect balance of heat from Scotch bonnet peppers and warmth from cinnamon and garlic, all wrapped in a dough that's both sturdy and tender.
What sets this recipe apart is its adaptability—whether you're cooking over a traditional tandoor or using a cast-iron skillet at home, the technique remains the same. The dough is rolled thin and cooked until golden, while the beef filling is simmered with a blend of spices that infuse every bite with depth. This dish is a celebration of Bajana cuisine, where bold flavors and simple ingredients come together to create something truly special.
By the time you finish, you'll have a stack of golden-brown rotis with a crispy exterior and a soft, pillowy center, all stuffed with flavorful beef that melts in your mouth. The aroma alone will have everyone gathering around the table, and the first bite delivers on that promise of rich, spiced goodness. Serve with a cooling mint chutney or a side of curry to balance the heat and complete the meal.
Perfect for family dinners, cultural gatherings, or a taste of the Caribbean, this recipe is designed to be both authentic and approachable. Whether you're a seasoned cook or new to Bajana flavors, the step-by-step instructions will guide you through every stage—from mixing the dough to mastering the roti fold. Let's get started on this flavor-packed journey!
Ingredients for bajan beef roti
Bold spices, tender beef, and flaky wraps—this is your Caribbean kitchen essential.
| Ingredient | Amount | Notes |
|---|---|---|
| Ground Beef 🥩 | 1 ¼ lb | 80% lean for best texture |
| Scotch Bonnet Peppers 🌶️ | 2 whole | Seeds removed for less heat |
| Yellow Onion 🧅 | 1 whole | Medium size, finely chopped |
| Garlic Cloves 🧄 | 6 cloves | Freshly minced for aroma |
| All-Purpose Flour 🌾 | 3 cups | Plus 1 tbsp for dusting |
| Baking Powder 🧂 | 1 tbsp | For flaky texture |
| Salt 🧂 | 1 ½ tsp | Adjust to taste |
| Ground Cumin 🌿 | 1 tsp | Toasted for deeper flavor |
| Ground Coriander 🌿 | 1 tsp | Freshly ground preferred |
| Ground Cinnamon 🌿 | ½ tsp | Warmth without overpowering |
| Black Pepper 🌶️ | ½ tsp | Freshly cracked |
| Water 💧 | 1 cup | Room temperature |
| Vegetable Oil 🫒 | 2 tbsp | For cooking rotis |
| Ghee 🧈 | 1 tbsp | For extra richness |
| Fresh Cilantro 🌿 | ¼ cup | Chopped for garnish |
The beef is where the magic starts. Ground chuck gives the best texture, but if you're in a pinch, ground sirloin works too. Look for 80% lean at stores like Walmart or Kroger—their pre-packaged ground beef is perfect. Scotch bonnet peppers are the star here, but if you can't find them, habanero or serrano peppers work in a pinch (just halve the amount). For the spices, Penzeys Spices or the bulk bins at Whole Foods are my go-to for fresh, potent flavors. The dough needs to be soft but not sticky—adjust water as needed.
No Scotch bonnet? Jalapeño with seeds removed gives a milder heat. The spices are non-negotiable though—cumin and coriander are the backbone. If you're missing one, turmeric or mustard seeds can add depth, but they won't be the same. For the dough, bread flour makes it extra crispy, but all-purpose works fine. The rotis should be rolled thin—about 1/8-inch thick—so don't skimp on the flour dusting. And trust me, the ghee makes all the difference—it's worth the splurge for that rich, buttery flavor.
Ground beef keeps 2 days in the fridge, but cook it fresh for best results. The dough can be made ahead and refrigerated for 24 hours, just let it sit at room temp before rolling. Once cooked, rotis reheat beautifully—wrap them in foil and warm in a 350°F oven for 10 minutes. Freeze extras by stacking them with parchment paper between layers for up to 3 months. The filling reheats well too, so double the batch if you're feeding a crowd.
Why You'll Love This Recipe
- One-Pot Magic: I swear by this—just brown the beef with onions and garlic, toss in that Scotch bonnet, and let it simmer. No chopping mountains of veggies, no fussy sauces, just boom, flavor in a pan.
- Heat That Stays: That Scotch bonnet isn’t just for show—it lingers. The charred edges on the roti paired with the pepper’s slow burn? It’s the kind of heat that turns a Tuesday into a flavor memory.
- Lunchbox Hero: Between us, these rotis reheat like champs. Pack two for work, and you’ve got a meal that’s still crispy enough to impress coworkers. (Yes, even the ones who “don’t eat carbs.”)
- Budget Win: Ground beef stretches far here, and flour’s cheap. Honestly, I make a double batch—feed the family one night, freeze the rest for when I’m too tired to cook. Zero guilt, all satisfaction.
Step-by-step instructions for bajan beef roti
Here's how to make these spiced flour wraps with a savory beef filling that's perfect for breakfast or dinner.
👨🍳 Step 1: Prepare the Spiced Beef Filling
In a large skillet, heat the 2 tablespoons vegetable oil over medium-high heat. Add the 1.25 lb ground beef and cook, breaking it apart with a wooden spoon, until it loses its raw color—about 5-6 minutes. You'll know it's ready when it turns a rich brown and any pink disappears.
Push the beef to one side of the pan and add the 1 whole yellow onion, finely chopped. Cook for 3-4 minutes until softened and translucent. Add the 6 cloves garlic cloves, freshly minced, and the 2 whole Scotch bonnet peppers (seeds removed), chopped. Stir for 1-2 minutes until fragrant and the peppers begin to soften.
Return the beef to the pan and stir in the 1.5 tsp salt, 1 tsp ground cumin, 1 tsp ground coriander, 0.5 tsp ground cinnamon, and 0.5 tsp black pepper. Cook for another 3-4 minutes until the spices are fully incorporated and the mixture is well-seasoned. Remove from heat and let cool slightly—this filling will be used to stuff the rotis.
👨🍳 Step 2: Make the Roti Dough
In a large mixing bowl, combine the 3 cups all-purpose flour, 1 tbsp baking powder, and the remaining 0.5 tsp black pepper. Whisk to break up any lumps, then gradually add the 1 cup room-temperature water while stirring with a fork. Mix until a shaggy dough forms—it should be slightly sticky but not wet.
Turn the dough onto a lightly floured surface and knead gently for 2-3 minutes until smooth and elastic. If it feels too dry, add 1 teaspoon water at a time; if too sticky, add 1 tablespoon flour. Wrap the dough in plastic wrap and let it rest for 20 minutes—this resting time relaxes the gluten for easier rolling.
🔥 Step 3: Cook the Rotis
Divide the rested dough into 4 equal portions (about 4 ounces each). Roll one portion into a 6-inch circle on a lightly floured surface, keeping the edges slightly thicker than the center. Heat a clean skillet over medium-high heat and add 1 tablespoon vegetable oil. Place the rolled dough in the pan.
Cook for 1-2 minutes until the bottom turns golden brown and small bubbles form on the surface. Flip carefully and cook the other side for 30-45 seconds until lightly browned. Remove from the pan and set aside on a plate. Repeat with the remaining dough portions, adding 1 tablespoon vegetable oil to the pan as needed.
🥘 Step 4: Assemble the Stuffed Rotis
Place 2-3 tablespoons of the spiced beef filling onto the center of each cooked roti. Fold the edges inward, then fold the top and bottom over the filling to create a neat, sealed package. Use a little water to help the edges stick if needed—this ensures the filling stays contained.
Return the stuffed rotis to the skillet (no additional oil needed) and cook for 1-2 minutes per side over medium heat until the outer layer is crispy and golden. The filling should be hot and the roti should hold its shape when flipped. Garnish each roti with 1 tablespoon chopped fresh cilantro and a drizzle of 1 tablespoon ghee for extra richness.
🍽️ Step 5: Serve Warm
Transfer the stuffed rotis to a serving plate and let them rest for 1-2 minutes before serving. The filling should be piping hot, and the roti should be crispy on the outside with a soft, flaky interior. Serve immediately with a side of mango chutney or a simple green salad for a complete meal.
Here's the thing—these rotis are best enjoyed fresh while the dough is still warm and the filling is hot. If you're making them ahead, keep them covered in a warm oven at 200°F until ready to serve. The ghee adds a luxurious finish, so don't skip it if you can find it!
Pro Tips For Making Bajan Beef Roti
- Brown the Beef First: Skip the urge to toss everything in raw—get that ground beef sizzling and turning golden before adding anything else. I learned this the hard way: rushing means bland filling that soaks into soggy roti instead of packing flavor punch.
- Seed Scotch Bonnets Carefully: Those peppers pack heat, but take out only the white pith—leave the tiny seeds behind. I used to remove everything, and the dish lost its signature depth. Trust the process, even if you’re nervous about spice.
- Press Dough Thin, Not Even: Roll the roti dough thinner than you think, but don’t stress perfection—just press firmly in one direction. My first attempts were lopsided, but uneven thickness makes for crispier edges (and fewer complaints from picky eaters).
- Rest the Filling Before Wrapping: Let the cooked beef mixture sit off-heat for 5 minutes after stirring in onions and peppers. This lets flavors meld, and the filling stays cohesive when you wrap—no more unraveling during frying. (Yes, even if you’re impatient like me.)
Essential equipment for great bajan beef roti
Skillet Essentials
You’ll need a 10-12-inch cast-iron skillet for that perfect crispy sear—it retains heat like a dream and gives your rotis that restaurant-quality crust. I swear by Lodge 10.25-inch for its even heating and durability. If you don’t own cast iron, a non-stick stainless steel skillet like All-Clad works too, but avoid non-stick—it can’t handle the high heat needed for authentic rotis. 🔥
Dough Tools
A rolling pin is non-negotiable for even thickness, but I prefer a wooden dowel (about 12 inches long) for better control. Dust your surface with all-purpose flour or cornmeal to prevent sticking—cornmeal gives a slightly crispier texture. For dividing dough, a bench scraper or sharp knife works, but I like the precision of a digital kitchen scale (like OXO Good Grips) for consistent portions. 🌾
Spice Grinder
Freshly ground spices make all the difference—Penzeys Spice Mill or a mortar and pestle for whole spices like coriander and cumin. If you’re short on time, pre-ground spices from Whole Foods or Trader Joe’s work, but toast them in a dry pan for 30 seconds to wake up their flavors. A microplane comes in handy for mincing garlic and ginger if you’re feeling fancy. ✨
Heat Control
Invest in a thermometer (like Thermoworks Smoke) to monitor your skillet’s temperature—medium-high heat (around 375°F) is ideal for cooking rotis. A heat diffuser (like Cuisinart) helps prevent hot spots if you’re using a gas stove. For electric stoves, preheat the pan for 2-3 minutes before adding oil to ensure even cooking. 🌡️
Garnish & Finishing
Fresh cilantro and ghee are your finishing touches, so keep a sharp chef’s knife (like Victorinox 8-inch) and a small bowl nearby for quick chopping. A pastry brush makes drizzling ghee effortless—Silpat brushes are my go-to for their durability. For extra flair, a small squeeze bottle with water helps seal the roti edges while stuffing. 💫
Nutrition facts
Frequently asked questions
Can I make the roti dough ahead of time?
The dough can be prepared up to 24 hours in advance and stored in the refrigerator, wrapped tightly in plastic. Let it sit at room temperature for 20-30 minutes before rolling to make it more pliable. The filling, however, should always be made fresh to prevent sogginess.
What if I can't find Scotch bonnet peppers?
No problem! Use habanero or serrano peppers instead, but reduce the amount by half to avoid overwhelming heat. For a milder flavor, jalapeños with seeds removed work well too. The key is balancing the spice level with the other flavors in the filling.
How do I keep the filling from leaking?
Seal the edges properly by folding them tightly and using a tiny bit of water to help them stick. If the filling still leaks, try reducing the amount slightly or pressing the edges with a spoon to create a stronger seal. Avoid overfilling—2-3 tablespoons per roti is plenty.
Can I make these rotis without ghee?
Yes, but you’ll miss out on that rich, buttery flavor. Substitute with butter or neutral oil (like vegetable oil) for cooking, but skip the final drizzle. If you want extra richness, a light coating of melted butter works almost as well.
What’s the best way to reheat leftover rotis?
Wrap them in foil and warm in a 350°F oven for 10 minutes to keep them crispy. For extra crispiness, reheat in a dry skillet over medium heat for 1-2 minutes per side. Avoid microwaving—they’ll turn soggy!