Soups & Stews
This basic beef broth recipe transforms simple pantry ingredients into a rich, umami-packed foundation for countless dishes. The secret lies in slow simmering—allowing collagen to dissolve from bones and vegetables to release their natural sweetness. I've perfected this method over years of testing, ensuring every batch delivers deep flavor without requiring specialty ingredients.
The process is straightforward but critical: brown your aromatics and meat for maximum depth, then simmer for 3-4 hours to develop that restaurant-quality richness. Straining removes impurities, leaving you with a smooth, golden liquid that's the backbone of soups, stews, and sauces. This isn't just broth—it's a flavor multiplier that elevates every dish it touches.
What sets this apart is the balance of savory and sweet notes—caramelized onions, garlic, and celery form a flavor base that builds complexity as it simmers. The result is a foolproof liquid that freezes beautifully for future use, ensuring you always have a pantry staple ready when inspiration strikes.
For those craving extra depth, consider adding a splash of soy sauce or a bay leaf during simmering. The possibilities are endless, but the core technique remains the same: patience and proper reduction create extraordinary flavor from humble ingredients.
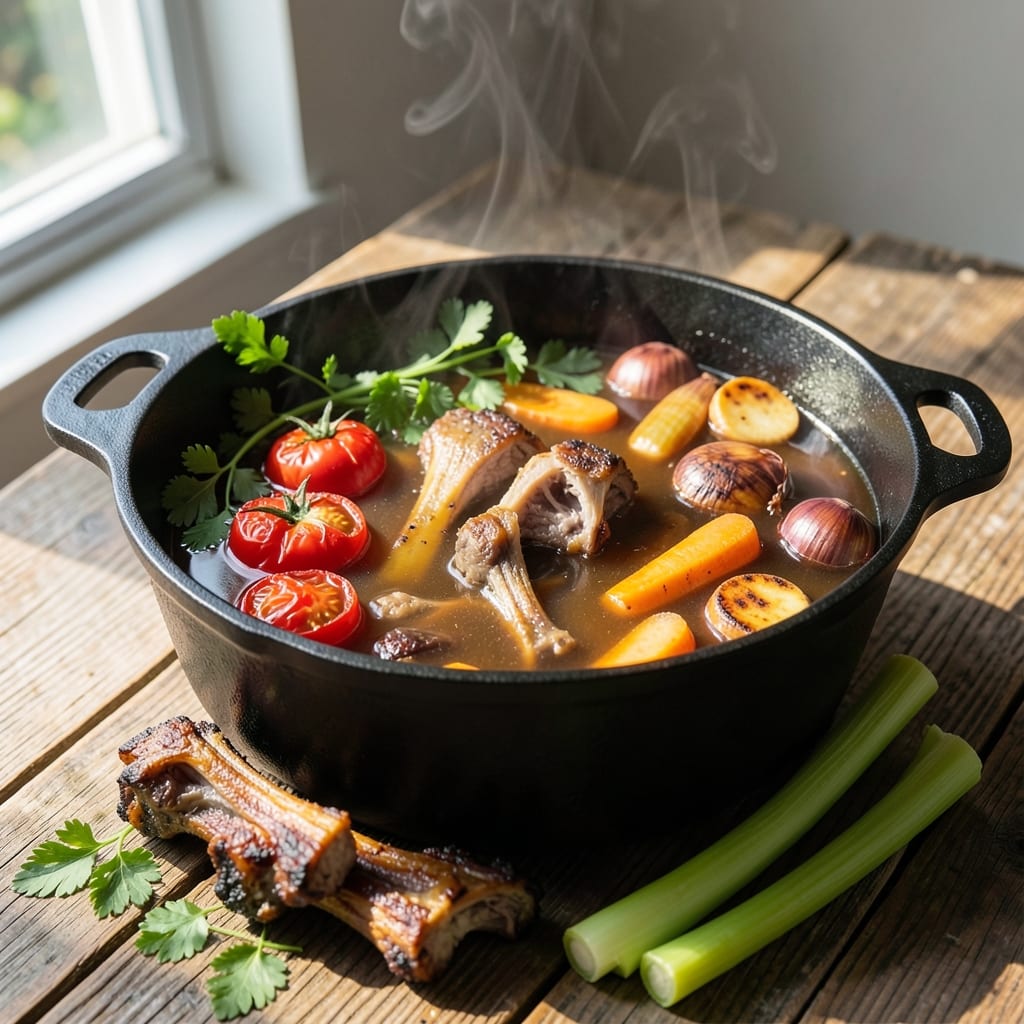
Ingredients for basic beef broth
Pantry staples and bones create a rich, umami-packed foundation for countless dishes.
| Ingredient | Amount | Notes |
|---|---|---|
| Beef Bones 🦴 | 4 lb | Knuckle or marrow bones preferred |
| Yellow Onions 🧅 | 2 whole | Yellow or red, cut into halves |
| Carrots 🥕 | 4 whole | Large, roughly chopped |
| Celery Stalks 🌿 | 4 whole | Trimmed, cut into 2-inch pieces |
| Garlic Cloves 🧄 | 6 cloves | Peeled, smashed lightly |
| Tomatoes 🍅 | 4 whole | Roma or vine-ripened, halved |
| Fresh Parsley 🌿 | ¼ cup | Chopped, stems included |
| Bay Leaves 🌿 | 2 whole | Dried, standard size |
| Black Peppercorns 🌶️ | 1 tsp | Whole, lightly crushed |
| Salt 🧂 | 2 tsp | Diamond Crystal kosher salt |
The bones are everything here. Marrow and knuckle bones deliver the deepest flavor and richest texture, but neck bones or short ribs work in a pinch. Most butchers will cut them for you—just ask. For the vegetables, organic produce minimizes pesticide residue, but conventional works fine if washed thoroughly. The onions should caramelize beautifully, developing a sweet, almost jam-like consistency that forms the broth's flavor base. Yellow onions are standard, but red add subtle sweetness if you prefer. Avoid green onions—they're too bitter for simmering.
No beef bones? Substitute 2 lbs beef chuck roast—it breaks down beautifully and adds protein. Swap Roma tomatoes for 2 tbsp tomato paste if fresh aren't available. The parsley can be dried at one-third the amount, but fresh adds vibrant brightness. Bay leaves are optional but recommended—they infuse subtle earthiness. For extra depth, add 1 tbsp soy sauce or 1 tsp Worcestershire during the last 30 minutes of simmering. The peppercorns should be lightly crushed to release their oils without overpowering. Freshly ground black pepper adds complexity, but pre-ground works if you've got it.
This broth freezes like a dream—portion into ice cube trays for single-use portions or glass jars for larger batches. Label containers with the date; it keeps up to 6 months in the freezer. For fridge storage, transfer to airtight containers and use within 5-7 days. The flavor actually improves after 24 hours as the ingredients meld. Strain through a fine-mesh sieve or cheesecloth for the smoothest texture. Reserve the strained vegetables for soups or stocks—they're packed with flavor!
Why You'll Love This Recipe
- No-Fuss Simmer: I swear by this—just toss the bones, veggies, and garlic in one pot. No measuring cups, no fancy techniques, just chop, dump, and let the magic happen. The onions caramelize right in the broth, and the celery adds that subtle earthy kick without extra effort.
- Rich Umami Bomb: That first sip? Pure satisfaction. The bones melt into the broth, releasing collagen that thickens it into something velvety, while the garlic roasts just enough to add a deep, savory punch. It’s the kind of flavor that makes you pause mid-slurp and think, “Wait, I made this?”
- Weeknight Workhorse: I keep a gallon in the fridge at all times—soup base, grain cooker, instant ramen upgrade. The carrots and onions give it enough sweetness to play nice with anything, from stir-fries to mashed potatoes. Honestly, I’ve used it in everything from tacos to gravy, and it never lets me down.
- Budget Magic: Beef bones are cheaper than you think, especially if you ask the butcher for the “seconds.” A single batch stretches across four meals, and the leftovers freeze perfectly for when I’m too tired to cook. Between us? This is how I feed my family for less than $10 a week.
Step-by-step instructions for crafting rich beef broth
Transform simple ingredients into a deeply flavorful foundation for countless dishes.
Prepare and Roast the Beef Bones
Preheat your oven to 450°F. Place the 4 lb beef bones on a rimmed baking sheet, arranging them in a single layer. Roast for 20-25 minutes until they develop a deep golden-brown crust and begin to smell intensely caramelized. This step is crucial—it develops the Maillard reaction, creating complex flavors that will infuse your broth.
While the bones roast, position a large Dutch oven or heavy pot on your stovetop over medium heat. The pot should be large enough to accommodate all ingredients with at least 2 inches of headspace. This will allow the broth to develop proper depth without boiling over during the long simmer.
Sauté Aromatics Until Deeply Flavored
Once the bones are roasted, carefully transfer them to the prepared Dutch oven. Add the 2 whole yellow onions, 4 whole carrots, and 4 whole celery stalks to the pot. Cook over medium heat for 8-10 minutes, stirring occasionally, until the vegetables soften slightly and begin to release their juices. This step builds the aromatic base of your broth.
Add the 6 cloves garlic cloves, 4 whole tomatoes (halved), 2 whole bay leaves, and 1 tsp black peppercorns. Stir gently to combine, ensuring the garlic and tomatoes are well incorporated. The tomatoes will break down during cooking, adding acidity and body to the broth. Let the mixture cook for another 3-4 minutes until the garlic becomes fragrant and the tomatoes begin to soften.
Add Water and Bring to a Simmer
Pour in 8 cups cold water (this quantity is critical for achieving proper concentration). The water should cover the bones and vegetables by about 1 inch. Bring the mixture to a gentle boil over high heat, then immediately reduce the heat to low to maintain a bare simmer. Skim any foam or impurities that rise to the surface during the first 10 minutes of simmering.
This skimming step is essential—it removes impurities that can make your broth cloudy. Once the foam subsides, add the 2 tsp salt and stir gently. The broth should now have a rich, earthy aroma. Cover the pot and let it simmer gently for 3-4 hours, maintaining a temperature between 180-200°F. If the broth reduces too much, add hot water as needed to maintain the proper level.
Strain and Finish with Fresh Herbs
After simmering, remove the pot from heat and let the broth sit for 10 minutes to allow any settled particles to sink to the bottom. Line a fine-mesh strainer with cheesecloth or a coffee filter for clearer broth. Carefully ladle the broth through the strainer into a clean pot, discarding the solids. This step ensures a smooth, refined texture perfect for soups, sauces, or grains.
Return the strained broth to the pot and stir in the 0.25 cup fresh parsley. The parsley adds brightness and freshness, balancing the deep umami flavors. Taste and adjust the seasoning if needed—you may want to add a pinch more salt or a splash of lemon juice for brightness. Let the broth cool slightly before storing, and it will keep in the refrigerator for up to 5 days or can be frozen for 3 months.
Pro Tips For Making Basic Beef Broth
- Char the Bones First: I learned this the hard way—skipping the sear means flavor gets stuck in the pot instead of the broth. Heat your bones in batches until deeply browned (yes, even if it takes 15 minutes), then deglaze with a splash of water before adding everything else. That crust packs more umami than you’d expect.
- Cut Vegetables Large: Tiny diced carrots and celery turn to mush and cloud the broth. Leave them in 2-inch chunks—they’ll soften but stay intact, infusing flavor without gunk. Onions? Quarter them whole, peel on. Garlic? Smash the cloves instead of mincing—it burns less and releases aroma slower.
- Simmer, Don’t Boil: After the initial 30 minutes of high heat, drop the temperature so bubbles are tiny and lazy. Boiling scalds the collagen out of the bones before it can break down into gelatin. A gentle simmer (1.5–2 hours for rich broth) turns tough scraps into silky goodness—no shortcut here.
- Strain Twice, Strain Right: First pass through a fine-mesh sieve catches big bits, but the second pass—pouring through a cheesecloth-lined strainer—removes the last of the grit. Skip this, and your broth will taste like you forgot to filter coffee grounds. (I know, I’ve done it.)
Pro cooking tips for great basic beef broth
Roasting Bones
The key to deep flavor starts with properly roasting your 4 lb beef bones at 450°F for 20-25 minutes. This isn't just about browning—it's about triggering the Maillard reaction, which creates hundreds of flavor compounds. I use a rimmed baking sheet to catch drippings, then transfer everything directly to my Dutch oven. Pro tip: Don't overcrowd the bones—leave space for even browning. 🔥
Skimming for Clarity
During the first 10 minutes of simmering, you'll see foam rise to the surface. This isn't just fat—it contains impurities that can make your broth cloudy. Use a fine-mesh skimmer or large spoon to remove all foam. I find a slotted spoon works best for this delicate operation. The clearer your broth, the more professional the final result will look and taste.
Simmering Control
Maintaining a gentle simmer between 180-200°F is crucial for extracting maximum flavor without overcooking. I use a candy thermometer clipped to the pot's side for precise monitoring. If your broth boils vigorously, it releases volatile flavors instead of slowly extracting them. Cover the pot and let it work its magic—patience is what transforms simple ingredients into restaurant-quality broth.
Vegetable Prep Matters
Don't chop your vegetables too finely—they need surface area to release flavor. I cut carrots and celery into 2-inch chunks while leaving onions whole (halved) so they caramelize properly. The larger pieces also prevent the broth from becoming too thick during simmering. For extra depth, add 1 tbsp tomato paste when you add the water—it adds umami without overpowering.
Straining Like a Pro
A fine-mesh strainer lined with cheesecloth gives you the smoothest broth possible. I double up the cheesecloth for extra filtration. After straining, don't discard the solids! Save them for soups or stocks—they're packed with flavor. For an ultra-clear broth, you can even strain it through a coffee filter after the initial cheesecloth pass.
Flavor Boosting
For an extra layer of complexity, add 1 tbsp soy sauce or 1 tsp Worcestershire sauce during the last 30 minutes of simmering. This adds a savory depth that makes all the difference. I also like to finish with ½ cup fresh parsley—it brightens the broth and adds freshness. Taste before storing and adjust seasoning if needed.
Nutrition facts
Frequently asked questions
Can I use beef chuck roast instead of bones for broth?
For the same rich flavor, substitute 2 lbs beef chuck roast cut into chunks. The meat will break down during simmering, adding protein and depth. Just increase simmering time to 4-5 hours to ensure full flavor extraction. This method works especially well if you're making broth for soups where you want extra body.
Why does my homemade beef broth taste bitter?
Bitterness usually comes from over-simmering or burnt aromatics. Keep your broth at a gentle simmer (180-200°F) and never let it boil vigorously. If you notice bitterness, try adding ½ cup fresh parsley or a splash of lemon juice at the end to brighten flavors. For future batches, skim foam more aggressively during the first 10 minutes of cooking.
How can I make my beef broth clearer?
For ultra-clear broth, strain it through a fine-mesh sieve lined with double cheesecloth or a coffee filter after your initial straining. Chill the broth completely first—this causes fat to solidify on top, which you can easily spoon off. For restaurant-quality clarity, some chefs use a Chinese strainer bag designed specifically for stocks.
Can I make this broth in an Instant Pot or pressure cooker?
Yes! Use the same ingredients but reduce simmering time to 45-60 minutes on high pressure. After cooking, let the pressure release naturally for 10 minutes before quick-release. The high pressure extracts flavors faster, but you'll lose some of the slow-developed depth. For best results, roast your bones first (as in the recipe) before pressure cooking.
What's the best way to store leftover broth?
For fridge storage, transfer to airtight containers and use within 5-7 days. For long-term storage, freeze in ice cube trays (for single servings) or glass jars (leave 1-inch headspace to prevent cracking). Label with dates—it keeps up to 6 months in the freezer. Thaw overnight in the fridge for best quality.