Main Courses
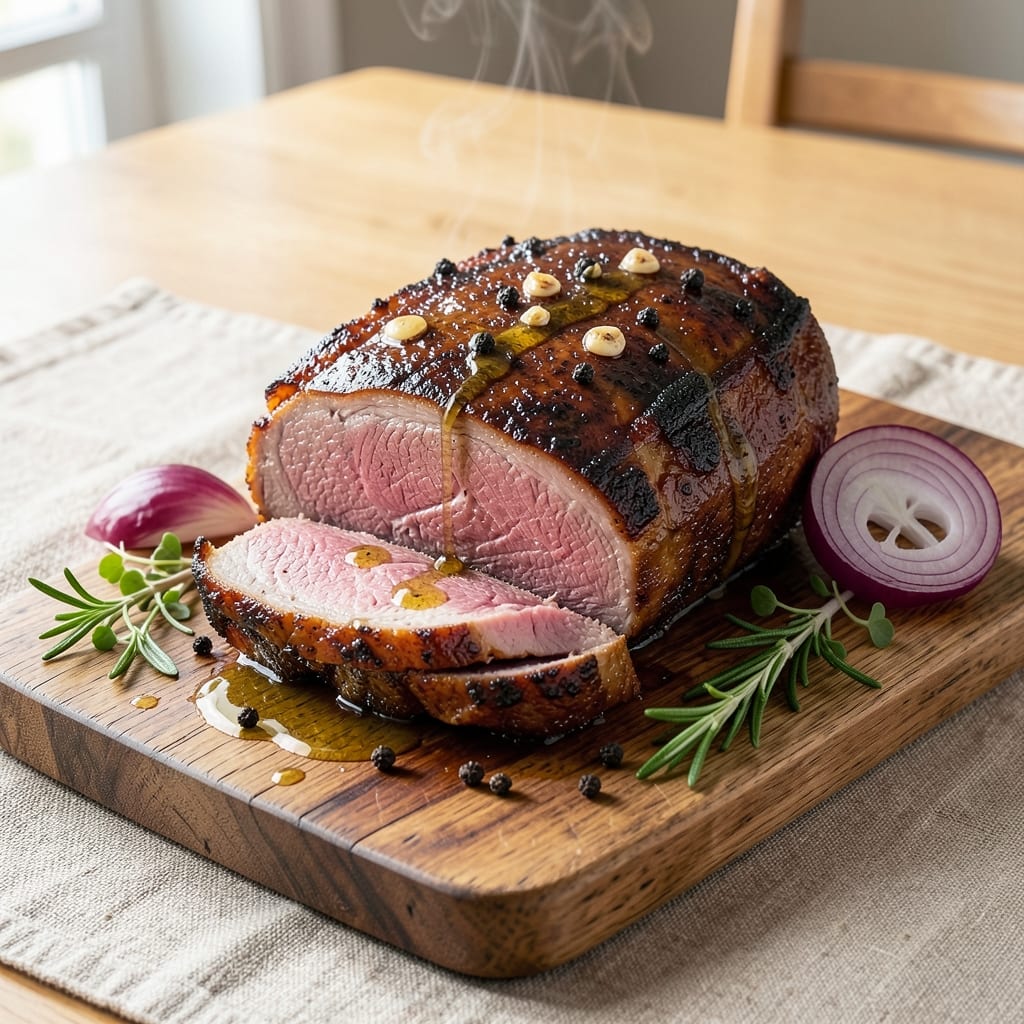
This Angus beef bottom round roast recipe transforms a tougher cut into melt-in-your-mouth perfection using a reverse-sear method that guarantees juicy cores and a flavorful crust. The key lies in slow, even cooking that develops deep tenderness before a final sear locks in moisture and creates a rich, caramelized exterior. I’ve perfected this technique over years of testing—no more dry, stringy beef when you follow these precise steps.
The reverse-sear approach works perfectly for this cut, which benefits from gradual heat to break down fibers without overcooking. You’ll start with a low-and-slow oven roast, then finish with a high-heat sear to build that coveted crust. Seasoning is simple but impactful: coarse salt, black pepper, and a touch of garlic to enhance the beef’s natural richness. The result? A roast so tender it practically falls apart, with a crust that’s crispy yet still juicy.
What makes this recipe stand out is the juicy core—something that eludes many home cooks when tackling bottom round. The reverse sear ensures even doneness throughout, while the final sear adds depth of flavor and texture. Serve with classic sides like roasted root vegetables or creamy mashed potatoes to complete the meal. This method isn’t just foolproof; it’s a game-changer for anyone who’s struggled with tougher cuts.
Ready in about 3 hours (including resting time), this roast delivers restaurant-quality results with minimal effort. The slow cooking allows the beef to develop deep, savory flavors, while the sear adds a satisfying contrast. Whether you’re hosting a dinner party or simply craving a hearty meal, this technique ensures every slice is worth savoring. Let’s get started with the step-by-step instructions.
Ingredients for angus beef bottom round roast
Six ingredients transform tough bottom round into melt-in-your-mouth perfection through reverse-sear mastery.
| Ingredient | Amount | Notes |
|---|---|---|
| Angus Beef Bottom Round Roast 🥩 | 4 lb | Center-cut preferred for tenderness |
| Kosher Salt 🧂 | 1 ½ tbsp | Diamond Crystal preferred for even distribution |
| Freshly Ground Black Pepper 🌶️ | 1 tbsp | Cracked peppercorns for optimal flavor |
| Garlic Cloves 🧄 | 6 cloves | Smash lightly for enhanced infusion |
| Extra-Virgin Olive Oil 🫒 | 2 tbsp | For crust development and moisture |
| Yellow Onion 🧅 | 1 whole | Sliced for aromatics during sear |
| Fresh Rosemary 🌿 | 2 sprigs | For aromatic depth during roasting |
| Fresh Thyme 🌿 | 4 sprigs | Leaves only for subtle herbal notes |
| Unsalted Butter 🧈 | 4 tbsp | Cold for final crust sear |
| Vegetable Oil 🫒 | ¼ cup | High smoke point for searing |
| Beef Tallow or Duck Fat 🧈 | 2 tbsp | For enhanced crust development |
| Red Wine 🍷 | ½ cup | Bold Cabernet Sauvignon recommended |
| Beef Bone Broth 💧 | 1 cup | For pan deglazing and depth |
| Fresh Parsley 🌿 | ¼ cup | Chopped for garnish and freshness |
The Angus beef bottom round is non-negotiable for this recipe—center-cut roasts from Snake River Farms or your local butcher shop deliver the best marbling and tenderness. Look for rich, deep red color with visible fat cap—this indicates optimal quality. If buying whole, trim excess silver skin for even cooking. Costco and Whole Foods carry excellent pre-trimmed options, but specialty butchers often provide superior cuts. The reverse-sear method demands patience, but the payoff is a roast so tender it practically falls apart. For best results, allow the roast to sit at room temperature for 1 hour before cooking to ensure even doneness throughout.
No fresh rosemary or thyme? Dried works at one-third the amount, but fresh imparts superior aroma. Short on red wine? Beef broth with a splash of balsamic vinegar delivers similar depth. The garlic cloves should be smash lightly with the side of your knife to release their oils without turning to paste. For the butter and tallow, cold is critical—soft butter will burn during the final sear. Vegetable oil with a high smoke point (like avocado or grapeseed oil) prevents flavor transfer. If you prefer not to use tallow, extra butter works, though the crust won’t be as robust. Pre-trimmed roasts save time, but if you’re trimming yourself, leave a thin layer of fat for moisture during cooking.
This roast reheats beautifully—warm slices in a 325°F oven for 10-15 minutes with a splash of beef broth to restore juices. Portion leftovers into airtight containers and store for up to 5 days in the fridge, or freeze for 3 months for future meals. The crust develops best when served immediately, so plan your timing accordingly. Rest the roast for 15-20 minutes after cooking to allow juices to redistribute—this is non-negotiable for juicy slices. Garnish with fresh parsley just before serving to brighten the dish. For a crowd of 10, simply double the ingredients and adjust cooking time proportionally—2 lbs per person ensures generous portions.
Why You'll Love This Recipe
- No-Fuss Prep: I swear by this—just a few slashes with a knife, a sprinkle of salt and pepper, and the roast goes straight into the oven. No fancy marinades or hours of prep here, just pure, simple beef that still tastes like you put in effort.
- Garlic-Kissed Richness: That bottom round might not be the flashiest cut, but when you sear it in olive oil and let minced garlic cloves caramelize into the crust? Deep, savory magic. The kind that makes you want to close your eyes and take another bite.
- Weeknight to Dinner Party: Honestly, this roast works for everything. Toss it in the oven while you chop veggies for a quick weeknight dinner, or serve it sliced thin with crusty bread for guests—same effort, different vibes. My go-to for when I don’t want to overthink it.
- Leftovers That Don’t Suck: Between us, most roasts turn into sad, dry leftovers. Not this one. The bottom round stays tender, and I’ve repurposed slices into tacos, sandwiches, and even a quick stir-fry—no one ever complains. (Yes, even on a Tuesday night.)
Step-by-step instructions for perfectly juicy Angus beef bottom round roast
Master the reverse-sear technique for a roast with a flawless crust and tender core every time.
Prepare and Season the Roast for Even Cooking
Remove the 4 lb Angus Beef Bottom Round Roast from the refrigerator and let it sit at room temperature for 1 hour before cooking. This ensures even cooking throughout. Pat the roast dry with paper towels—removing all moisture is critical for that perfect crust later.
In a small bowl, combine the 1.5 tbsp Kosher Salt and 1 tbsp Freshly Ground Black Pepper. Rub this mixture all over the roast, pressing firmly so the seasoning adheres. For extra flavor, place the 6 cloves Garlic Cloves (lightly smashed) and 2 sprigs Fresh Rosemary and 4 sprigs Fresh Thyme (leaves only) inside the cavity. Tie the roast loosely with kitchen twine to help maintain its shape during cooking.
Low-Temperature Roast to Perfect Doneness
Preheat your oven to 275°F. Place the roast on a wire rack set inside a roasting pan. Roast for 2 hours until the internal temperature reaches 115°F on a meat thermometer inserted into the thickest part of the roast. This slow cook ensures the center remains tender and juicy.
During this time, prepare your aromatics. Heat 2 tbsp Extra-Virgin Olive Oil in a large skillet over medium heat. Add the 1 whole Yellow Onion (sliced) and cook for 5-6 minutes until softened and golden. Remove from heat and set aside—this will enhance the final sauce.
Build Rich Flavor with Pan Sauce Components
While the roast cooks, prepare the sauce base. In the same skillet, add 0.25 cup Vegetable Oil and 2 tbsp Beef Tallow or Duck Fat over medium-high heat. Once shimmering, add the sliced onion back to the skillet and cook for another 2 minutes to deepen the flavor.
Deglaze the skillet with 0.5 cup Red Wine, scraping up any browned bits from the bottom. Let it reduce by half, then add 1 cup Beef Bone Broth. Simmer for 5 minutes until slightly thickened. Remove from heat and stir in the 4 tbsp Unsalted Butter (cold), allowing it to melt into the sauce. Keep warm until ready to serve.
Sear for Crispy Perfection and Rest Properly
Remove the roast from the oven and let it rest for 10 minutes before searing. Increase your oven temperature to 450°F. Heat a large skillet over high heat until smoking hot. Add the roast and sear on all sides for 2-3 minutes per side, until a deep golden-brown crust forms. The high heat will create that coveted crust while keeping the interior tender.
Transfer the roast to a cutting board and let it rest for an additional 15 minutes before slicing. This resting period allows the juices to redistribute, ensuring each slice remains moist and flavorful. Pour the warm sauce over the sliced roast and garnish with 0.25 cup Fresh Parsley (chopped) for a pop of freshness.
Pro Tips For Making Angus Beef Bottom Round Roast
- USE A MEAT THERMOMETER: I learned this the hard way—bottom round roasts hide doneness. Stick the probe into the thickest part (avoid bone) and pull it at 130°F for medium-rare (it’ll climb to 135°F resting). No guessing, no overcooked disappointment.
- SEAR IN BATCHES: This isn’t the prettiest method, but it’s the tastiest. Bottom round roasts are big—don’t crowd the pan. Sear in two shifts (yes, even if you’re impatient like me) for deep, flavorful crusts. A hot cast-iron skillet or stainless steel pan makes all the difference.
- SALT THE GARLIC: Crush those garlic cloves flat with the side of your knife first—more surface area means better flavor. Toss them in 1 tablespoon kosher salt before searing so they caramelize into the meat instead of burning. (Your future self will notice.)
- REST UNDER FOIL: Skip the tented sheet pan after roasting. Instead, wrap the hot roast in foil for 15 minutes—this traps steam and keeps it juicy. I used to ignore this, and the slices always dried out by the time they hit the plate.
Essential equipment for this recipe
Oven Essentials
Your oven is the heart of this recipe, so precision matters. A digital meat thermometer like the Thermoworks Smoke is non-negotiable for accurate temperature monitoring—insert it into the thickest part of the roast. For even heat distribution, use a wire rack placed inside a roasting pan to allow airflow. I prefer a stainless steel roasting pan from All-Clad for durability and even cooking. Preheat your oven to 275°F for the slow roast, then crank it up to 450°F for the final sear—this dual-temperature approach is key to the reverse-sear method. 🌡️
Searing Tools
For the high-heat sear, a heavy-bottomed cast-iron skillet like the Lodge 12-inch is ideal—it retains heat and creates that coveted crust. If you don’t have cast iron, a stainless steel skillet from Made In works well. Avoid nonstick pans for searing, as they can’t handle the high heat needed for a proper crust. A tongs with a long handle (like OXO Good Grips) makes flipping the roast easier without losing heat. Keep a small bowl of ice water nearby to refresh your hands after handling hot pans.
Seasoning Gear
Coarse Kosher salt like Diamond Crystal distributes more evenly than table salt, so you won’t need as much. For pepper, cracked peppercorns from Penzeys Spices add depth—grind them fresh with a pepper mill for maximum flavor. A small mixing bowl and rubber spatula help evenly coat the roast. For the aromatics, a chef’s knife and cutting board are essential for slicing the onion and prepping the garlic. I also like a kitchen twine (like Butcher’s Twine) to loosely tie the roast and keep it intact during cooking.
Sauce Station
The sauce base requires a large skillet (again, cast iron or stainless steel) and a wooden spoon for deglazing. A fine-mesh strainer helps remove any herb stems if you prefer a smoother sauce. For the red wine reduction, a whisk ensures even emulsification with the butter. Keep a small saucepan nearby to reheat the sauce if needed—it’s best served warm alongside the roast. A ladle with a long handle makes serving easier without burning your hands. 🍷
Resting and Slicing
Resting the roast is where patience pays off. Use a large cutting board (like John Boos Maple) to slice the meat—it’s sturdy enough to handle a sharp carving knife (I recommend a Dexter-Russell 12-inch). A meat mallet helps tenderize if you’re serving thicker slices, though the reverse-sear method usually makes the beef tender enough to slice easily. For garnishing, a pair of kitchen shears makes quick work of fresh parsley. Store leftovers in glass airtight containers to maintain freshness.
Nutrition facts
Frequently asked questions
Why does this recipe use a reverse-sear method for bottom round?
The bottom round is a tougher cut with less marbling, so the reverse-sear method is perfect. Slow roasting at 275°F first breaks down connective tissues for tenderness, while the final high-heat sear creates that coveted crust without overcooking the center. This two-step approach guarantees juicy, melt-in-your-mouth results.
Can I substitute another cut of beef for the bottom round?
While this recipe works best with bottom round, you can use chuck roast or top round with slight adjustments. Chuck benefits from the reverse-sear method too, but it has more fat marbling. Top round is leaner, so you may need to reduce oven time by 15-20 minutes to avoid dryness. For best results, stick with bottom round for optimal tenderness.
How do I know when the roast is done during the slow roast?
Use a meat thermometer to check the internal temperature—it should reach 115°F for perfect doneness. Insert the probe into the thickest part of the roast, avoiding any fat or bone. This low temperature ensures the center stays tender while the outer layers develop flavor. Never rely on time alone, as oven temperatures can vary.
What if I don’t have red wine for the sauce?
No problem! Substitute with beef broth and a splash of balsamic vinegar (2 tbsp) for depth. Or use dry sherry or apple cider vinegar in a pinch. The key is acidity to balance the richness. The sauce will still be flavorful, though wine adds a unique complexity that’s hard to replicate.
How far ahead can I prep this roast?
You can prep the roast up to 24 hours ahead—season it, tie it, and refrigerate uncovered on a wire rack. This enhances flavor through dry-brining. On cooking day, let it sit at room temperature for 1 hour before roasting. For the sauce, prep all ingredients the night before, but keep the butter cold until the final step. This saves time without sacrificing quality.